Viewing🔗
Viewing in the grid mode🔗
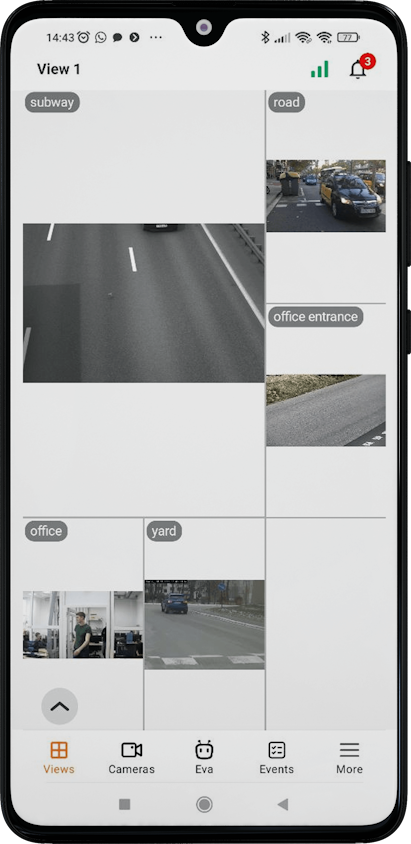
Tapping on a camera cell expands the selected camera to full screen.
A long tap on a camera cell opens a context menu:
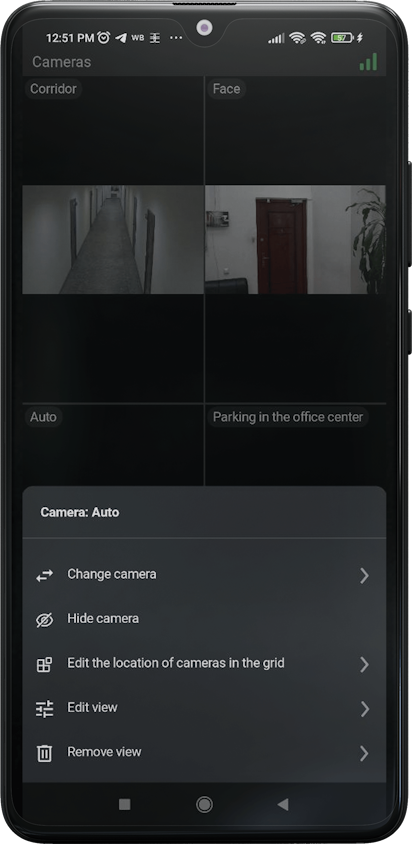
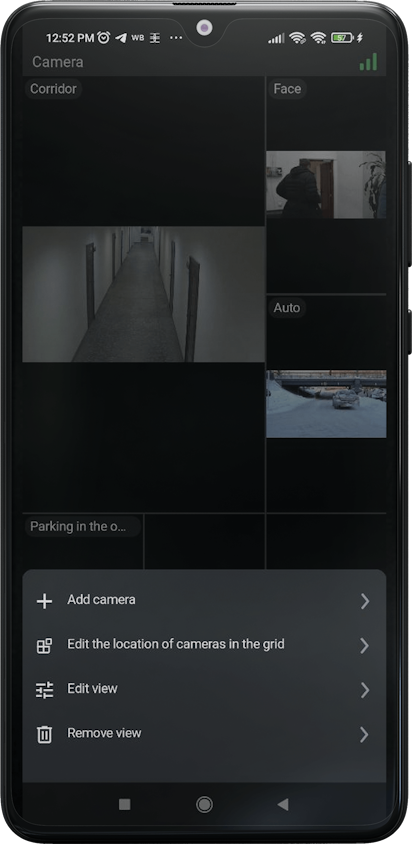
If no camera is selected in a cell, then a long tap in an empty cell opens a context menu that allows you to select a camera.
Selecting a view🔗
Tapping the ![]() button in the bottom left corner of the screen opens the view selection menu.
button in the bottom left corner of the screen opens the view selection menu.
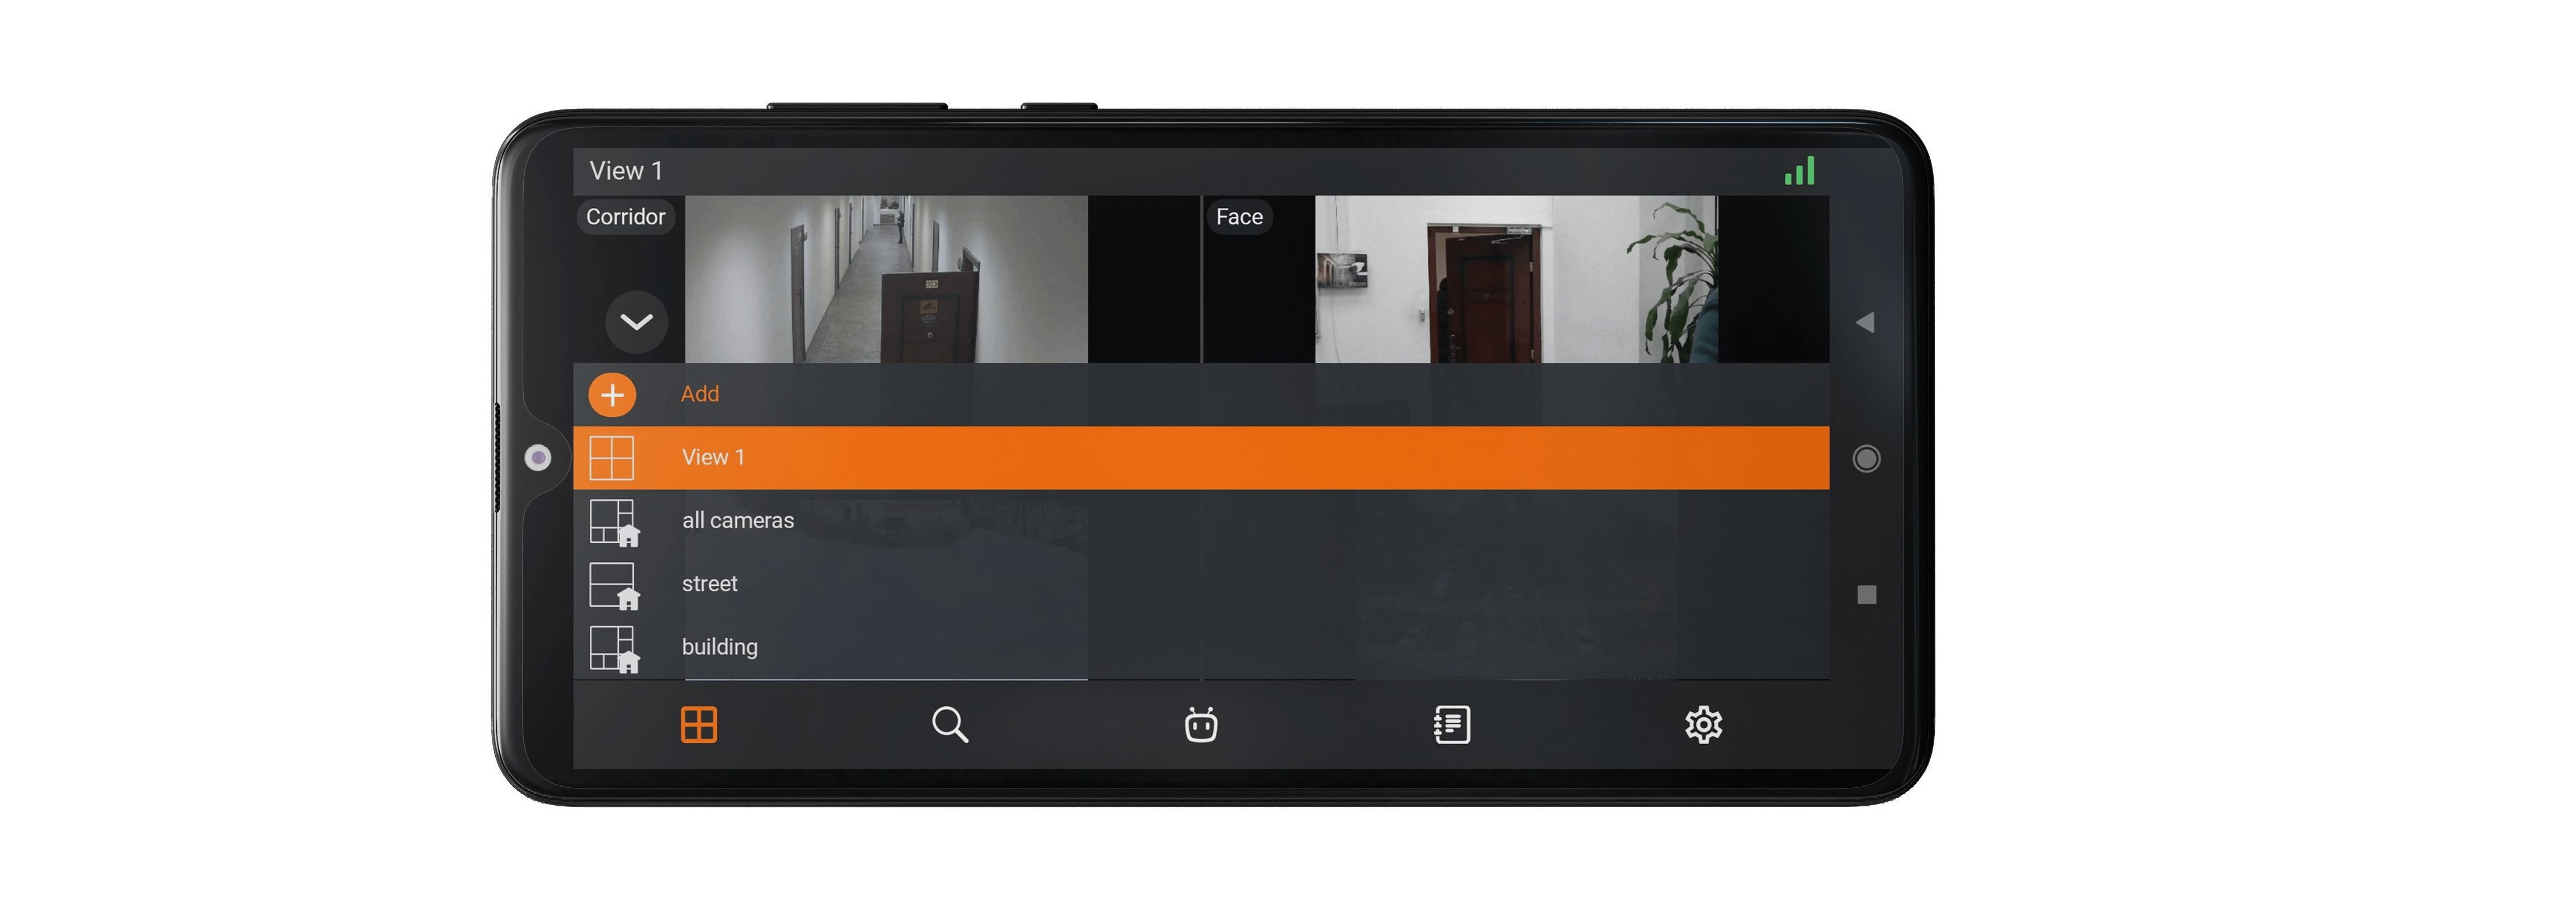
View is a preconfigured on-screen grid with cameras already assigned to cells.
Views are available for selection, both centrally configured by the system administrator, and configured on this device by the current user.
A long tap on a view opens the context menu:
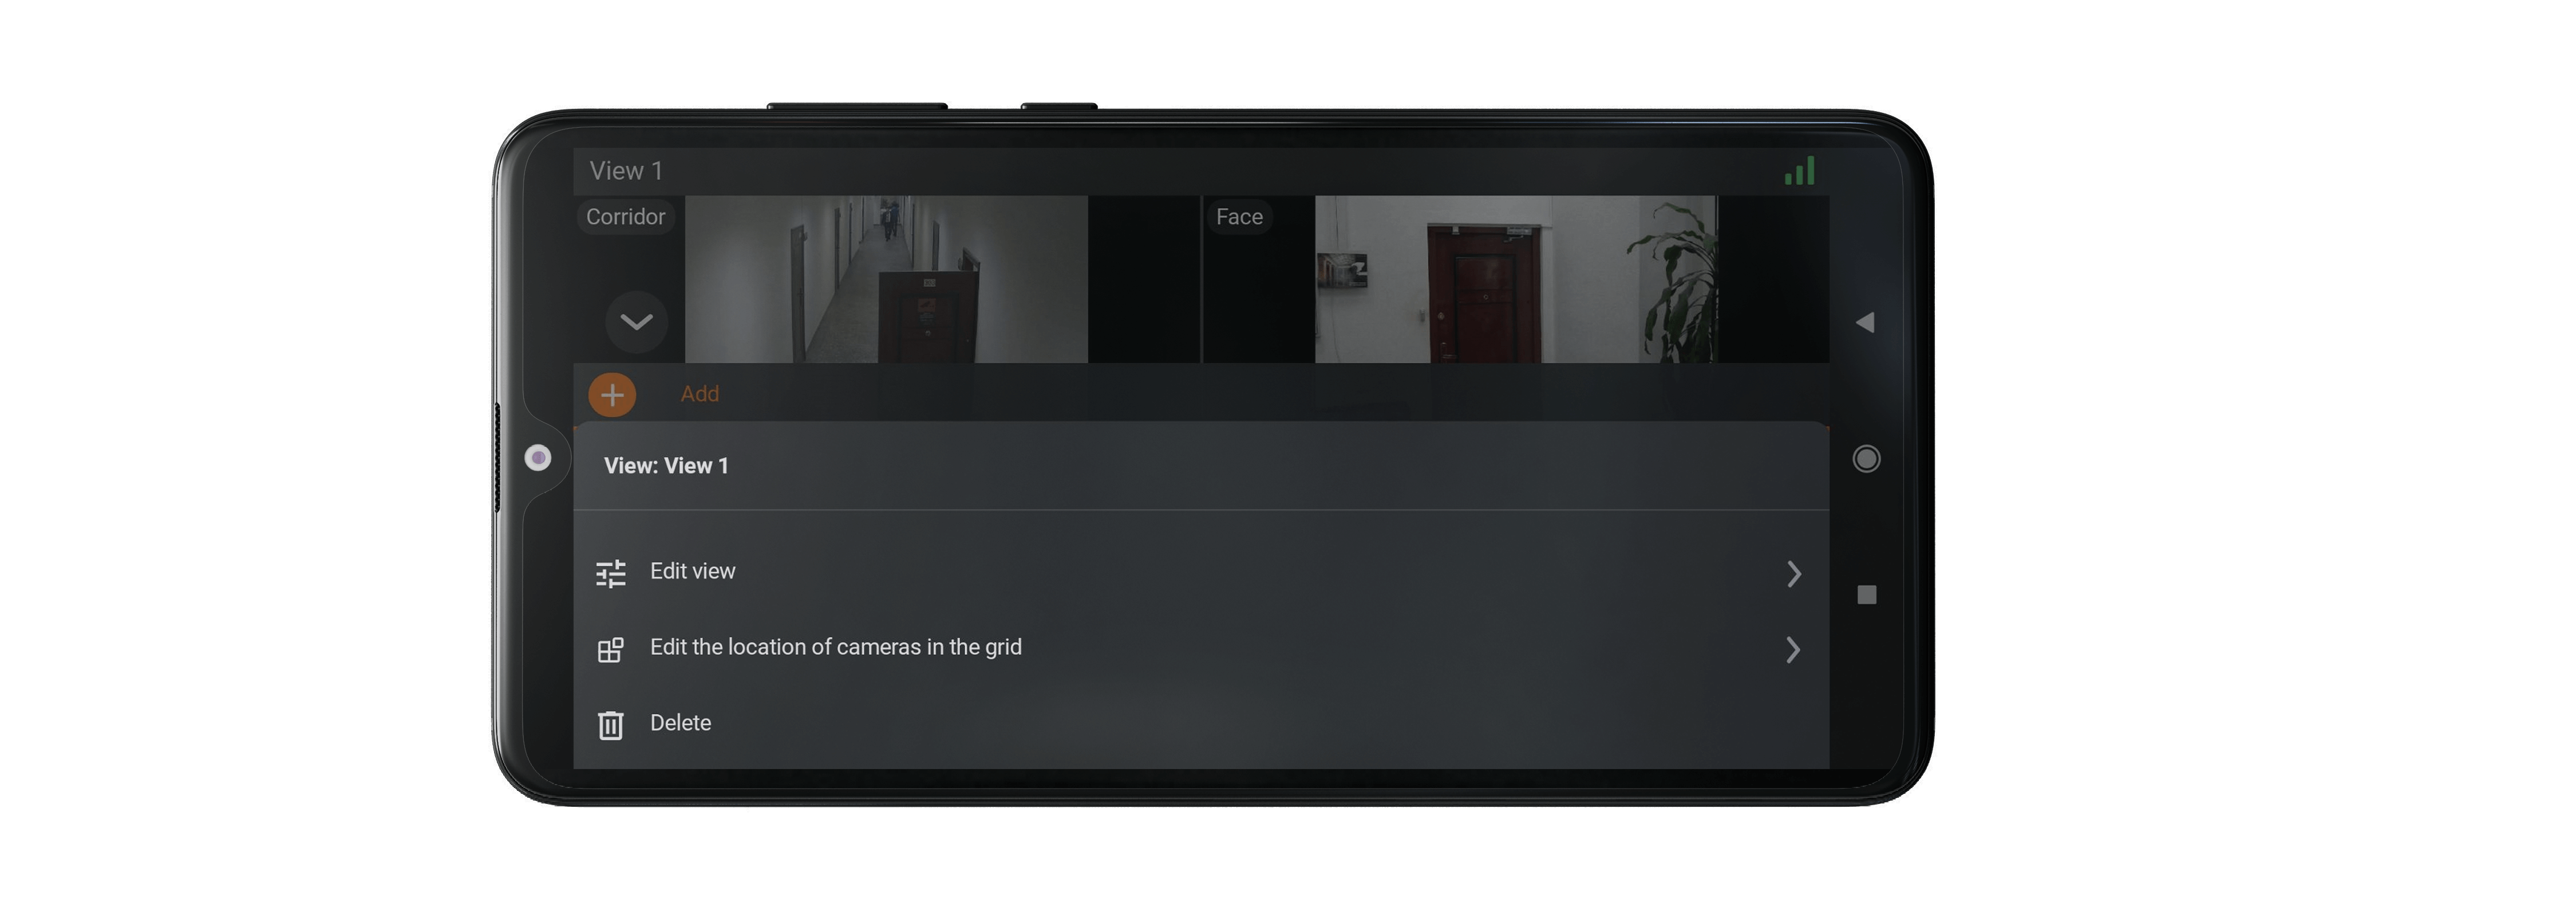
Note
The context menu is not available for server-configured views.
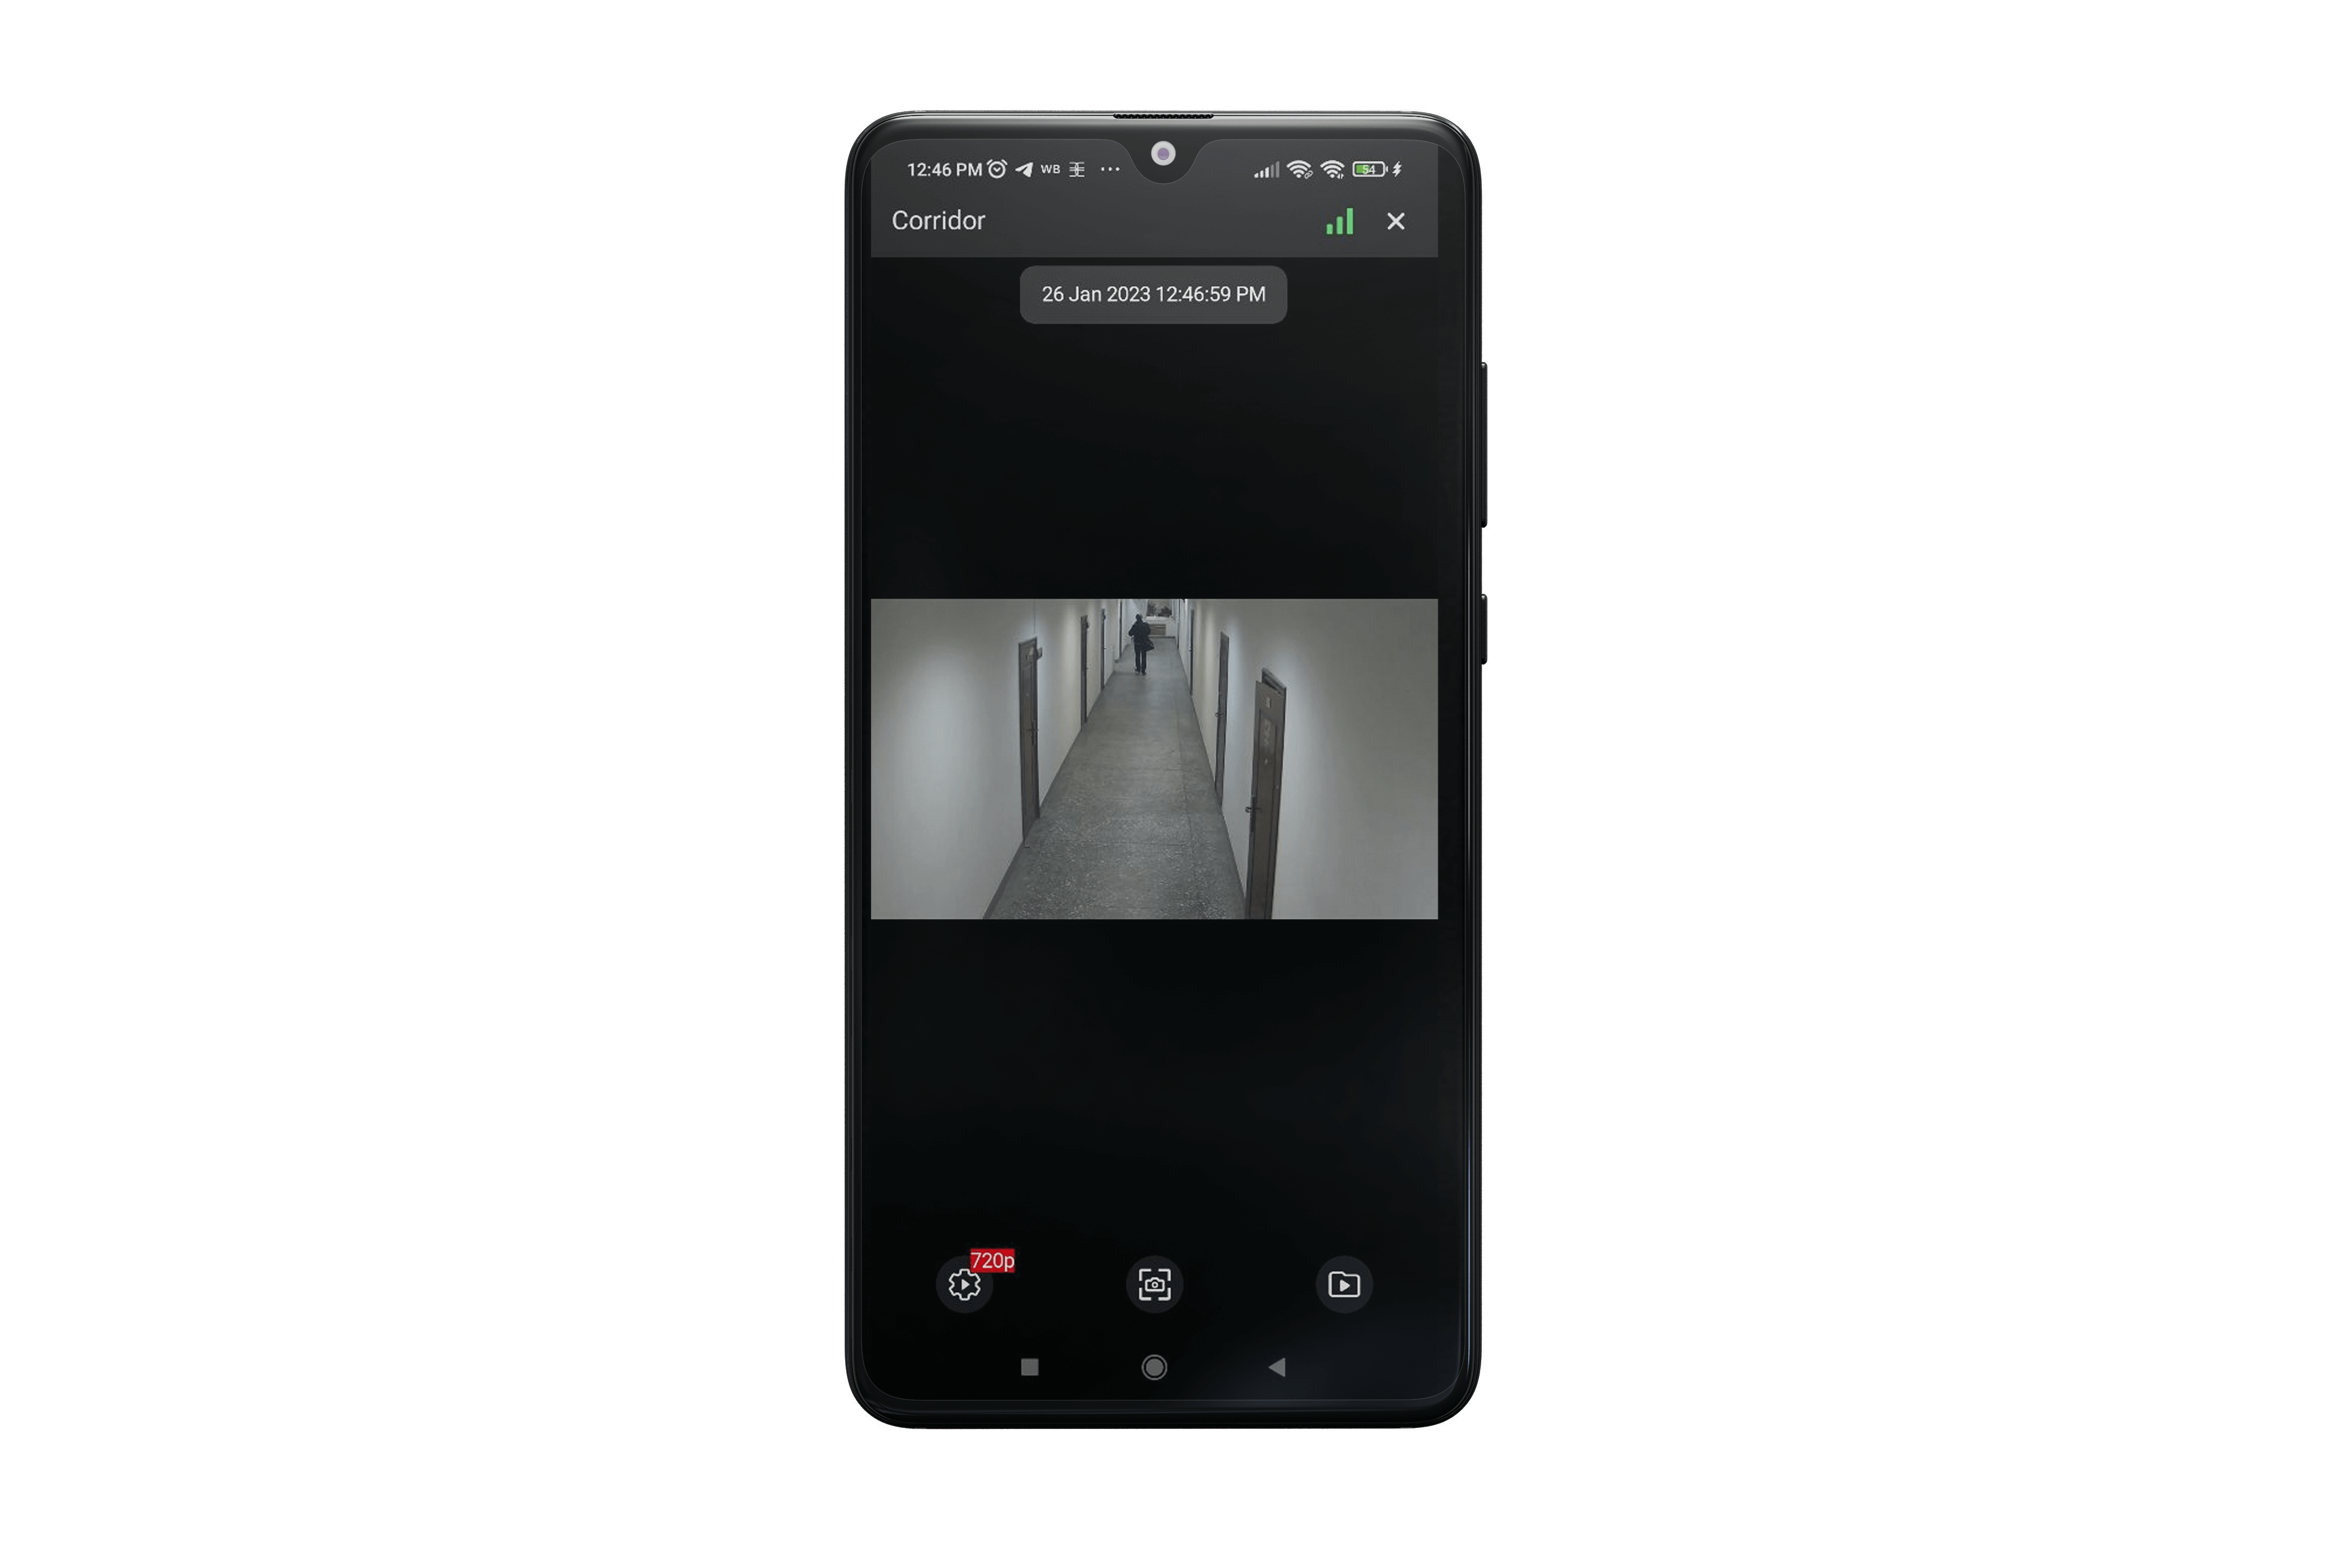
Full screen view🔗
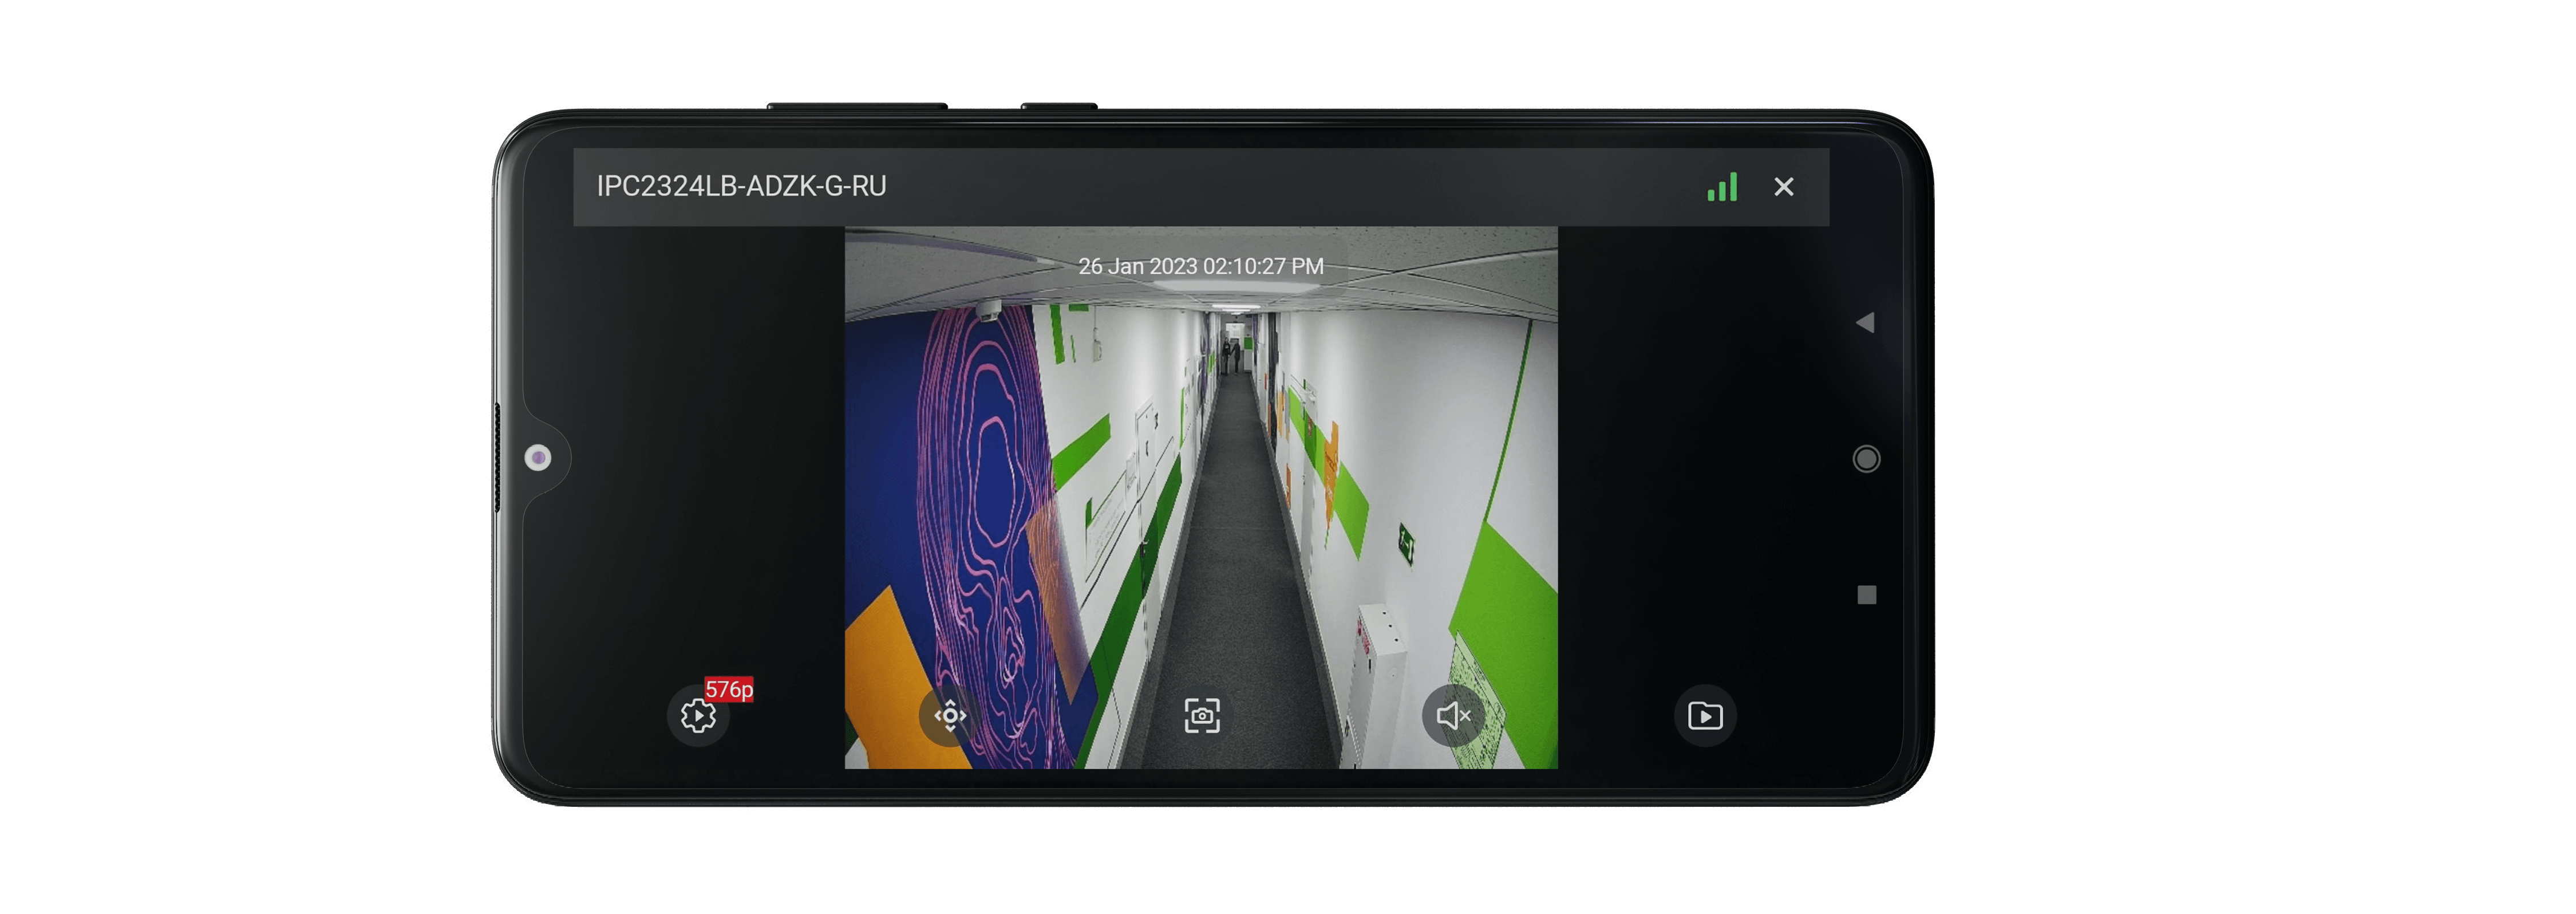
The following gestures are available in full-screen mode:
Single tap on the screen: hides/uncovers controls;
Zoom: put two fingers side by side on the screen. Spread your fingers apart to zoom in, or pinch your fingers together to zoom out;
Double-tap on the screen:
if the current zoom is less than 5x, then zoom to the screen point by 5x will occur;
if the current zoom is greater than 5x and less than 10x, then zoom to the screen point by 10x will occur;
if the current zoom is maximum (10x), then the image will be reset to the original scale.
Swiping left/right: Scrolls through the cameras within the current open view.
Swiping down: Closes the full-screen view.
Note
If zoom is active, then swiping using gestures is not available.
The following actions are available in full-screen mode by pressing the corresponding buttons:
 : video stream selection;
 : launching a user task (available only for cameras with user tasks configured);
 : open PTZ camera control (available only for PTZ cameras);
 : switch to viewing the archive;
 : turn the sound on/off (available only for cameras with sound reception enabled);
 : save the frame to the Gallery of the device.
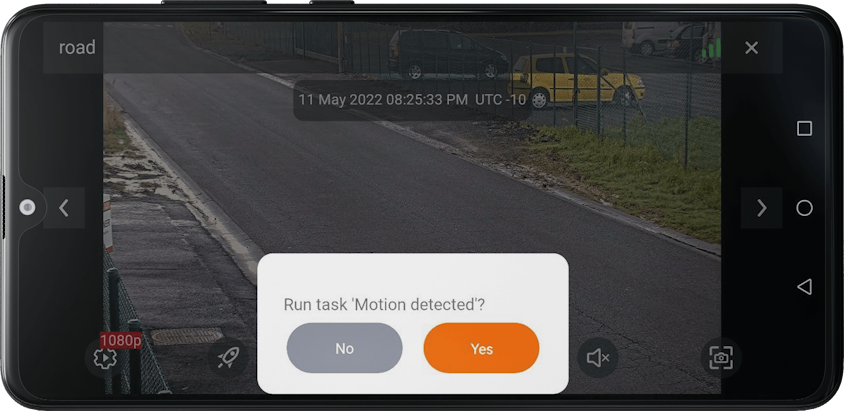
User tasks🔗
If one or more user tasks are assigned to the camera, pressing the  button opens the task launch menu.
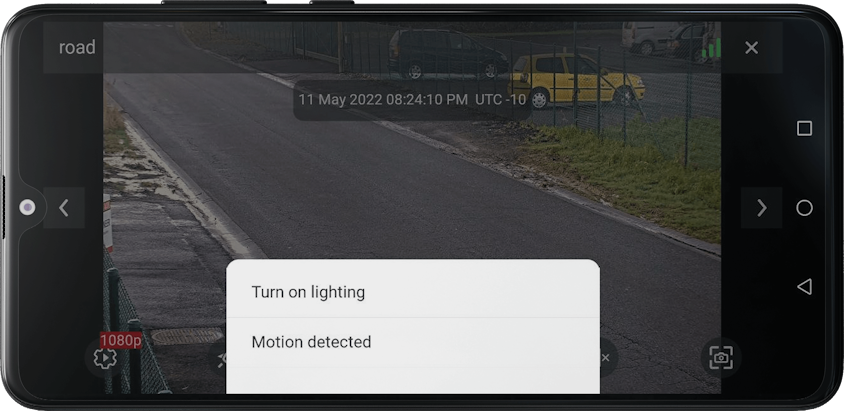
Some tasks may require launch confirmation to run.
PTZ🔗
Tapping the  button for PTZ cameras will display the on-screen joystick and other camera controls.

PTZ camera controls:
 : Zoom in/out
 /
/  : Focus control
 (Guidance mode): Turn the camera by tapping on the desired point on the screen.
 (presets): Set the camera to preconfigured positions.
Archive🔗
Description🔗
To play back a camera's archive, expand that camera to full screen in view mode and press the on-screen button  .
.
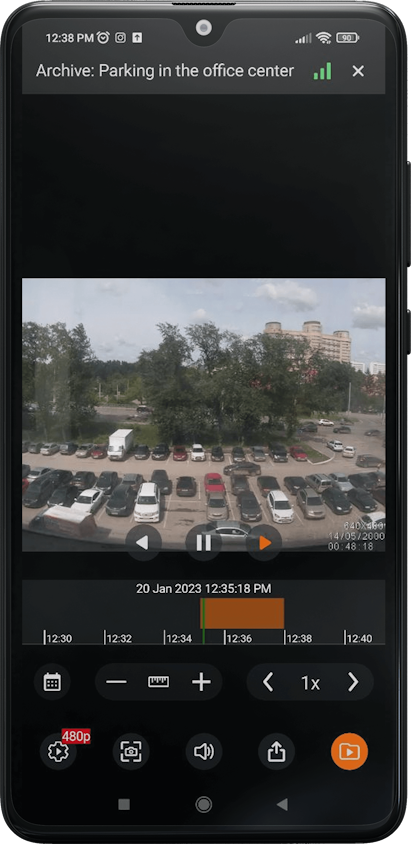
At the bottom of the screen is a panel of archive fragments superimposed on the timeline.
For positioning in the archive, touch the timeline at the desired time point.
Timeline can be scrolled to the right/left.
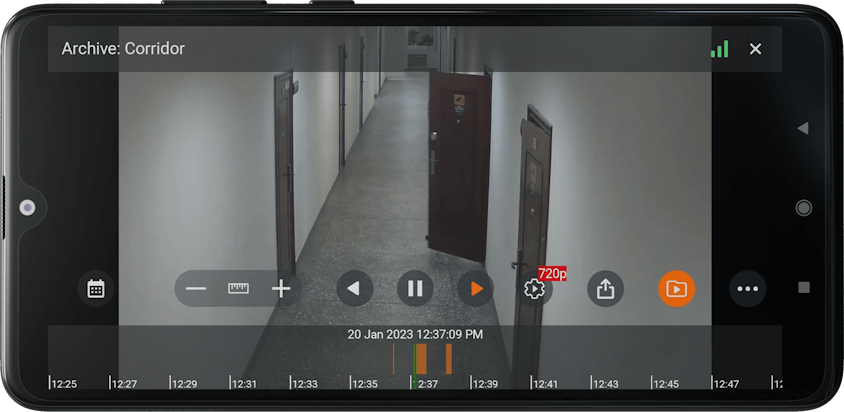
The following actions are available in the archive playback mode by pressing the corresponding buttons:


 : Archive playback control (back/pause/forward).
 : Date and time selection.
 : Timeline scale control. The scale can be changed either using the +/- buttons or by selecting from the list that opens by pressing the button.
 : Archive playback speed control. Playback speed can be changed either using the +/- buttons or by selecting from the list that opens by pressing the button.
- : Video stream selection.
- : Turn the sound on/off (available only for cameras with sound recording enabled).
- : Save the frame to the Gallery of the device.
 : Export video archive to the Gallery of the device.
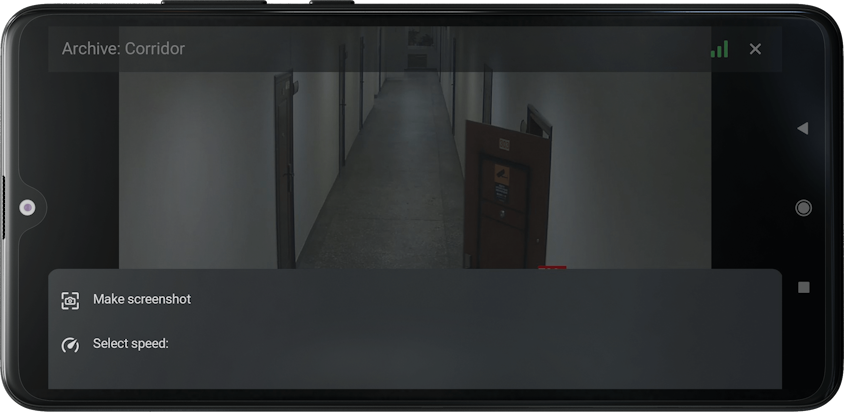
In the horizontal orientation of the device, pressing the  button opens a context menu that allows you to save a frame and control the playback speed of the archive.
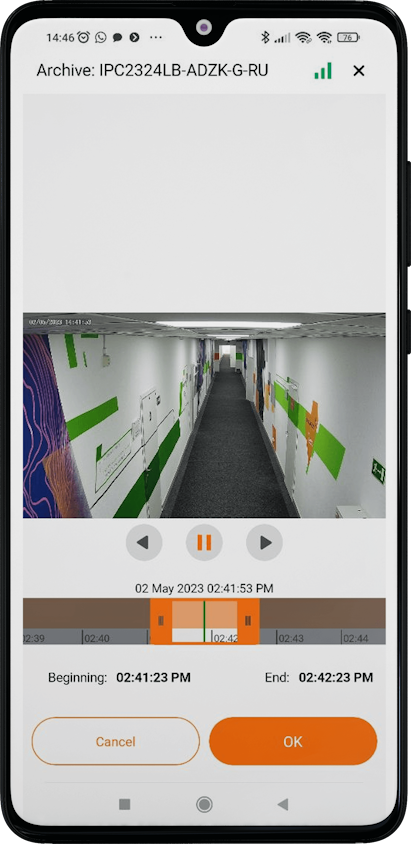
Archive export🔗
Tapping the on-screen button  will enable the camera archive export mode.
Note
This button is available if the user has rights to view and export the archive.

All buttons are hidden except for playback in this mode. The archive is paused, while playback remains available. Markers appear on the timeline, with which you can select a fragment of the archive for export. A fragment of the video is highlighted: -30 and +30 seconds from the current time by default.
Note
In the export mode, you can select a fragment of the archive and save it to your device in the .mp4 format.
The maximum fragment size is 5 minutes. The intervals on the timeline automatically adjust to the screen size so that a fragment of 5 minutes fits on the screen.
Two labels appear on the screen, showing the time boundaries of the fragment and two buttons. The Cancel button closes the export mode. The OK button starts the export with the set parameters.
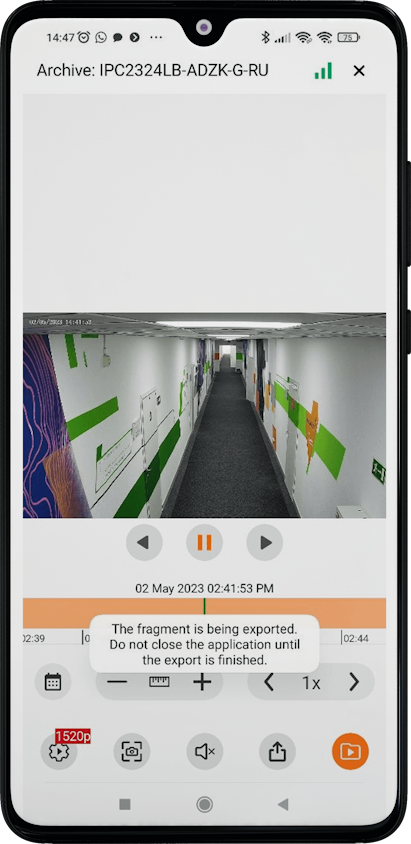
Tapping the OK button closes the export window and starts the export itself in the background. The user will be shown a notification window about the start of the export. If you activate the checkbox, then next time the window will not be shown. Instead, the user will see a pop-up message in the center of the screen:
Note
All saved file records are stored in Export History.
Saving exported video files🔗
The video files are saved in the Eocortex folder, which is created in the Video or Directory Movies folder, the name of the latter may vary depending on the system. User permission is required to save.
Export archive with timestamps🔗
Note
The archive is exported without timestamps by default.
This feature can be configured on the App tab by selecting Export archive with timestamps.
The mode with timestamps significantly reduces the amount of video received, but increases the load on the server. In the enabled mode, a timestamp is superimposed on each frame, the permissible error of which is 1-2 seconds. The export speed is lower and is 300-400 frames per second. Video with timestamps is indispensable for restoring the chronology and picture of events.
Warning
Exporting H.265 video may increase the video generation time and server load.