Configuring the Tracking module🔗
To use the module, enable and set up the software motion detector, then enable and set up the module itself.
Launch the Eocortex Configurator, go to the  Cameras tab, select a camera in the list located on the left side of the page, and set up the motion detector on the Motion detector tab on the right side of the page.
Then switch to the Analytics tab and enable the module using the  toggle.

Clicking the  button opens the module setup window.
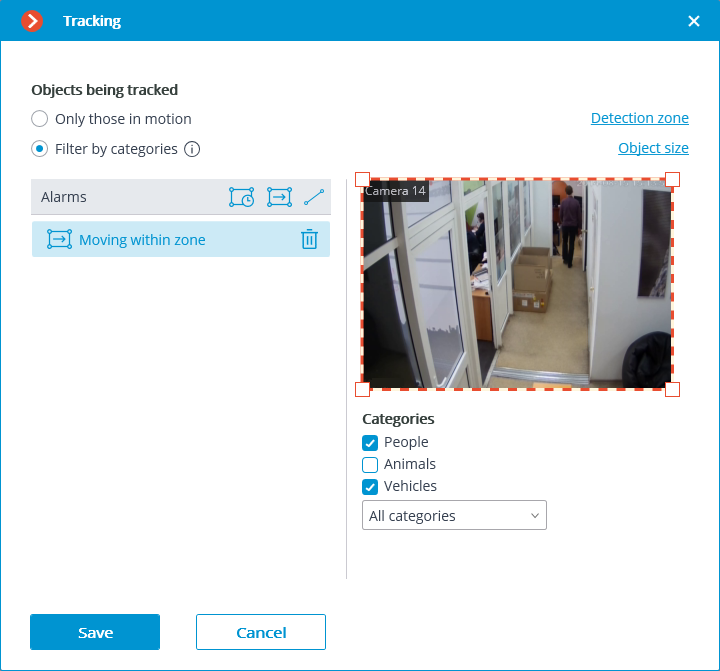
In the Objects being tracked group of settings, the user can choose which objects to track: all the objects, or people, vehicles and animals only.
If Only those in motion selected, it is possible to enable Using neural networks clicking the  button.
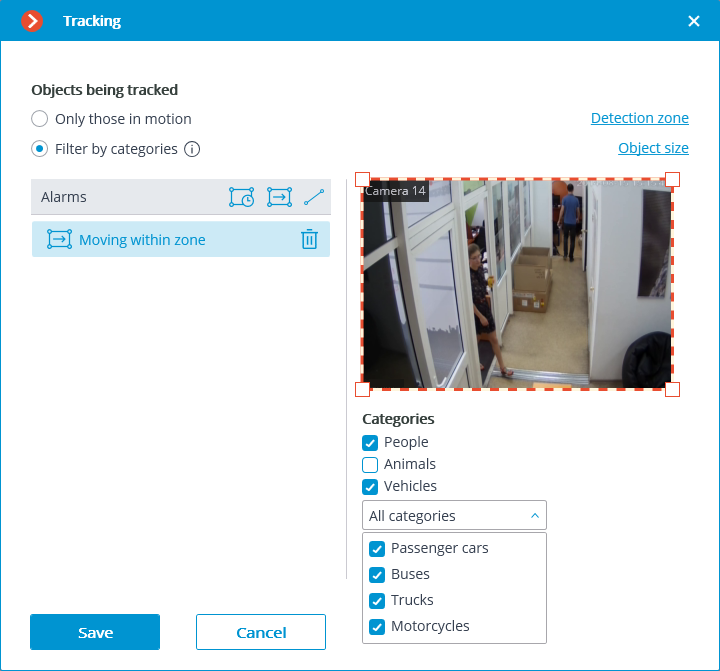
Selecting Filter by categories it is possible to optionally select which object categories will be tracked:
People
Animals
Vehicles by type: Passenger cars, Buses, Trucks, Motorcycles.
Note
By default, People and Vehicles of all modes of transportation are selected.
In the Alarms group of settings, it is possible to set the situations that will trigger alarms:
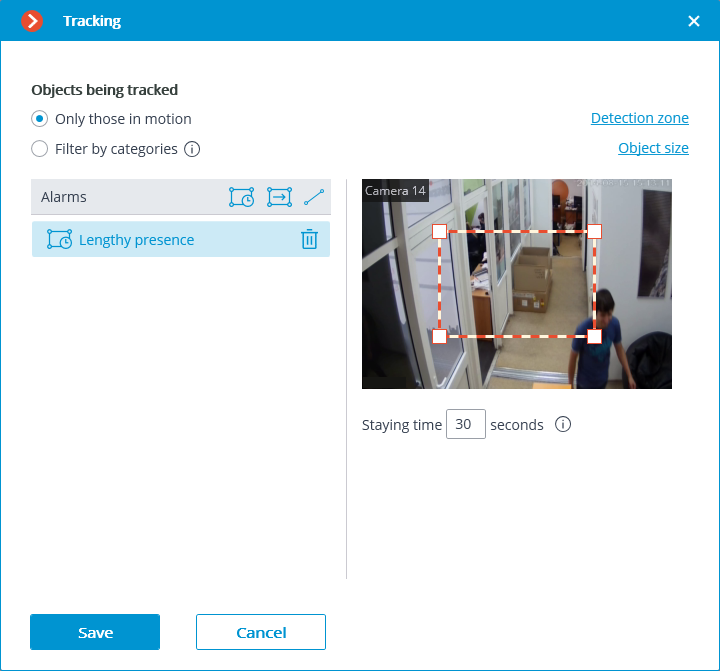
 Long stay of an object in a preset area;
 An object entering a preset area;
 Crossing of a preset line.
Long stay in the zone🔗
To set the control zone, it is required to press the button. A rectangular zone will appear in the preview window.
The zone configuration can be changed by dragging the key points at the corners of the polygon. To add a key point, it is required to double-click the left mouse button on the line; to delete — right-click on the key point.
For the Long stay in the zone alarm, the allowable duration of stay must be set. The default setting is 30 seconds. The maximum permissible value is 300 seconds.
Alarm will be generated only when the object has stayed in the zone for longer than the allowed time. The object may be out of the zone for a short time, but no more than 5 seconds.
Movement in the area🔗
To set the control zone, it is required to press the button. A rectangular zone will appear in the preview window.
The zone configuration can be changed by dragging the key points at the corners of the polygon. To add a key point, it is required to double-click the left mouse button on the line; to delete — right-click on the key point.
The alarm will be generated when any object with the preset parameters enters the zone.
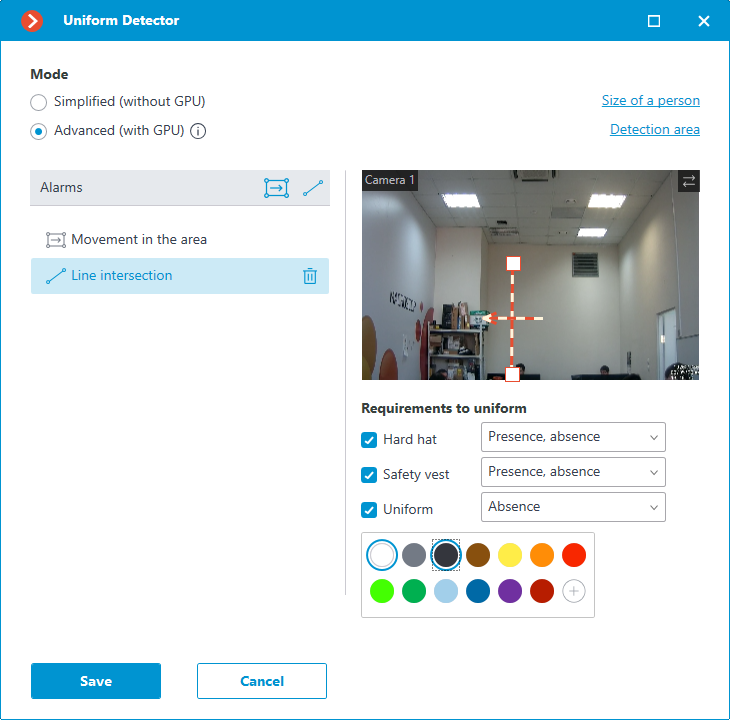
Line intersection🔗
The position of the line can be changed by dragging the key points on its ends.
In order to indicate the direction of triggering, it is required to select the corresponding value in the Moving direction dropdown list. When only one direction is selected, an arrow showing the set direction will appear perpendicular to the line. In this case, an alarm will be generated only when the line is crossed in the preset direction.
To set an intersection line, it is required to press the button. A line will appear in the preview window.
The position of the line can be changed by dragging the key points on its ends.
To indicate the direction of operation, click the button  located in the upper right corner of the preview window. If only one direction is selected, an arrow will be displayed to indicate the direction you set. In this case, the alarm will be generated only when the objects cross the line in the given direction.
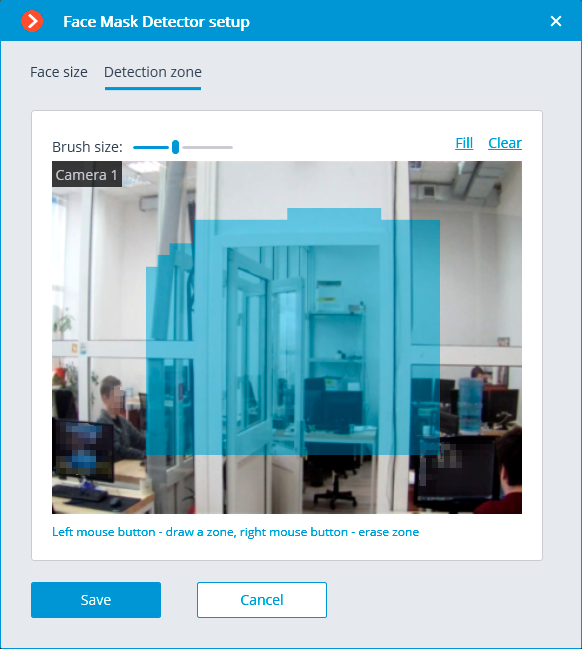
Detection area is the zone of the frame filled with the semitransparent blue fill in the settings window. The mouse is used for modifying the zone: the left mouse button serves for filling the zone, and the right one is used for clearing it. With the help of the Fill and Clear buttons, the whole area of the frame be can filled or cleared. The corresponding slider is used to modify the Brush size.
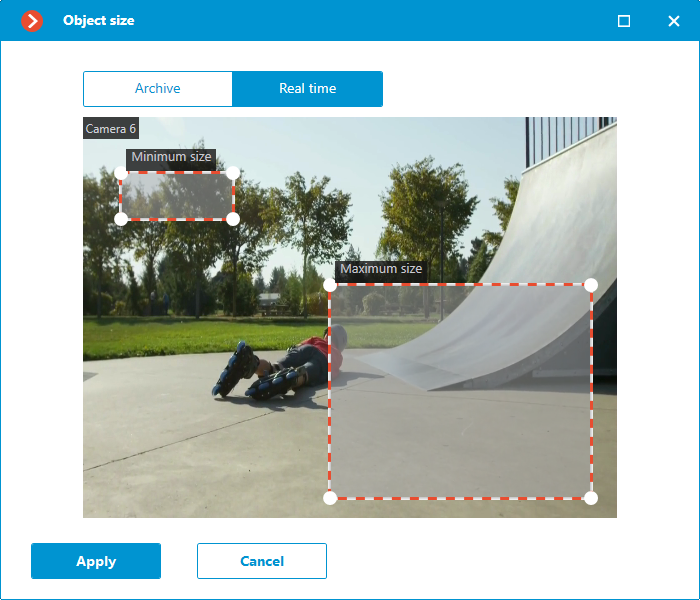
The minimum and maximum sizes of the objects to be detected are set on the Object size tab.
Warning
The module will start working only when the settings are applied.