Site plans🔗
Eocortex allows placing and interacting with cameras, sensors, and relays on the created plans of sites. In addition, if you set the field of view for the camera, you can view the video directly on the plan.
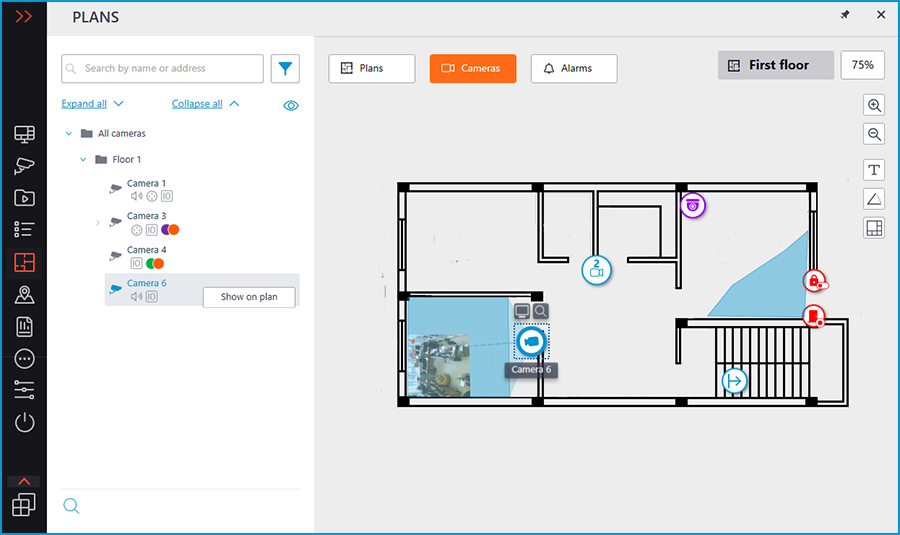
To get access to the Object plans section, select the Plans item in the main menu.
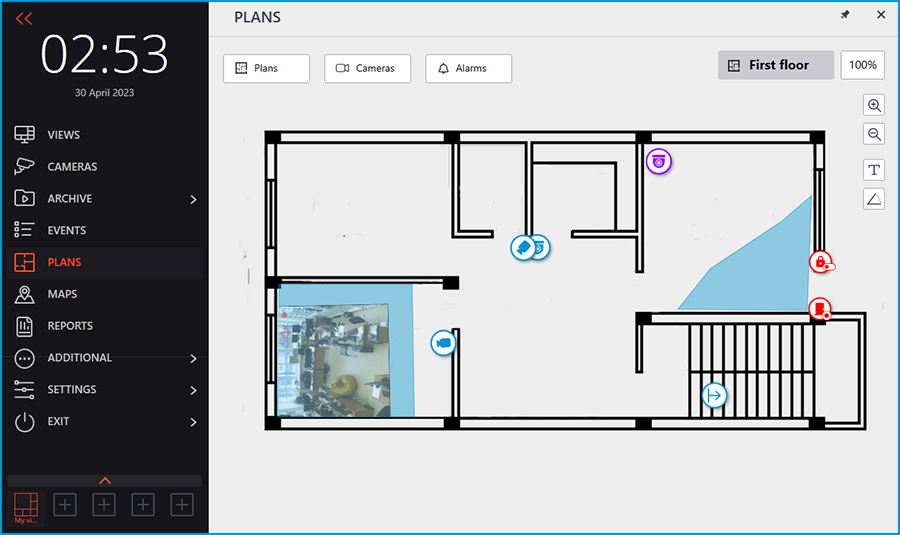
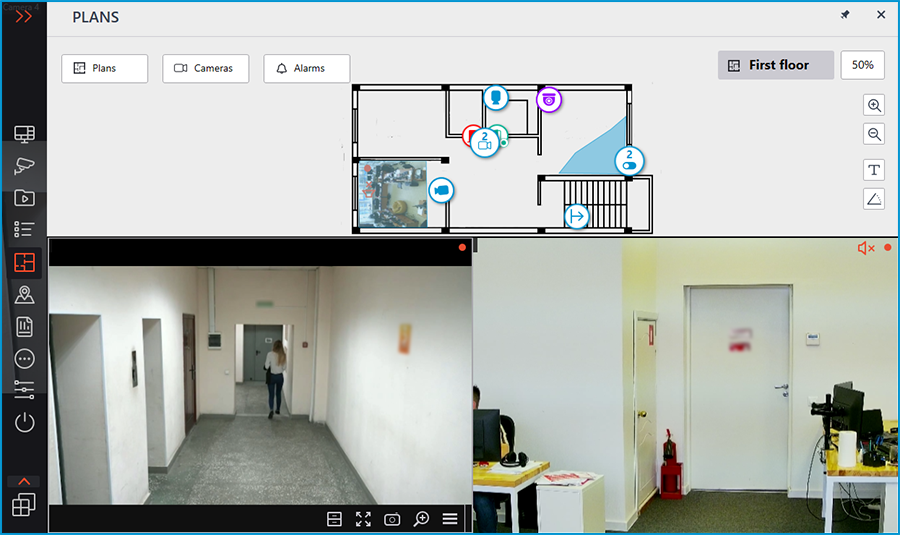
The Plans, Cameras, and Alarms buttons are available at the top of the screen. Clicking the button opens a slide-out panel on the left with the relevant information.
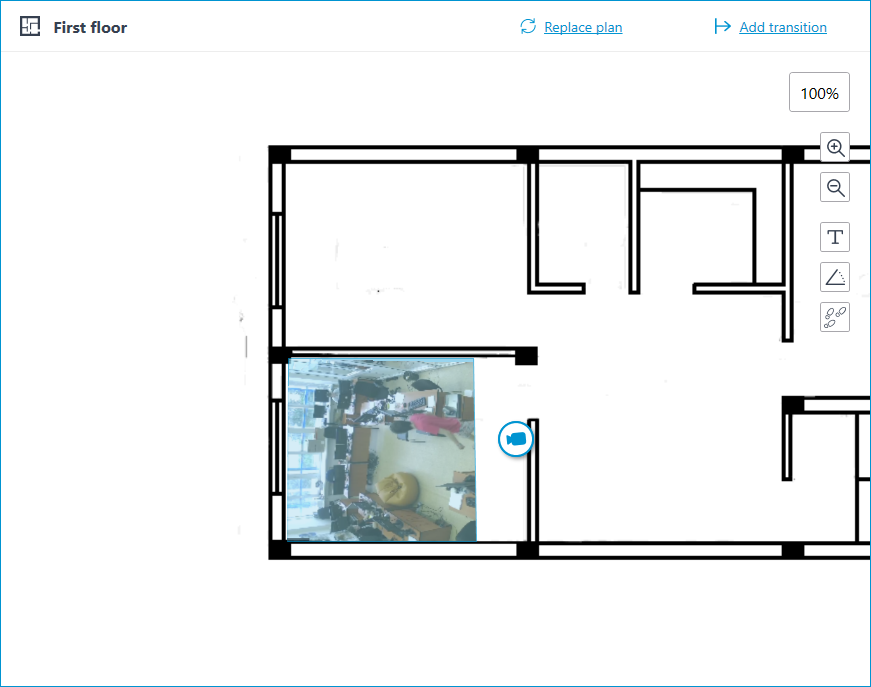
The center of the screen displays the plan with its name and scale.
A bar with the following buttons is available on the right side of the plan:
 Zoom in: Scales the plan up.
 Zoom out: Scales the plan down.
Note
You can also use the mouse wheel to change the scale of the plan.
 Show camera names: Hides or displays the names of all cameras on the plan.
 Show fields of view: Hides or displays the field of view of all cameras on the plan. If no fields of view are configured, this button will not be displayed on the panel.
 Show heat maps: Overlays a heat map for the specified period on the video in the camera's field of view. If there are no cameras with the Traffic Density Heat Map module configured, this button will not be displayed on the panel.
Plans🔗
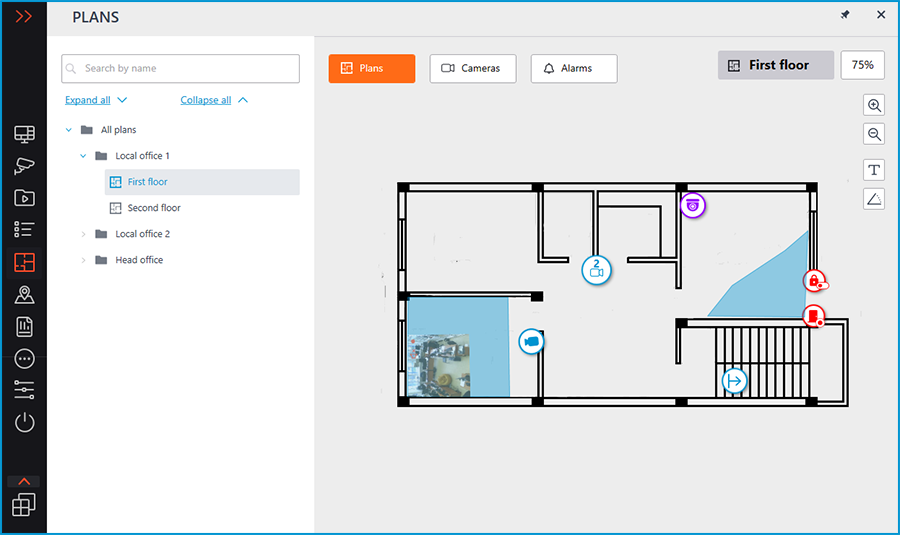
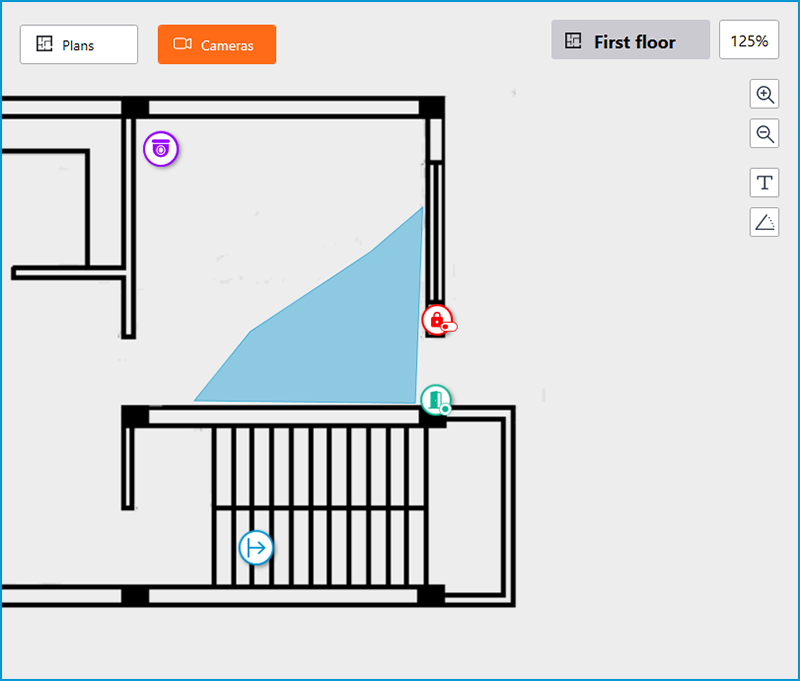
This tab displays the plan tree. Switching between plans is possible by clicking on the needed plan in the tree or via the configured transitions indicated by the  button.
Note
Each plan has its camera tree when clicking the Cameras button.
Cameras🔗

This tab contains the cameras tree.
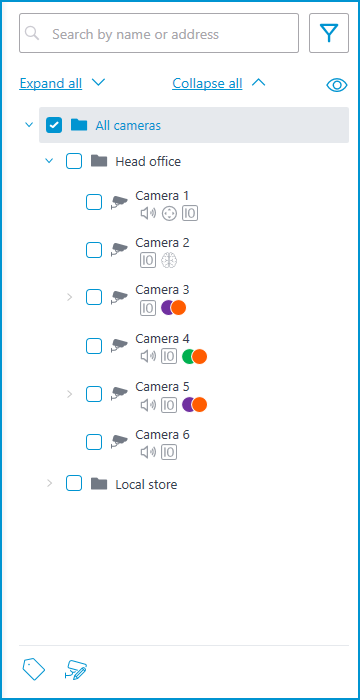
Cameras can have the following attributes:
 : the camera has enabled video analytics module;
 : the camera has enabled sound receiving option;
 : the camera has enabled PTZ;
 : the camera has enabled alarm inputs/outputs.
Colored labels: the camera has tags with the displayed colors;
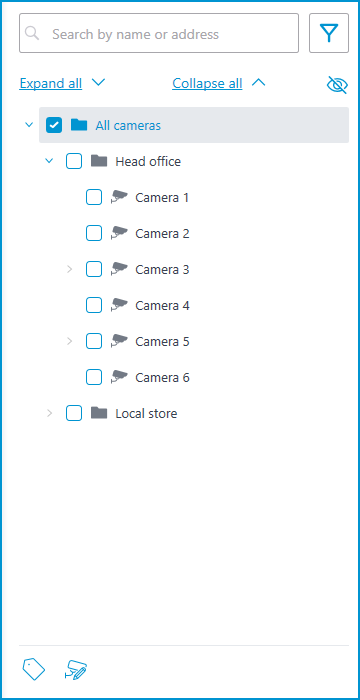
If necessary, you can hide the attributes by clicking the  icon on the right side of the tree.
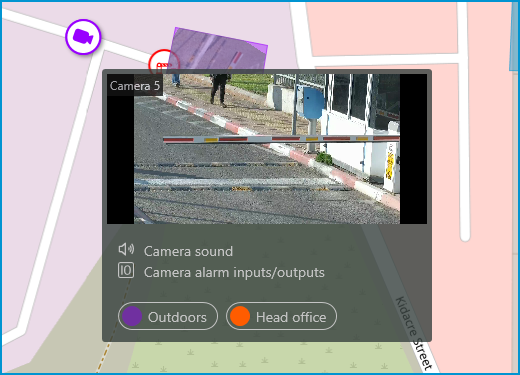
Hovering the cursor over the camera opens a preview window that contains video from the camera and a list of its attributes.

The same preview window opens when hovering the cursor over a camera located outside the cameras tree.
To select a camera manually, you can also find it by name or IP address using the search field above the camera's tree.
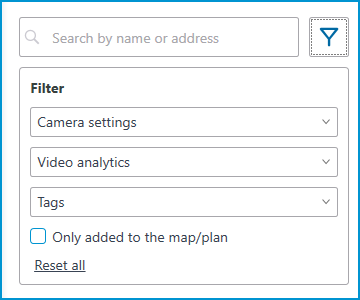
You can filter cameras by clicking the  icon and customizing the following filter options:
Camera settings
Filter by the following attributes: , , .
Video analytics
Tags
Note
The availability of filtering options depends on the settings of the cameras. Filtering applies immediately after selecting an item.
Warning
For placed sensors and relays, filtering only works for the Only added to the map/plan parameter.
If necessary, it is possible to collapse the filtering by clicking the filter button. When the filtering is applied and collapsed, the filter icon changes to  .
.
To quickly jump to a camera is on the plan, select this camera in the tree and click Show on plan in the context menu. The same way the sensors and relays are on the plan can be switched to.
When a camera is selected on the map, the following buttons will pop up around the camera:
Viewing video from the camera in full screen mode
Viewing the camera in the tree
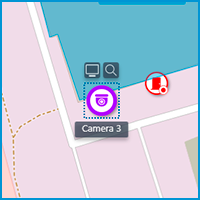
Note
Also, when a camera is selected, its name will be displayed. By default, it is hidden.
It is possible to display video in the field of view with the proper setting of the camera.
Warning
Video display in the camera's field of view on maps is not supported in the Eocortex Client application running under GNU/Linux operating systems.
By selecting one or more cameras, you can create new client views containing the selected cameras. To select multiple cameras, right-click the mouse and stretch the rectangle, capturing the desired cameras.

To create a view made up of the selected cameras, click the  button.
In addition to cameras, the plan can display sensors and relays attached to the alarm inputs and outputs of cameras.
The state of the sensors and relays is indicated by its color: red — off, green — on.
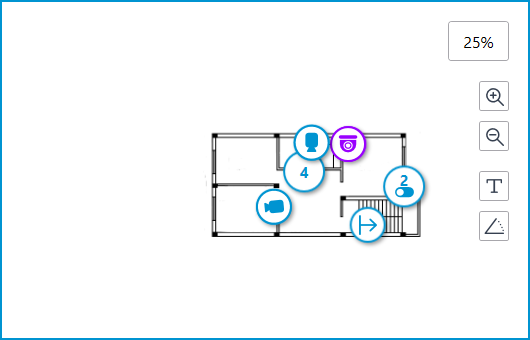
When you change the scale of the plan - cameras, sensors, relays, and transitions are grouped into markers.
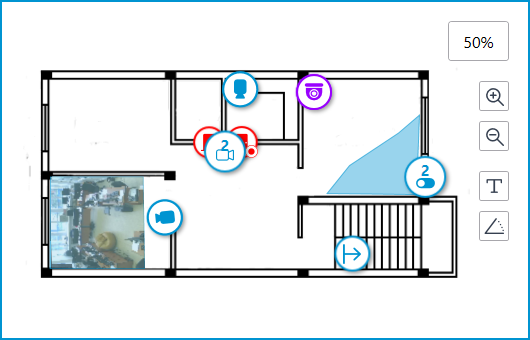
Elements of the same type located close to each other on the plan are grouped into one marker with the number of devices and their type: camera, sensor, relay, or transition.
Elements of different types are grouped into one marker with the number of devices.
Note
If the number of grouped elements is more than 99, the number on the marker will be displayed as 99+.
Warning
Dragging cameras from a map or plan on one monitor and dropping them onto a view located on a separate monitor causes an error.
Alarms🔗
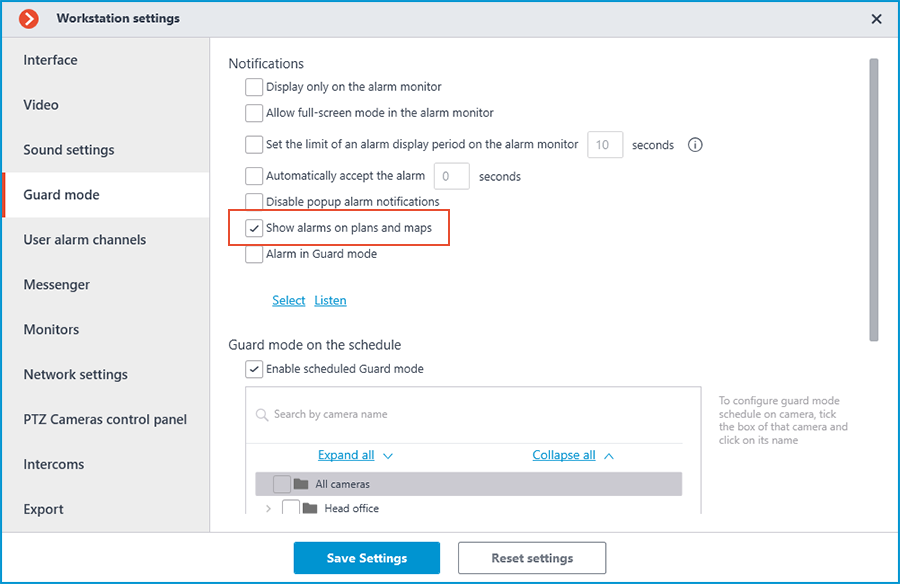
To enable displaying camera alarms, activate the Guard mode option in the Show alarms on plans and maps section of the workplace settings.
This tab displays alarms from all cameras.
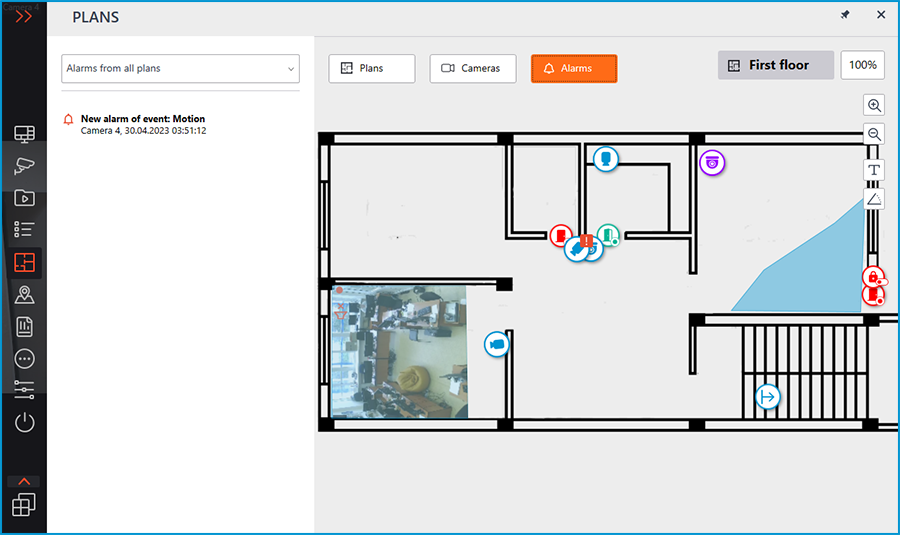
To view the active alarms for the cameras of a certain plan, select the needed plan from the drop-down list.
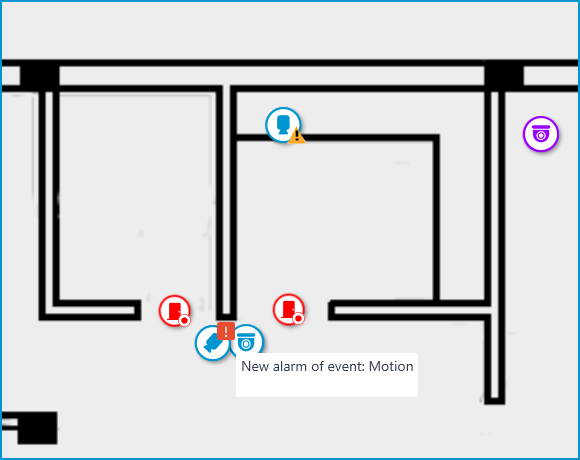
In addition to the alarm indicators, the cameras on the map may also have indicators of a broken or missing connection with the camera.
Alarms are indicated with a red square, broken or missing connection with a yellow triangle. When placing the cursor on the alarm indicator, the event that caused it will be shown.
Note
When the connection with the camera is broken, the alarm indicator will be hidden. When the connection is restored and the alarm has not been acknowledged yet, the alarm indicator will be displayed again.
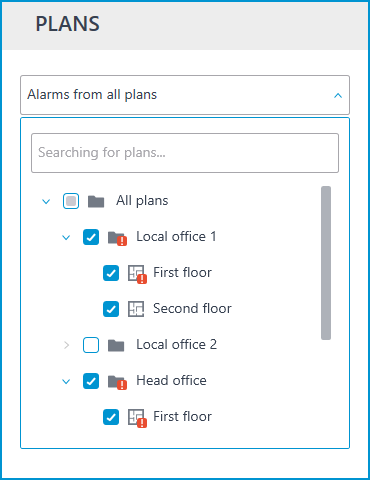
Also, alarm indicators can be displayed on the plans in the plans tree:
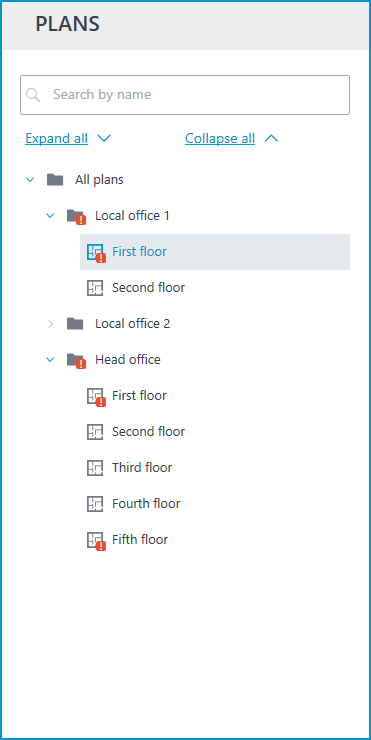
Grouped camera markers also have alarm indicators. If the group contains cameras with an alarm and cameras with a broken or missing connection, both indicators will be displayed.

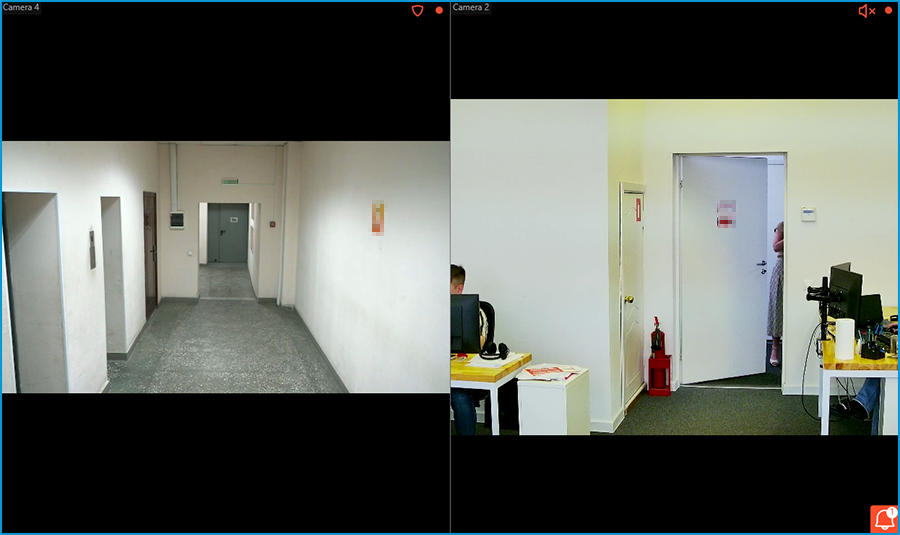
Camera cells🔗
It is possible to configure displaying of camera cells with video in the Object plans section. To do this, in the Interface tab of the workplace settings, select the grid of cells to be used when working with plans.
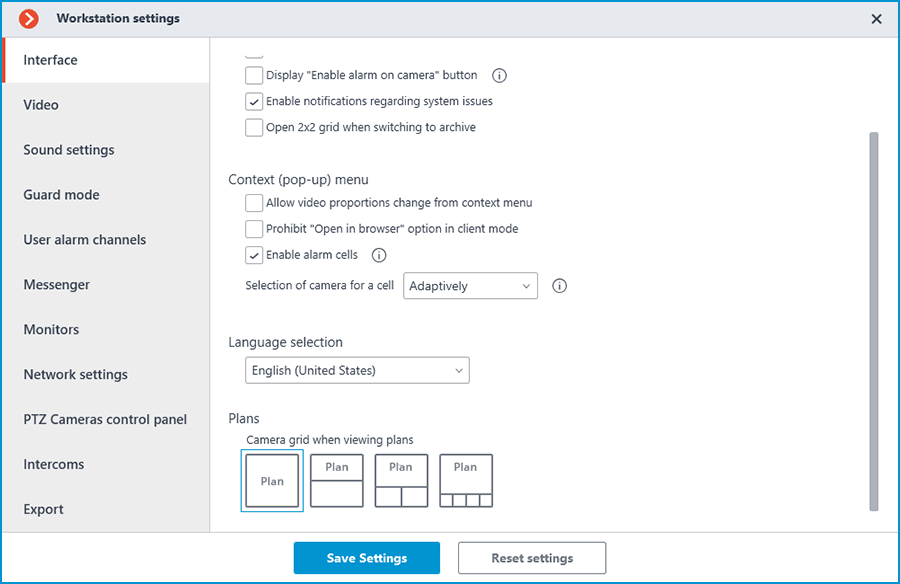
The following displaying options are available:
No camera cells;
One camera cell;
Two camera cells;
Four camera cells.

To be able to assign these cells as alarms, enable the Enable alarm cells option available in the same window.
The height of the cells panel can be changed by dragging its top edge.
Camera can be added to a cell through the context menu of the cell or by dragging the camera from the plan. The indicator of the alarm that happened on the camera will also be displayed in this cell.
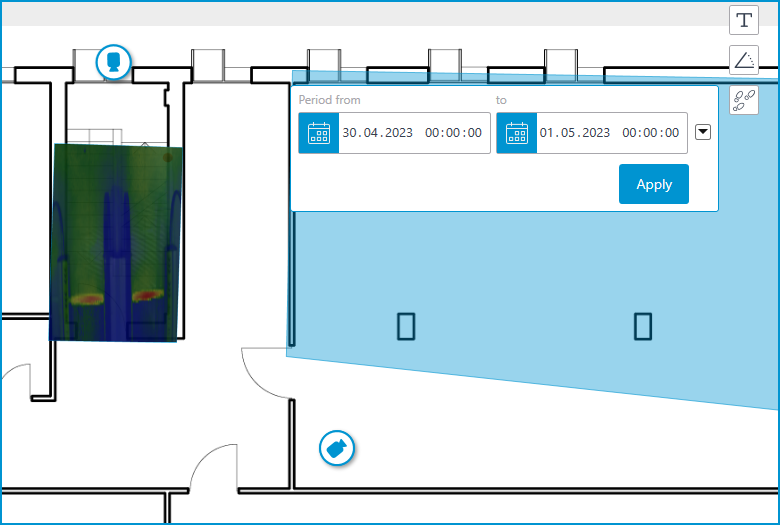
Heat map🔗
Heat map — displays the data of the Traffic Density Heat Map module on the plan.
Note
This option is available only if the relevant module is configured on the cameras.
To display the heat map, click the button and set the required time interval, then click Apply.

Heat maps will be displayed in all configured camera fields of view. The heat map image completely reflects how the video was configured in the field of view and crops to match its shape in exactly the same way.
Cross camera tracking🔗
When selecting cameras in the Cross-camera tracking, the plans associated with them are displayed. It is possible to change the scale of the plan with the mouse scroll wheel and move over the plan by dragging it with the left mouse button held.
Note
This option is available only if the relevant module is configured on the cameras.
To switch to plans, you can assign the hotkeys in the Workstation settings.