Integration with ZKBioSecurity ACS🔗
In Eocortex, it is possible to receive events from ZKBioSecurity ACS and configure the reaction to these events, as well as to view the received events in the Events Log of the Eocortex Client application.
Note
The integration is available on both Windows and Linux-based servers.
Note
Integration is available in version Eocortex 3.6 and higher.
Integration was performed with ZKBioSecurity version 4.1.2000.
Description🔗
Information regarding an event may contain the following fields:
Time (Event Time);
Employee identifier (Pin);
Employee (Name + Last Name);
Name of department (Department Name);
Name of area (Area Name);
Card number (Card Number): number of the card swiped at the reader;
Serial number (Device Sn): serial number of the device;
Verification mode (Verify Mode Name) (e.g., Face, Other, Only Password);
Description of event (Event Name): textual description of a ZKBioSecurity event;
Event point (Event Point Name);
Name of reader (Reader Name);
Zone (Access Zone);
Name of device (Device Name);
Event identifier (LogId);
Type of event (Event Number) (e.g., Opening by verification, Opening using emergency password, Prohibition of double passing);
Level of event (Event Level). The following values are available: Normal (Normal), Error (Exception), Alarm (Alarm);
Name of door (DoorName).
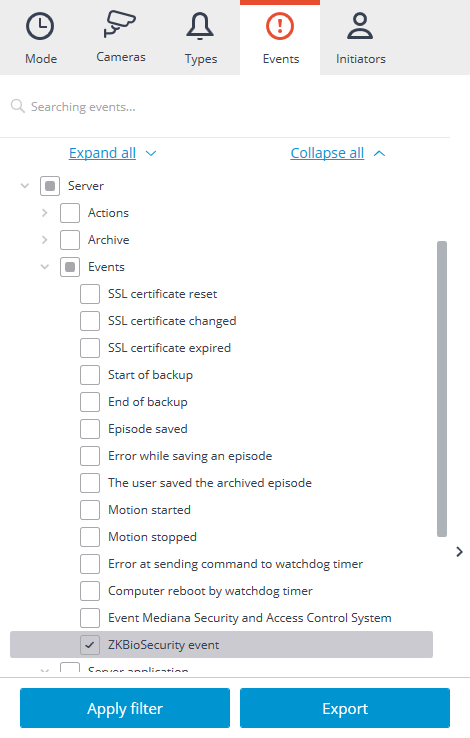
Events log🔗
The events received from the ZKBioSecurity ACS are displayed in the event log of the Eocortex Client application.
The following event log information fields are displayed (if available for the given event):
Type of event (EventNumber): as a description of the event (Door closed);
Area (Area);
Point of event (Event Point);
Employee (Name + Last Name);
Device (Device);
Door (Door);
Reader (Reader).

Filtering ZKBioSecurity ACS events is available.
Setting up tasks by events🔗
To configure the actions to be performed in response to events occurring in the video surveillance system, it is required to go to the Automation  tab in the Eocortex Configurator application, select an individual camera or folder in the camera tree, and then, on the page that opens, go to the Tasks by event tab.
Any standard ZKBioSecurity event tasks by event can be configured.

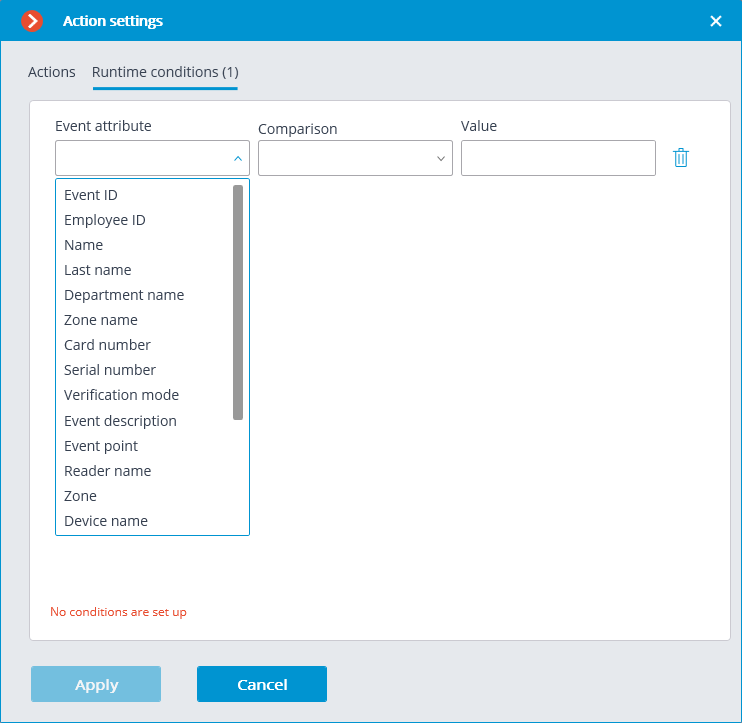
The following event fields are available as execution conditions:
Event information:
Time (Event Time), string;
Event description (Event Name), string: textual description of ZKBioSecurity event;
Event point (Event Point Name), string;
Event ID (LogId), string;
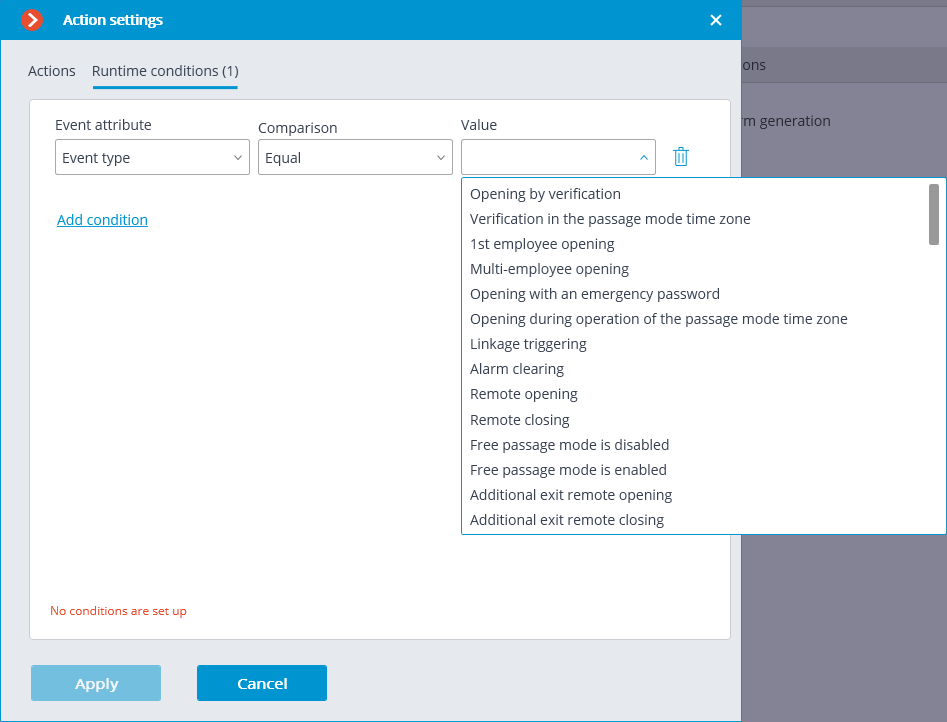
Event type (EventNumber), enumeration: selecting out of several popular event types (e.g., Opening by verification, Opening using emergency password, Prohibition of double passing);
Event code (EventNumber), numerical code of ZKBioSecurity event;
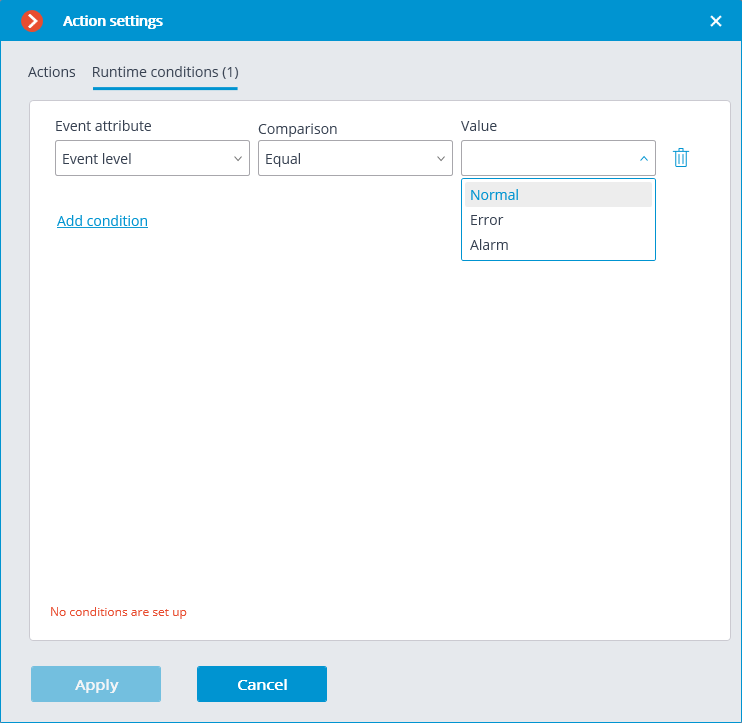
Event level (Event Level), enumeration: selecting out of several defined levels (may adopt the following values: Normal (Normal), Error (Exception), Alarm (Alarm)).
Device data:
Serial number (Device Sn), string: device serial number;
Verification mode (Verify Mode Name), string: textual description (e.g., Face, Other, Only Password);
Reader name (Reader Name), string: textual description (e.g., SysproDemo-1-In);
Device name (Device Name), string.
Door data:
Area name (Area Name), string;
Area name (AccZone), string;
Door name (Door Name), string.
User data:
Employee ID (Pin), string;
Employee (Name + Last Name), string;
Department name (Department Name), string;
Card number (Card Number), string: number of the card swiped at the reader (e.g., 2596802013, 9251205323699455112).
Configuring in Eocortex Configurator application🔗
In order for the Eocortex server to respond to events from the ZKBioSecurity access control system, it is required to start the Eocortex Configurator application, go to the Automation tab, select the camera in the list, then, on the page that opens, go to the Integrations tab and enable ZKBioSecurity.
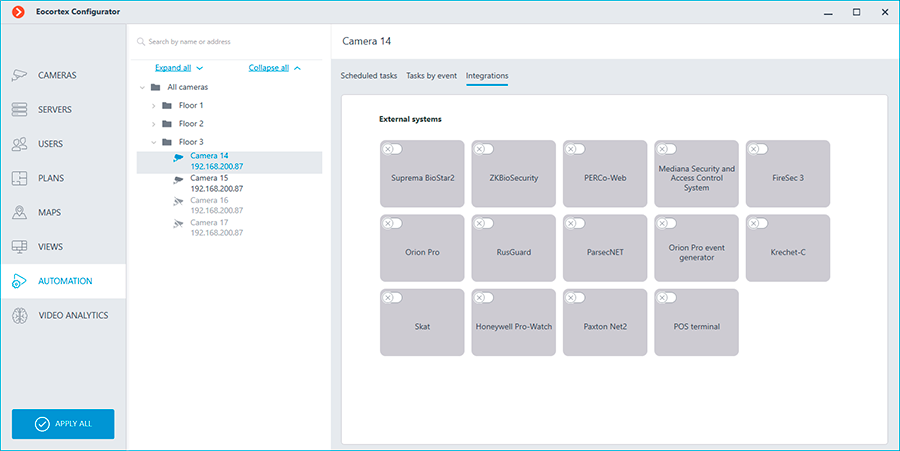
Two tabs are available in the integration settings:
General settings;
Camera settings.
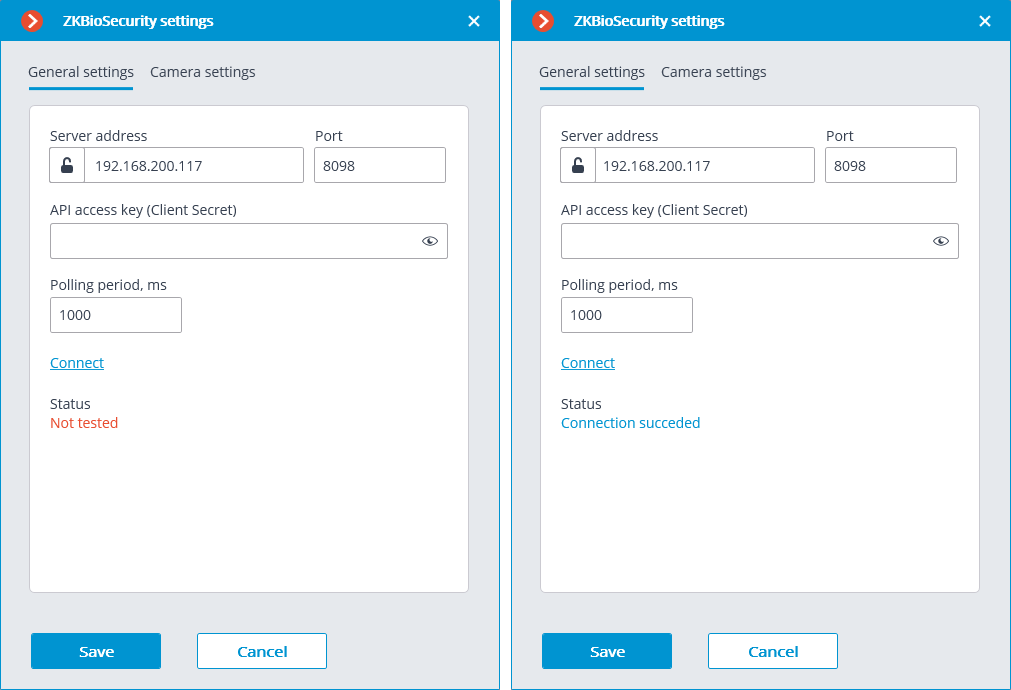
General settings🔗
The General settings tab is used to configure the system-wide connection to ZKBioSecurity.
Note
Setting up the connection to only one ZKBioSecurity server is available per one server system.
The following settings are available:
Server address (IP address or URL. Prefixes as http:// are not required to be specified in this field).
Use of a secure connection can be set here.
Port. Interaction with ZKBioSecurity is performed via HTTP.
API access key (Client Secret).
After making the settings, it is required to press the Connect button.
Note
The Status field will show the verification result.
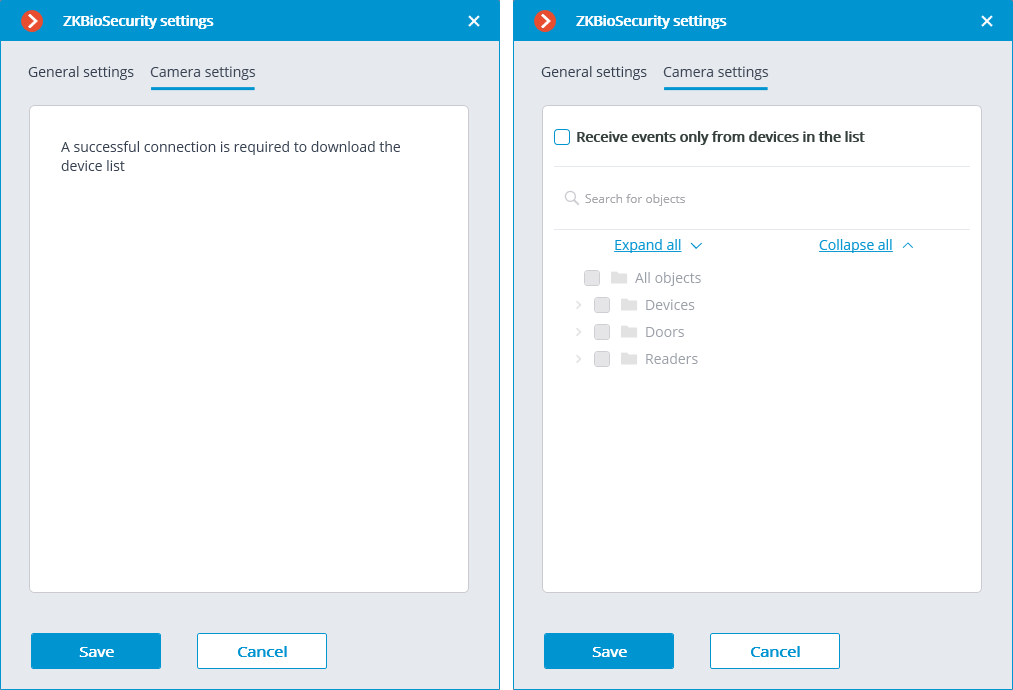
Camera settings🔗
On the Camera settings tab, it is possible to specify the devices whose events are to be received for the given camera.
Note
By default, all the ZKBioSecurity events are received from all devices.
Note
Enabling integration on multiple cameras with the default setting will provide duplication of the events for all enabled cameras.
Three types of ZKBioSecurity objects are available for configuration (full text search is available):
Doors
 . A high-level object whose rules are usually configured in ZKBioSecurity. Usually, the door is connected to a relay and a sensor of some device. Receiving events from specific doors allows for a more precise integration.
Readers
 . A high-level object whose rules are usually configured in ZKBioSecurity. Typically, the reader is installed on doors, turnstiles and other access control points. Receiving events from specific readers allows to configure the integration more precisely.
Devices
 . A lower-level ZKBioSecurity object. Setting up the reception of events from the device permits to configure the integration more flexibly. For example, if multiple doors are connected to the same device and ZKBioSecurity is in the process of being set up, and the doors are being connected and disconnected, the integration settings will have to be changed frequently when setting up the reception of events from the specific doors. In the process of configuring the reception of events from a device, the integration settings do not need to be modified when new doors are being connected to the device.
Note
Changing the names of ZKBioSecurity objects (devices, doors or readers) requires their manual reassignment in the device list every time. Otherwise, the events from the newly renamed object will not be registered.
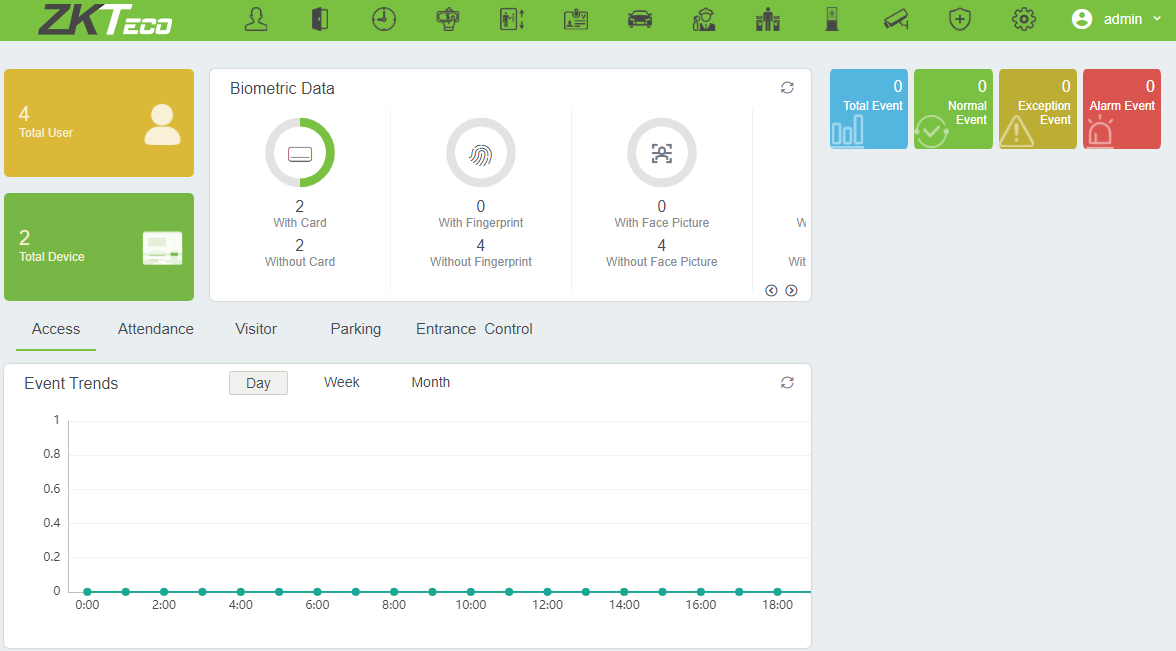
Configuring ZKBioSecurity🔗
Configuring ZKBioSecurity for integration is performed via the web interface on the same port that is specified in the integration settings.
Warning
The time and the clock zone on the Eocortex Server and on the computer where ZKBioSecurity is installed must match.
Note
The lowest version of ZKBioSecurity: with the license activation on the API module.
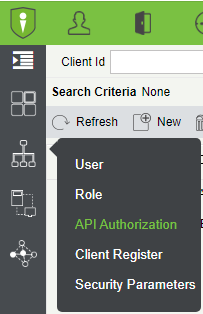
To gain access via the API, it is necessary to create or use an existing Client Secret. To do this, it is required to go the System  tab, switch to the Authority Management
  tab and select the API Authorization item.
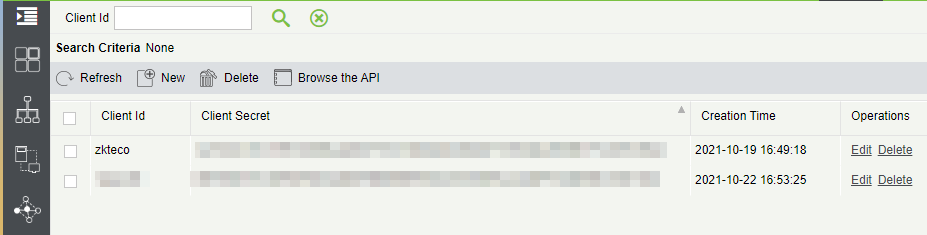
Clicking the Edit button opens a window where the Client Secret field can be copied.
