Additional server settings🔗
The additional server settings are as follows:
Archive allocation settings;
Mobile and web connection settings;
Settings of client application updates;
Watchdog timer settings;
Settings for synchronization of databases with third-party systems;
Part of the network settings;
Part of the archive replication settings (only for replication servers).
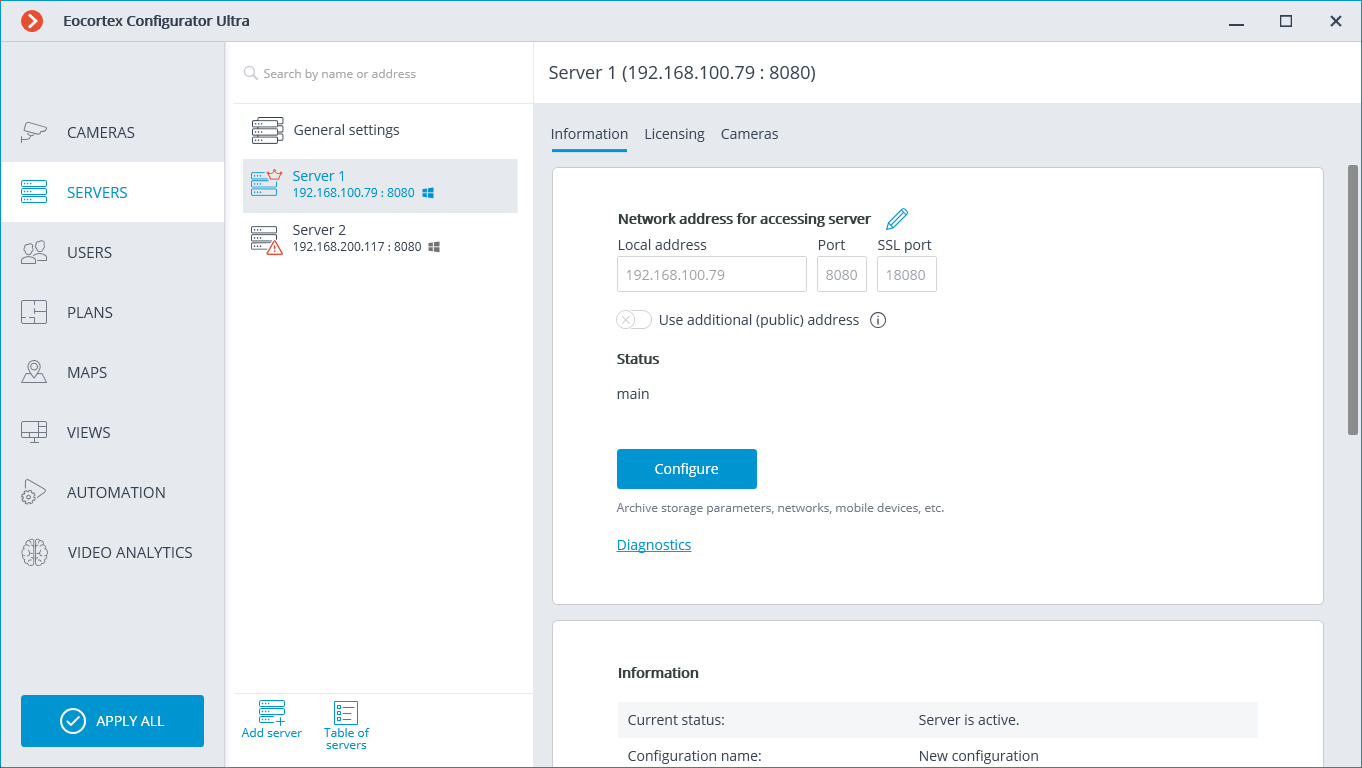
To open the additional server settings window, select the server on the  Servers page of Eocortex Configurator application and then either select Configure in the context menu or click Configure on the Information tab of the server settings tab.
The additional settings window contains the following tabs:
Replication server (replication servers only)
Warning
To save the changes made, it is required to press the Apply server settings button.
Archive🔗
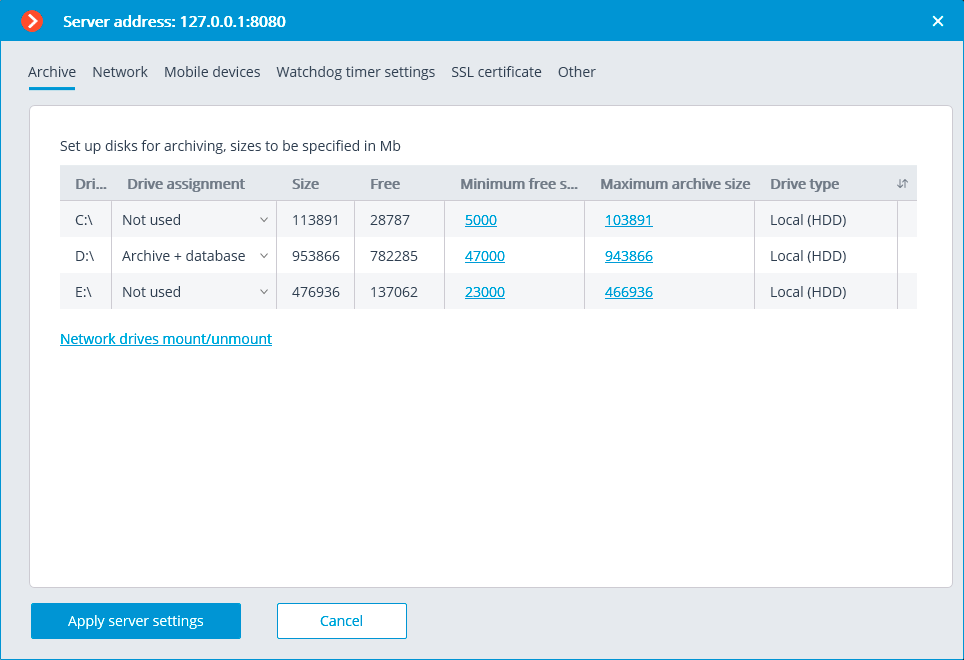
Drive: logical name of a drive.
Drive assignment: indication of the usage of the drive.
The following options are available:
Option
Video archive
Event database
Not used
—
—
Archive + database
main
yes
Archive only
main
—
Database only
—
yes
Backup archive
backup
—
Backup archive + database
backup
yes
Duplicate Archive (only for ULTRA and Enterprise)
is duplicated
is duplicated
Size: total drive size (GB).
Free: currently remaining free space on drive (GB).
Minimum free space: minimum drive space that is required to remain free when recording the archive (GB). In order to set the value of this parameter, double click on the current value, enter the new one and press Enter.
Maximum archive size: maximum size of the archive in GB. In order to set the value of this parameter, double-click on the current value, enter the new one and press Enter.
Drive type: information regarding the type of drive — Local (HDD) or Network.
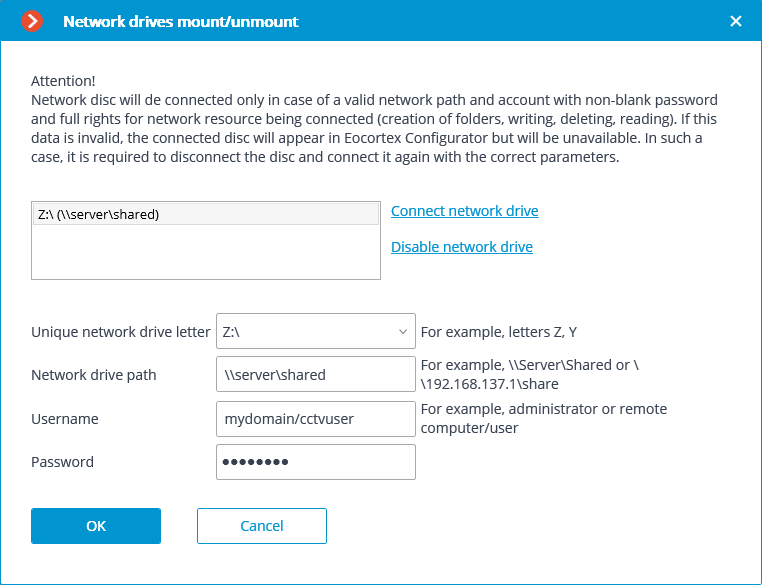
Network drives mount/unmount: this link opens network drive connection window.
Attention
Databases must not be stored on network drives.
Warning
Avoid using network drives for archive storage. Due to data transfer protocol limitations with network storage, this may cause system failures, extended recovery delays, and ultimately result in archive gaps.
To connect a network drive, select a letter that will be used to designate the network drive being added in the Network drives mount/unmount window, indicate a path to the network drive in the corresponding fields, and enter the username and password of the user who has access to reading, writing and creating files and folders on this path; then click on the Connect network drive link and click on the Apply button.
After clicking the Apply button, the server will restart and all the network drives listed will be added to the list of drives displayed in the Archive tab. After that, network drives can be configured in the same way as local drives.
To disconnect a network drive, it is required to select the drive to be disconnected in the list of drives in the Network drives mount/unmount window, then click on the Disable network drive link, and then on the Apply button.
After clicking the Apply button, the server will restart and all the network drives not in the list will be excluded from the list of drives displayed on the Archive tab.
Warning
At the first start of the server its default settings are created automatically. C: drive is connected to the archive. During the initial setup it is recommended to assign other drives for archive allocation, because the placement of the archive on the same physical drive with the Windows operating system may lead to the reduction of productivity or system errors.
Note
The archive is stored on the server with the indication of the Coordinated Universal Time (UTC). At that, in the client applications the local time of the device used for viewing the archive is displayed (with account for the time zone).
As an example:
The server with the UTC+03:00 time zone settings recorded a fragment of the archive from 12:00 to 12:05 server time.
When viewing this fragment in the Eocortex Client application running directly on the server, it will be displayed on the timeline between 12:00 and 12:05.
But when viewing this fragment on a computer with UTC+05:00 time zone settings, the fragment time on the timeline will be from 14:00 to 14:05.
And when viewing the same fragment on a computer with UTC+01:00 time zone settings, the fragment time on the timeline will be from 10:00 to 10:05.
Note
Archive data:
The archive of each server stores the video recordings of only those channels that are assigned to this particular server.
The archive has a cyclic structure. If the space designated for the archive is full, the new archive files begin to replace the oldest ones, taking into consideration the archive depth parameters set for each channel.
When several drives are used, the recording to archive is performed simultaneously to all the available drives. If one of the drives becomes unavailable, the recording to it stops and the data is redistributed to the available drives. Likewise, if the unavailable drive becomes available again, the recording of data to it resumes.
One or more drives may be assigned as redundant. The recording of the new data to the redundancy drives starts only when all the main drives become unavailable; when a main drive becomes available again, the recording to the redundancy drives stops.
The archive is located in the EocortexArchive folder in the root directory of each drive used for archive storage.
One or more drives can be assigned as duplicating drives. New data is recorded on the duplicating drives in parallel with the recording on the main or backup drives.
Note
This capability is not present in some types of licenses.
Network🔗
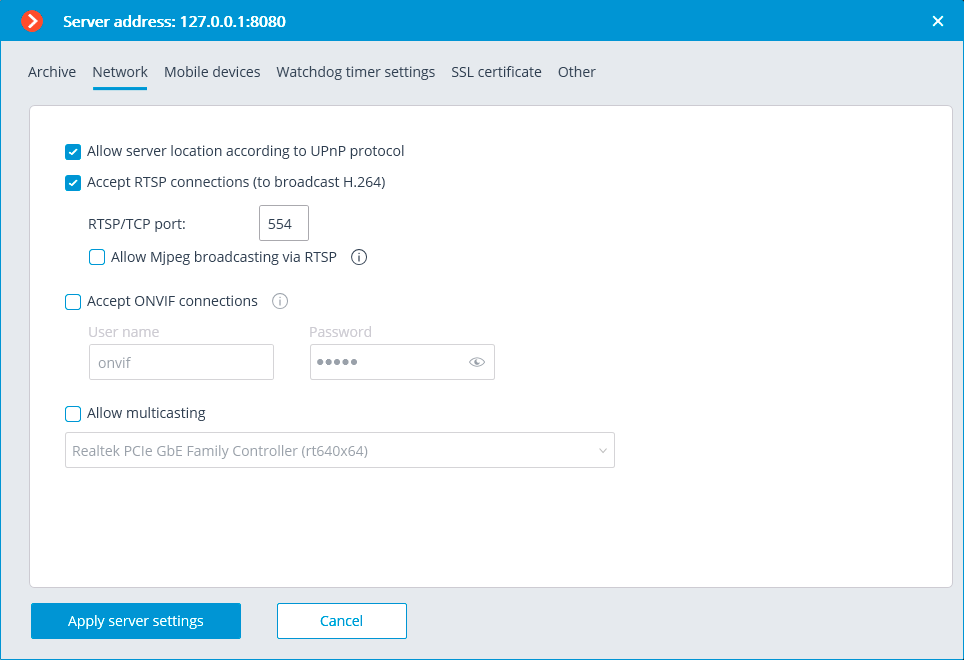
Allow server location according to UPnP protocol: enables the UPnP protocol for the video surveillance server that allows to locate the server in the network using the stated protocol.
Accept RTSP connections (to broadcast in H.264, H.265 and MJPEG): allows to receive video stream and operational information using direct requests to server via RTSP protocol.
Note
When receiving RTSP video streams encoded with H.265, B-frames are not supported.
RTSP port (for TCP or HTTP connections):: port for client connections to server using RTSP protocol.
Allow Mjpeg broadcasting via RTSP: enables MJPEG broadcasting via RTSP protocols.
Note
Since RTSP protocol only supports MJPEG frames encoded in the base (Baseline) encoding mode, for broadcasting video streams encoded in other modes their recoding will be required. It will increase server load. Moreover, in the course of MJPEG recoding the frame rate can be reduced (in comparison with the frame rate transmitted directly by camera).
Accept ONVIF connections: enables client connections to video surveillance server via ONVIF. By default, username is onvif, password — onvif. It is recommended to change password when enabling this option. Username cannot be modified.
Allow multicasting: enables multicasting from the server for those channels that have this option on. If there is more than one network adapter installed on the computer, it will be possible to choose the adapter for multicasting in the dropdown list that appears upon enabling this option.
Mobile devices🔗
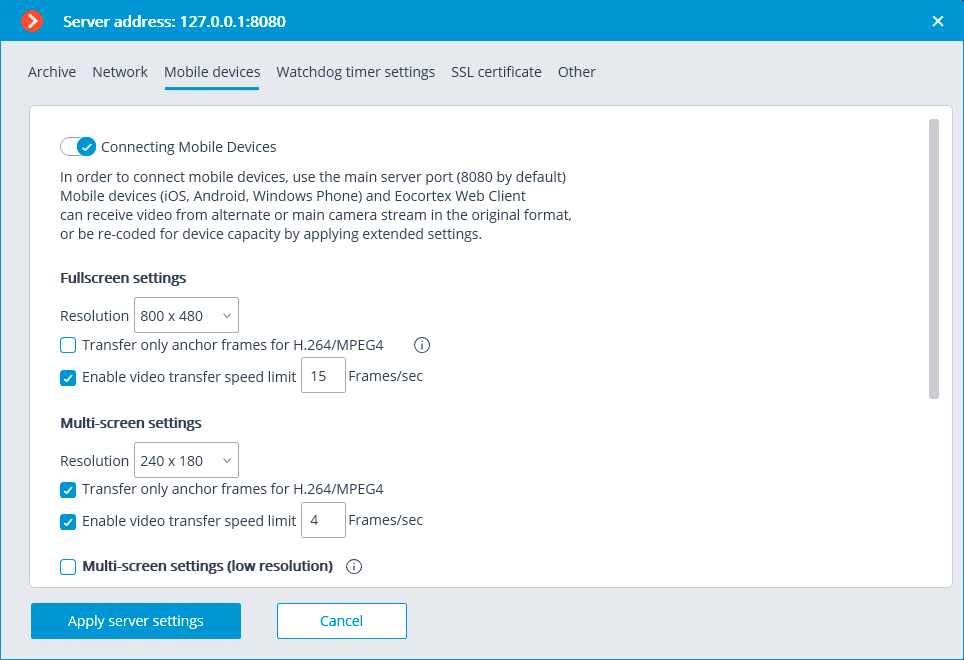
Connecting Mobile Devices: activates the service of broadcasting video streams for mobile devices and web clients built in the Eocortex server application.
Note
This service is also used for arranging broadcasting to site.
Depending on the resolution of the connected mobile device or web browser, the service can broadcast video streams in two or three modes:
Good quality (high resolution): used for full-screen mode.
Medium quality (medium resolution): used for multiscreen mode.
Multi-screen settings (low resolution): used for low resolution multiscreen mode. This mode is off by default.
It is possible to set the following for each of the modes:
Resolution that will be broadcast by default for each of the channels.
Transmit only key frames (for H.264, H.265, MPEG4, MxPEG): for these codecs, only anchor (key) frames will be broadcast; this setting allows reducing the amount of data transferred in the networks with limited bandwidth.
Enable video transfer speed limit: the frame rate of the frames being transferred will be limited to the set value; this setting permits to reduce the amount of data transferred in the networks with limited bandwidth.
Note
The broadcast stream is not transcoded to MJPEG when the mobile device or web application supports decoding of the original video stream, and when the original video stream is encoded in MJPEG.
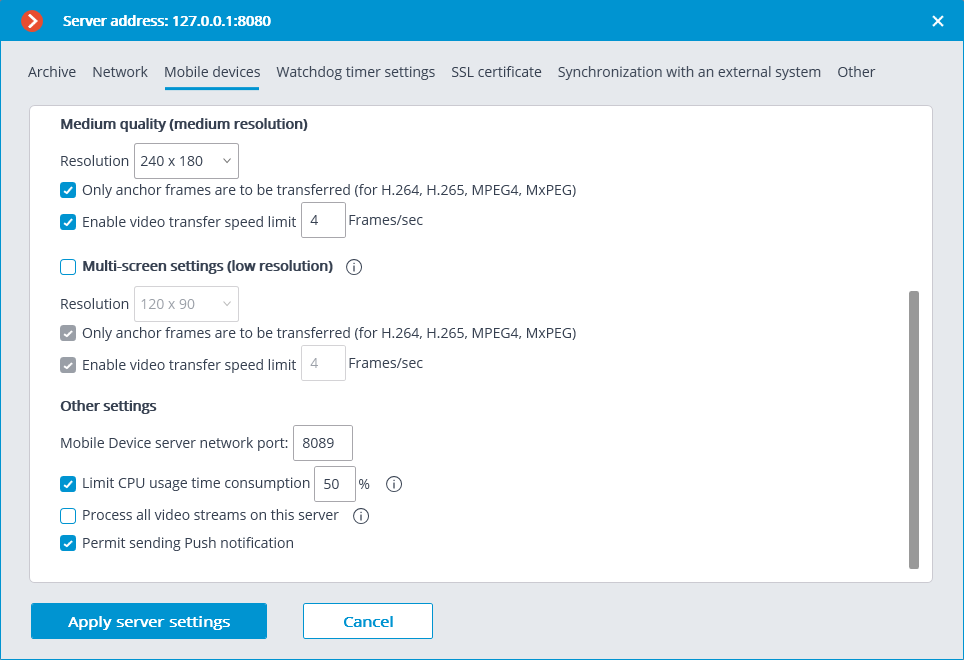
Other settings:
Mobile Device server network port: allows setting the port through which the connection to the video stream broadcasting service will be available.
Limit CPU usage time consumption: allows limiting the consumption of CPU time by the mobile connections service.
Process all video streams on this server: when this option is enabled, all video streams sent from this server to mobile applications will be reencoded on this server; if the option is disabled, the streams will be reencoded on those servers to which the cameras are connected, and already reencoded streams will be sent to this server.
Note
This feature appeared in Eocortex version 3.4. The servers upgraded from earlier versions will have this option enabled. The option is disabled by default for new servers.
Permit sending Push notification: enables the possibility of sending various Push notifications from the server to mobile devices (see Actions).
Watchdog timer settings🔗
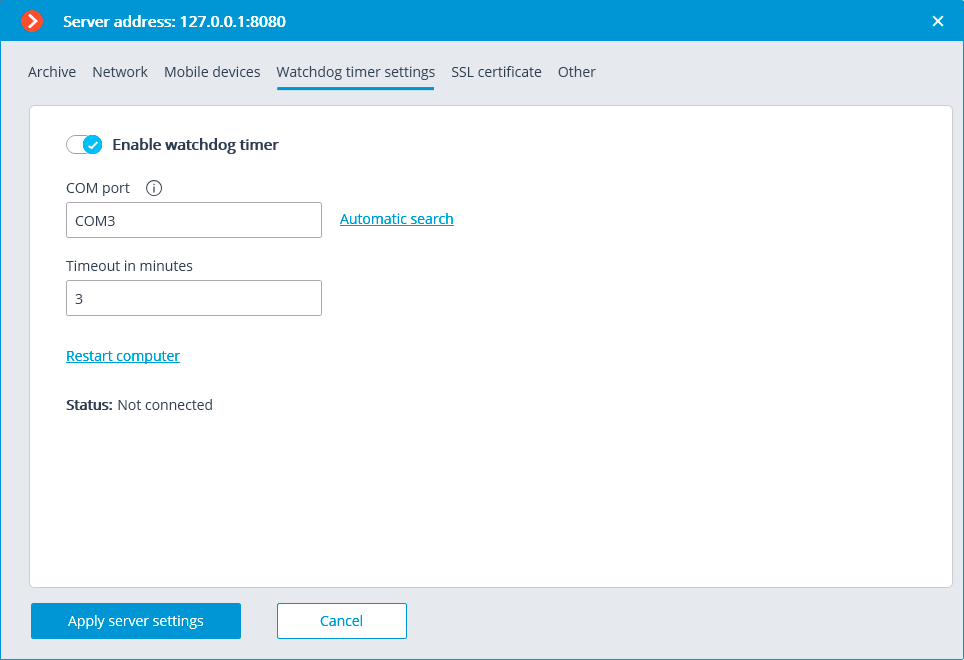
Watchdog timer settings: activates/deactivates interaction with the watchdog timer.
COM port: assigns a COM port to which the watchdog timer is connected.
Automatic search: performs automatic search for a connected watchdog timer.
Timeout in minutes: sets a period after which the watchdog timer is triggered.
Restart computer: restarts the computer being set up.
Status: displays the current watchdog status.
Firmware version: displays the current version of watchdog firmware.
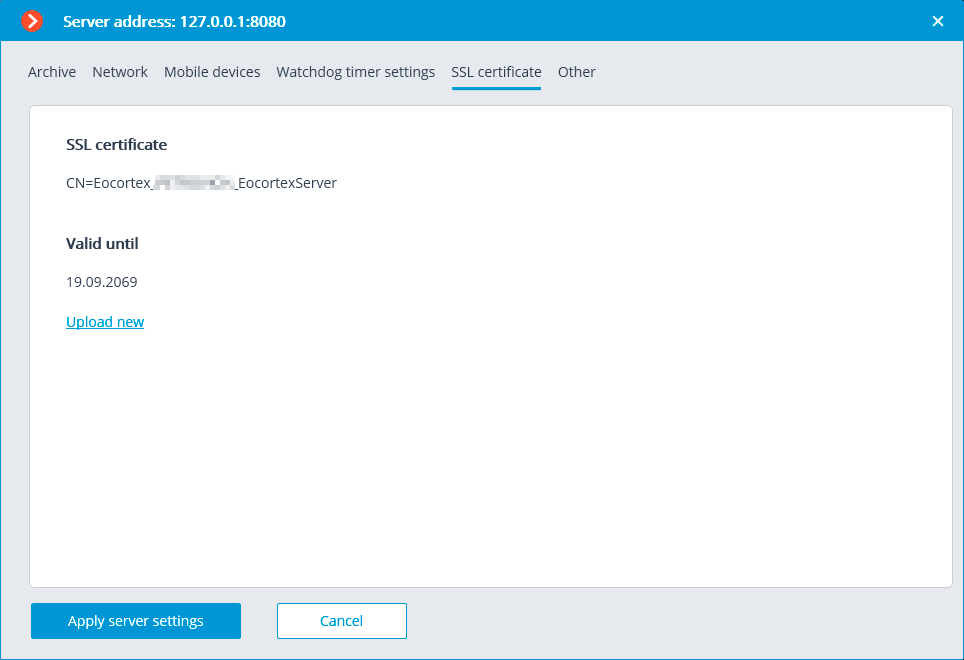
SSL certificate🔗

This tab shows the parameters of the certificate installed on the server. The following links are also provided here:
Upload new: Provides the ability to upload a new certificate to replace the current one.
Reset: Returns the self-signed certificate.
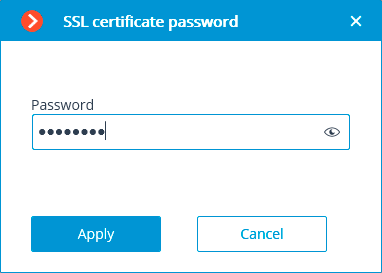
Uploading a new certificate
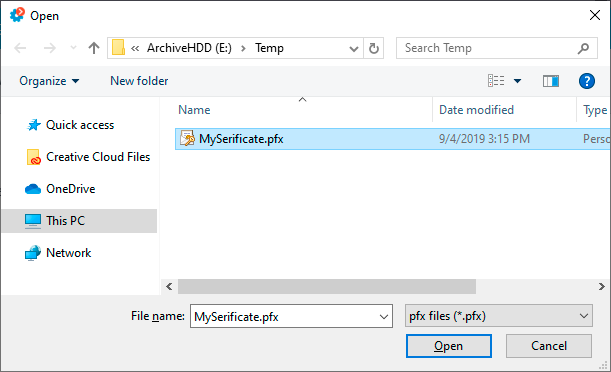
When installing the certificate, it could be required to enter the password assigned to the certificate.
Note
The uploaded certificate will be used for encrypting the secure connections only after the server settings are applied.
Note
All the information regarding the modification and usage of the certificate is recorded in the event log.
Generating a self-signed certificate
If a third-party security certificate for the server is not installed, or it has been impossible to load it during the launch of the server, the self-signed TLS certificate will be used for establishing secure connections with the server. Such certificate is generated on the server in the process of creating a new configuration of the video surveillance system. The self-signed TLS certificate has the following disadvantages:
The certificate can be replaced by an insecure one within the network; the user may not even notice that, confirming the insecure connection.
The users of the web application will have to confirm the insecure connection every time; it may lead to the distrust of the users.
The absence of the Reset link proves that the self-signed certificate is being used.
Note
To activate the self-signed certificate, apply the settings and restart the server.
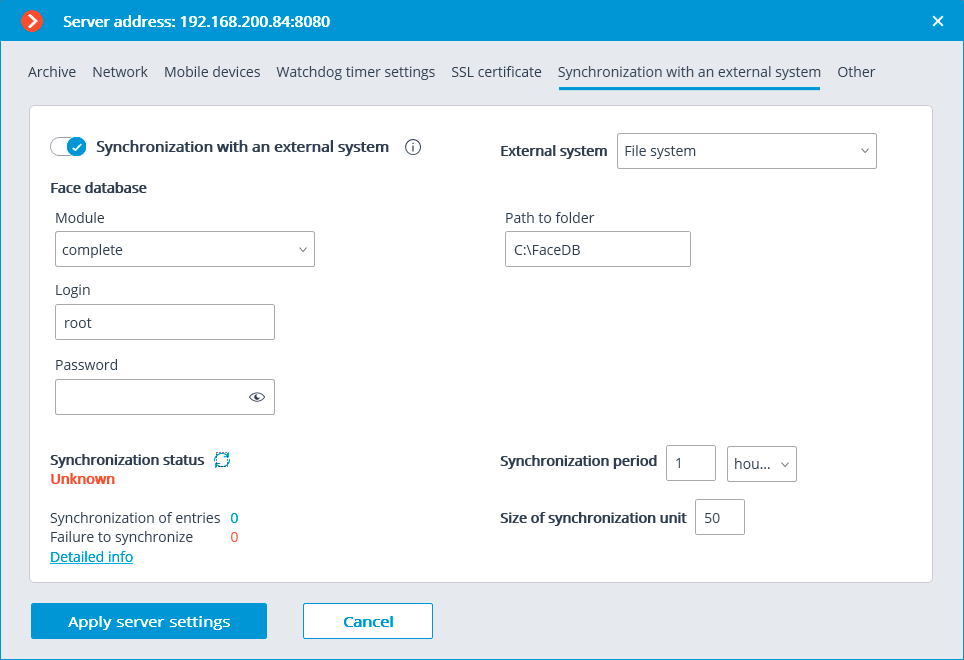
Synchronization with an external system🔗
The Synchronization with an external system tab is used to turn on and configure synchronization of the database used by one of the Eocortex recognition modules with the third-party database used in the external system. This synchronization is unidirectional: only from the external system to Eocortex.
Warning
The synchronization can only be turned on for one Eocortex module.
In a multi-server system, synchronization can only be turned on on one Eocortex server.
Synchronization will only start if at least one camera with the synchronization module enabled is present on the server where synchronization is configured.
Data can be downloaded either from a file or directly from external systems.
To set up synchronization, you need to:
Select the module for which the data will be loaded.
Set the name and password of the Eocortex user, under whose authority the data will be loaded into the Eocortex database. This user must have permissions to edit the database to which the data will be loaded.
Specify Synchronization period and Size of synchronization unit.
Note
Synchronization period can be configured from 1 minute to 40 days.
Select the source from which the data will be loaded: file system or external system.
Set parameters specific to each data source.
File system🔗
Warning
When loading data from the file system, image files will be loaded from the folder specified in the settings on the server, and the object parameters (in particular, the employee's full name for two-factor verification) will be extracted from the file name. For this purpose words in the file name should be separated by spaces.
ONVIF Profile A/C🔗

During the first synchronization session in the Eocortex all groups and all records of individual objects that meet the requirements will be imported from the external system. At the same time, those records that were added to the Eocortex module database manually will not be affected by the synchronizer in any way during the synchronization process.
In later synchronization sessions, only records that have been changed, added or deleted in the external system since the previous synchronization session will be imported.
In the Eocortex module base, each record imported from an external system will have a corresponding note. The color of all imported groups will also be different.
Warning
For some external systems, synchronization will only be available if you have special licenses and/or modules in those systems.
Records imported from an external system are overwritten during each synchronization. Therefore, if changes are made to such a record in Eocortex, these changes will be lost in the next synchronization operation.
Note
Only records that contain data suitable for use by the Eocortex module will be imported from the external system.
The Synchronization of entries counter displays the total number of imported records of individual objects and groups. Only added or modified groups are taken into account.
Other🔗
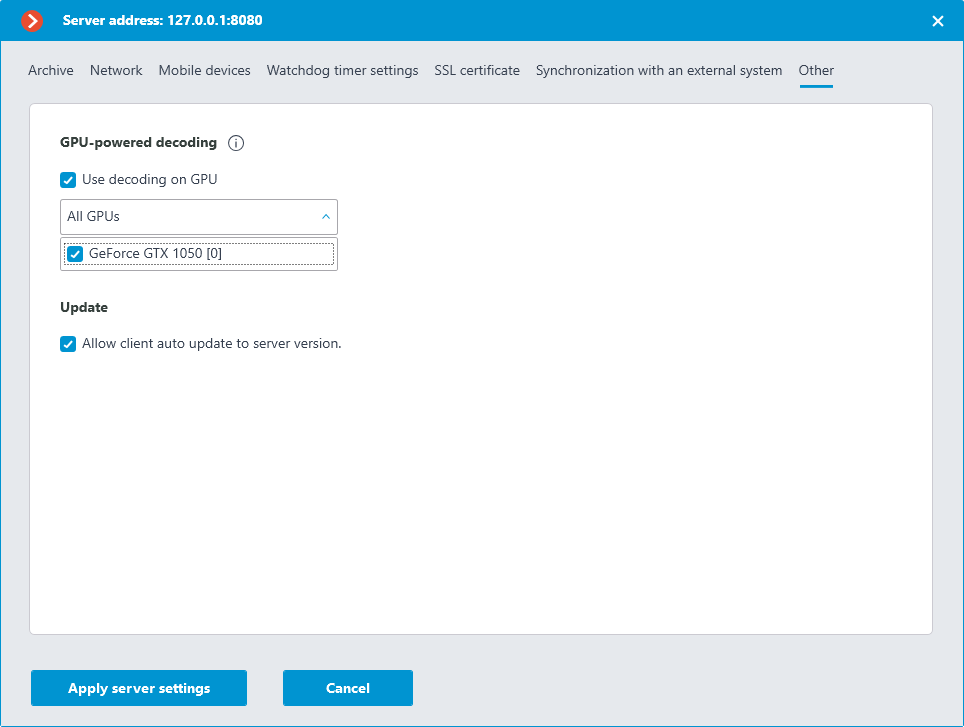
Use decoding on GPU: enables to optimize the load on the server.
Allow client auto update to server version.: enables the automatic update mechanism built into the server application.