Integration with ONVIF Profile A/C🔗
The Eocortex video surveillance system is integrated with external systems that support the ONVIF Profile A and Profile C specifications, without the need to integrate these systems directly with Eocortex.
Within this integration, the following features are available:
Synchronization of the Eocortex face database with the face database of the external system.
Two-factor access verification through interaction between Eocortex and the external system.
Warning
Integration with external systems is configured without checking compatibility.
Note
Integration is available in version Eocortex 4.2 and higher.
Eocortex setup🔗
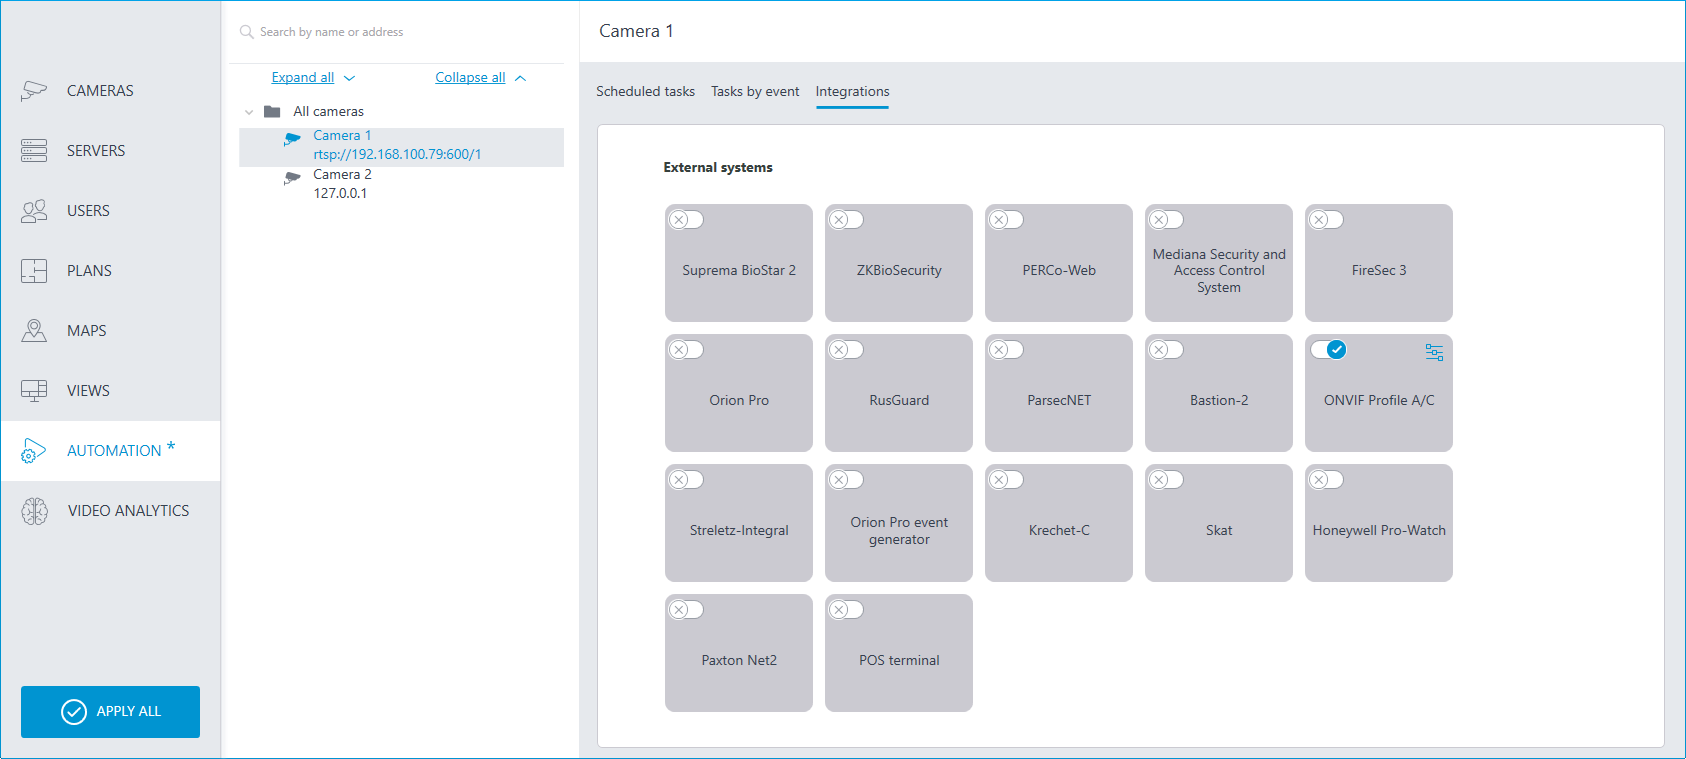
To enable Eocortex to interact with an external system, launch Eocortex Configurator application, go to the  Automation page, select the camera in the list, switch to the Integrations tab, and enable ONVIF Profile A/C.
There are two tabs available in the integration settings:
General settings
Integration of face recognition
General settings🔗
The General settings tab is used for system configuration of connection to the external system.
The following settings are available:
Server address: IP address or domain name. There is no need to specify a prefix with the name of the protocol (http://, etc.). There is no option to use a secure connection (HTTPS).
ONVIF port: The port of the external system.
ONVIF login and ONVIF password: Login and password to connect to the external system via ONVIF. These credentials are usually not the same as the system users and are specified in a separate section of the external system settings.
After finishing the setting, press the Connect button.
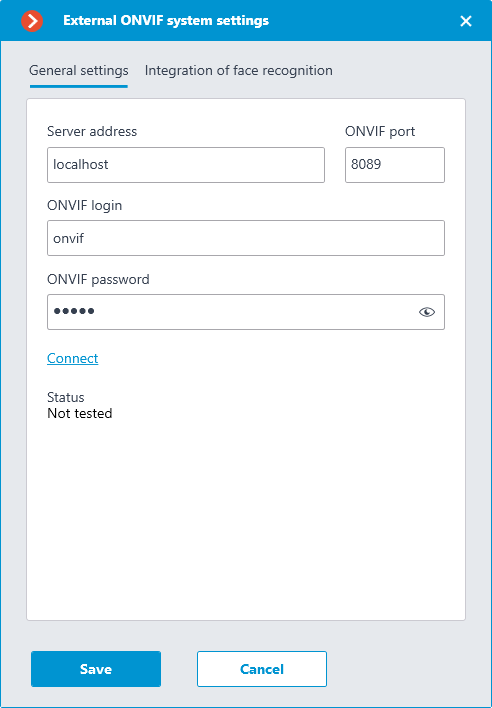
The Status field displays the result of the check:
Not tested.
Testing...
Connection succeeded.
Server is unavailable: In this case, check the network availability of the external system server and its ONVIF settings.
Request timeout: In this case, check the network availability of the external system server.
Unknown error: More detailed information about such errors can be found in Eocortex log files that can be sent to technical support for analysis.
Verification integration🔗
On the Integration of face recognition tab one-factor and two-factor verification are configured for the devices from which events are to be received for the configured camera.
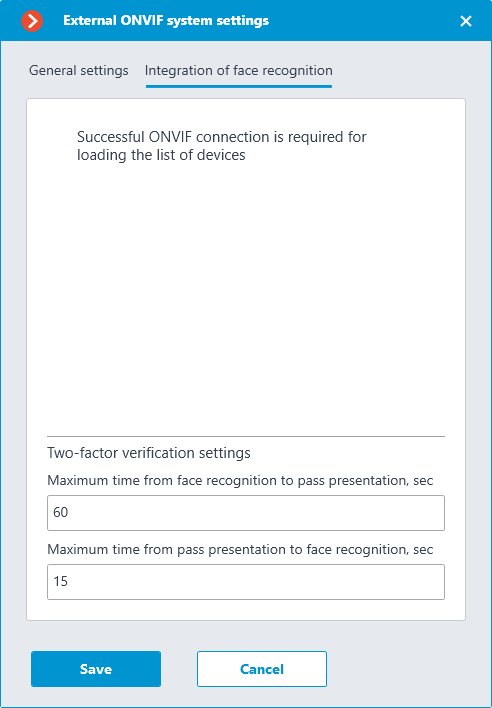
Note
The list of devices is displayed only after successful connection testing on the General settings tab.
The following folders are displayed in the device tree:
One-factor authentication: Devices configured for one-factor verification mode.
Two-factor authentication: Devices that support two-factor verification.
Note
Even though cameras can only use one verification mode, there is no restriction on connecting devices of both types.
Below the device tree are the Two-factor verification settings.
Maximum time from face recognition to pass presentation, sec: The maximum time interval from employee recognition to badge reading. It is not recommended to set this value too high, because after successful recognition the employee may leave the access point, and the badge may be presented by someone else.
Maximum time from pass presentation to face recognition, sec: The maximum time interval from badge reading to recognition. For example, in situations where an employee approached the access point wearing a mask and only removed it after presenting the badge.
The synchronization of the database used by one of the Eocortex recognition modules with the database used in the external system is configured in the Eocortex server settings.
Two-factor verification setup🔗
Any actions available in Eocortex can be configured for events received from an external system.
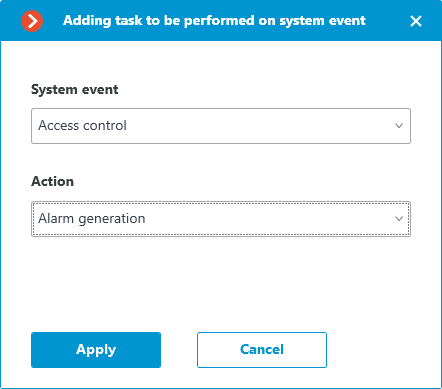
To set up the scenario executing as a response to the event received from the external system, go to the Automation section of the Eocortex Configurator application. In the camera list, select a camera or a group of cameras and switch to the Tasks by event tab on the page that opens.
Information about the access granting actions occurring in the external system is transmitted in the Access control event received from the external system.
When configuring the actions to be performed on this event, it is possible to set various conditions. In this case, if several conditions are set, the action will be performed only if all of them are met.
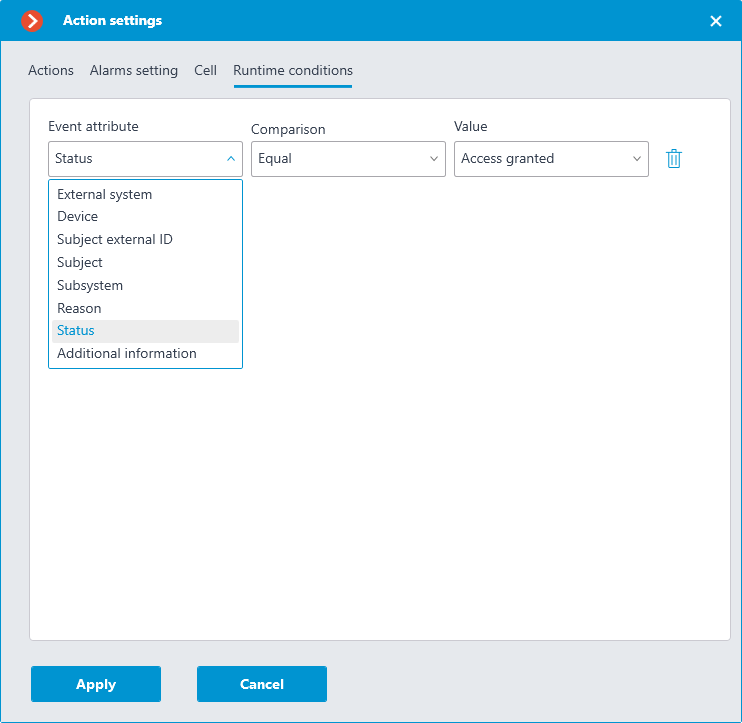
For this event, it is possible to set the following runtime conditions:
External system: name of the external system;
Device: name of the external system device (door, turnstile, other reader) associated with the camera to which the access granting information will be sent;
Subject: the name of the person who is granted access;
Subject external ID: the number of the badge;
Subsystem: the Eocortex subsystem responsible for making the decision to grant access. In this case, Face Recognition.
Reason: using a specific algorithm to select single-factor or two-factor verification or manual mode.
Status: The status of the access granting process:
Access verification requested: In two-factor verification, an event with this status is generated first.
Access provided: Generated when access is granted.
Access denied: Generated when access is denied in a situation where the employee is not recognized.
Additional information: With the Access denied status for two-factor verification, the explanation here will be that access is denied due to a failed face recognition attempt in a given time.