Viewing video🔗
Launch🔗
The Eocortex Player application can be launched using one of the following options:
Using the Eocortex Player shortcut on the desktop.
Via Start Menu / Applications / Eocortex Player folder / Eocortex Player item.
When opening an MCM file in Windows Explorer (works only on the computer where Eocortex Client or Eocortex Player is installed).
On startup, the main application window opens.
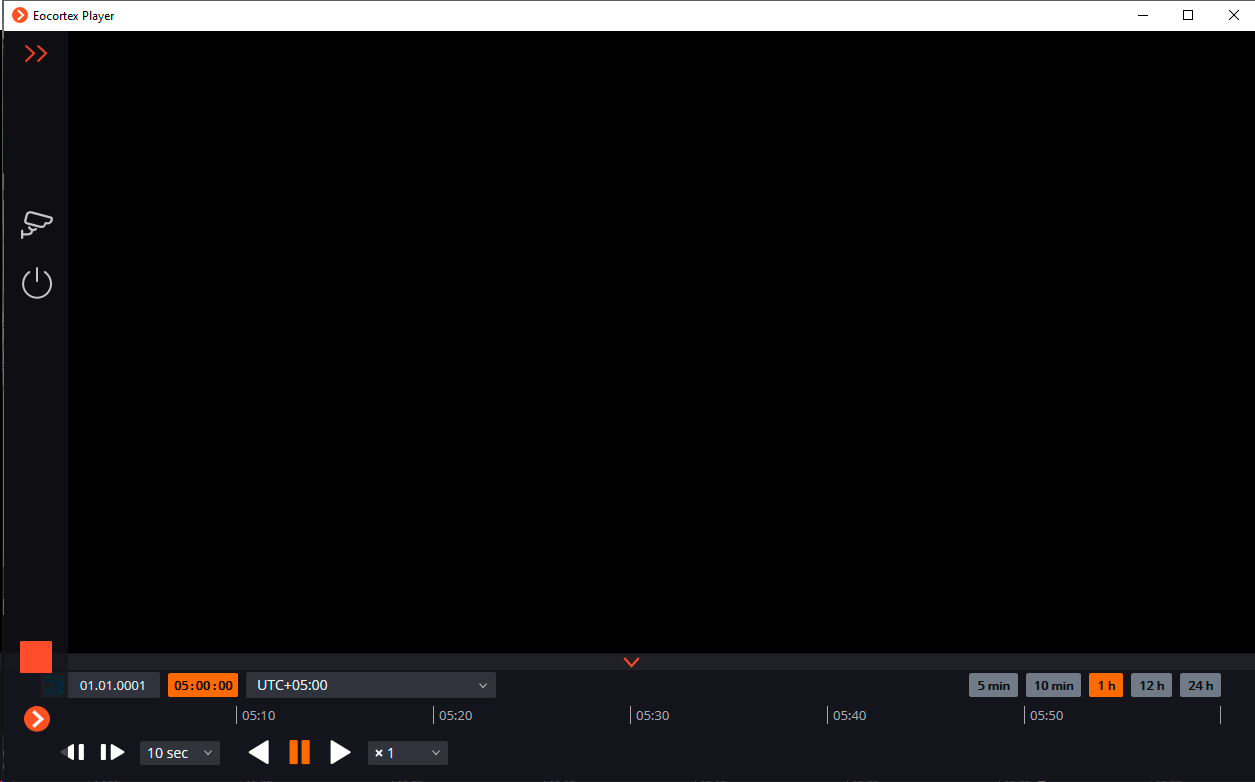
Main window🔗
The main window of the Eocortex Player application consists of a workspace containing a grid of camera view cells and a control panel.
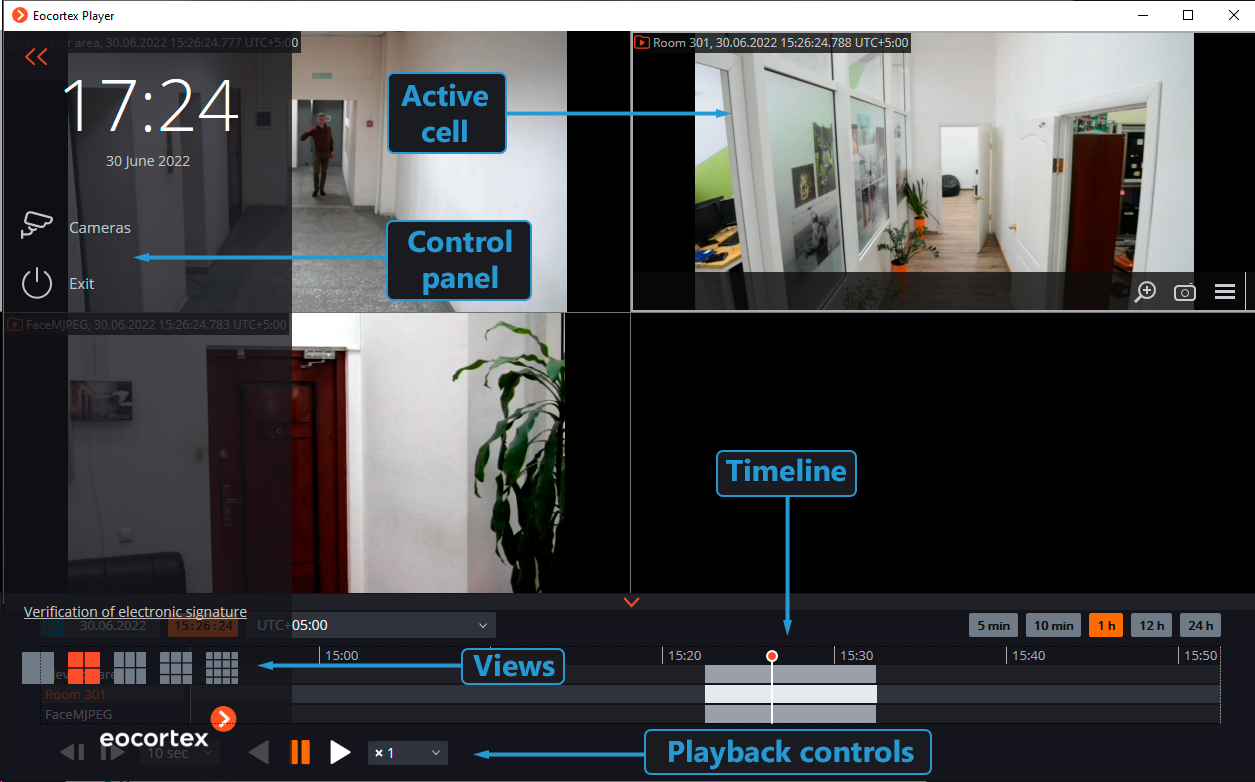
To hide/show the control panel, use the  button in the upper left corner of the application window.
At the bottom of the control panel there are buttons for selecting the camera view.
In the center of the control panel (under the current date and time) is the main menu of the application.
Clicking the Verification of electronic signature button opens the electronic signature verification window.
Clicking the  Exit button in the main menu closes the application.
The following elements are located at the bottom of the window:
 Calendar: Allows to navigate to a specific fragment of the recording by specifying the exact date and time.
Time zone selector: Allows to select a time zone from a drop-down menu containing the list of time zones that have been configured in the system for the exported cameras.
Note
When opening a file exported without taking into account time zones, the time zone of the computer on which the Eocortex Player is opened will be selected by default.
Timeline: An interface element for positioning on the timescale video fragments saved in the archive for each camera placed in the view.
The vertical line indicates the location in the archive for the currently displayed fragment.
To move to the specific fragment of the recording, click in the corresponding place on the timeline. To move the scale forward or backward, click and hold the left mouse button on the scale and move it in the desired direction.
The scale of the timeline can be changed by rotating the mouse wheel.
In addition to using the timeline, navigation to the needed fragment can be performed using the
Calendar.Note
The timeline displays the local time of the computer on which the video is being viewed. At the same time, all archive recordings on the server are stored in the Coordinated Universal Time (UTC).
For example:
There is an archive created on the server with the time zone settings UTC+3. A fragment of this archive from 12:00 to 12:05 server time was exported.
When viewing this fragment in Eocortex Player directly on this server, it will be located on the timeline as intended — from 12:00 to 12:05.
When viewing this fragment on a computer with the time zone settings UTC+5, the fragment time on the timeline will shift by two hours forward, and the new start and end times will be 14:00 and 14:05, respectively.
On the contrary, when viewing the video on a computer with the time zone settings UTC+1, the fragment time on the timeline will be 10:00 to 10:05.
Note
If there is no archive available in the video file for the moment corresponding to the time indicator position for any camera, the No frames message will be displayed in the cell of this camera.
Below the timeline is a playback control block that is common to all cells and contains the following elements:
 Archive step-by-step playback control buttons with several step length options: Frame, 0.1 s, 0.5 s, 1 s, 5 s, 10 s, 30 s.
Warning
When Frame step length is selected, the
Step Forward/Backward buttons are not available. Archive playback control buttons to play the recording forward, backward, and stop playback.
Warning
For frames encoded in H.264, jerky playback will be observed during playback, since in this case only the key frames will be displayed. The reason is the peculiarities of the H.264 codec itself, since for the decoding of intermediate frames it is necessary to store the entire chain, starting from the last key frame. This may unreasonably waste computer resources when playing backwards.
Playback speed:: By clicking this icon, the playback speed of the archive can be set from x0.5 to x120.
Camera selection🔗
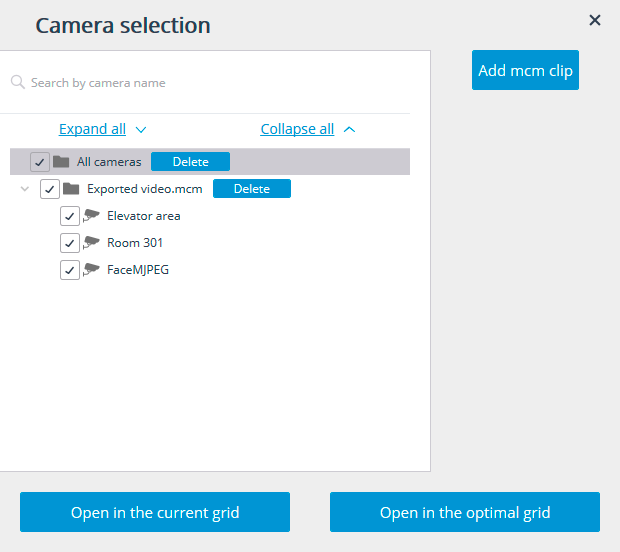
Clicking the  Cameras item on the control panel opens the camera list window, where the cameras that will be displayed in the cells can be selected.
Note
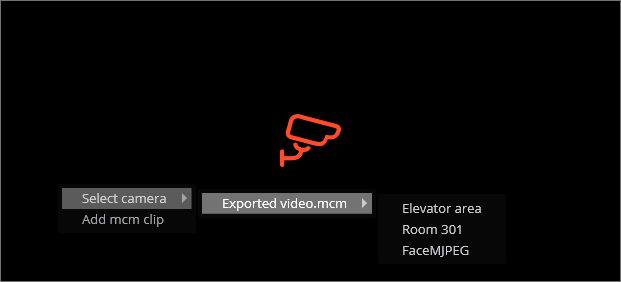
In addition, a camera can be added to the view in two more ways:
By left- or right-clicking in an empty cell and selecting a camera from the Select camera list that opens.
By right-clicking in an occupied cell or calling the context menu by clicking the
 button and selecting a camera from the Select camera list that opens.
The Add mcm clip button allows to add other MCM files to the already opened. Clicking this button opens a file selection window.
Clicking the Open in the current grid button places the selected cameras in the current channel grid.
Clicking the Open in the optimal grid button, the grid that allows to place all the selected cameras with a minimum number of empty cells remaining is automatically selected.
Camera grid cells🔗
Each cell of the grid displays the archive of a single camera, but at the same time, all cells display video that corresponds to the same moment of time. Thus, when viewing several cameras, the archive recordings will be played synchronously.
Cameras can be dragged from one grid cell to another by holding the left mouse button. If the cell of the grid where the camera was moved is occupied, the cameras will swap places.
One cell in a grid can be active. The active cell is highlighted with a frame and provided with controls. To make a cell active, left-click in that cell.
The active cell has the following controls:
Save frame: Saves the frame to the disk.
Volume control: allows to adjust the volume of the sound played from the archive, as well as enable or disable audio playback.
To display the volume level slider, click on the speaker icon. If the archive of the camera has no audio recordings, the icon of this button will be the same as in the case of
 disabled audio playback.
This button is available only if audio recording to the archive is enabled in the system for the exported camera.
Enlarge image: enlarges the selected part of the frame.
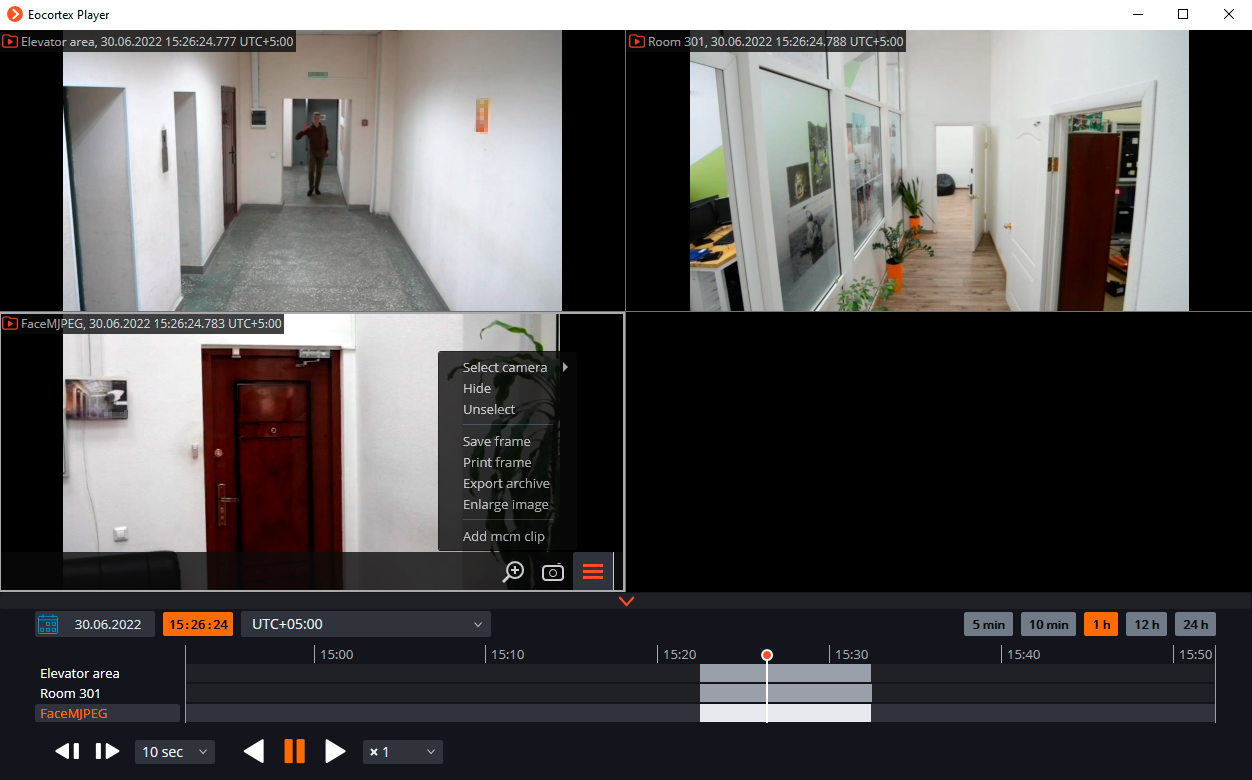
The context menu can be accessed in two ways:
By clicking the
button in the bottom right corner of the cell.By right-clicking anywhere in the cell.
Cell context menu:
Select camera: allows selecting one of the available cameras to be displayed in the grid cell.
Hide: Hides the camera (empties the cell).
Unselect: removes selection from the cell (makes it inactive).
Save frame: Saves the frame to the disk.
Print frame: Sends the frame to the printer.
Volume Control: Displays the audio volume control at the bottom of the cell.
Export archive: performs archive export (see below).
Enlarge image: Magnifies the part of the frame selected with the mouse.
Add mcm clip: Allows to add other MCM files to the already opened.
Warning
More than one MCM clip cannot be added to the player for the same camera, even if clips will be of different time intervals.