Configuring the Uniform Detection module🔗
Warning
Before using the neural network capabilities of the module, it is necessary to install the neural networks package.
To use the module, enable and set up the software motion detector, then enable and set up the module itself.
Launch the Eocortex Configurator, go to the  Cameras tab, select a camera in the list located on the left side of the page, and set up the motion detector on the Motion detector tab on the right side of the page.
Then switch to the Analytics tab and enable the module using the  toggle.
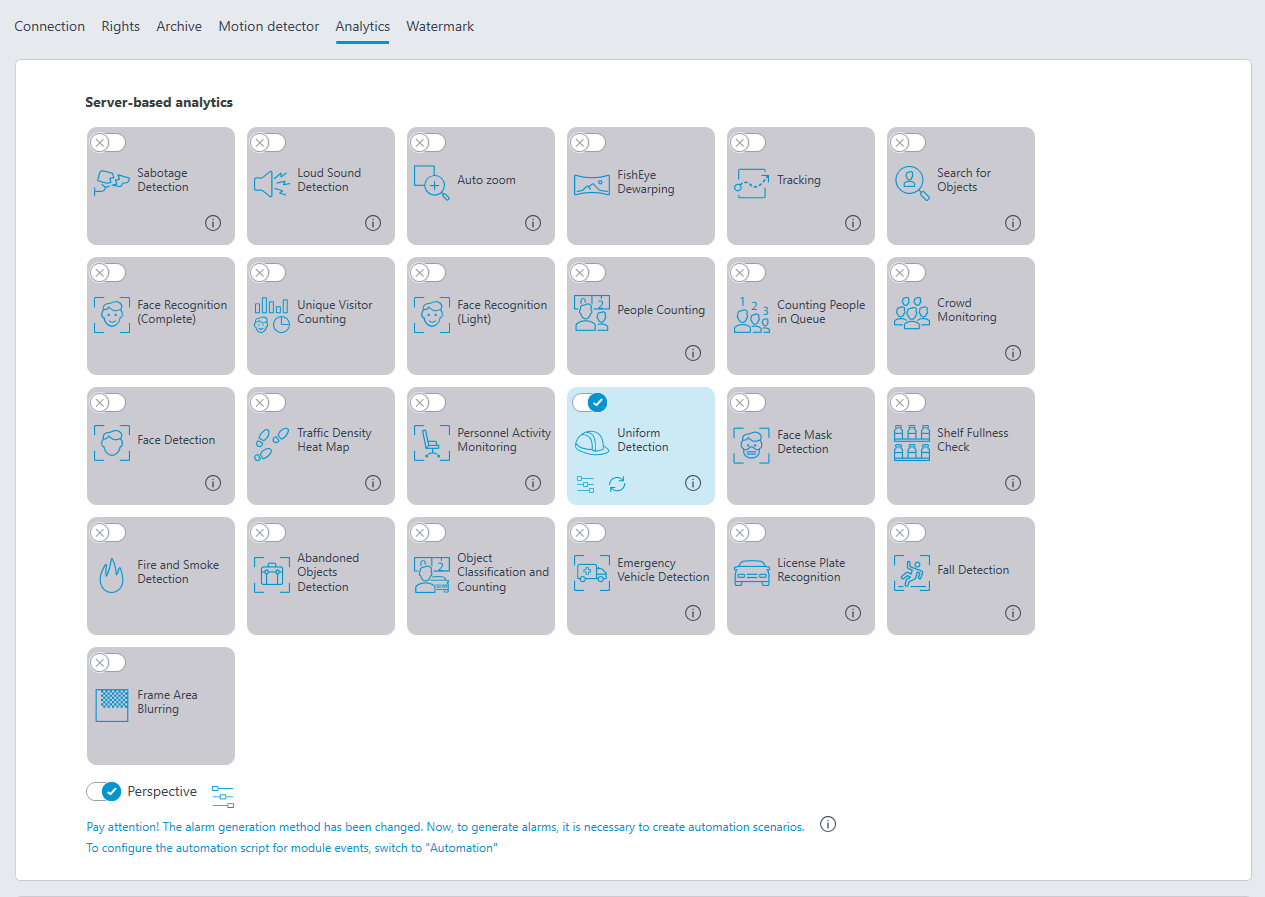
Clicking the  button opens the module setup window.
Two operating modes are available in the window that opens:
Simplified (without GPU);
Advanced (with GPU): More precise neural network object detector. Video card required.
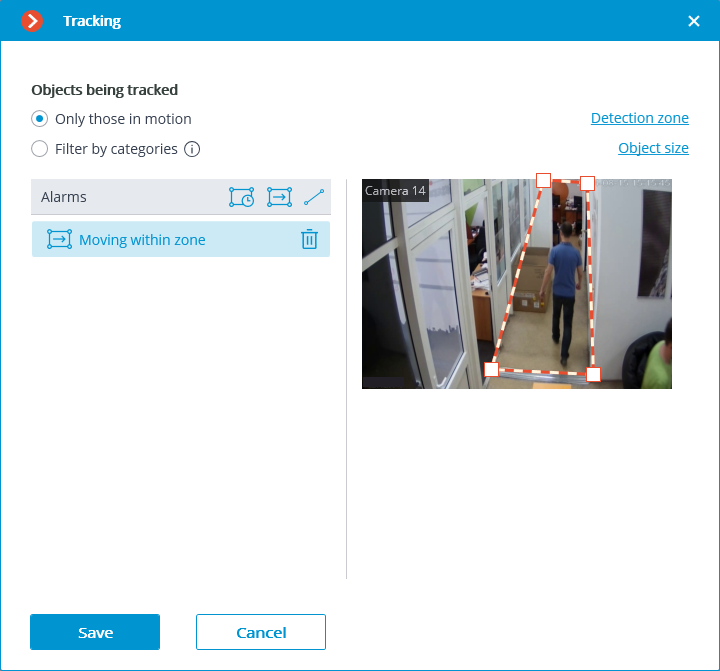
In the Alarms group of settings, situations are set when the alarms will be generated:
 upon detection of movement in the zone;
 when the preset line has been crossed.
Movement in the area🔗
To set the zone, it is required to press the button . A square zone will appear in the preview window.
The zone configuration can be changed by dragging the key points at the corners of the polygon. To add a key point, it is required to double-click the left mouse button on the line; to delete — right-click on the key point.
An alarm will be generated when a person enters the zone without uniform, or in the uniform that does not meet the specified parameters.
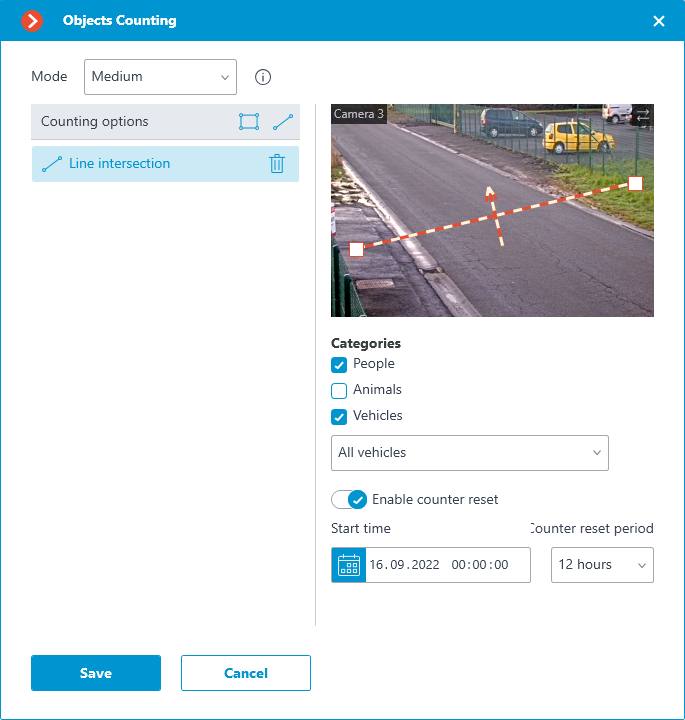
Line intersection🔗
To set the line, press the button . The line will appear in the preview window.
The position of the line can be modified by dragging the key points at its ends.
To indicate the direction of triggering, it is required to click the button  located in the upper right corner of the preview window. If only one direction is selected, an arrow will appear indicating the direction set.
An alarm will be generated when a person without a uniform crosses the line, or when their uniform does not meet the specified parameters. If the direction has been specified, the alarm will be generated only when a person crosses the line in the specified direction.
It is possible to set specific requirements for the uniform below the preview window. It is possible to set Presence, Absence or both at the same time for the following parameters:
Hard hat
Safety vest
Respirator
Glasses
Face shield
Hearing protection
Gloves and mittens
Clothing of set color
When selecting Clothing of set color, the clothes of the specified color on the person's upper body will be defined. In this case, it is possible to choose from 1 to 3 colors that will be considered as uniform colors.
If the desired color is not in the palette, it can be added by clicking the  button to select a color.
Warning
For a more accurate definition of gray, slightly darker shades should be set than those recognized by the human eye when viewing clothes directly. In this case, possible shadows on the clothes will be compensated.
Also, when adjusting the color, it is required to take into account that when comparing colors, the module tries to compensate for possible changes in the brightness of the illumination. This affects the search for shades of gray to the greatest extent. For example, when 50% gray is selected in the settings, both white and dark gray clothes may appear as matching under certain lighting conditions.
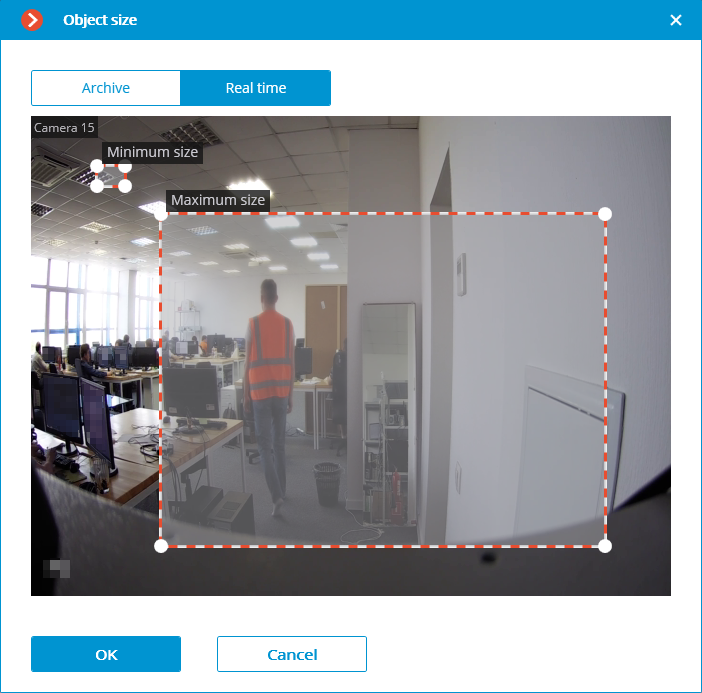
Click the Size of a person button to open the Object size window for setting the minimum and maximum sizes of people to be detected.
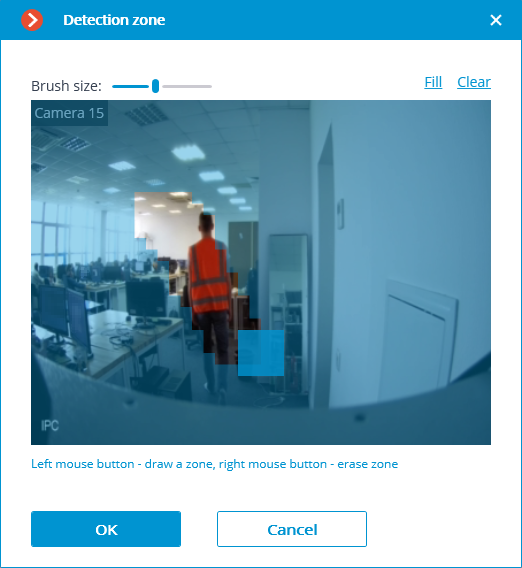
Detection area is the zone of the frame filled with the semitransparent blue fill in the settings window. The mouse is used for modifying the zone: the left mouse button serves for filling the zone, and the right one is used for clearing it. With the help of the Fill and Clear buttons, the whole area of the frame be can filled or cleared. The corresponding slider is used to modify the Brush size.
Warning
The module will start working only when the settings are applied.