Connecting to video systems🔗
Authorization🔗
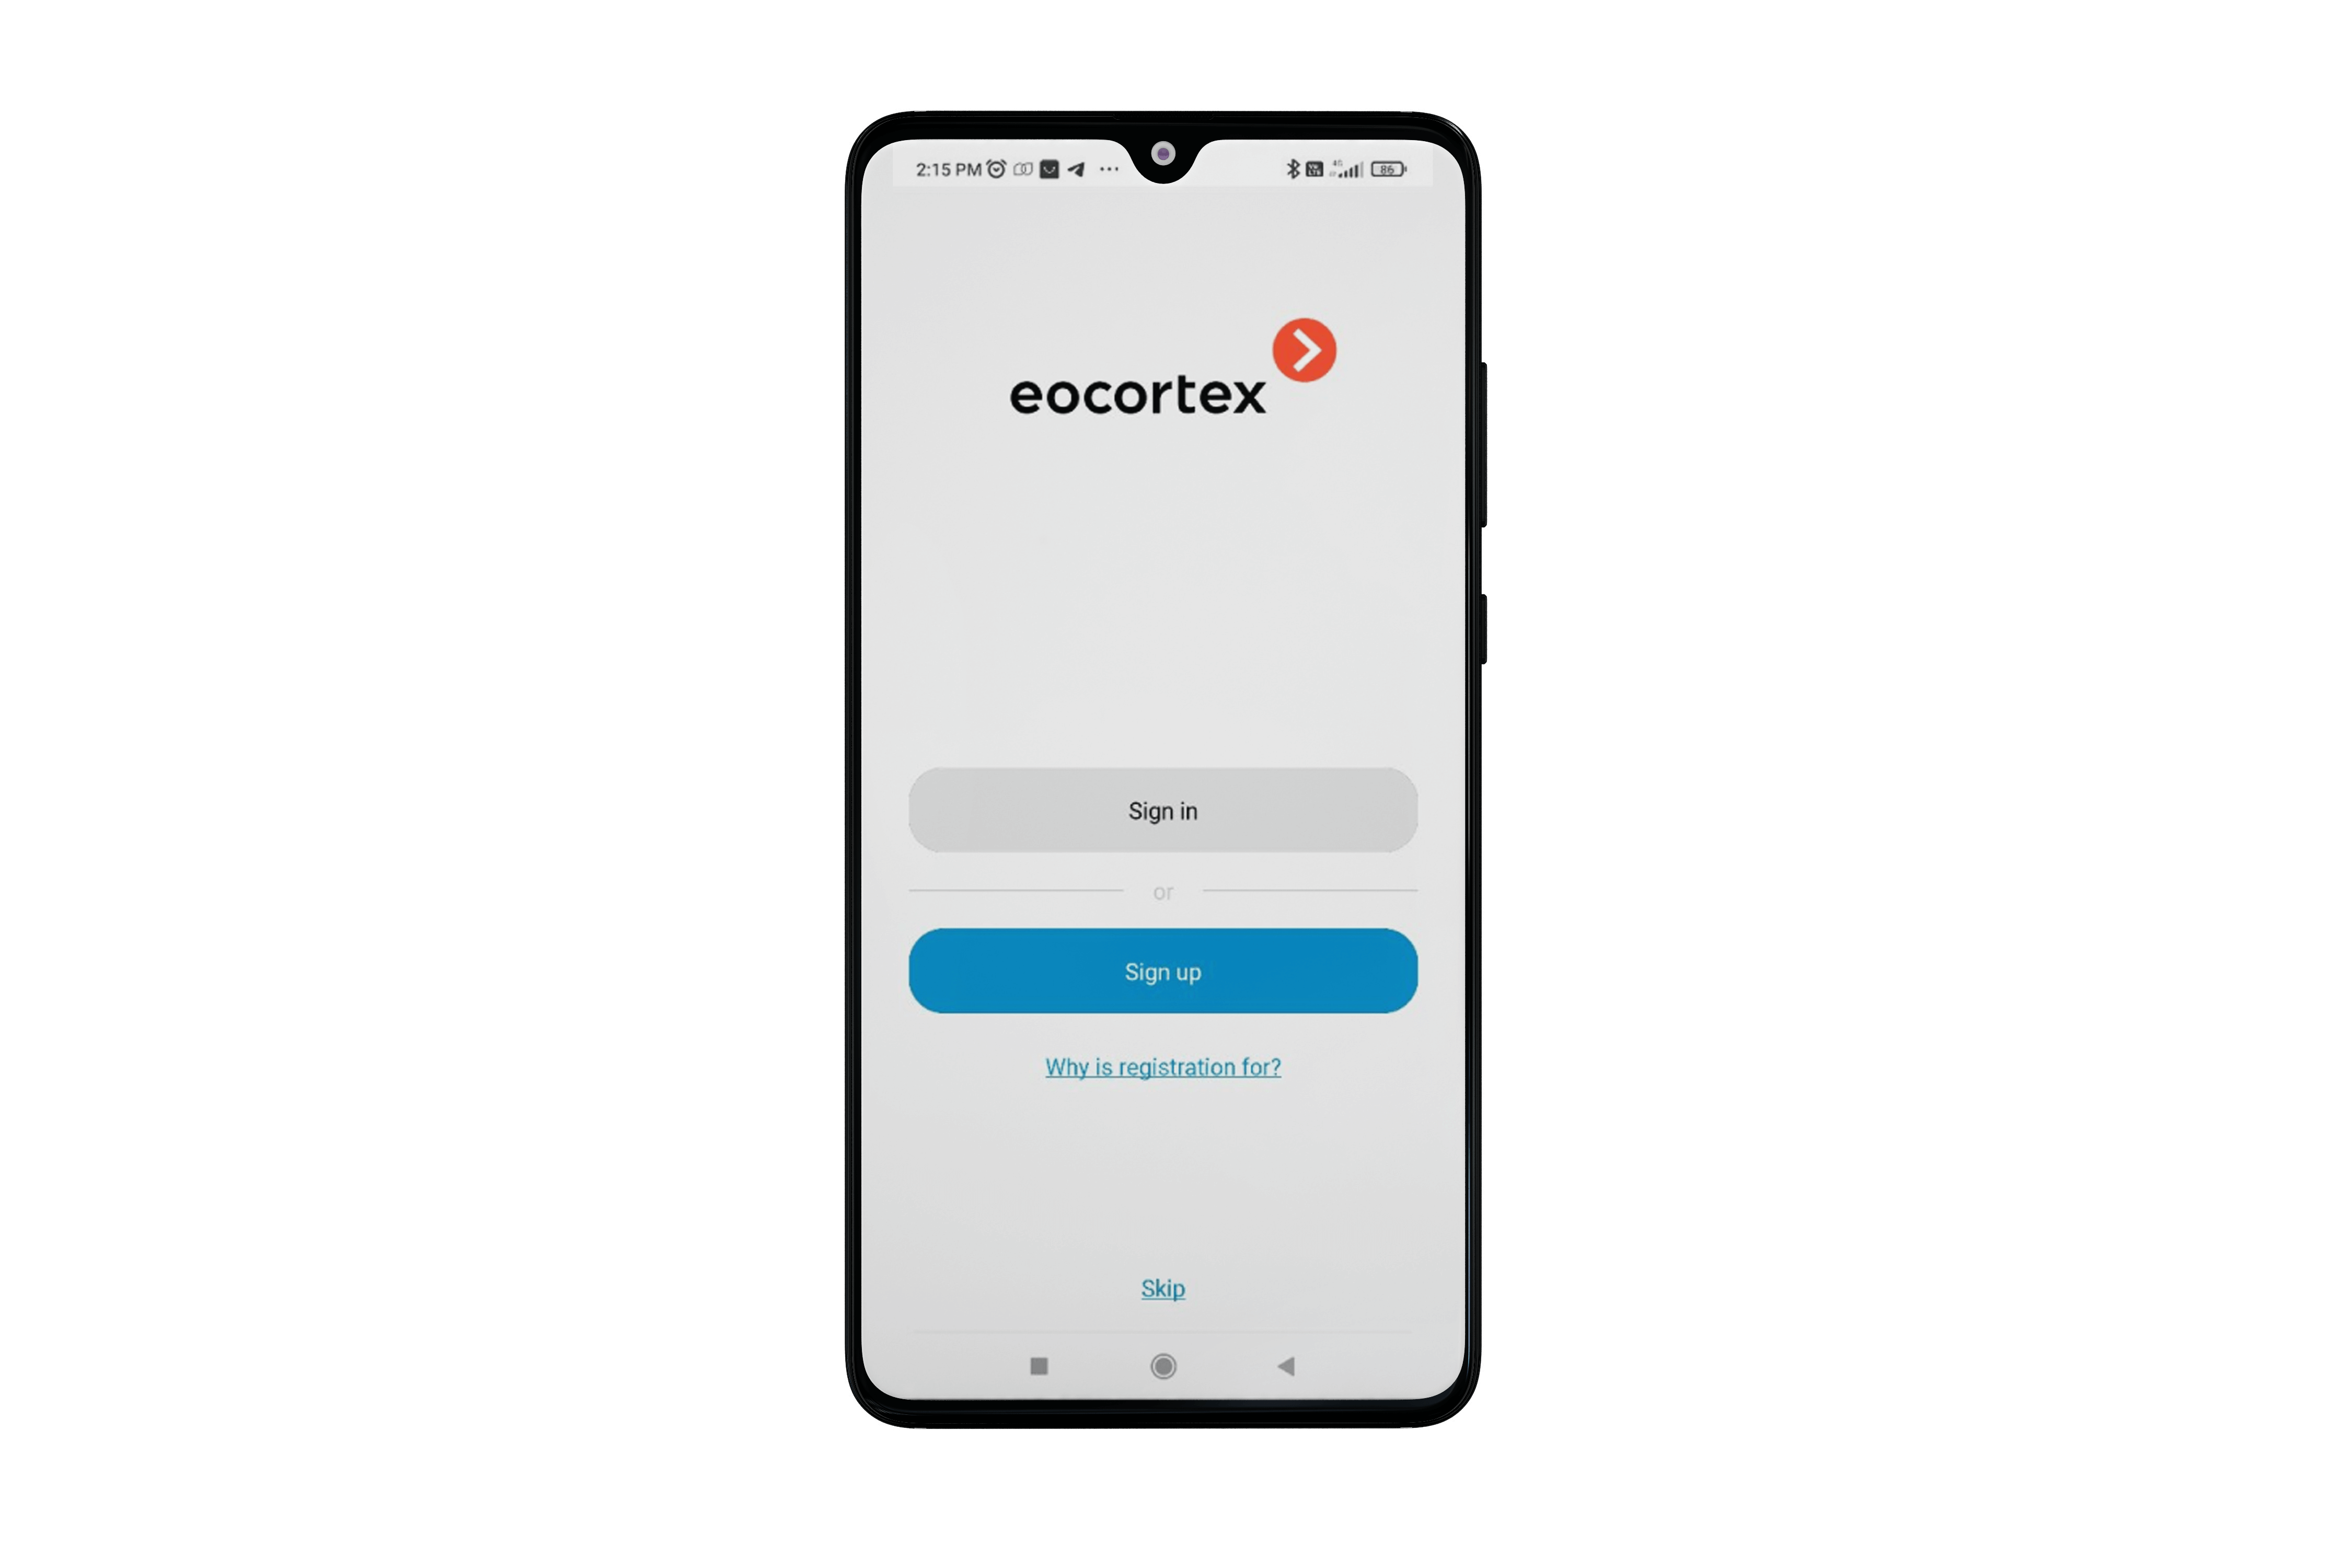
When opening the Eocortex app for the first time, the user will see a login page with the Sign in and Sign up buttons. The Sign in button is used to sign in to the account, and the Sign up button is used to create a new account in the Eocortex app.
Log in🔗

To sign in to your account, fill in the Email and Password fields, then tap the Sign in button.
Note
The account login details are stored in the local settings of the mobile app. These details are used to automatically log in to the account when the app is launched.
By tapping the Skip button, it is possible to skip signing in and go to the connection settings of the Eocortex video surveillance systems.
Note
If you skip authorization, the next time you log in to the application, the Log in page with a list of video systems will open.
Registration🔗

On the Registration page, enter your email address and choose a password to create a new account.
Warning
Password must contain at least 6 characters, including numbers, uppercase letters, and lowercase letters.
When signing up, you can also agree to help improve the app.
After tapping the Sign up button, a check will be performed to verify the existence of an account with the specified Email.
Warning
One email address can be used to sign up for only one account.
Note
To confirm registration, you need to enter the code sent to the specified email address. The code is valid for 10 minutes.
Password reset🔗
To reset the password, select Forgot password? and fill in the fields in the window that opens.

After resetting your password, you will be signed in to your account. The new account details will be saved in the local settings of the mobile app.
Adding a video system🔗
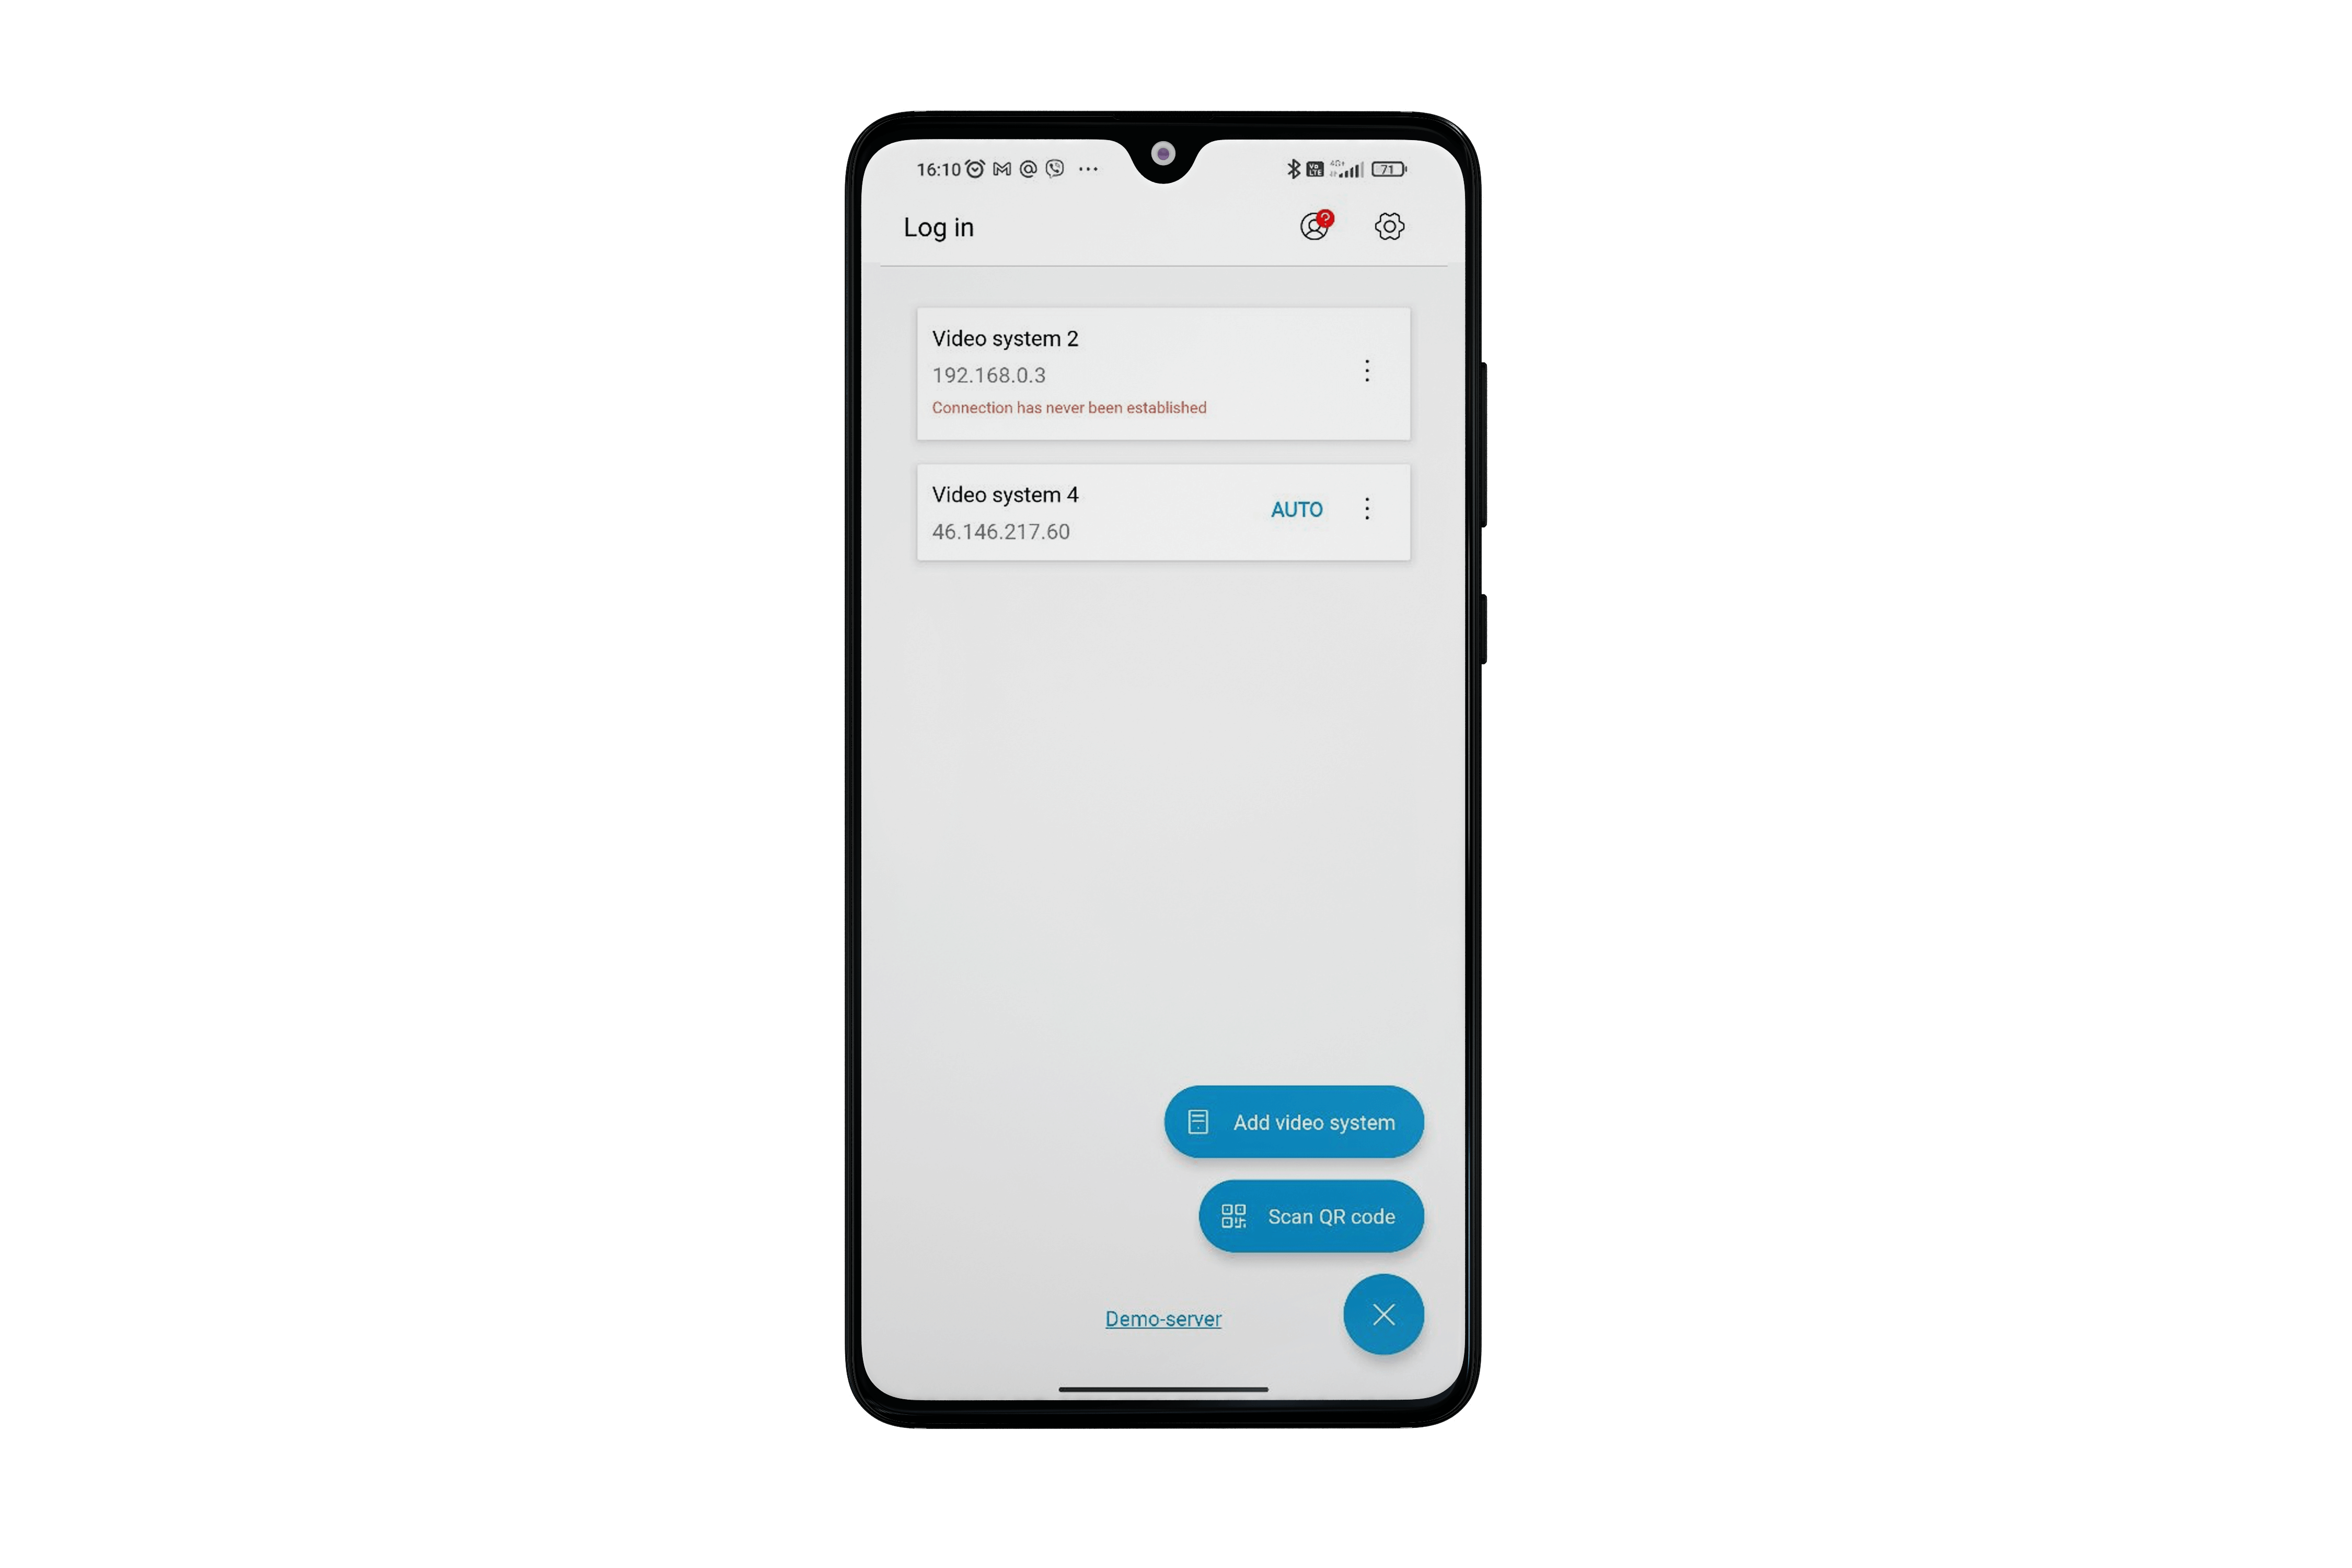
The Log in page displays the list of video systems.
There are two ways to add a video system:
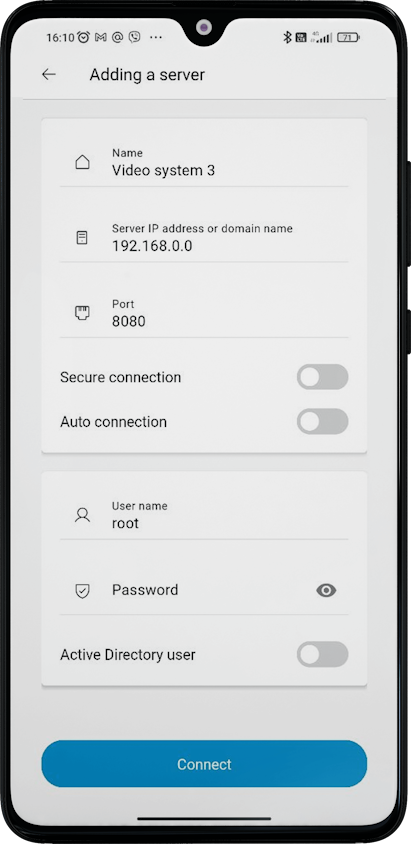
Via the video system editor by tapping the Add video system button.
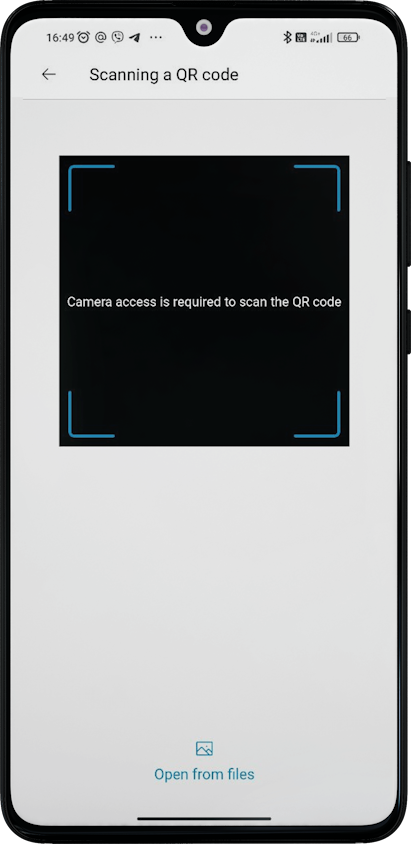
Via QR code.
Note
When the user opens the page for adding a video system by QR code, the app will request access to the camera. If the user refuses, the camera scanner will turn off, and an error message will appear. However, the user can still open the code from the files.
On successful scanning of the QR code, the editor of the video system will open with filled-in data.
Note
Scanning the code is also possible with the standard application on the user's device.
To generate a QR code, go to More and select the
 icon in the video system field.
Statuses that can be displayed as a tooltip at the bottom of the video system field:
Password required. This status is displayed if the device does not have a password for the video system after synchronization with the authorization server. When attempting to connect to the video system, the user will be redirected to the editor with the password field activated.
Connection has never been established. This status is displayed if there is no video system configuration on the device because there has never been a connection to the video system.
Changing the video system settings🔗
By tapping on the context menu of the video system, the following actions are available:
Delete
Change Settings
Enable/disable auto connection.
When selecting Change Settings, the Server Settings window will open, where you can change the video system information.

Note
There can be only one video system with auto connection in the application, which will be marked with the word AUTO.
Warning
If a user opens the account via the More page, all video systems on the user's device will be replaced by the video systems in the account. If the video systems in the account and on the device are different, the current connection is considered invalid because the user does not have such a video system. As a result, the user will be disconnected from the current video system and will receive a message to reconnect.
When you log into your account, a window will appear to synchronize data between your device and your account with the following options:
Account -> Device. All device data will be replaced with the data from the account in the service.
Device -> Account. All data from the account in the service will be replaced with the device data.
Activity tracking🔗
Eocortex may collect non-personal data about the use of the application for analysis and improvement of product quality with the user's permission. Data collection is disabled by default, and a permission request appears after installation when the application is used for the first time.
To change the activity tracking settings, use the following methods:
On the Log in page, go to
 Settings and open the Feedback section.
On the More page, open the Feedback section.
