Video analytics🔗
The information regarding the available and activated video analytics in the system is shown in the Eocortex Configurator application, on the  Video analytics page. Also, it is possible to set up the video analysis modules already in use on the cameras as well as the automatic sending and saving of the reports for some of the modules.
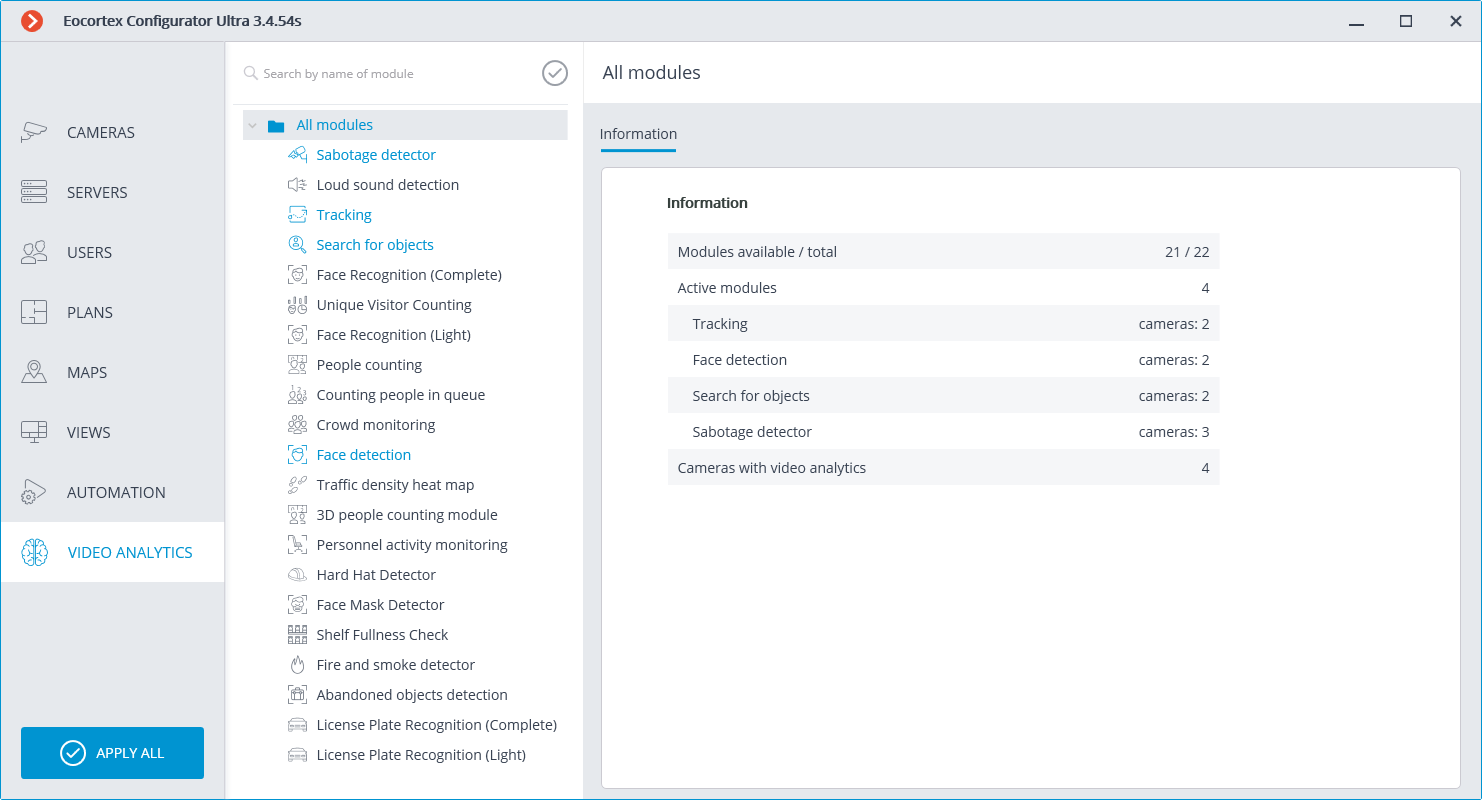
The list of all the video analysis modules is shown on the left side of the page. Using the  button, it is possible to hide or display the unused modules.
The information regarding the use of the video analytics in the system is shown on the right side of the page, in the Information tab.
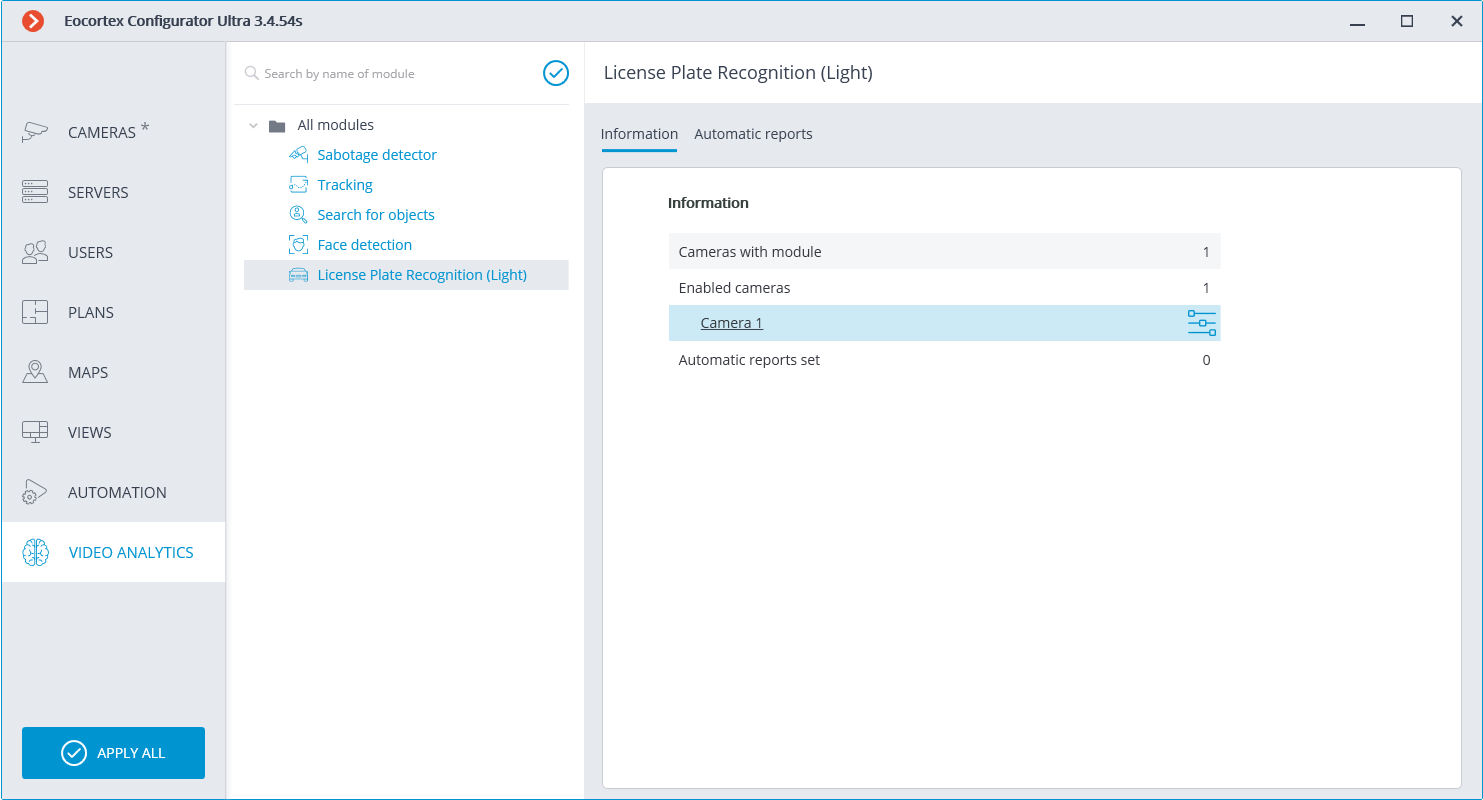
When a video analysis module is selected, the list of all cameras where this module is activated is displayed, among other things. When clicking on the line of a camera, the connection settings page of this camera appears.
Hovering over the line of a camera in the right side of the line shows the  button. Pressing this button opens the pages of the module’s settings for this camera.
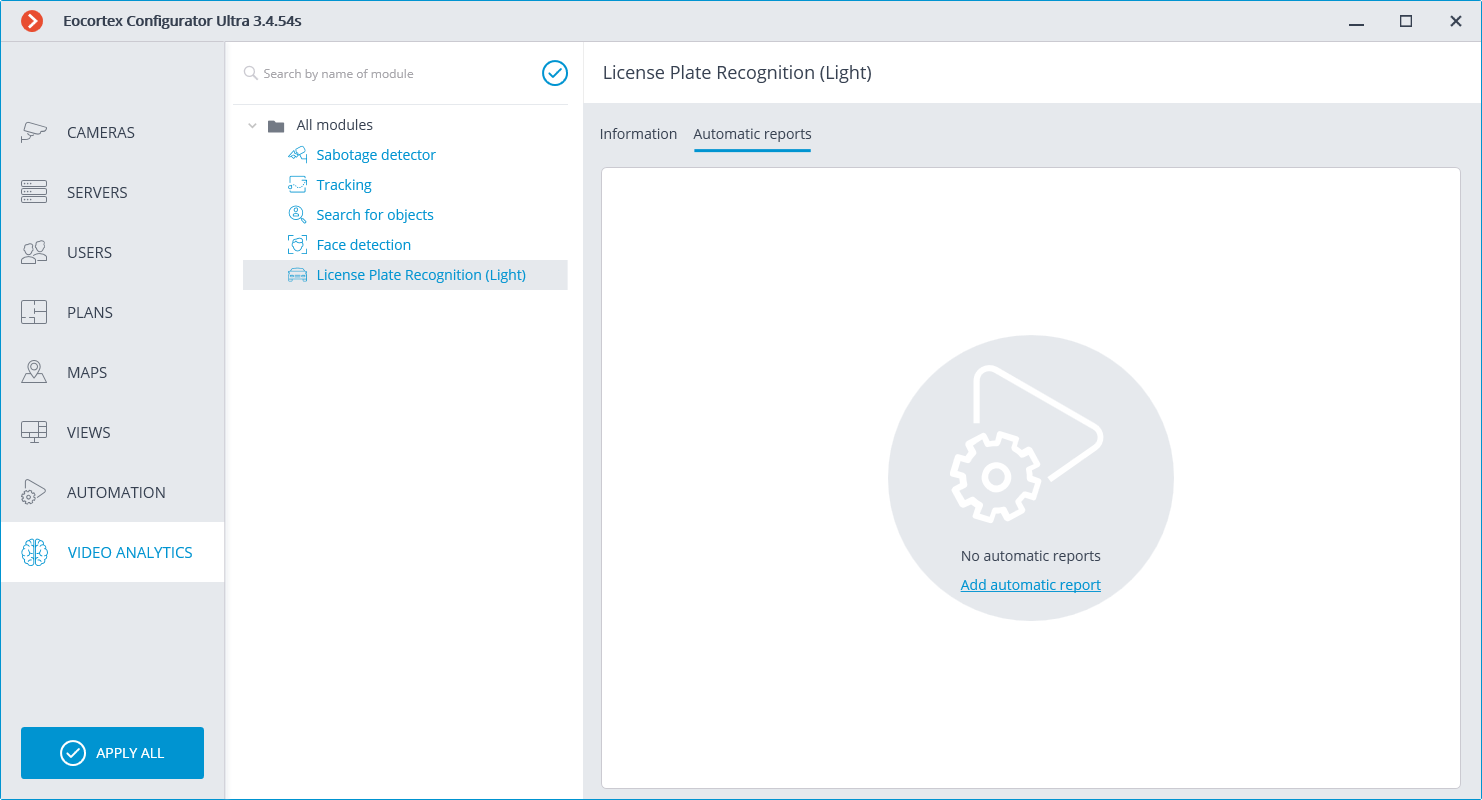
The Automatic reports feature setting is available for specific video analytics modules. Using this setting, it is possible to specify regular sending or saving of reports containing data generated by the module. The tab also displays information about each generated report.
Note
The automatic reports are available for the following video analysis modules:
Personnel Activity Monitoring
People Counting
License Plate Recognition (Complete)
License Plate Recognition (Light)
Face Recognition (Complete)
Face Recognition (Light)
Object Classification and Counting
Unique Visitor Counting
License plate recognition
Each server generates its unique report. Thus, if one automatic report is configured for cameras attached to several servers, several reports will be generated simultaneously.
If no automatic report has been created, the tab will be empty. In such a case, it is required to use the Add automatic report link.
If at least one automatic report has been created, a list of all the automatic reports generated will be shown on the left side of the tab, and the right tab will contain the information regarding the report selected at the moment.
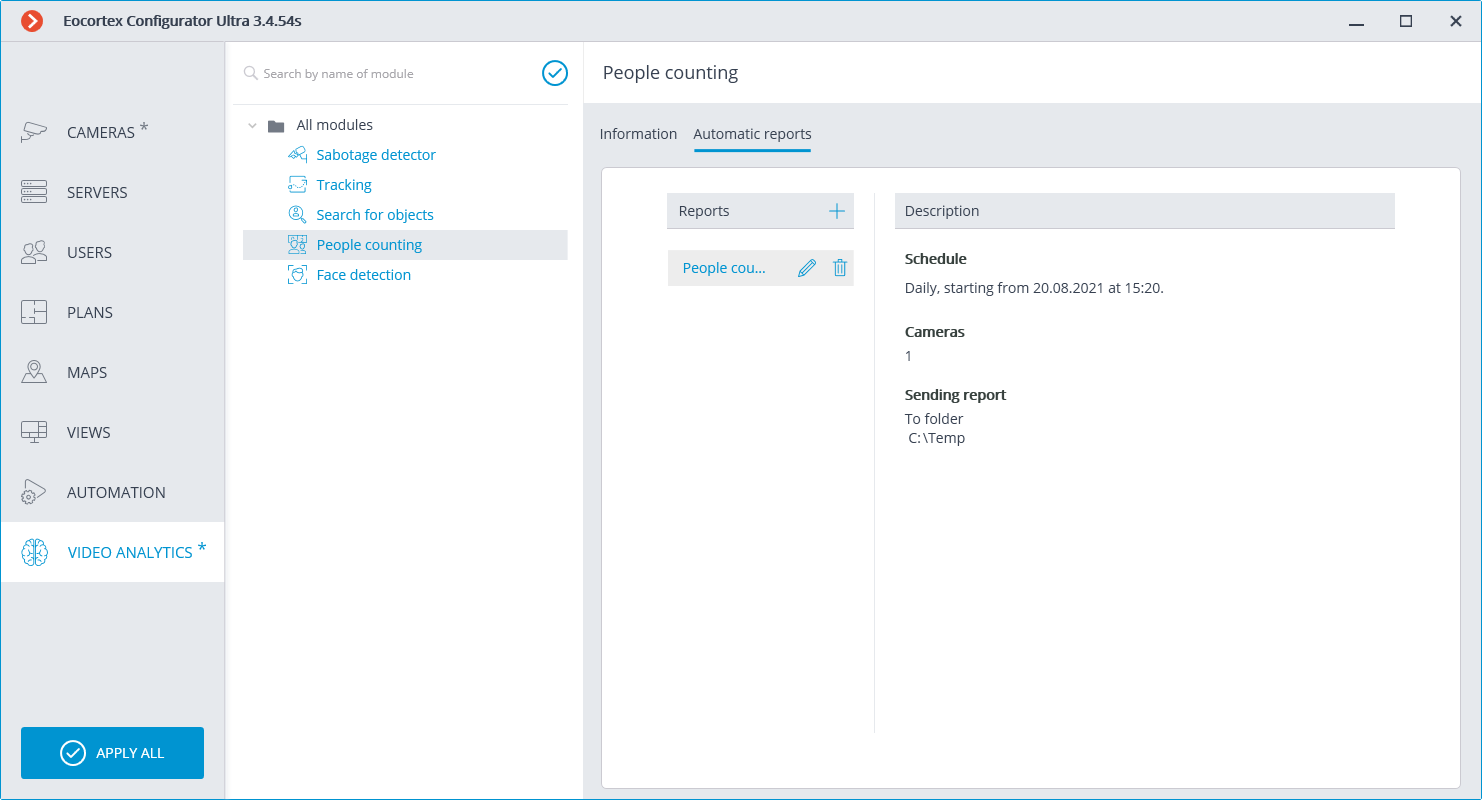
Renaming a report can be done by double clicking on its name in the list. Changing settings or deleting is performed by clicking a corresponding button to the right of the name of a report.
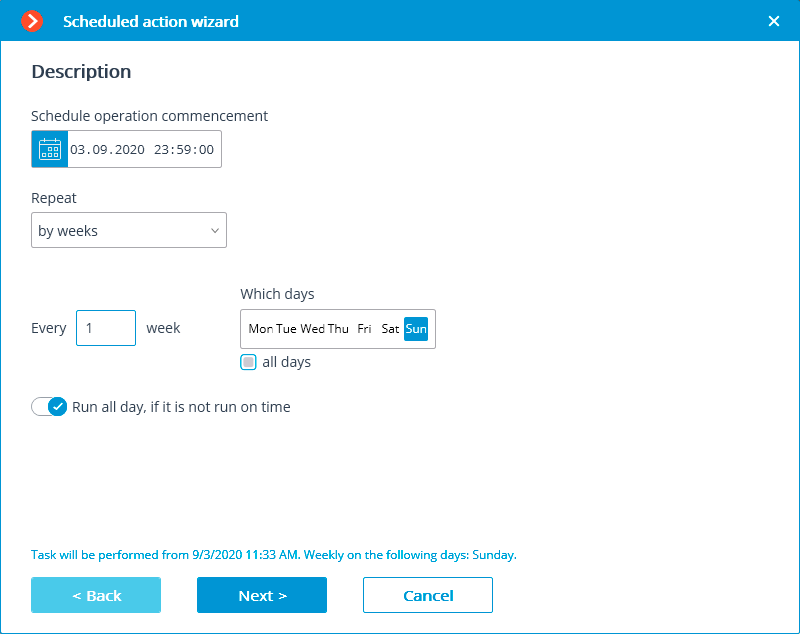
For adding a new automatic report, it is required to press the  button in the list header. It will open the first page of the task adding wizard where it is required to set the time and periodicity of the report’s creation. This page is similar to the page of the wizard of adding the scheduled tasks.
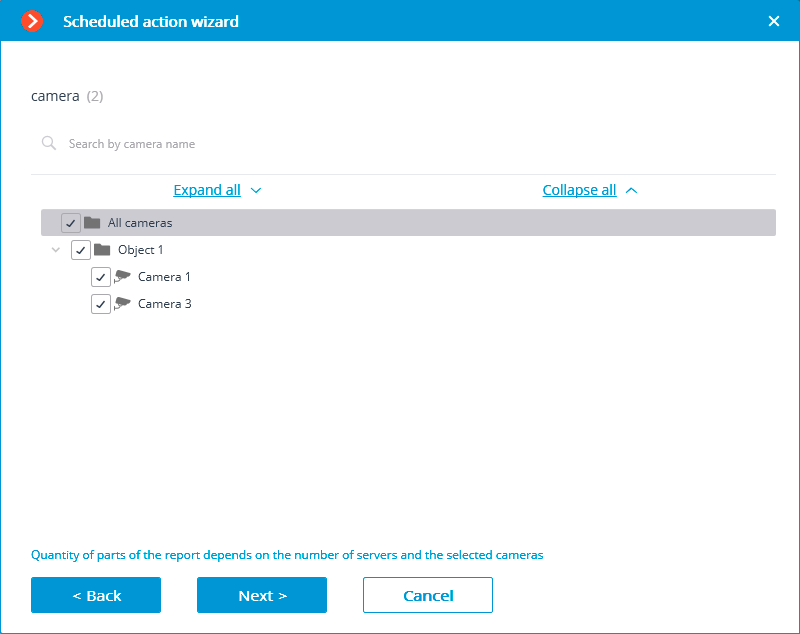
At the next step, it is required to choose the cameras for which the report will be generated.
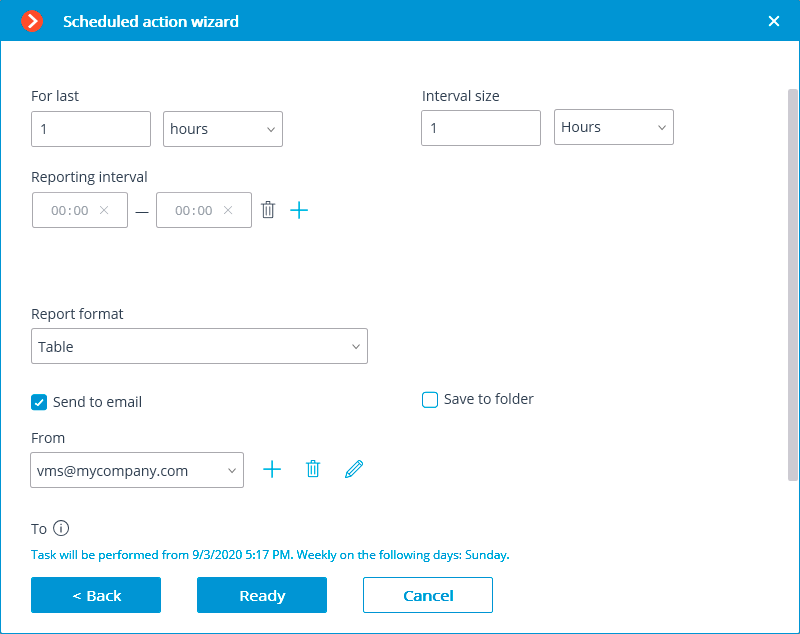
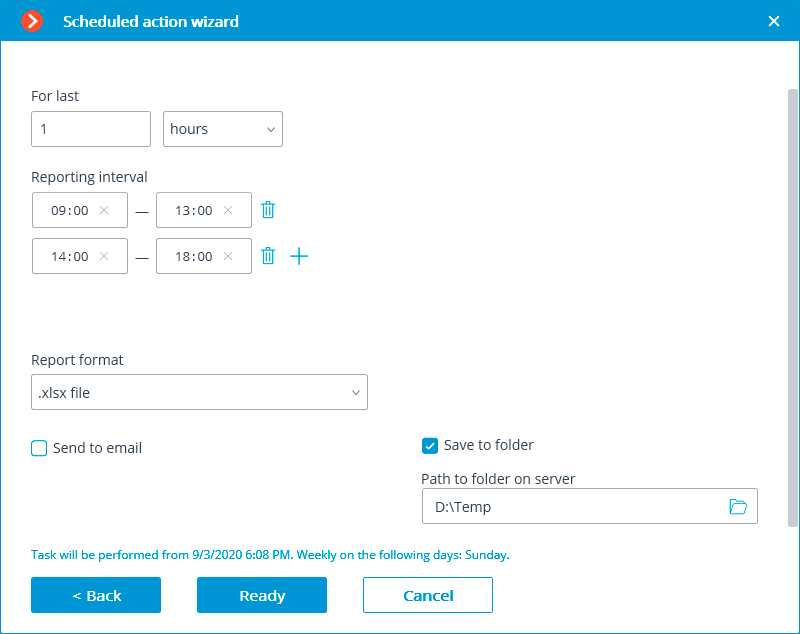
At the final step, it is necessary to set the parameters of creating and sending the report. At that, some of the parameters are common for all the video analysis modules, and some are specific to each individual type of the modules.
Objects/people counting🔗
License plate recognition🔗

Face recognition🔗
Personnel activity monitoring🔗
Unique Visitor Counting🔗

General parameters:
For last: the period for which the report will be created.
Reporting interval: the intervals within a twenty-four-hour period whose data will be used for creating the report. The intervals can be added and deleted.
Report format: allows to choose one of the formats available for the report. The reports can be generated in the following formats: a Microsoft Excel spreadsheet, a CSV file with tabular data, and an image file containing a chart.
Note
The report for Unique Visitor Counting is only available in CSV format.
Send to email: the parameters for sending the report by email. The forms of adding a mail server and a sender’s address are shown in the description of the Send notification by email action.
Save to folder: the path to a folder on the server where the report will be stored.
To report on the number of visitors:
Interval size: the size of the unit interval in the report.
Note
For the Unique Visitor Counting module, the following selection of steps is available: hour, day, week, month.
When using hourly increments, reporting intervals are taken into account. If the step is not equal to an hour, then intervals are not applied, and a standard report is generated in steps of a day, week, or month.
To report on recognized license plates:
Group filter: groups for which data will be displayed in the report.
Note
The list of groups will only be displayed when the corresponding recognition module is enabled on at least one camera and the system settings are applied.
Filter by direction: the direction of movement of vehicles, according to which the data will be displayed in the report.
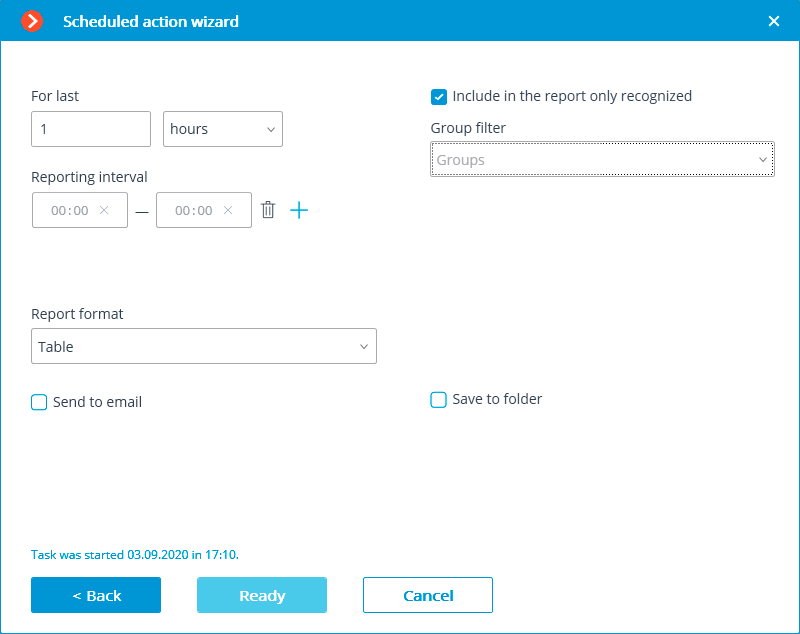
For face recognition reports:
Include only recognized faces in the report: when this option is enabled, the report will only include those faces that were identified using a database; when this option is off, all the faces detected by the module will be included into the report.
Group filter: groups whose data will be included into the report.