Local monitoring and backup archive utility🔗
Note
The Local monitoring and backup archive utility is available on supported Windows operating systems.
In order to view the archive recordings with the terminated Eocortex Server, as well as recordings that are not linked to the deployed server (for example, copied from the server to any external media), the Local monitoring and backup archive utility can be used.
To run the utility, use the shortcut by the path: Start menu / All Applications / Eocortex Server (Client, Standalone) / Local monitoring and backup archive.
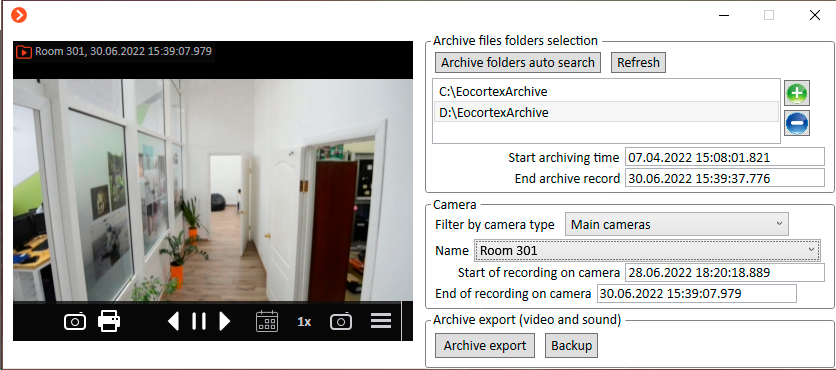
The utility window contains the following controls:
The Archive files folders selection settings section contains a list of folders used by the utility for viewing and exporting archive recordings.
Clicking the Archive folders auto search button starts the operating system scan in order to automatically search for all folders in which the archive is stored. All found folders are included in the list.
Clicking the  button allows specifying the archive folder manually in the Explorer window that opens.
Clicking the  button with a folder selected removes this folder from the list. The folder will only be excluded from the list, but it will remain on the disk and can be added to the list again at any time if necessary.
Below the list of folders, information is displayed about the date and time of the beginning and end of the records available for viewing, also known as the archive depth. This information covers all folders added to the list.
Clicking the Refresh button updates the information about available folders and cameras. For example, if after launching the utility one of the folders in the list was deleted in Windows Explorer, it still will be displayed in the utility as available until the Refresh button is clicked.
The Camera settings section allows getting information about cameras available in selected folders, as well as select a camera and view its recordings in the preview cell in the left part of the utility window.
The Archive export button allows exporting the recordings to AVI, MP4 and MCM files.
Clicking the Backup button opens the Archive backing up wizard window:
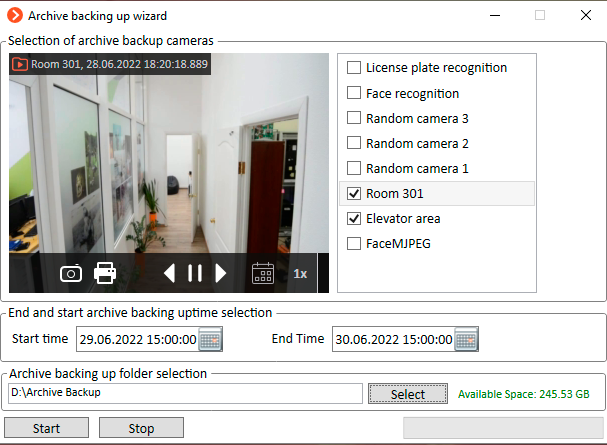
To create a backup of archive recordings, select the cameras for which a backup must be created, set the time interval for which the archive will be copied, and select a folder for storing the created copy. When all the settings are configured as needed, click the Start button.
The backup process will be displayed as a progress bar in the lower right part of the window:
