Face recognition🔗
Eocortex allows to use several modules that perform face recognition using a database: Face Recognition (Complete), Face Recognition (Light) and Unique Visitor Counting.
However, it is not possible to use Face Recognition (Light) module with other face recognition modules on one camera at the same time.
The modules ensure high recognition accuracy and can be used together with access control systems at the facilities with high security requirements, for example, at banks or restricted access facilities. Another important use of the modules can be automatic identification of the hotel guests, restaurant customers, and the visitors of other similar enterprises.
Comparison of modules🔗
Capabilities |
Versions |
||
|---|---|---|---|
Face Recognition (Light) |
Face Recognition (Complete) |
Unique Visitor Counting |
|
Identification of faces contained in a database |
√ |
√ |
– |
Identification of people wearing sunglasses, headgear, etc. |
– |
√ |
√ |
Relative recognition accuracy |
Medium |
High |
– |
Number of people in database |
Up to 500 |
Unlimited |
– |
Determination of sex and age |
– |
√ |
√ |
Recognition of emotions |
– |
√ |
√ |
Recognition of faces in archive |
– |
√ |
– |
Reports regarding faces |
√ |
√ |
Detection only |
Reports regarding unique visitors |
– |
– |
√ |
Usage of high-performance video card (GPU) |
+ |
√ |
√ |
Usage of several video cards (GPUs) |
– |
√ |
√ |
√ |
Yes |
– |
No |
+ |
Optionally |
Details🔗
Warning
This module will only work on the cameras on which it has been enabled by the administrator of video surveillance system.
The Face Recognition (Complete) and Unique Visitor Counting modules also define sex, age and emotions of recognized people.
The following emotion recognition results are available: Positive, Neutral, Negative and Unknown.
The Face Recognition (Complete) module can identify masked faces with high accuracy; provided that the database contains samples of these persons without a mask. Also, this module can recognize turned faces; despite the fact that only images of faces looking directly into the camera are entered into the database.
Live view🔗
In the live view displaying of the recognized faces may be activated. To enable this option, select the cell and click  icon. Recognized faces panel will be opened:
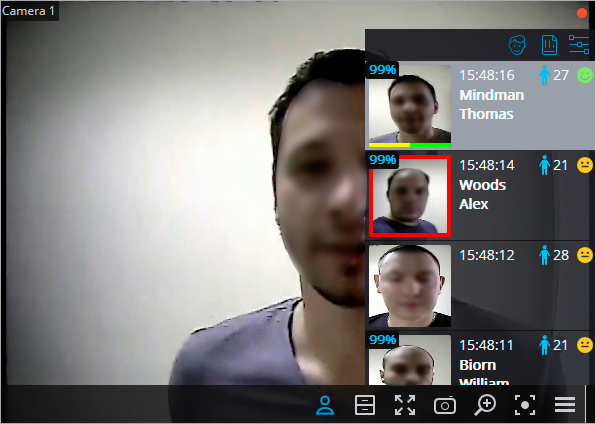
There are the buttons at the top of the panel for addition of a face into the database  and switching to reports page
  .
.
Below there is the list of recognized faces in descending time order.
If the face belongs to one or more groups, a bar with the colors, assigned to these groups, shall be placed below it.
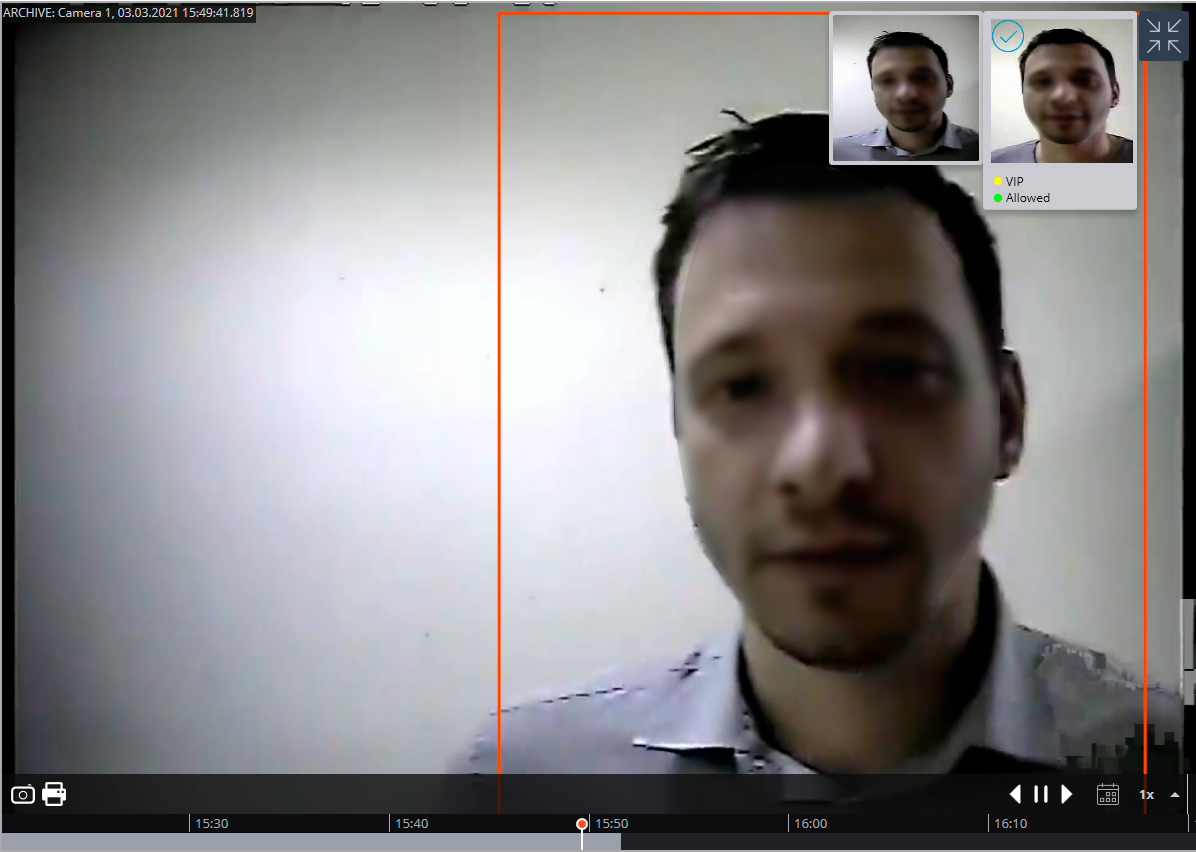
Double-clicking on the row in the list opens the archive window with the moment of recognition of this face.
The module settings window.
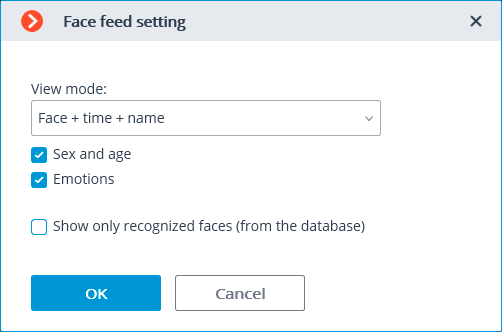
The following settings are available in this window:
View mode: allows to configure the displayed information.
If Show only recognized faces (from the database) is checked, only those faces which exist in the database will be displayed in the recognized faces list.
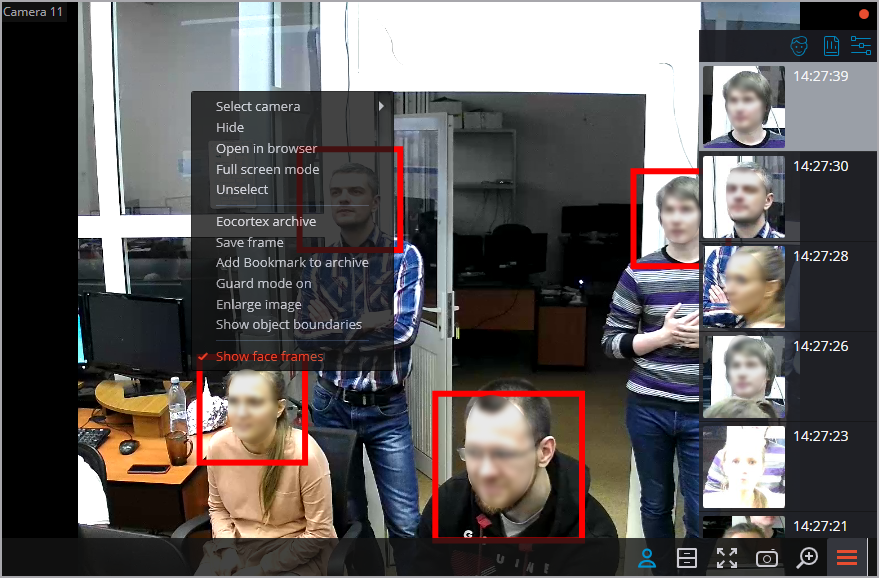
When viewing a camera in live view, the following options are available in the cell context menu:
Show face frames: enables/disables the display of frames for recognized faces.
Show warning messages: enables/disables the display of various warnings.
"Face Recognition (Complete)" report🔗
Face Recognition (Complete) report displays the recognized faces.
Note
The reports of all the modules are similar, with some differences in the interfaces and features.
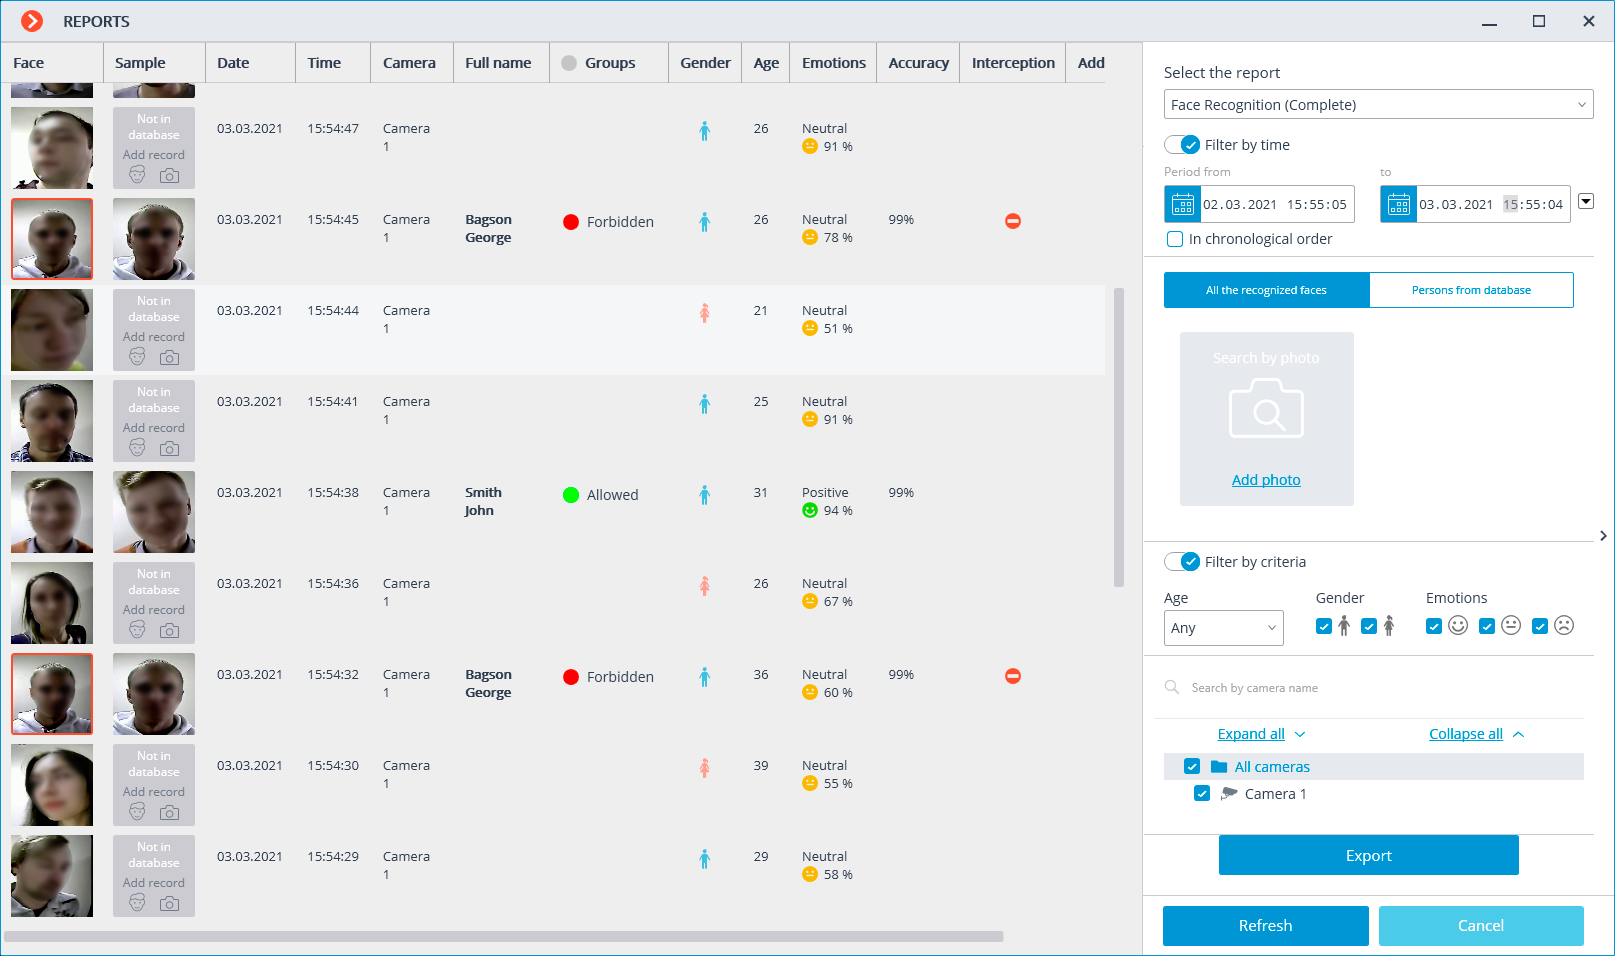
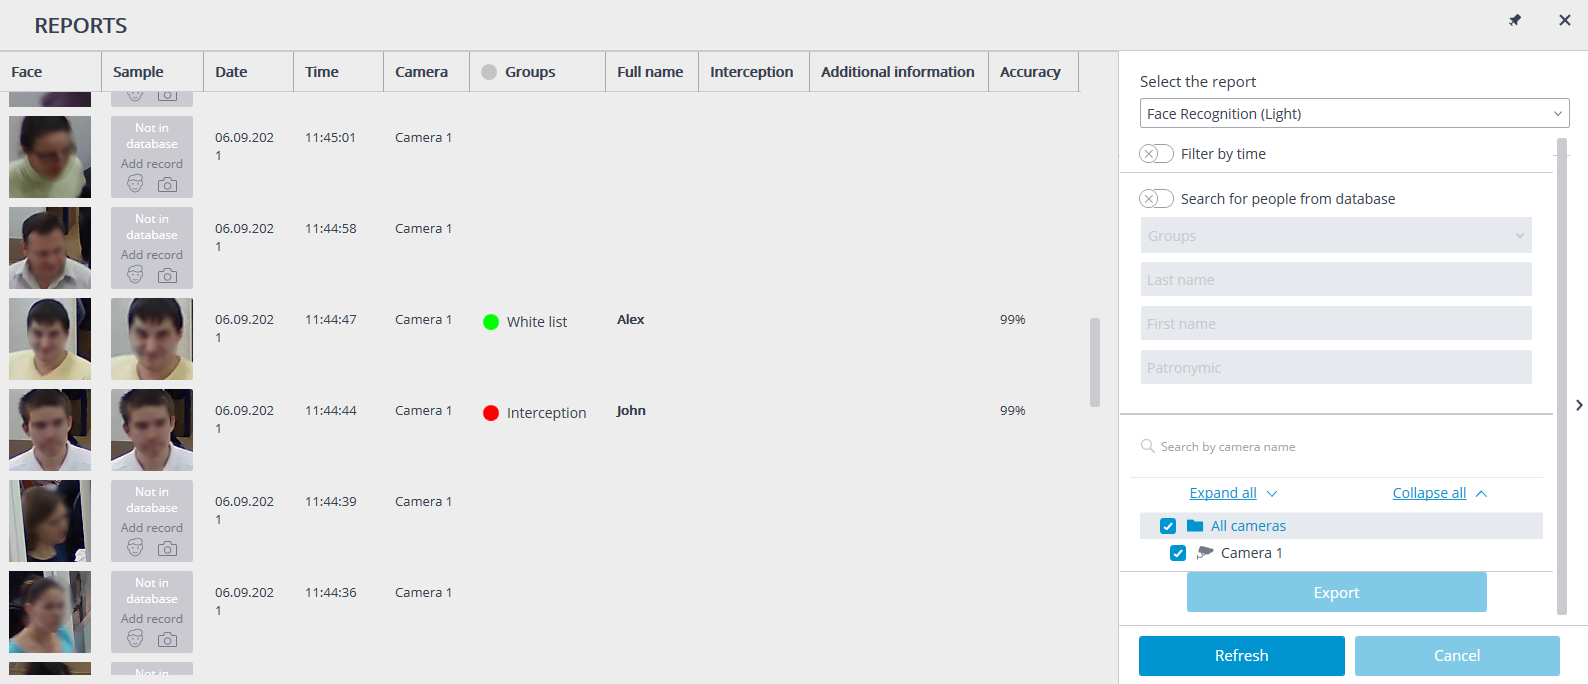
This report is a table, in which each row contains the recognized face, date and time of recognition, camera name, as well as the person's data in the database (if this face exists in the database): his name, groups, additional info.
Using the mouse, you can change the order and width of the columns.
Double clicking on the row opens the face recognition moment on the archive view page.
By default, the recognized faces are displayed in a descending time order.
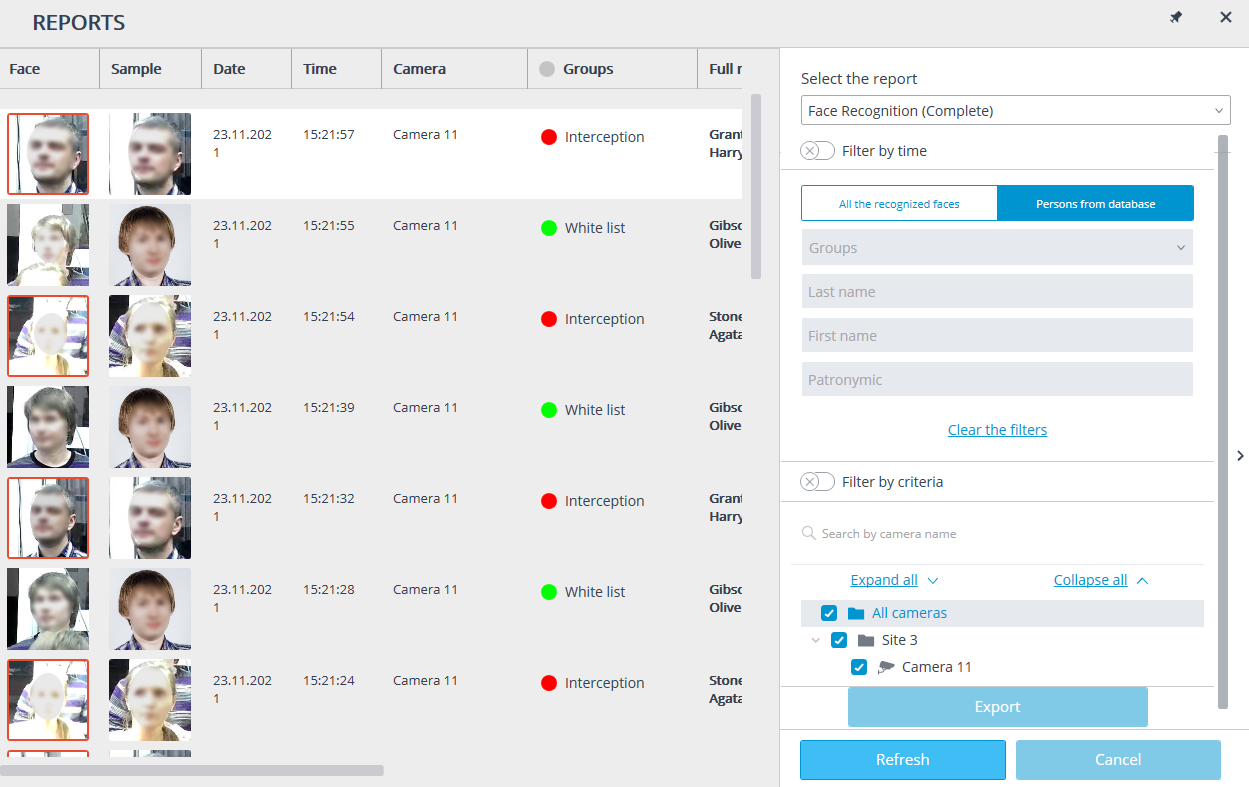
The list and order of the displayed recognized faces in the report may be changed using the filter panel, located on the right. This list may be filtered by time, cameras, groups and person’s names. The filter will be applied after pressing the Refresh button.
When the Filter by time option is enabled, it is possible to specify the period for which recognized faces will be displayed.
Selecting Persons from database it is possible to filter recognized persons using the data stored in the database.
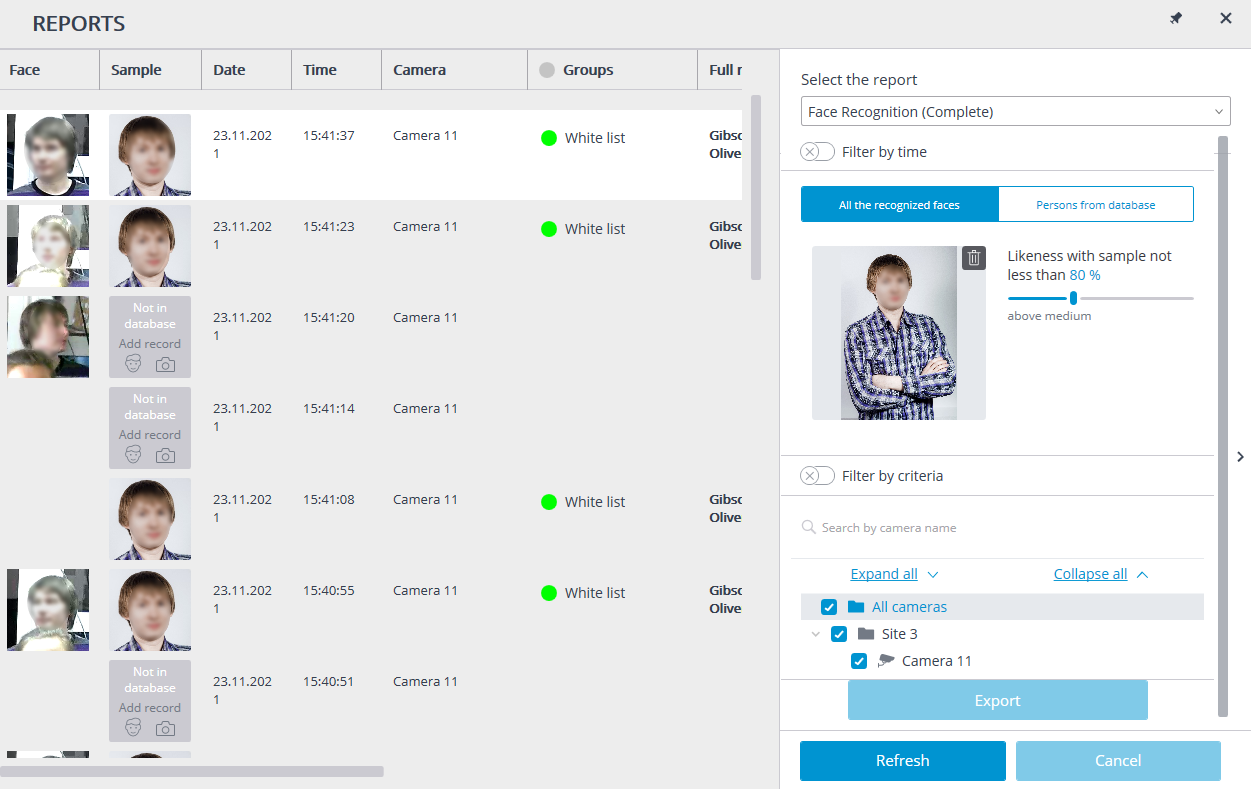
It is also possible to search for recognized persons based on their similarity to a recognized face or to an image from an uploaded file.
If a period has been specified for the report, the report will be downloaded to disk upon pressing the Export button.
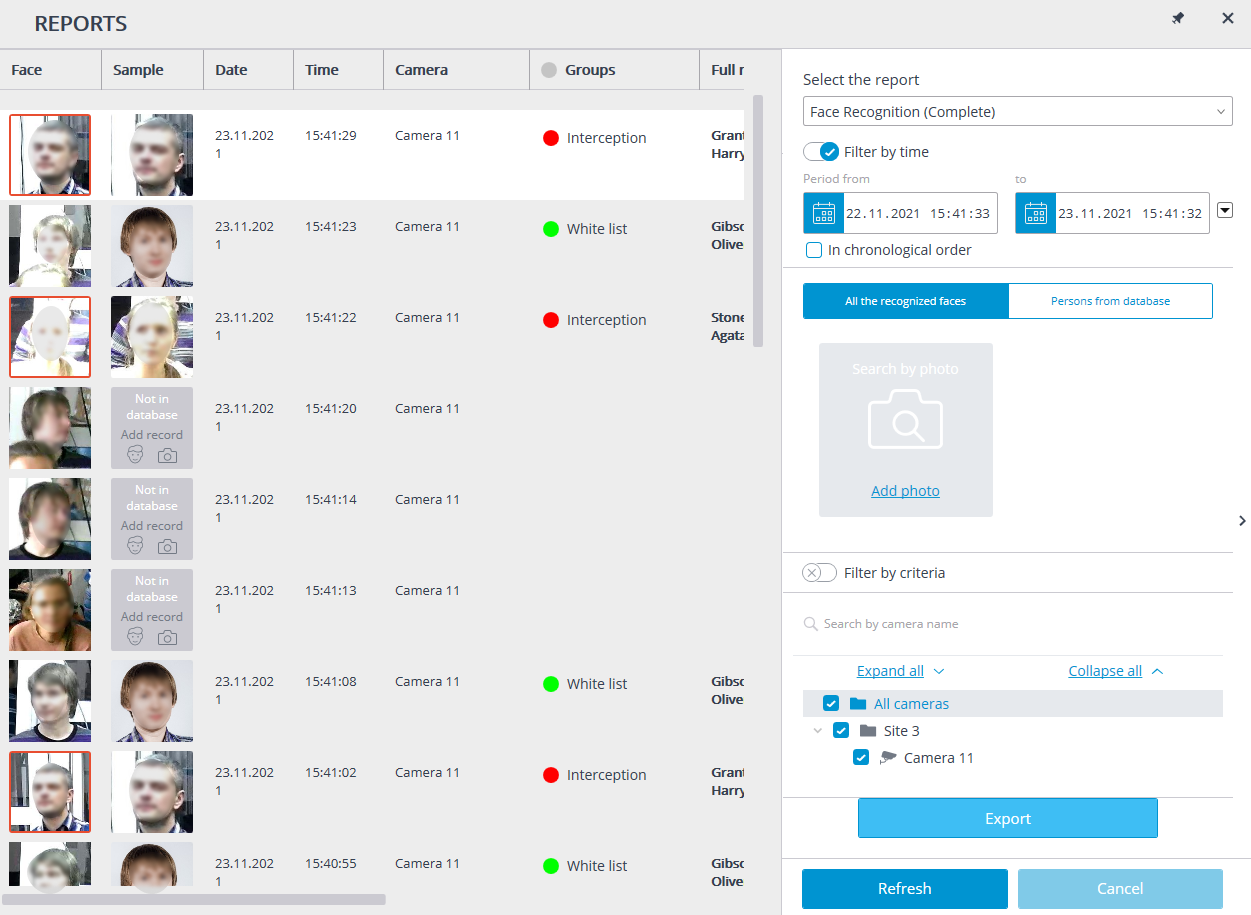
This will open a window where it will be possible to select the location and format of the file: CSV, Excel or PDF.
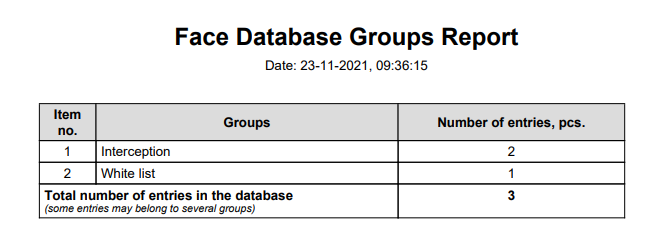
Face Database Groups Report🔗
The Face Database Groups Report is a table with the information on the state of the face database: the number of entries in the groups, the number of groups, the total number of entries in the database.
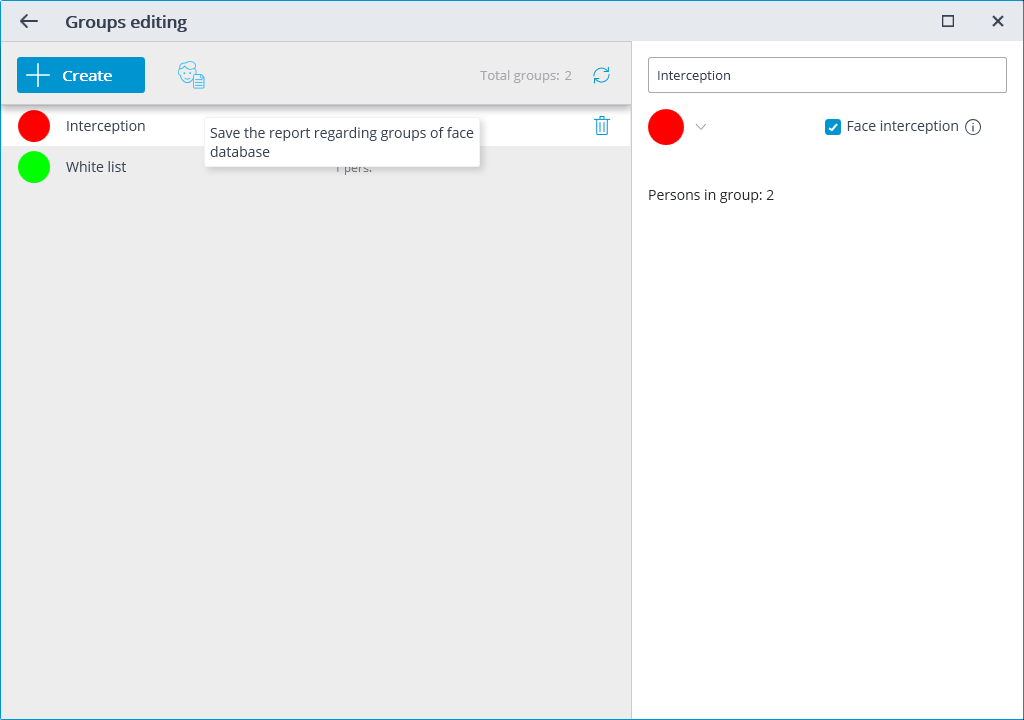
To create a report, it is required to go to the tab Groups editing  and click on the button
  .
.
The report will be saved in the PDF format.
"Work time logging (Complete)" report🔗
Work time logging (Complete) report is formed by areas (zones). An area is a territory where it is required to monitor the presence of persons. The people’s faces must be recognized at the entrance to and the exit from the area by the Face Recognition (Complete) module. Several cameras may be used for a single area both at the entrance and at the exit.
Note
If a face was recognized at the exit of the zone, but was not recognized at the entrance, the person's time in the zone will be counted from 00:00.
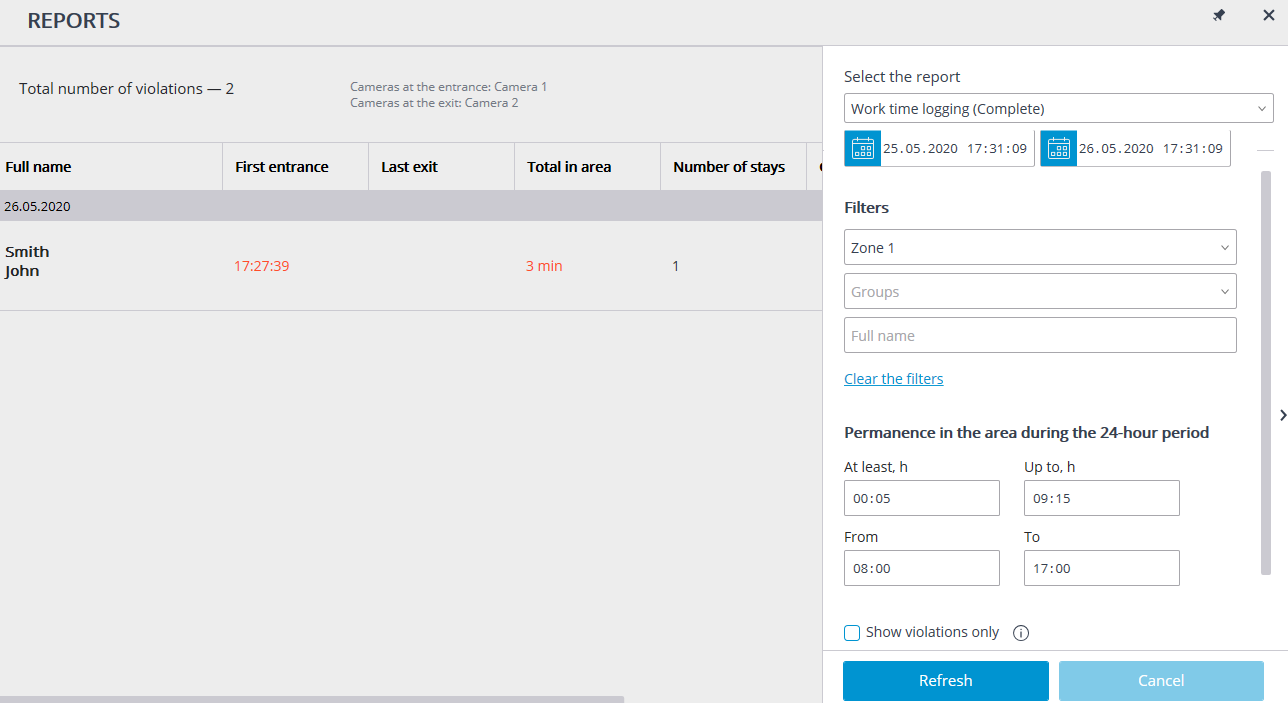
For creating a report, it is required to specify the area and the time period for which the report will be made. Additionally, optional filters allowing to create reports by names, by surnames and by groups of people, as well as by the time they spend in the area, are available.
In the Permanence in the area during the 24-hour period group of settings, the following parameters that are used to monitor the violations of the allowed time of presence in the area of all the recognized persons are set:
At least, h: total time of presence in the area must not be less than the value set in this field.
Up to, h: total time of presence in the area must not exceed the value set in this field.
From: a person must enter the area before or at the time set in this field.
To: a person must not leave the area before the time set in this field.
After setting all filters need press the Refresh list button.
It is required to press Refresh after setting all filters.
The total number of violations of the rules of presence in the area and the descriptions of cameras monitoring exits and entrances are shown in the title of the report.
The lines of the table are grouped by dates. For each date, the people whose entrances and exits to and from the area are shown.
It is possible to open the context menu in the line of the table by clicking the right mouse button.
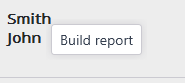
The Build report item of the context menu opens the individual chart of the presence of a particular person in the areas in the course of a 24-hour period.

The individual chart shows all the areas where a person was during the selected 24-hour period. For each area, the periods of time when the person was there are highlighted. Hovering the mouse pointer over any highlighted period displays the prompt with the amount of time and the interval of presence of the person in the area.
Faces database🔗
Description🔗
The Faces database contains the following information: full name of person; group, to which the person belongs; samples of the person's face, and other.
It is possible to add to the database the faces found by the face recognition module as well as to upload image files with faces.
The ways of adding faces found by the face recognition module are described below.
In the Face recognition report, select a face and press the Add button. The face database window will open in the mode of adding a new face.
In the Face recognition report, select a face and press the
 Add photo to face database entry button. The face database will open, allowing to select the corresponding entry.
In the camera cell, select a face in the panel of recognized faces, then press the
 Create entry in face database button. The face database window will open in the mode of adding a new face.
The face database window can be opened from the window of the report regarding the recognized faces, from the camera cell when adding a recognized face, and from the main menu of the application.
Note
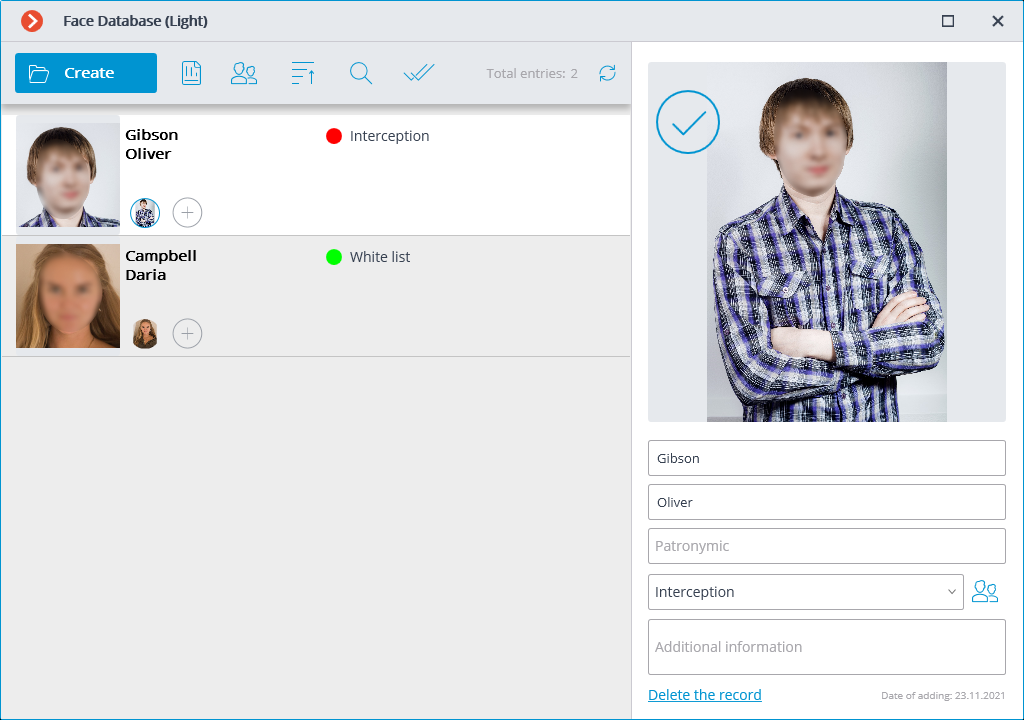
The face databases of all the modules are similar, with some minor differences in the interfaces and features.
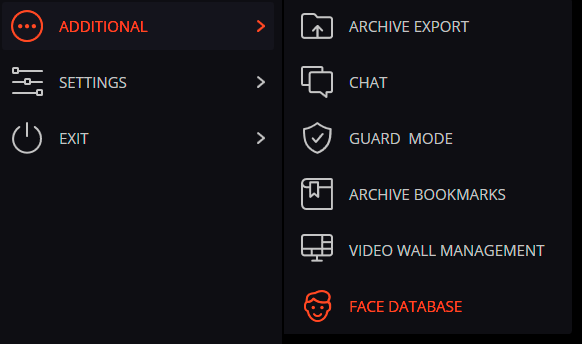
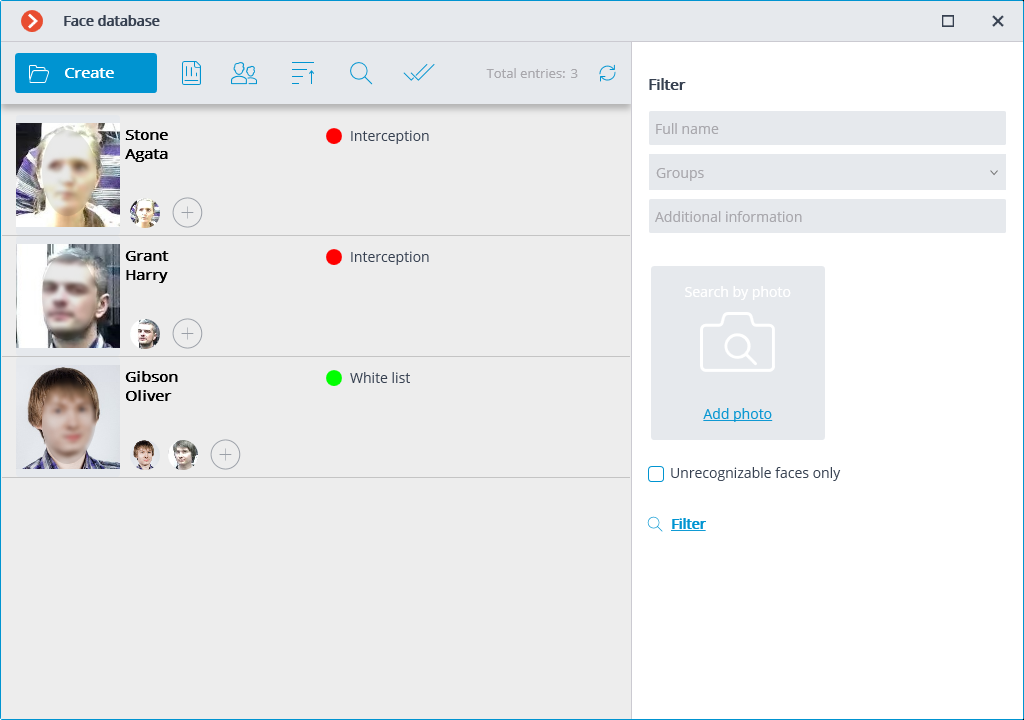
There are the following buttons at the top of the page:
 Add button opens the File Explorer for adding a new face image to the database.
 Reports button opens the Face recognition report.
- Groups button opens the form for editing groups.
 Sorting: allows to sort the entries of the face database by the date of addition or alphabetically.
 Search button opens the person search form.
 Group operations: allows to work simultaneously with several entries of the face database.
 Refresh list button allows loading the entries from the face database on the server again. This feature is useful, in particular, in the situation when several users are working with the face database simultaneously; it permits to see recent modifications made by other users.
Capabilities🔗
It is possible to add faces found by the face recognition module as well as to upload image files with faces to the database. It is also possible to add a new entry to the database and add a recognized face to an existing entry.
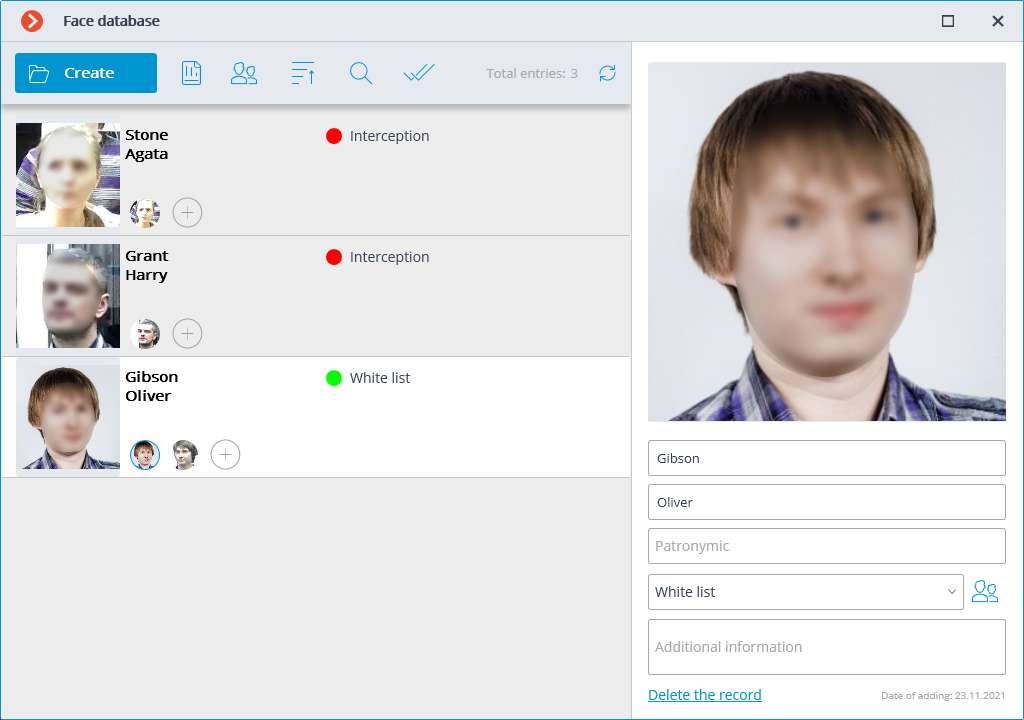
Each face database entry contains the following information: sample face images; surname, given name, patronymic of a person whose face images are in the entry; additional textual information about this person; groups the entry belongs to.
Warning
Each entry may contain up to 5 photos. When this limit is reached, the photo adding button will be unavailable.
The entry deletion button is located in the upper right corner of a highlighted entry.
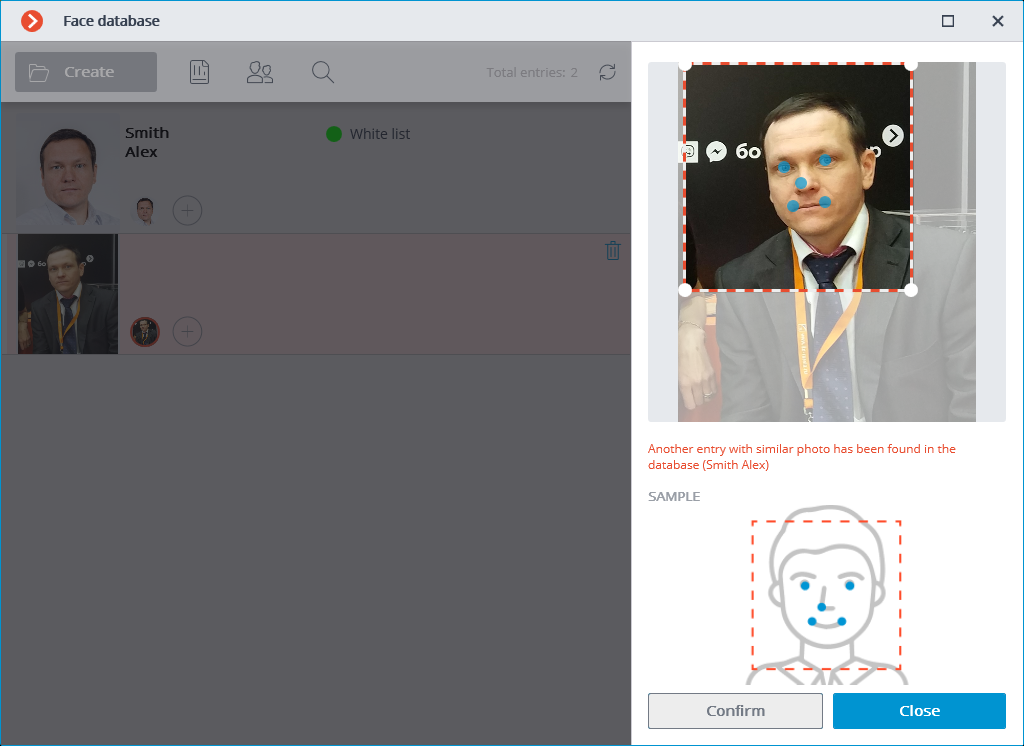
When adding a new face to the database, it is possible to find out if there are duplicates of the given face in the database.
Warning
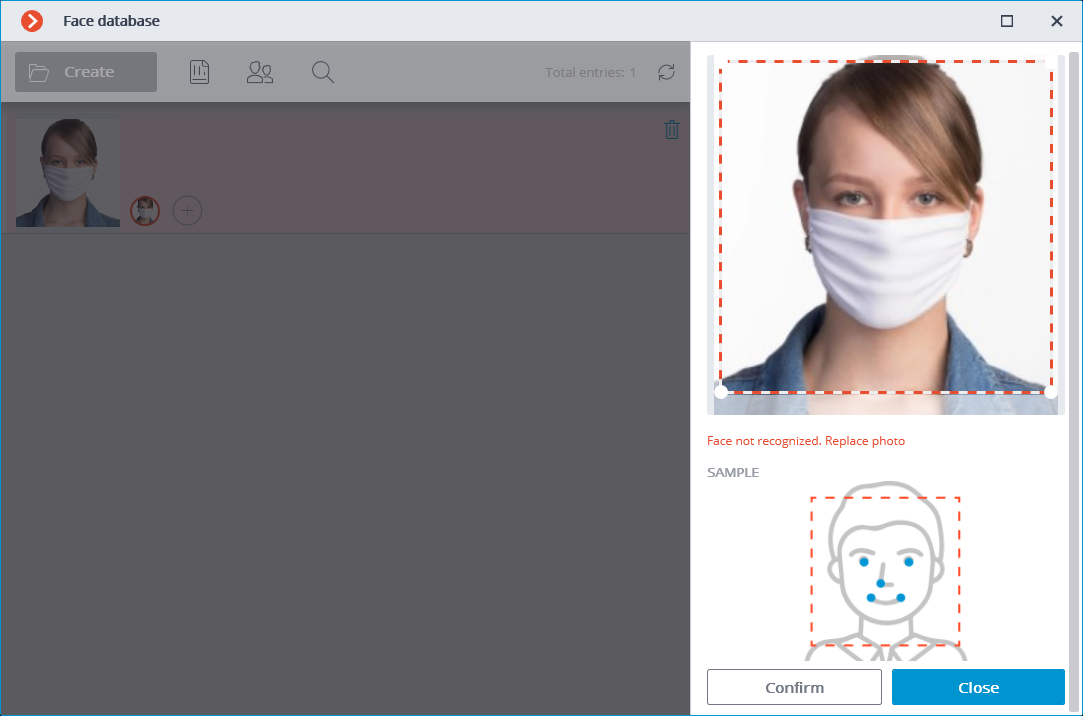
It is not possible to add images of masked faces to the database.
Note
It is possible to add faces that do not meet quality requirements to the database, but they will not be used as samples for recognition. The unrecognized images will be marked with  ; it is recommended to replace them with the samples that meet the requirements for recognition.
Sorting face database entries🔗
Pressing the button opens a menu for selecting the type of sorting.
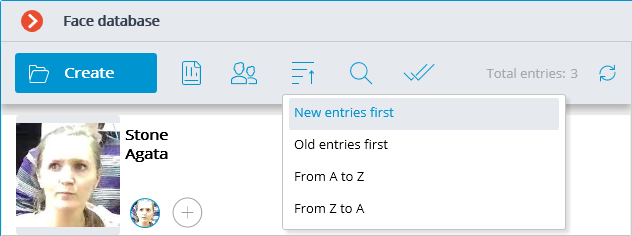
Several types of sorting are available:
By the date of addition:
New entries first;
Old entries first.
Alphabetically:
from A to Z;
from Z to A.
Note
By default, when opening the face database, entries are sorted by the date of addition: New entries first.
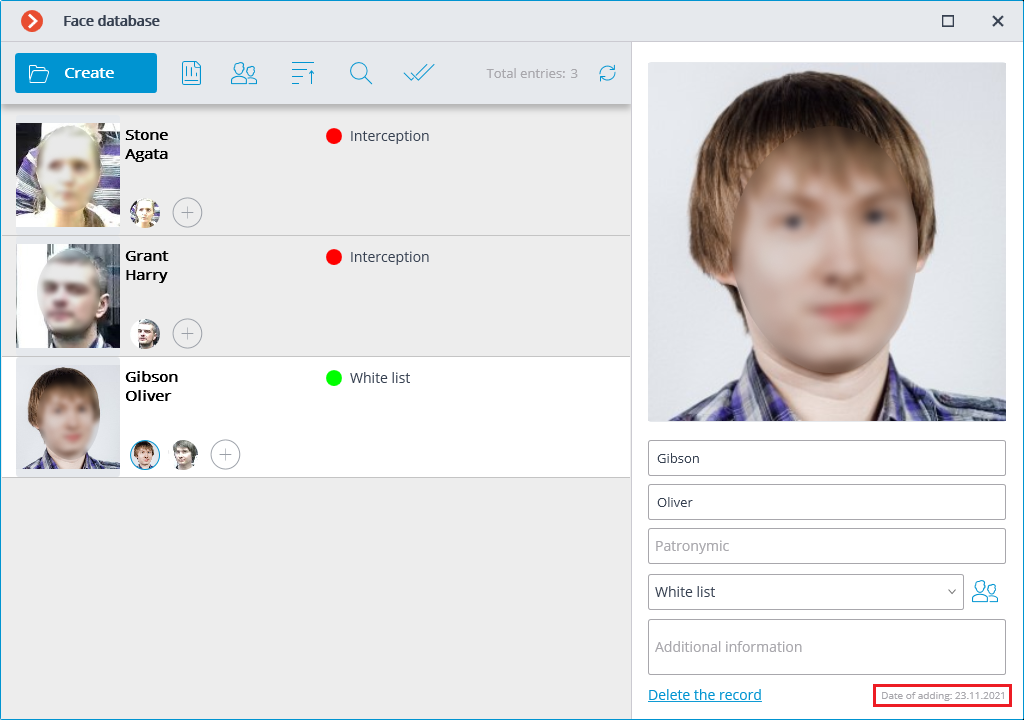
The date the entry was added to the database is displayed at the bottom of the entry card.
Search in the face database🔗
The search in the face database is performed by the following parameters: Full name, Groups, Additional information.
Note
For the Face Recognition (Complete) module, a search by photo is available.
Group operations🔗
To work with several entries at the same time, it is necessary to switch to the Group operations mode.
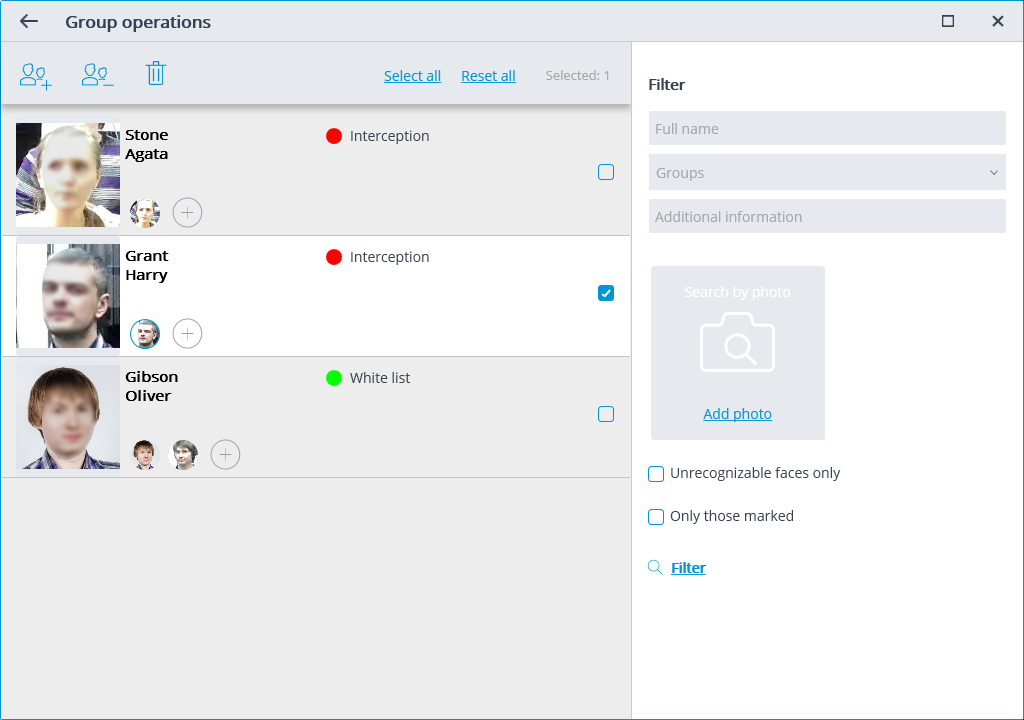
The following group operations are available:
 Adding to groups: allows to add all the selected entries of the face database to the marked groups.
 Deletion from groups: allows to remove all the selected entries in the marked groups from the face database.
 Delete marked entries: allows to remove all the selected entries from the face database.
Note
Reopening the Group operations mode will discard all previously selected entries.
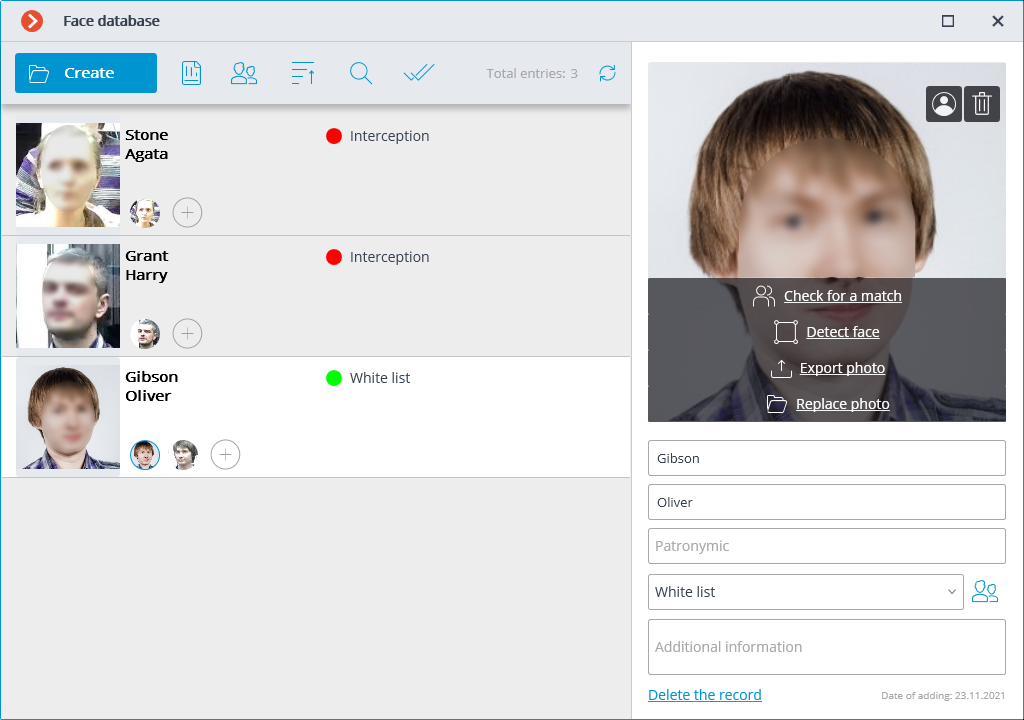
Editing panel🔗
The panel for editing a highlighted entry can be found to the right of the list. The face sample is displayed in the upper part of the panel. The text fields with a surname, a given name, a patronymic and the additional information about a person are located below, together with the field with the list that allows selecting the groups. To the right of the list there is the button that opens the list of groups to be edited.
Saving the changes made in the database using the editing panel is performed when highlighting another entry in the list or when closing the face database window.
By default, the editing panel displays the first (the leftmost) face sample. To display another sample, it is required to click on the thumbnail of the sample in the database entry.
Hovering the mouse pointer over the face sample in the editing panel displays the Check for a match, Detect face, Export photo and Replace photo links in the lower part of the image; the sample deletion button appears in the upper right corner.
Note
The Check for a match feature is only available for the Face Recognition (Complete) module and for recognized faces.
Detect face launches the search for special points of a face.
Replace photo opens the File Explorer for selecting an image file with the replacement face sample. The current sample will be deleted.
Warning
The face sample is deleted without confirmation, immediately after the delete button is pressed.
Note
The sample deletion button is shown only for the entries that contain several samples.
Warning
The image of a face to be added from a file must not occupy more than one-third of the frame.
When adding a new face or when performing the Determine Face operation, the module attempts to find a face in the frame, highlight it with a frame and show the position of the eyes, tip of the nose and corners of the mouth.
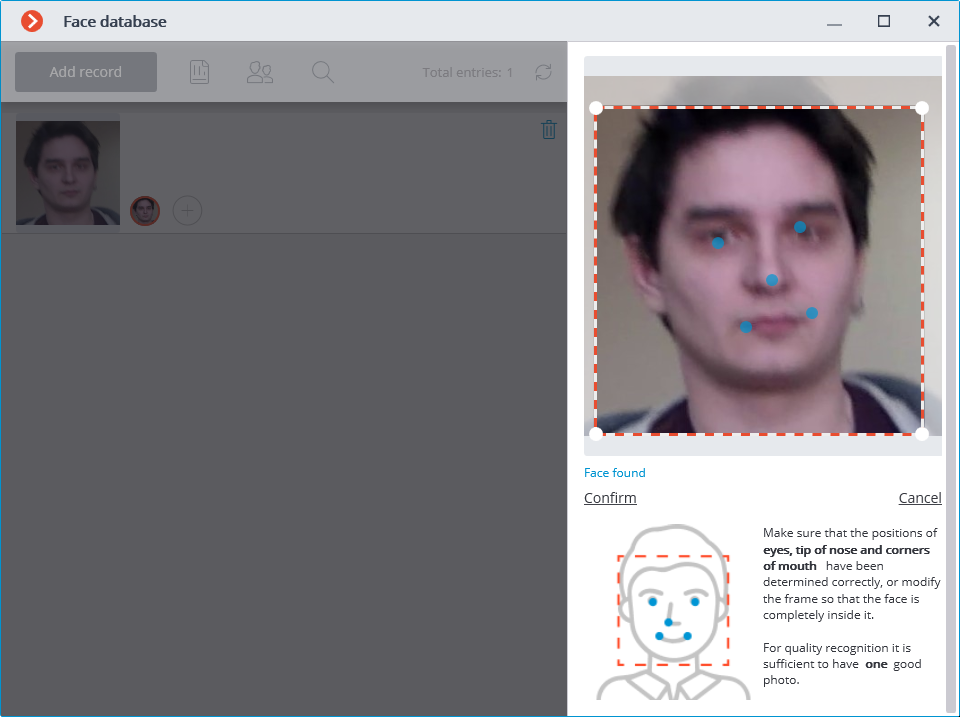
If all the key points of the face are marked correctly, it is required to click on the Confirm link.
If the key points have not been found or are marked incorrectly, it is required to manually modify the position of the frame to ensure that it fully embraces the face and that the shoulders are also included. After that, the module will attempt to determine the key points again. If the modification of the frame does not help and the key points are not determined or are determined erroneously, it is required to cancel the loading of the image.
Note
If there are several faces in the frame, the module will find one of them; if necessary, you can select a required face manually using a frame.
If the Confirm button is not pressed after finding the key points, the photo will be marked in the list by a red frame. It means that it is required to find the key points on the face and confirm them, or replace the image.
The unconfirmed samples are not entered into the database. The samples that are not compliant with the specified requirements are not entered either.
Editing the list of groups🔗
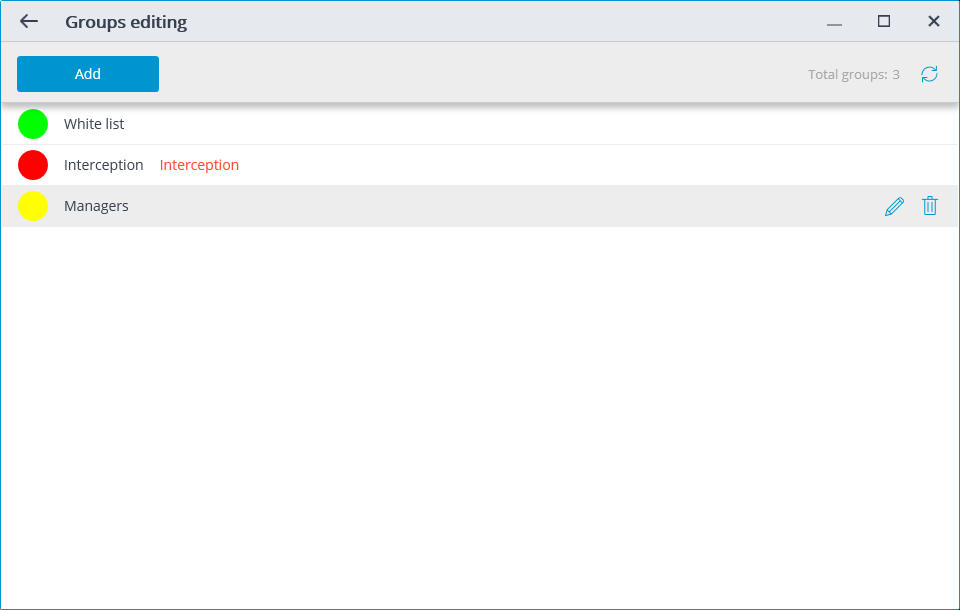
Each group must have a unique name.
You may also assign a color to the group: in this case, face of this group will be marked with this color in report and list of recognized faces.
You may also enable the Face interception option for the group, which may be used to configure the automatic actions.
Related references🔗
Configuring the Face recognition module
Requirements and recommendations for the Face recognition module