Interactive Maps🔗
Note
This feature is available only for Enterprise and ULTRA licenses.
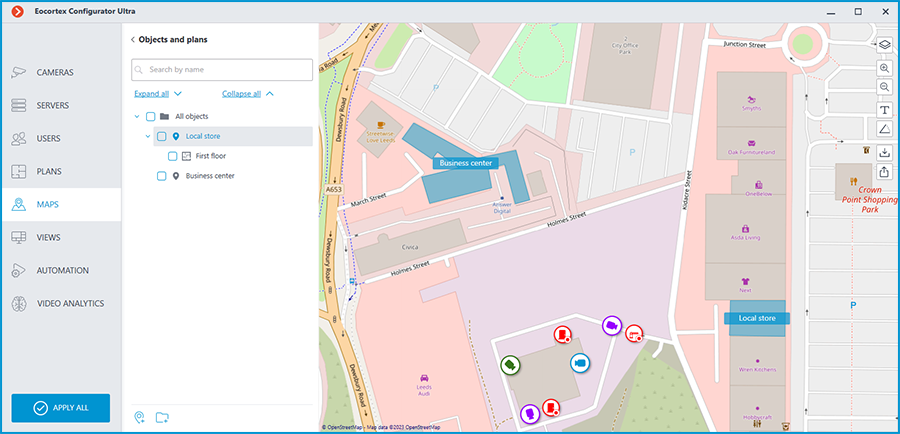
To place cameras on the geographical maps provided by the cartographic services, go to the  Maps tab in the Eocortex Configurator application.
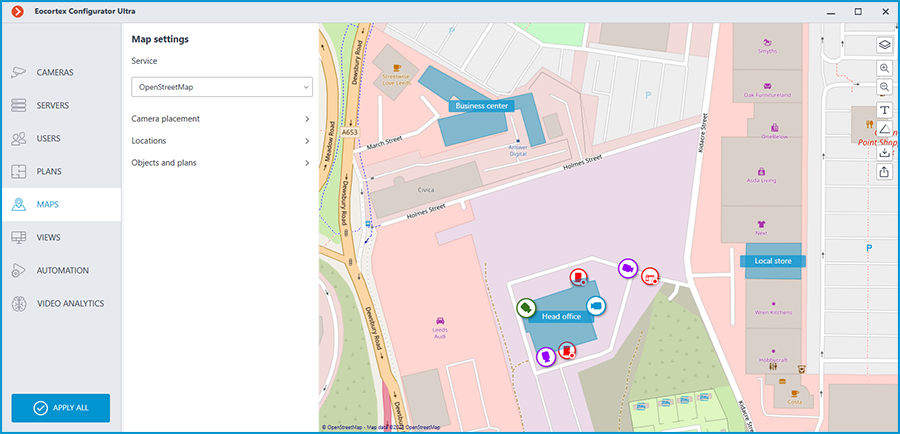
Description🔗
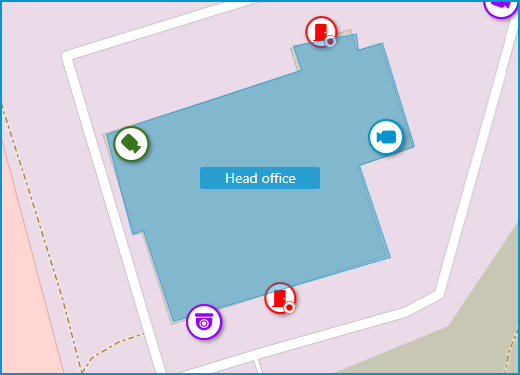
This tab displays a geographical map with the cameras, sensors, and relays placed on it.
A bar with the following buttons is available on the right side of the map:
 Change layer: Changes the current map layer.
 Zoom in: Scales the map up.
 Zoom out: Scales the map down.
Note
The scale can also be changed with the mouse wheel.
 Show camera names: Hides or displays the names of all cameras on the map.
 Show fields of view: Hides or displays the field of view of all cameras on the map. If no fields of view are configured, this button will not be displayed on the panel.
 Camera configuration export: Exports the current map settings to the device. The export can be made to a CSV file, which contains:
Identifier of the camera.
Full camera path, including the camera name.
Coordinates of the camera on the map. If the camera is not placed to the map — the coordinates will not be added.
 Camera configuration import: Imports a map settings file. When imported, the camera is added to the map by the coordinates written in the file.
If the camera is already placed to the map, the imported settings will change its coordinates to the new ones. If the file does not contain the coordinates for this camera — it will be removed from the map. For those cameras that were not found in the current configuration of the system or whose coordinates are specified incorrectly, an error message will be displayed. The import of the remaining cameras will continue.
 Edit camera settings: Opens the camera settings window. This button will not appear in the panel if no site is selected.
 Remove selected objects from map: Deletes the selected sites from the map. This button will not appear in the panel if no site is selected.
In the Service section, the preferred GIS service can be selected.
Note
Changing the GIS service does not change the current position.
The following GIS services are available:
OpenStreetMap
Google Maps
Layers of the map can be changed by clicking the button on the panel located to the right of the map.
OpenStreetMap
Available layers: OpenStreetMap; OpenCycleMap; OpenCycleLandscapeMap.
Google Maps
Available layers: Map; Satellite.
Below there are the Camera placement, Locations, and Objects and plans tabs. Clicking them opens the corresponding settings panel.
Camera placement🔗
General🔗

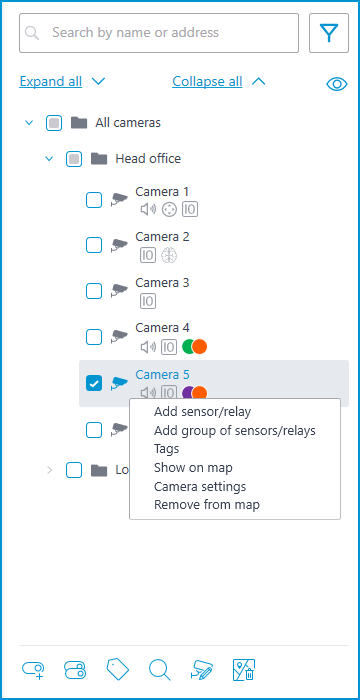
This tab contains the cameras tree.
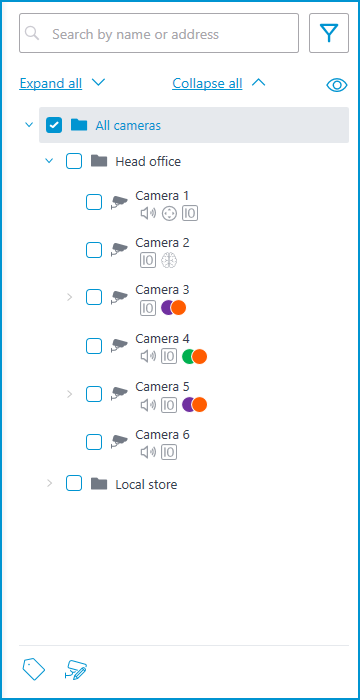
Cameras can have the following attributes:
 : the camera has enabled video analytics module;
 : the camera has enabled sound receiving option;
 : the camera has enabled PTZ;
 : the camera has enabled alarm inputs/outputs.
Colored labels: the camera has tags with the displayed colors;
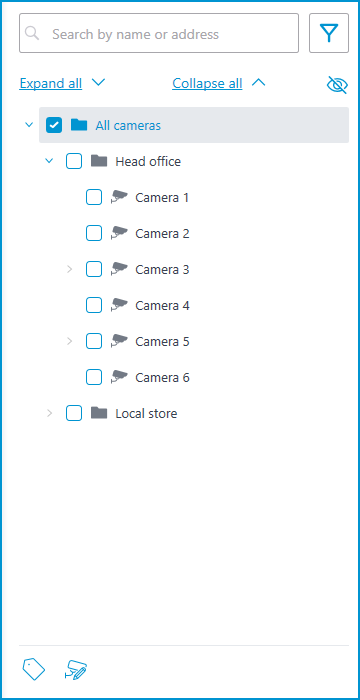
If necessary, you can hide the attributes by clicking the  icon on the right side of the tree.
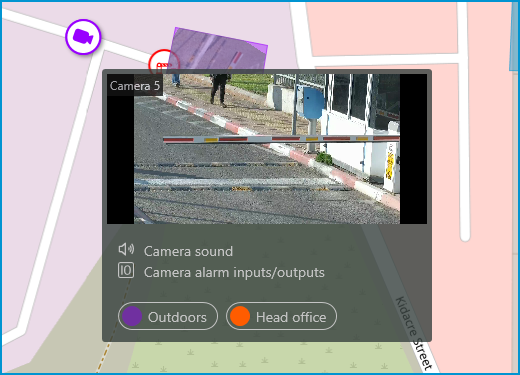
Hovering the cursor over the camera opens a preview window that contains video from the camera and a list of its attributes.

The same preview window opens when hovering the cursor over a camera located outside the cameras tree.
To select a camera manually, you can also find it by name or IP address using the search field above the camera's tree.
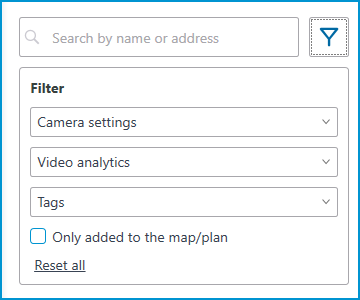
You can filter cameras by clicking the  icon and customizing the following filter options:
Camera settings
Filter by the following attributes: , , .
Video analytics
Tags
Note
The availability of filtering options depends on the settings of the cameras. Filtering applies immediately after selecting an item.
Warning
For placed sensors and relays, filtering only works for the Only added to the map/plan parameter.
If necessary, it is possible to collapse the filtering by clicking the filter button. When the filtering is applied and collapsed, the filter icon changes to  .
.
Representation of the camera on the map🔗
To customize the camera representation, click Camera settings in the camera context menu or at the bottom of the camera tree.
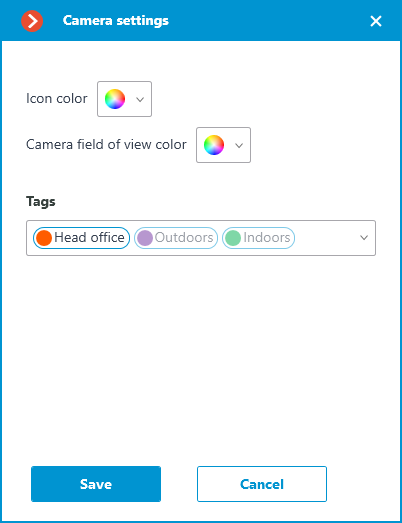
The following can be configured in the camera settings window:
Color of the camera icon
Color of the camera field of view
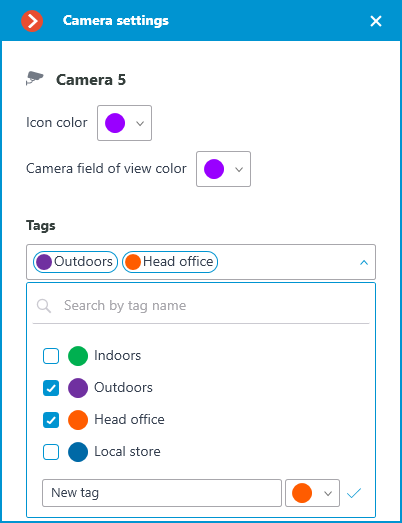
This settings window is available both for individual cameras and for entire groups. When opening the settings window for a group of cameras at once, the own settings of cameras are displayed in the combined view. If the camera settings are the same, the actual parameter values will be displayed for the group. Otherwise, merged information is displayed.
Placement of cameras on the map🔗
General🔗
To add a camera to the map, drag it from the camera tree to the needed point on the map.
The camera icon depends on the settings you set in the Cameras section. If PTZ functionality is enabled for a camera, it will be displayed on the map with the corresponding icon. Other cameras are displayed with the usual icon.
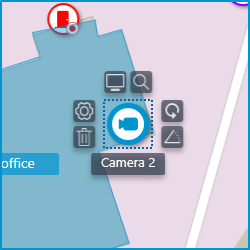
When a camera is selected on the map, the following buttons appear around it:
 : view video from the camera in full-screen mode.
- : edit camera settings.
- : remove the camera from the map.
 : rotate the camera.
- : set up the field of view.
 : jump to the camera position in the tree.
Note
Also, when a camera is selected, its name will be displayed. By default, it is hidden.
Camera field of view🔗
If necessary, a custom field of view can be created. To do this, click the button. After that, an editable rectangle will appear, which can be used to adjust the needed viewing angle. The shape of the field of view can be changed indefinitely: add and delete nodes, move them along the plan or the map.
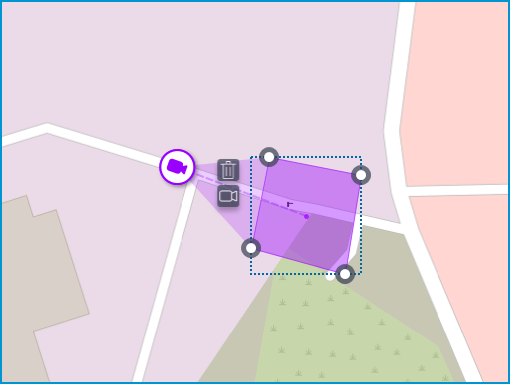
To delete a custom camera field of view, select it and click the button. If the video displaying has been set in the field of view, deleting the FOV deletes this setting as well.
Video inside the field of view🔗
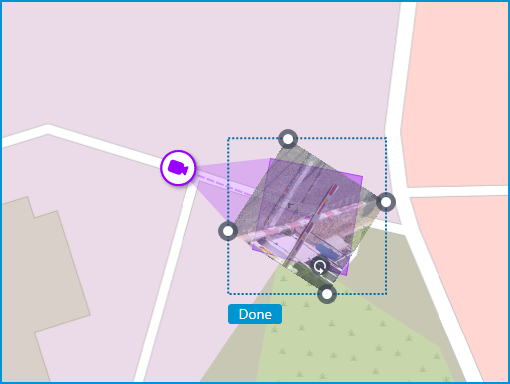
The field of view can display video from the camera. To set it up, click the  button. This will create an editable rectangle in which the live video from the selected camera will be embedded. By default, video appears as the size of the dotted outline of the field of view.
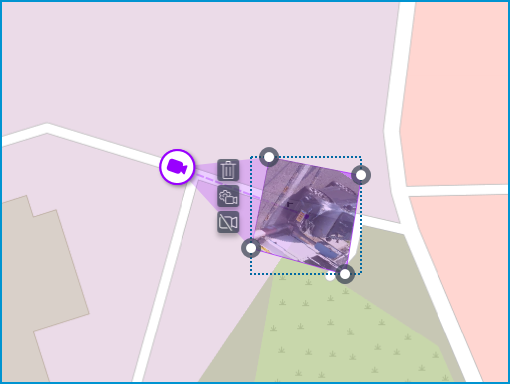
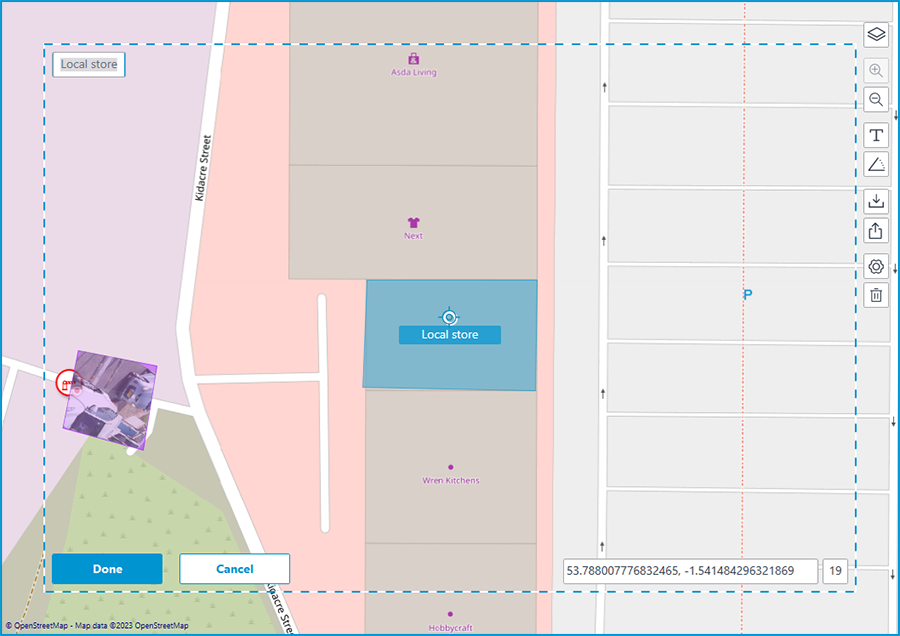
Adjust the shape and location of the displayed video so that the area visible in the frame matches its position on the map. Once ready, click the Done button.
To edit an already configured video displaying, click the  button. To reset the video displaying settings in the field of view, click the crossed-out camera button. Reconfiguration of the video displaying after resetting will be performed according to the current shape of the field of view.
When the field of view editing mode is switched off, the video will be cropped according to the shape of the field of view:

Placement of sensors and relays🔗
If the camera has alarm inputs/outputs enabled in the Cameras section, sensors and relays connected to it can be placed to the map.
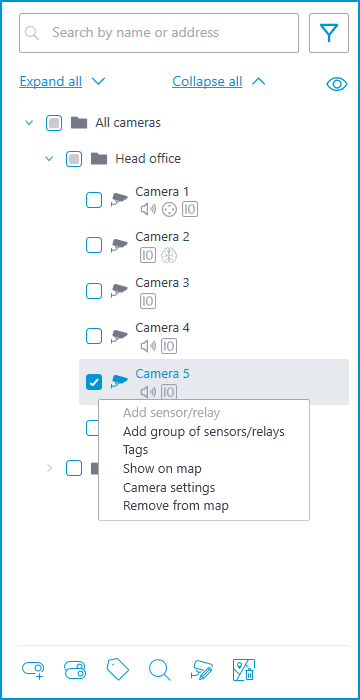
To place a sensor or a relay, select the Add sensor/relay item in the camera context menu or click the corresponding button in the bottom panel of the cameras tree.
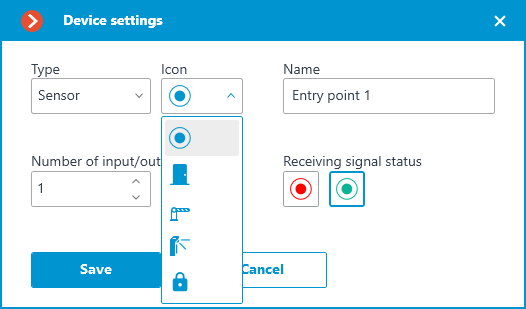
The following sensor parameters can be configured in the Device settings window:
Type
Sensor
Relay
Displayable icon
Default icon
Door
Barrier
Turnstile
Lock
Name
Number of input/output
Receiving signal status
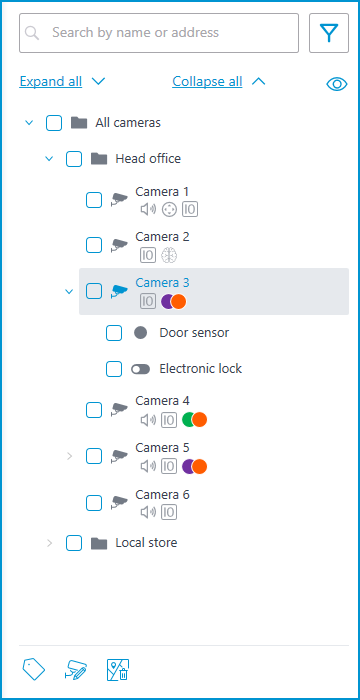
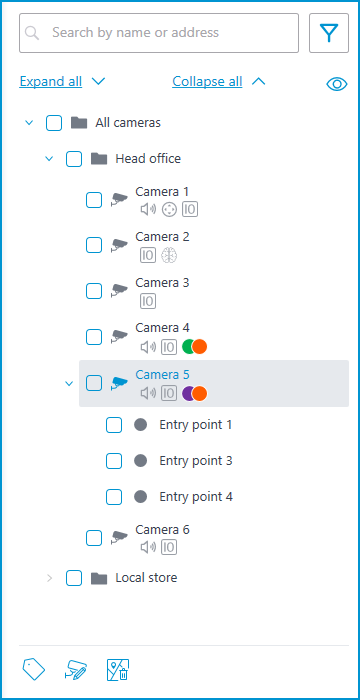
Sensors are displayed in the camera tree for those cameras to which they are connected. The device type and name of the sensor are also displayed there.
To create a sensor or relay group, click Add group of sensors/relays in the camera context menu or at the bottom of the camera tree.
In the Add group of devices window, all the same parameters can be selected that are available when setting up an individual sensor. But the difference is that in this case, several I/Os can be specified simultaneously.
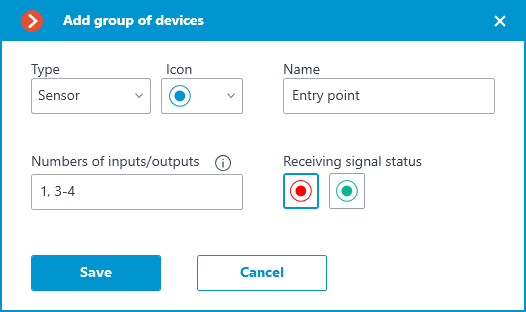
After clicking the Save button, all sensors/relays will be added to the associated camera. The device name will be generated from the sensor name and the input number.
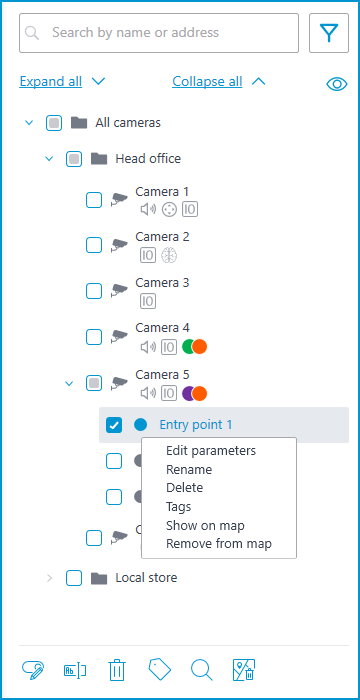
If the sensor is placed to the map, the following additional items appear in its context menu:
Show on map
Remove from map
The sensor will be displayed on the map with the icon that was selected when it was created. The device type will also be displayed. The color of the sensor depends on the specified state when there is a signal and, consequently, on the current signal status for this sensor.
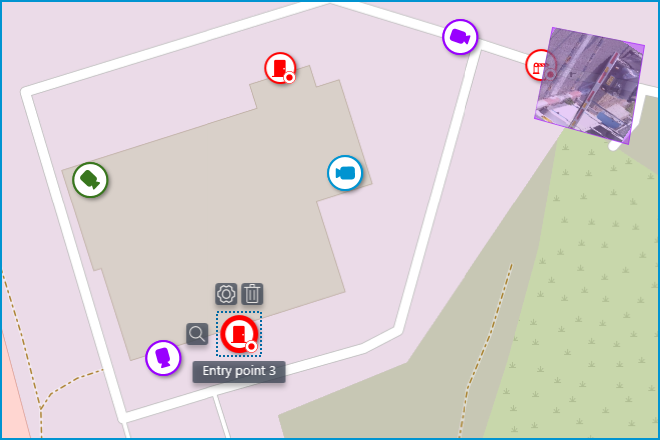
When the sensor is selected on the map, its name and the following buttons appear: Edit parameters, Remove from map, and Show in tree.
Grouping elements on the map🔗
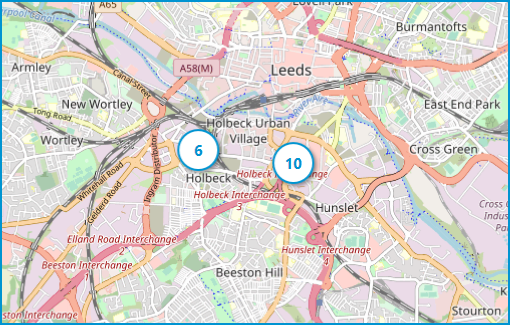
When the scale of the map is changing, cameras, sensors, relays, and sites on the map can be clustered into the group markers.
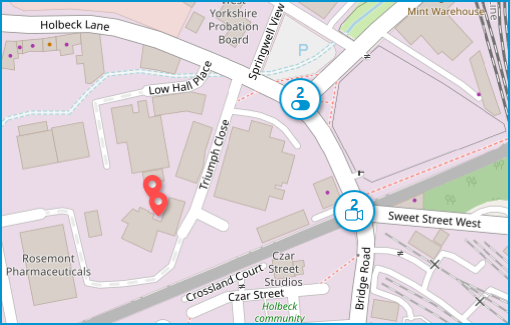
Elements of the same type located close to each other on the map are grouping into one marker with the number of grouped elements and their type: camera, sensor, relay, or site.
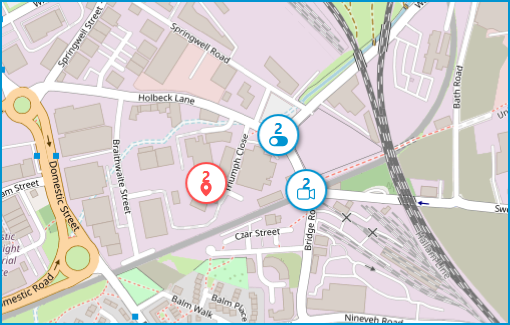
Elements of different types are grouping into one marker with the number of devices.
Note
If the number of grouped elements is more than 99, the number on the marker will be displayed as 99+.
Locations🔗
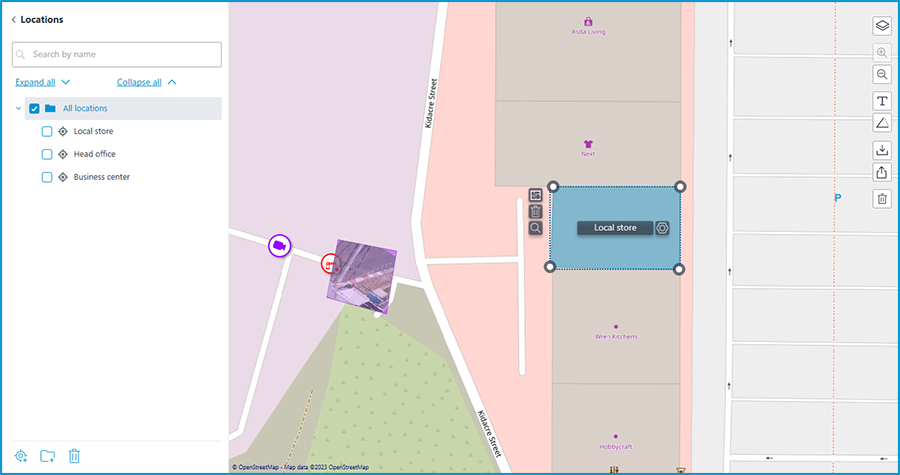
On this tab, preset locations can be created on the map, using which users can quickly navigate to the required parts of the map with a given map scale.
To create a location, click the Add location option in the context menu or at the bottom of the locations tree.
If necessary, locations can be grouped by folders.
Warning
Location, starting from Eocortex 4.1, is the lowest level element in the tree. When migrating settings from earlier versions, folders are used to keep the hierarchical structure. For an item with attachments, a folder with the same name is created at a higher level, in which the item itself and its attachments are placed in the same manner.
The following actions are available in the context menu when selecting an individual location or an entire folder:

It is possible to move between folders both individual locations and even entire folders.
To define a location, select an area on the map. The bottom part of the area displays the coordinates of the selected area center and the map scale.
If necessary, the coordinates can be set manually. The following types of coordinates are allowed:
53.788007776832465, -1.541484296321869
S53.788007776832465, W-1.541484296321869
53.788007776832465S, -1.541484296321869W
A comma or semicolon can be used as the separator, and the decimal separator can be specified as either a comma or a dot.
The name of the location can be set by double-clicking both In the tree and on the box in the upper left corner of the site on the map.
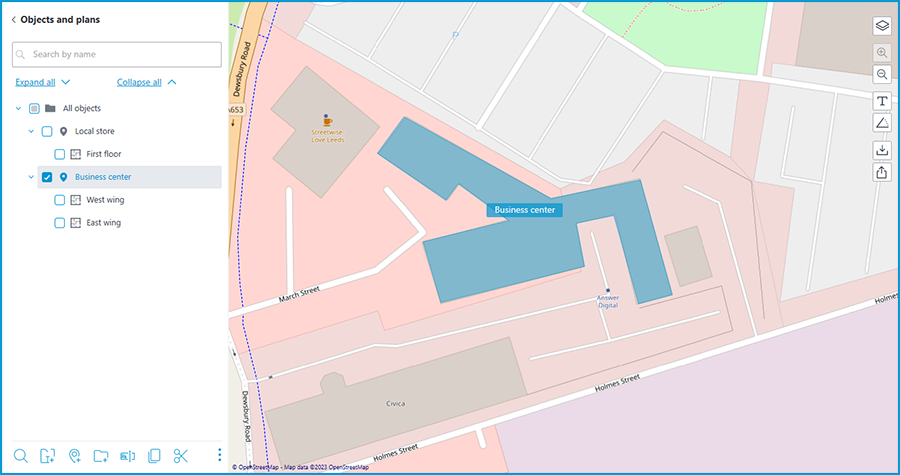
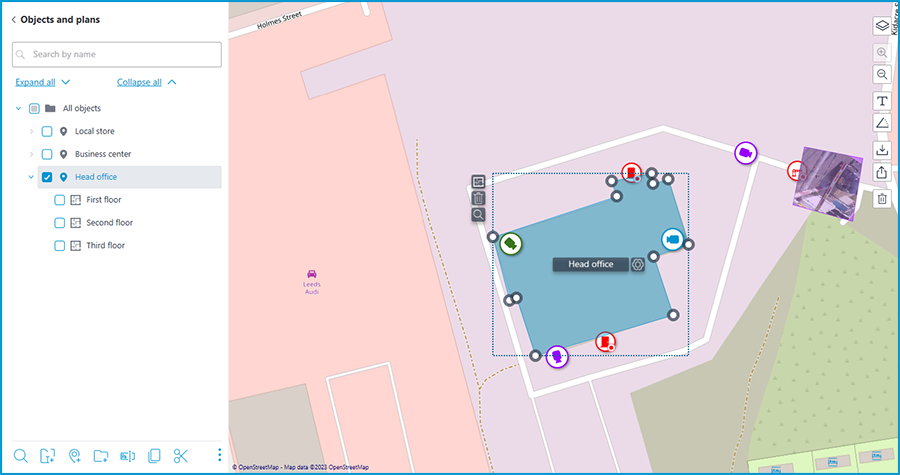
Objects and plans🔗
You can create Sites on this tab. Site is an area on the map, such as a building or facility area, for which you should set up a more detailed plan.
The site can have several plans attached. This feature is useful if the building has several floors.
In the context menu, when you select a site or an entire folder, the following actions are available:
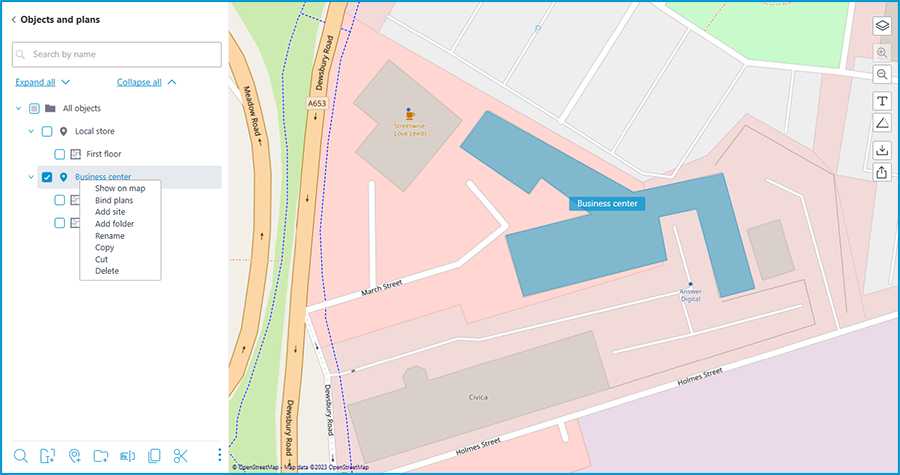
The same actions can be performed using the buttons in the bottom panel of the sites tree.
It is possible to move between folders both sites and entire folders.
To create a site, click the Add site option in the context menu or at the bottom of the sites tree.
When creating a new site, a rectangular area appears on the map, which can be adjusted by dragging the nodes. You can add a new node by left-clicking on the site's boundary, and it is possible to remove an unnecessary node by right-clicking on it.
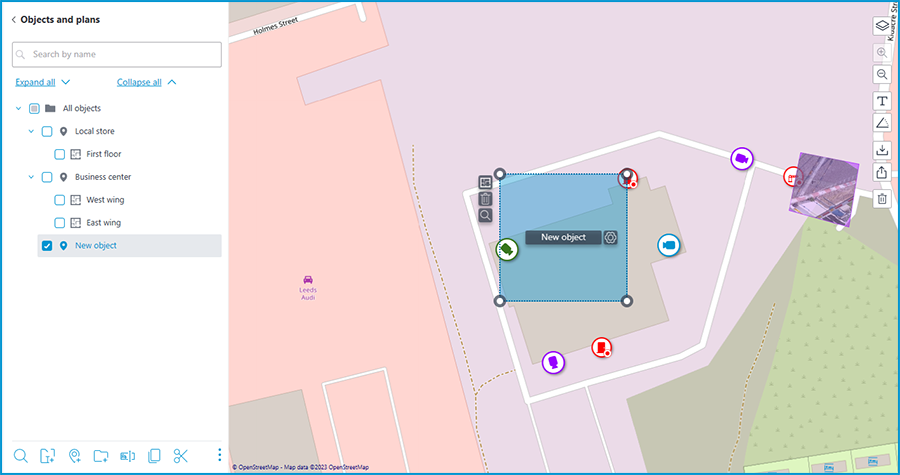
You can name the site either by double-clicking on the site in the tree, or by clicking on the button located in the interactive area of the site next to the current name.
Clicking this button makes the name field interactive. In addition to changing its value, it is also possible to extend and reduce its size depending on the length of the name.
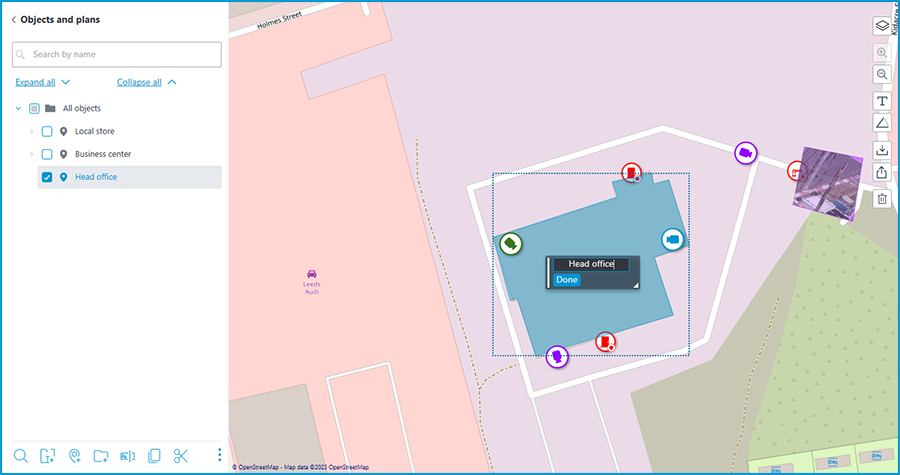
If the site name is too long to display, you can resize the name window by dragging the bottom right corner. Otherwise, the part of the name that does not fit into the rectangle will be replaced by an ellipsis when displayed.
If necessary, the name can be moved to the place where it should be displayed on the site. To do this, drag the rectangle by the left edge to the desired position and click the Done button. By default, the sites name is displayed in the middle of the site.
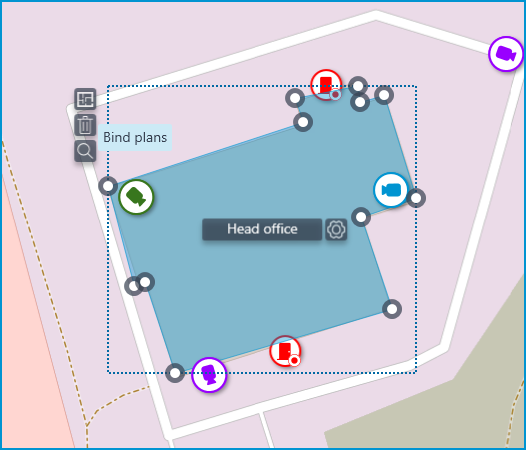
Plans can be attached to the site. Select the site in the tree and click the Bind plans option in the context menu or at the bottom of the site tree. Also, the same button is available next to the site area on the map.
The opened window displays all the plans available in the Plans section. To switch to the plans, click the Switch to plans button.
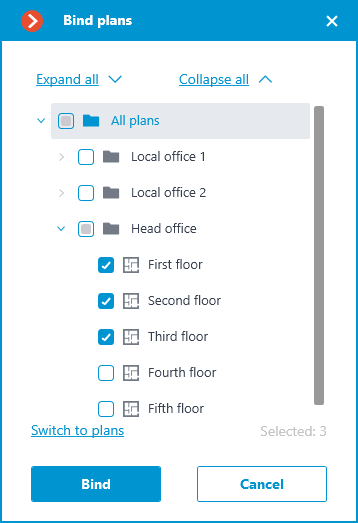
Select the plans to be bound and click Bind. After that, all bound plans will be displayed in the tree for the relevant site.
You can delete selected site by clicking the option in the context menu or at the bottom of the site tree. Also, the same button is available next to the site area on the map.