Configuring the Crowd Monitoring module🔗
Warning
Before using the module, it is required to enable and set up the perspective.
To use the module, enable and configure it.
Launch the Eocortex Configurator, go to the  Cameras tab, select a camera in the list located on the left side of the page, and set up the motion detector on the Motion detector tab on the right side of the page.
Then switch to the Analytics tab and enable the module using the  toggle.
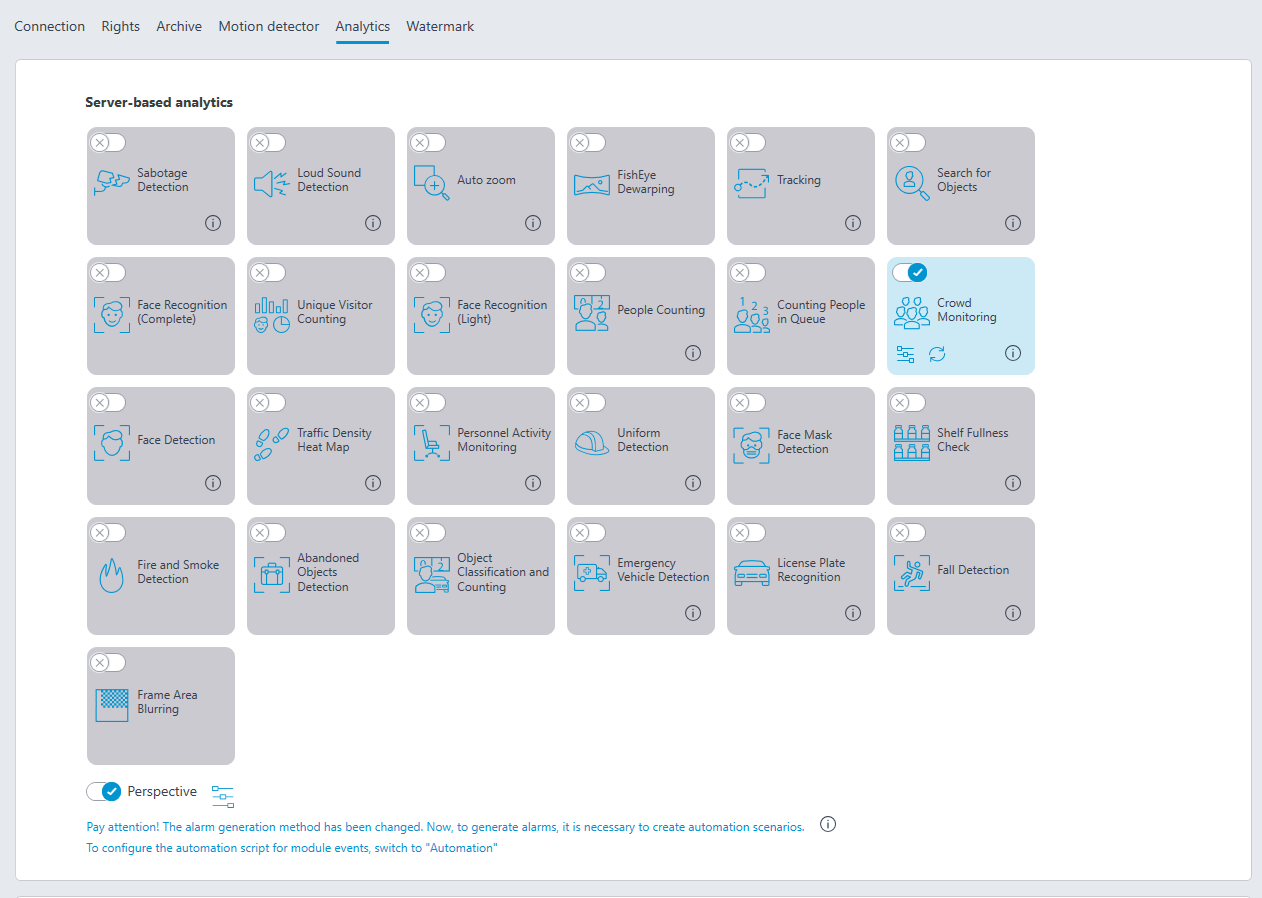
Clicking the  button opens the module setup window.
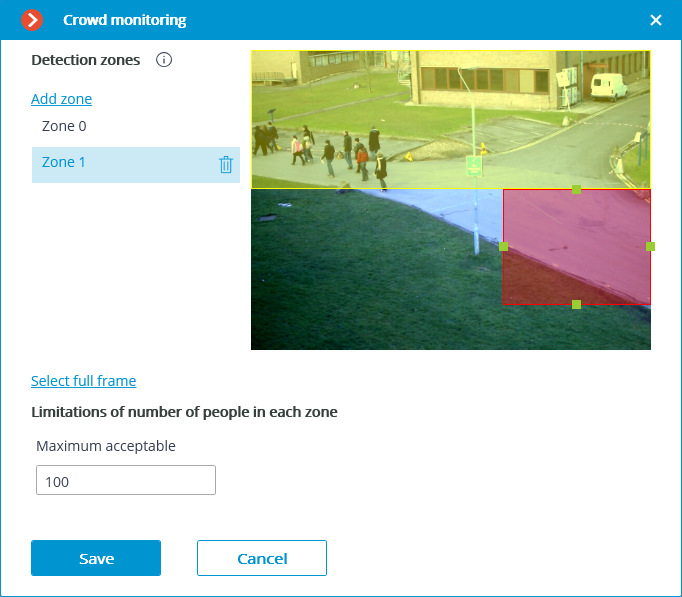
In the opened window, set and adjust up to six detection zones.
Detection area is the frame area filled with semitransparent fill in the setup window. The zone being edited is highlighted with a semitransparent red fill. The detection zone, which is not selected and not edited, is highlighted with a semitransparent yellow fill.
The green squares located on the sides of the edited zone are used to resize the zone: click the mouse button on the green square and move the side holding the button. To move a zone in the frame, click on it with the mouse button and drag it to the required area.
The Select full frame button can be used to fill the entire frame area.
To delete a zone, click on the  button located opposite the zone name in the list of detection zones.
Warning
To avoid counting errors at the zone borders, it is recommended, wherever practical, to use the smallest possible number of zones.
It makes sense to use several zones in the following situations:
If there are an automobile road and a pedestrian zone in the frame. In this case, it is required to limit the controlled area to the pedestrian zone.
If there is a rest area in the frame that is crossed by the pedestrian way with heavy foot traffic. In case it is necessary to prevent people from flocking in the recreational area, the controlled area shall be limited to the rest area.
It is needed to indicate the limit of the number of people for each zone: Maximum acceptable level.
Warning
The module will start working only when the settings are applied.