Electronic signature🔗
The electronic signature permits to confirm the authenticity of the exported file, as well as its ownership.
Note
The availability of an electronic signature is one of the requirements of the General Data Protection Regulation (GDPR).
Preparation of electronic signature🔗
The exported files are electronically signed using X509 certificates. Only the certificates that use the RSA asymmetric algorithm are supported.
The signatory’s root certificate can be either a self-signed root certificate or a certificate purchased from a certification authority.
The end certificates must be generated on the basis of the signatory’s main certificate, one for each user. These certificates must be installed on a computer. Their installation is carried out either by means of the operating system or using specialized software.
The signatory’s root certificate must be included in the trusted list of the relying party.
Certificate generation🔗
File signing certificates can be generated using the free OpenSSL utility.
It is necessary to select the current version of the OpenSSL distribution kit that matches the bitness of the operating system used.
The steps below are a sequence of commands that should be executed on the Command line.
Add the OpenSSL folder to the PATH environment variable.
For the Win64 version of OpenSSL use:
path=%path%C:\Program Files\OpenSSL-Win64\bin\;
Create a directory that will contain the generated certificates. On the command line, navigate to the created directory.
Create the root certificate private key file:
openssl genrsa -out rootCertKeyName.key 2048
Create the root certificate:
openssl req -x509 -new -key rootCertKeyName.key -days 10000 -out rootCertName.crt
Note
The command will prompt for the certificate details.
Create the service private key:
openssl genrsa -out serviceCertKeyName.key 2048
Create the Certificate Signing Request (CSR):
openssl req -new -key serviceCertKeyName.key -out serviceCertRequestName.csr
Note
The command will prompt for the certificate details.
An important point is to fill in information about the Common Name (e.g. server FQDN or YOUR name). Common Name is the string that will be displayed in the certificate signer information. If this field is left blank, the result will be an empty string.
Create the service certificate by signing the CSR with the root certificate:
openssl x509 -req -in serviceCertRequestName.csr -CA rootCertName.crt -CAkey rootCertKeyName.key -CAcreateserial -out serviceCertName.crt -days 5000
Export the certificate and private key into a single file:
openssl pkcs12 -export -out serviceCertFileName.pfx -inkey serviceCertKeyName.key -in serviceCertName.crt -certfile rootCertName.crt
Note
Steps 5 — 8 should be repeated for each user who needs to generate a certificate. To do this, you need to replace the serviceCertName string in the commands with the username written in Latin letters without spaces.
The corresponding .pfx files must be given to users and imported into the operating system at their workstations.
The root certificate rootCertName.crt must be imported into the operating system at all workstations where it is planned to verify the electronic signature.
Importing certificates into the system🔗
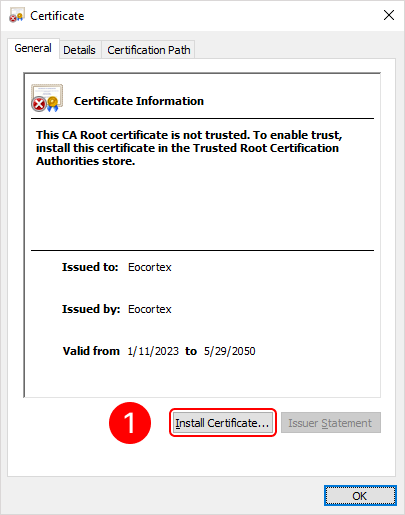
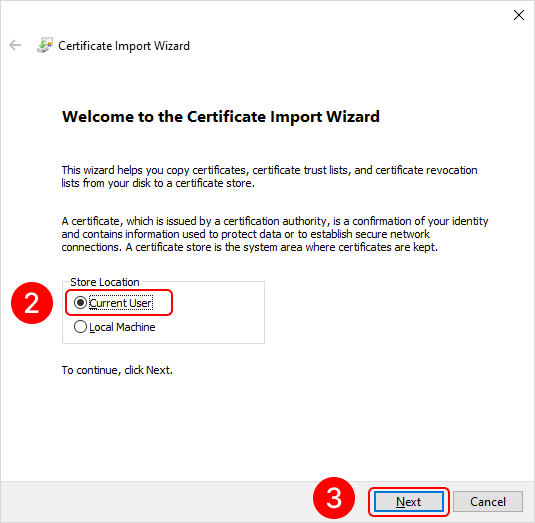
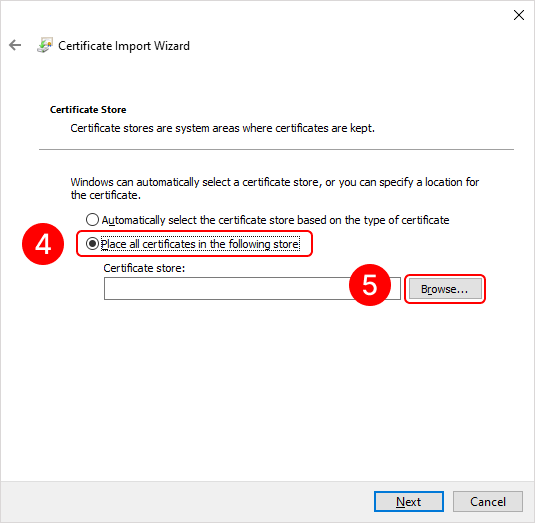
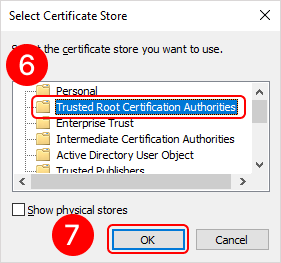
Root certificate (Relying Party)🔗
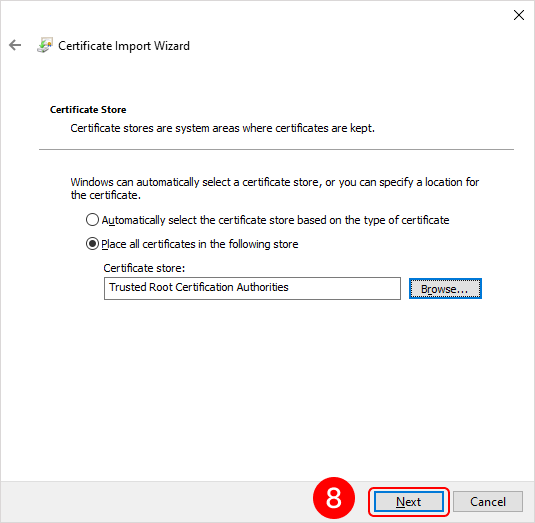
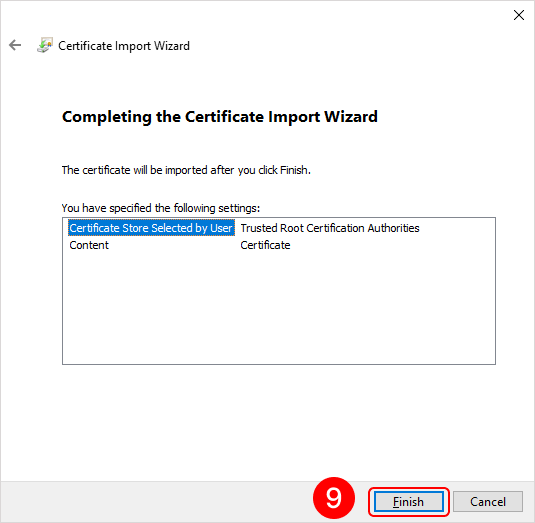
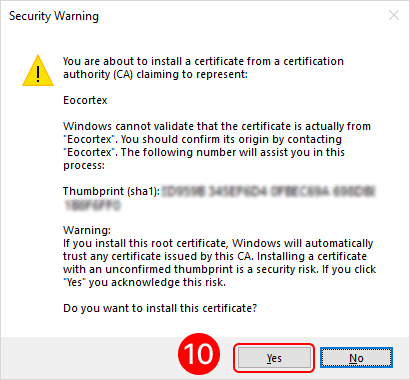
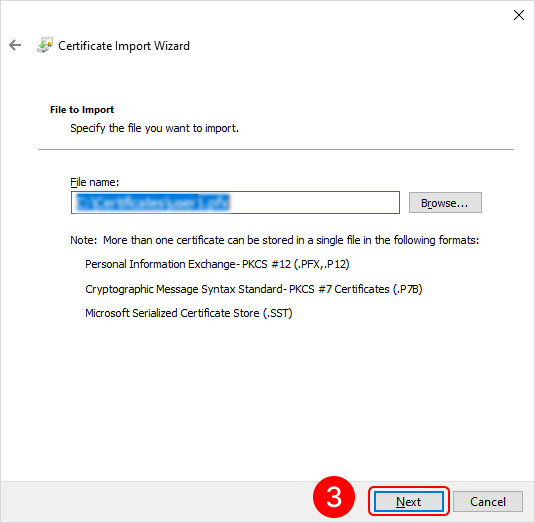
To add a root certificate, double-click on the rootCertName.crt file. This will open the Add Certificate Wizard window. Next, follow the steps indicated by the numbers in the images below:
User certificate (Signer)🔗
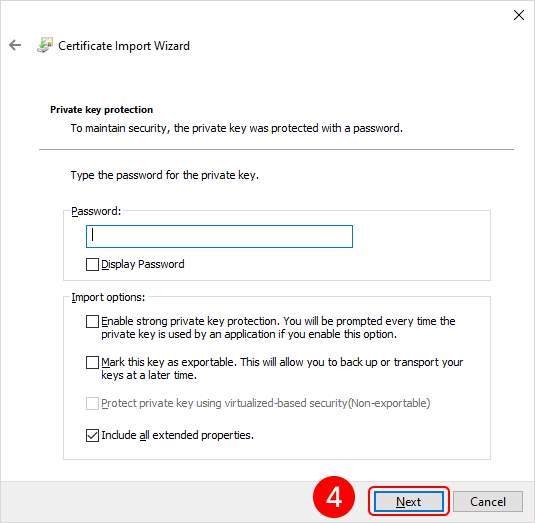
To add a personal user certificate that will be used for signing files, double-click on the user.pfx file. This will open the Add Certificate Wizard window. Next, you need to follow the steps in the images below:


Eocortex Client application setup🔗
Open the Eocortex Client application under the account that will be used to export the signed files.
Go to the control panel clicking on the button
 located in the upper left corner of the window.
Select the item
 Settings in the menu, then select the subitem
  Workstation settings.
Go to the Export tab.
Enable the Electronic signature option using the switch
 .
.Press the button Select a certificate.
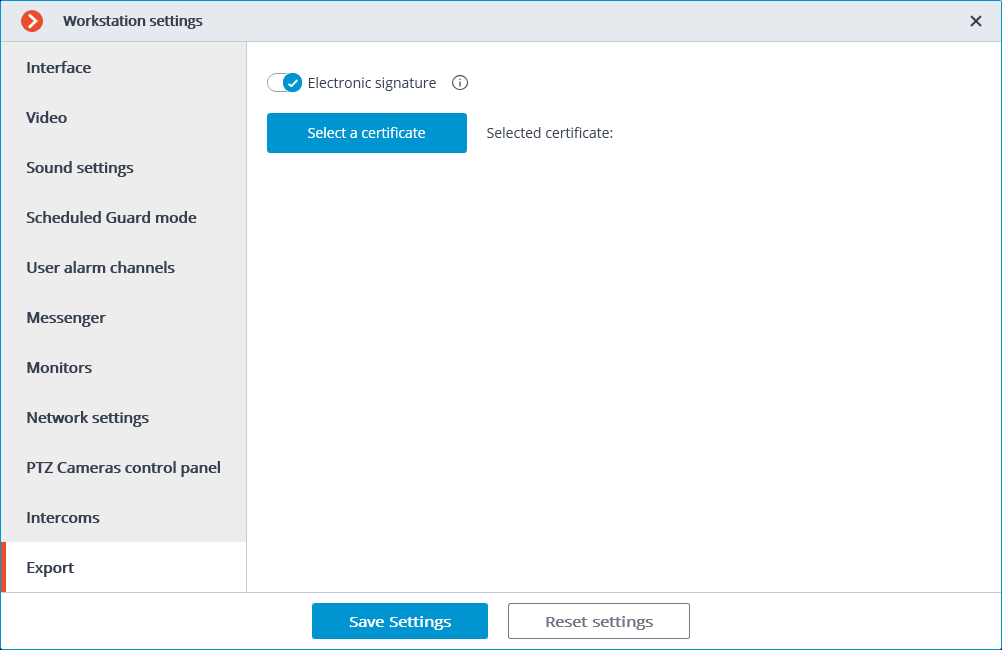
In the opened window, select the certificate that the given user will use for signing the files.
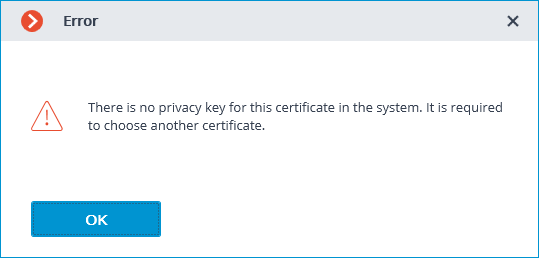
Warning
It is important that the imported certificate has a private key. If there is no such key, or the certificate uses an asymmetric algorithm other than RSA, then when you will receive the following error message when trying to select such a certificate:
Signing a saved frame🔗
In order to sign a saved frame, click on the icon  in the active cell or in the archive cell, or open the context menu and select the Save frame item.
Subsequently, open the item Frame with digital signature in the window that has appeared.
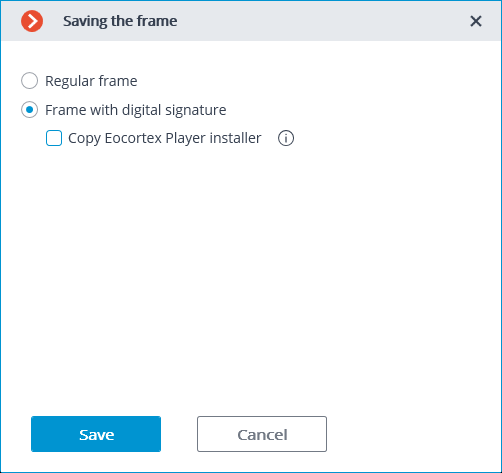
Pressing the Save button opens the dialog screen with the option of selecting the storage location for the frame to be saved.
Warning
If an electronic signature has not been set, the dialog screen with the option of selecting the storage location for the frame to be saved will open immediately instead of the Save frame window.
Signing video clips to be exported🔗
Enable the option Sign the file in the Archive export window in order to sign the archive to be exported.
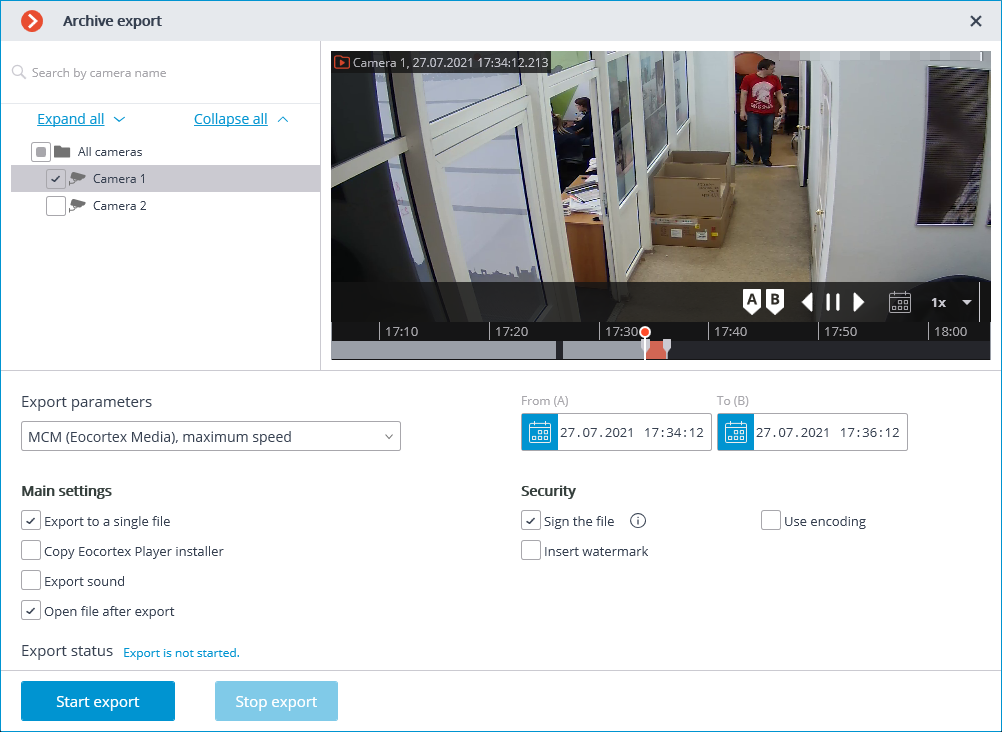
Warning
If an electronic signature has not been set, the Sign the file item will not be available.
Note
The electronic signature file is saving alongside the exported file. The signature file name consists of the exported file name and the msig extension.
Verification🔗
The Eocortex Player application is used to check the signed files. To check the electronic signature of a file, open the file with the msig extension, or open it with the Check electronic signature button in the window of the application.

Note
Eocortex Player will try to find and check the exported file automatically. If an error occurs during the process, you will be prompted to select the file manually.
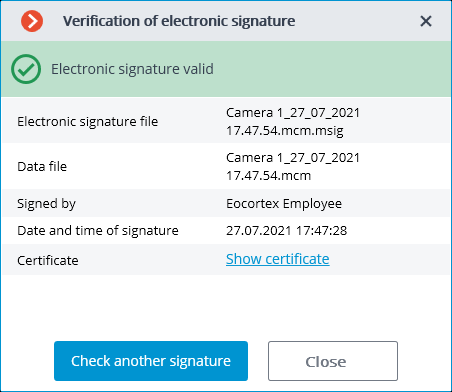
The following window will appear in case of a successful verification:
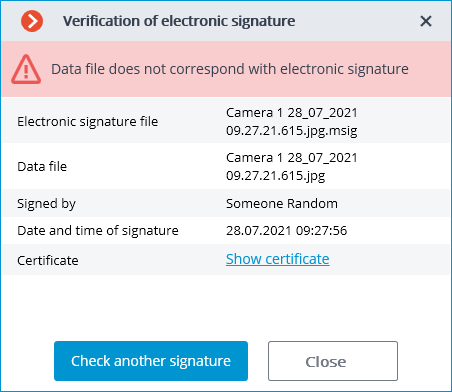
If the file has been modified, the following window will appear:
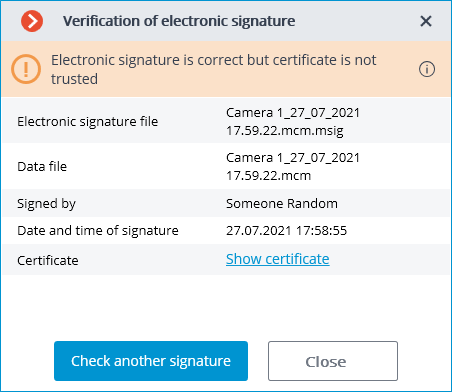
If the certificate is not a trusted one but the file has not been modified, the following window is displayed:
Additionally, the status of the electronic signature can be viewed in MCM format in the cells of the Eocortex Player. To do this, it is required to move the cursor over the status icon. The verification takes place automatically if the corresponding signature file was found.
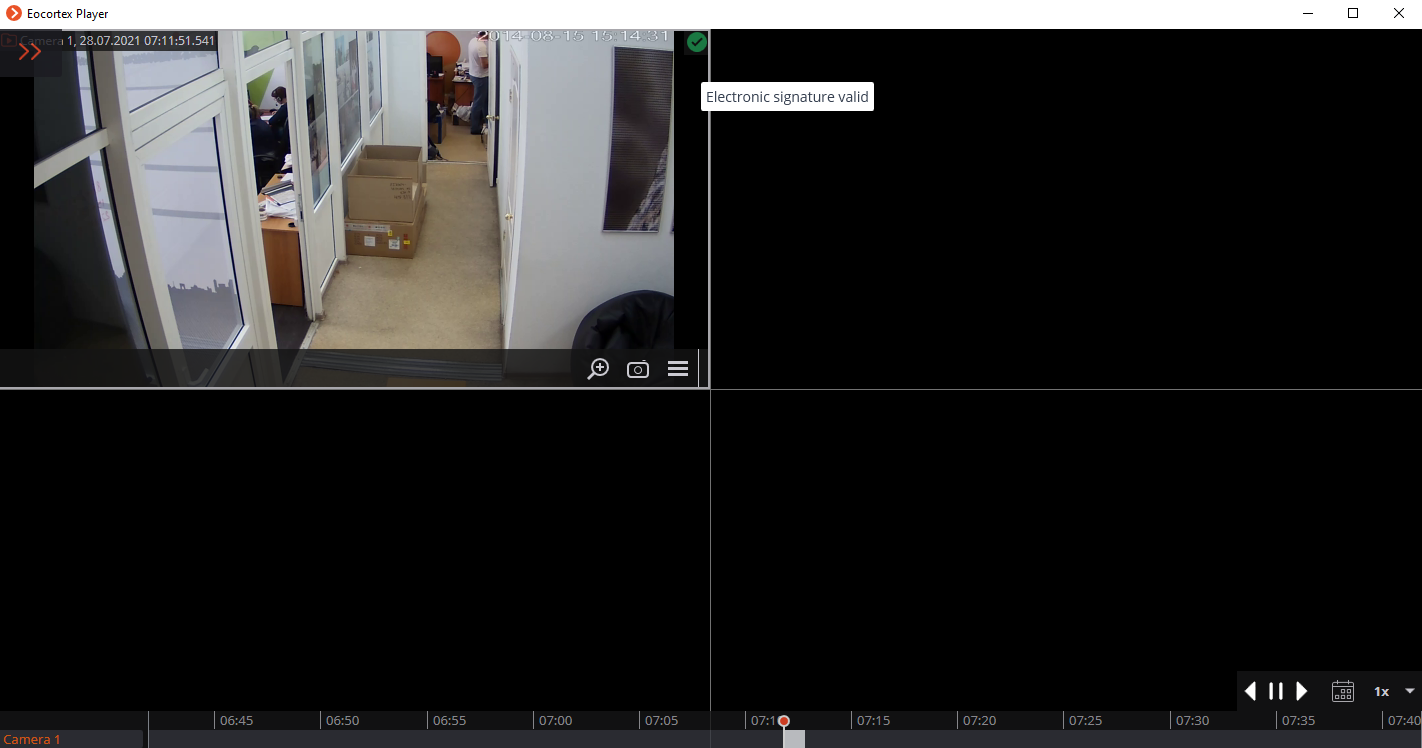
Click on the status icon to view the details.