Configuring the People Counting module🔗
To use the module, enable and set up the software motion detector, then enable and set up the module itself.
Launch the Eocortex Configurator, go to the  Cameras tab, select a camera in the list located on the left side of the page, and set up the motion detector on the Motion detector tab on the right side of the page.
Then switch to the Analytics tab and enable the module using the  toggle.
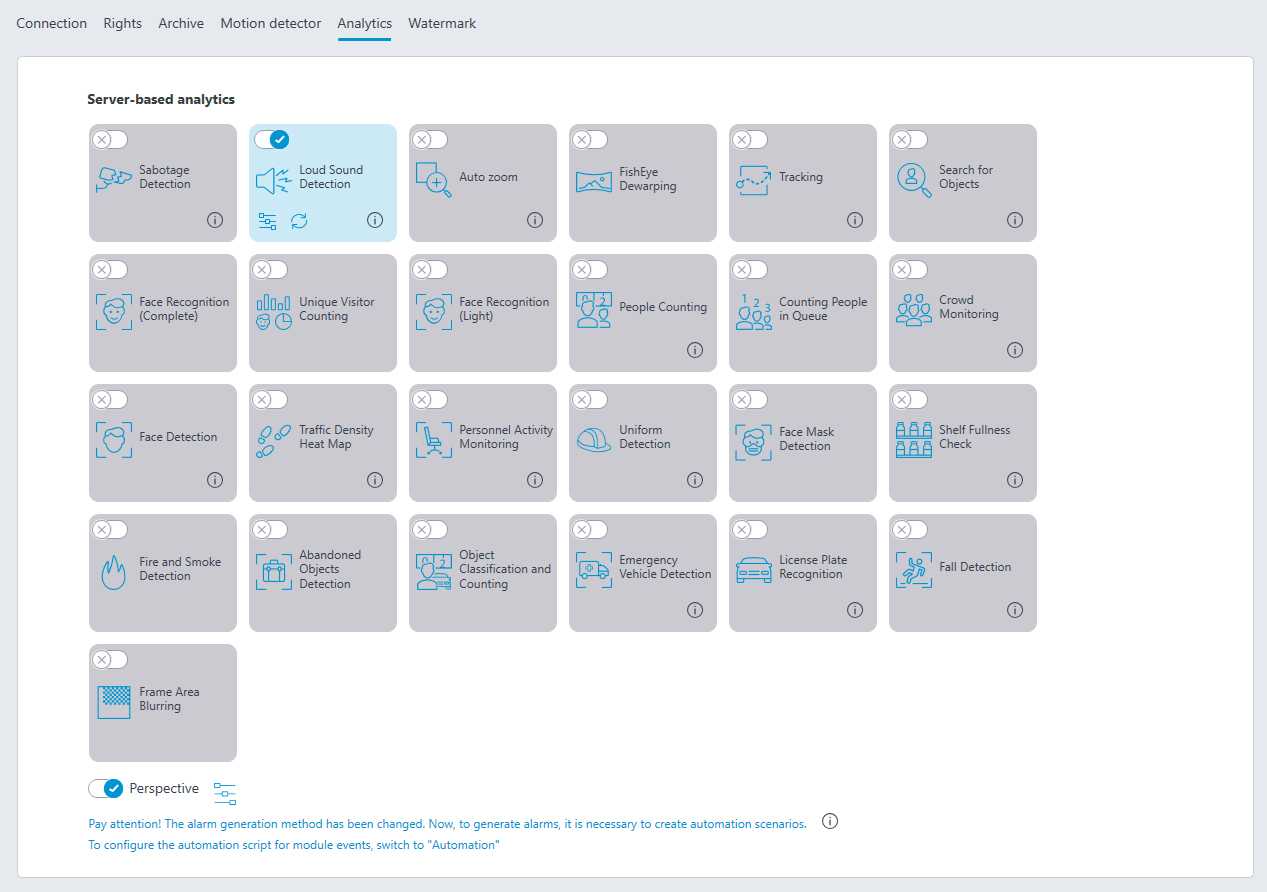
Clicking the  button opens the module setup window.
The module settings are described below.
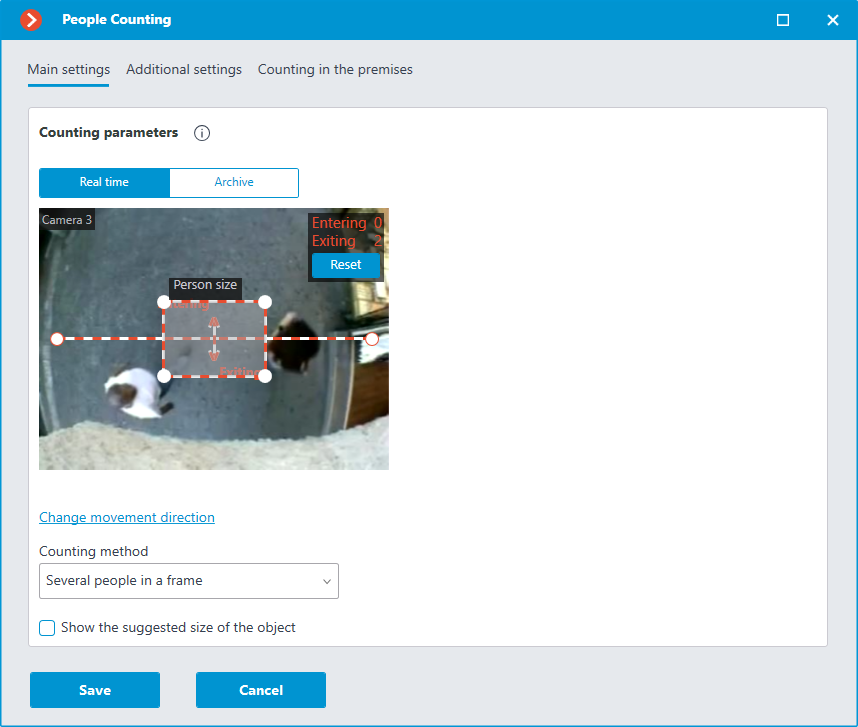
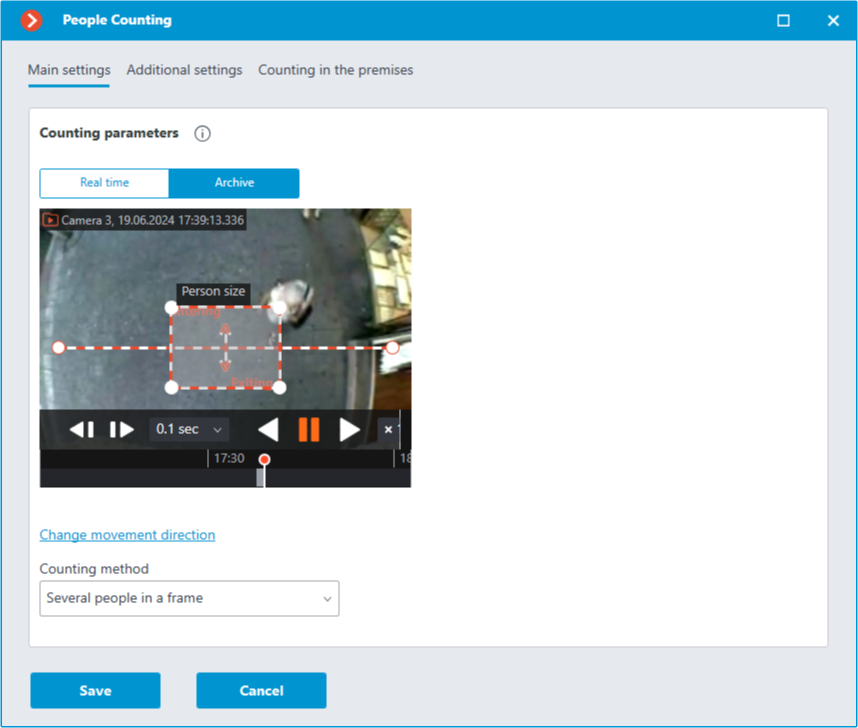
The Real time and Archive buttons permit to select the source of video for the preview window.
It is required to specify the crossline in the preview window by dragging the ends of the line with the mouse. This line must be crossed by all the entering and exiting visitors in order for the counting to be performed.
Warning
It is not recommended to place the crossline in the immediate proximity of doors or other moving objects.
Additionally, in the preview window, it is required to set up the average object size by dragging the corners of the rectangular frame with the mouse. The dimensions of the frame must enclose the counted object of the average size in the confluence with the line. This dimension is taken into account when counting: if the line is crossed by the object significantly bigger than the frame dimensions, it will be counted as several objects (for example, if the object is three times larger than the frame, it will be counted as three separate objects).
Note
It is recommended to use the video from the archive for the convenience of setting up the average size.
Note
The rectangle of setting the average size may be located in any part of the frame, i.e. it is not required to place it on the crossline.
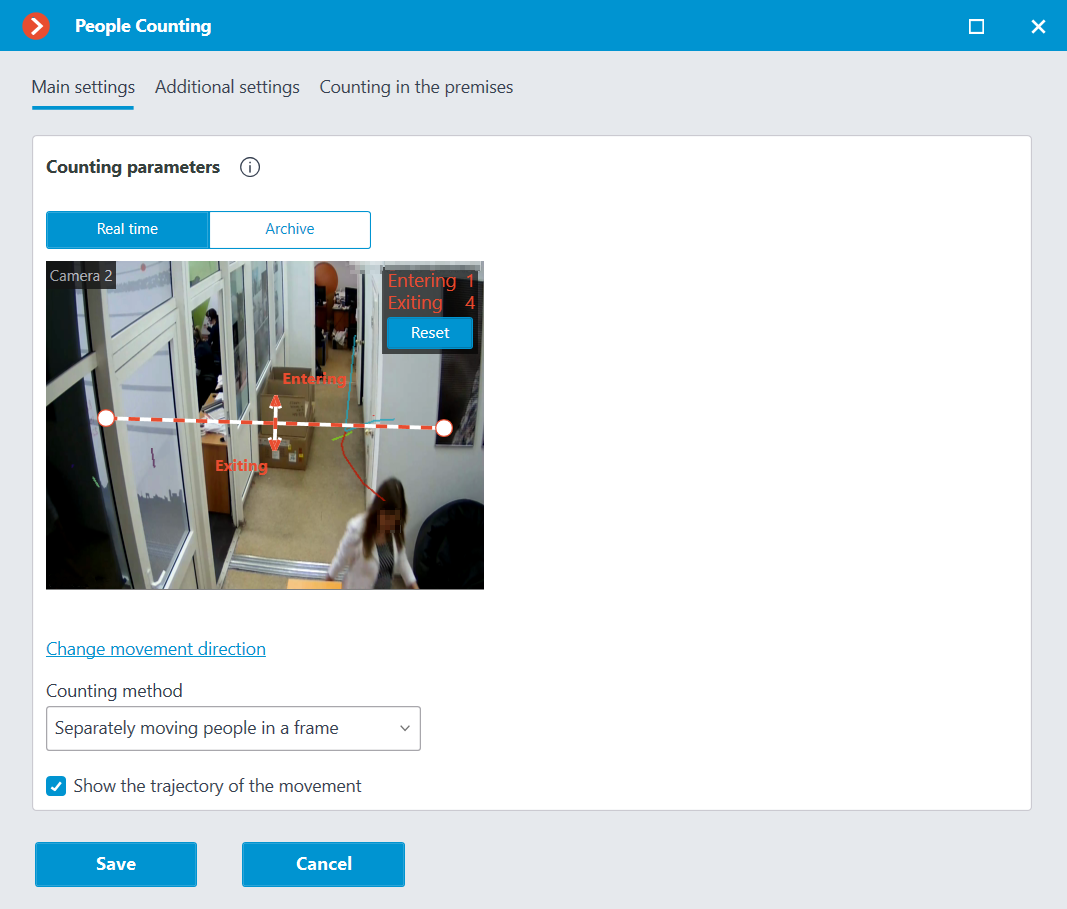
The Change movement direction link permits to change the direction in which the entering people will be counted. To designate the direction of entrance and exit, the ends of the arrows perpendicular to the counting line are provided with the corresponding legends.
The Counting method dropdown list allows to select the way of counting in accordance with the conditions of the module’s operation. The following options are available:
Several people in a frame: ensures the counting of both separately moving people and groups of people. This method is recommended to be used in the majority of cases when the conditions of the module operation are met.
Separately moving people in a frame: this method is recommended to be used only when it is not possible to provide all the conditions of the module’s operation (for example, if the camera is installed in a low position, or when it is not installed vertically) and more than one moving person rarely enters the field of view of the camera.
When displaying in the real-time video viewing window, the following settings are available, depending on the specified operating conditions:
Settings for conditions of Several people in a frame:
Show the suggested size of the object: the preview cell displays the size of the object, automatically calculated by the calculation algorithm.
Settings for conditions of Separately moving people in a frame:
Show the trajectory of the movement: the preview cell displays the trajectories of the objects being tracked.
The following settings are available on the Additional settings tab:
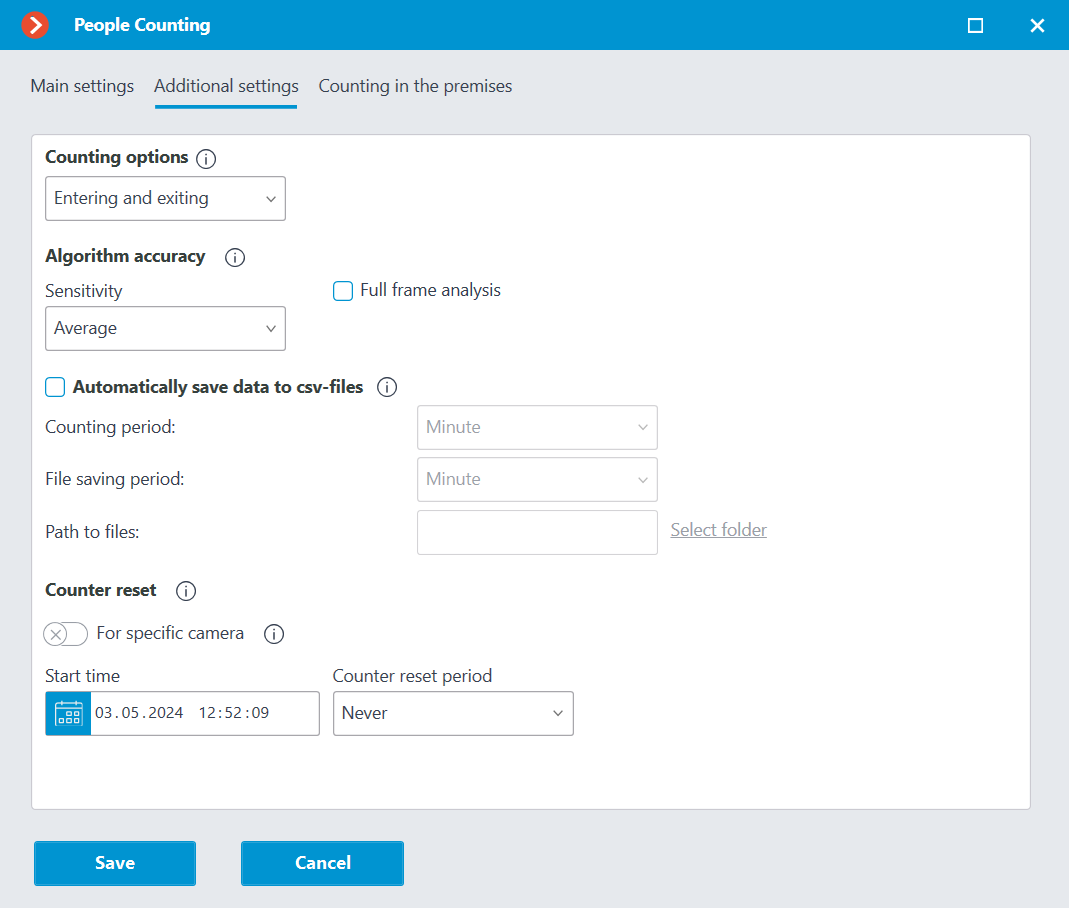
Counting options is used to select the value that will be calculated, stored in the archive, and displayed in the client application.
Sensitivity: high sensitivity increases the chances of detecting objects but the probability of false triggering also increases; low sensitivity reduces the instances of false triggering, but the counting accuracy may suffer.
Full frame analysis: activation of this option allows to increase the counting accuracy at the cost of the increased processor load.
Automatically save data to csv-files: enables automatic data saving to disc.
Counting period: sets the interval for which the counter data of one report line are summed up.
File saving period: determines the interval of the creation and saving of the report.
Path to files: allows to set the folder on the server where the report files will be stored.
Warning
The folder on the server to which the camera being set up is bound is specified for automatic saving.
Warning
The Select folder button may be used only when the Eocortex Configurator application is launched on the server to which the camera is bound.
Note
The CSV filename format is as follows: Counters_CameraName_DDMMYYYY# hhmm.csv. For example, for the Hour period of autosaving for Camera 1 camera the following files will be saved:
Counters_Camera 3_02022017#10.csv
Counters_Camera 3_02022017#11.csv
Counters_Camera 3_02022017#12.csv
The example of the CSV file contents:
time;in;out;inside;
02/02/2017 12:00:00;6;4;2;
02/02/2017 12:01:00;6;11;-5;
02/02/2017 12:02:00;10;6;4;
where time is the date/time of the beginning of the single counting interval; in / out / inside is the quantity of the people who, correspondingly, entered, exited and remain inside for the given period of time.
Counter reset: determines the reset to zero parameters of the counters in the Eocortex Client application.
Start time: sets the date and time the reset intervals will be counted from.
Reset period: sets the counter reset interval.
The switch For specific camera sets the counter reset settings for an individual camera or for all cameras.
Note
If this switch is off, the counter reset settings will be applied to all cameras whose switches are off as well.
When the switch is on, the counter reset settings are set for an individual camera and do not change the counter reset settings for other cameras.
If the switch for an individual camera is off and the changes are made, the selected settings will be applied to all other cameras with the switch off upon saving the settings.
When the switch mode is changed, the following settings are made automatically:
When switching to general settings: general settings
When switching to unique settings: the most recent (saved) unique settings.
By default, the switch is off.
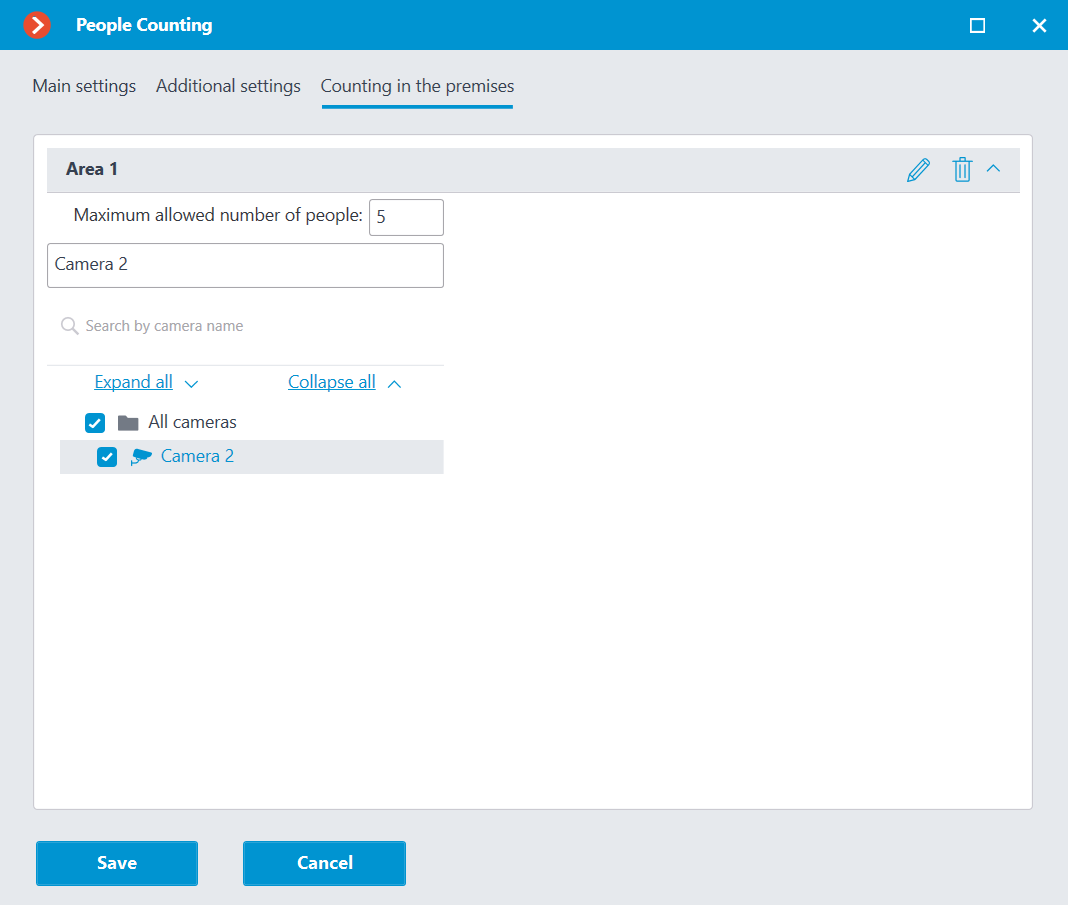
On the Counting in the premises tab, it is possible to set the zones that will be used for counting visitors in the premises.

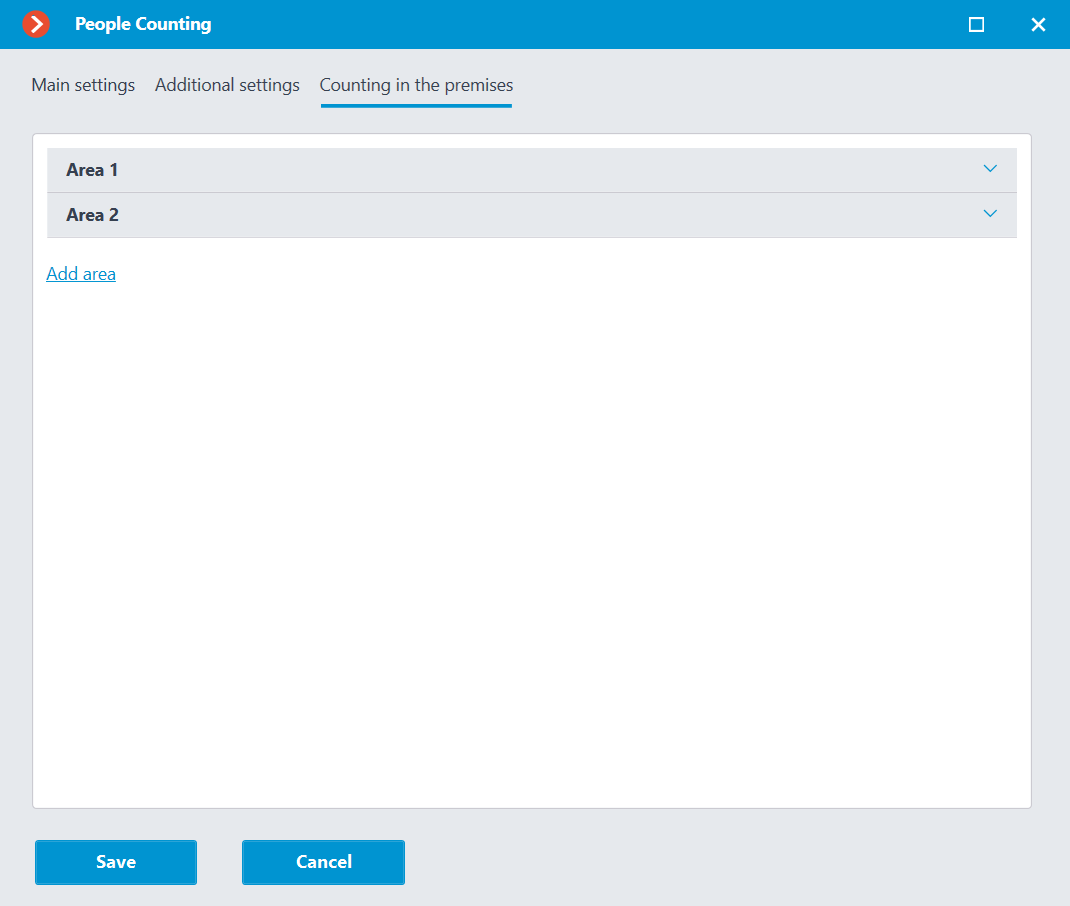
In order to set the maximum allowable quantity of visitors and to include the cameras into the zone, it is required to open the settings of the corresponding zone.
Warning
The module will start working only when the settings are applied.
Note
Within 10 to 15 seconds after the application of the settings, the module will be in the process of “learning”; during this time the counting results will not be accurate.
Since during “learning” the registering of the permanent background is performed, it is recommended to use this setting when there is a minimal number of moving and foreign objects in the frame in order to ensure the more accurate counting.