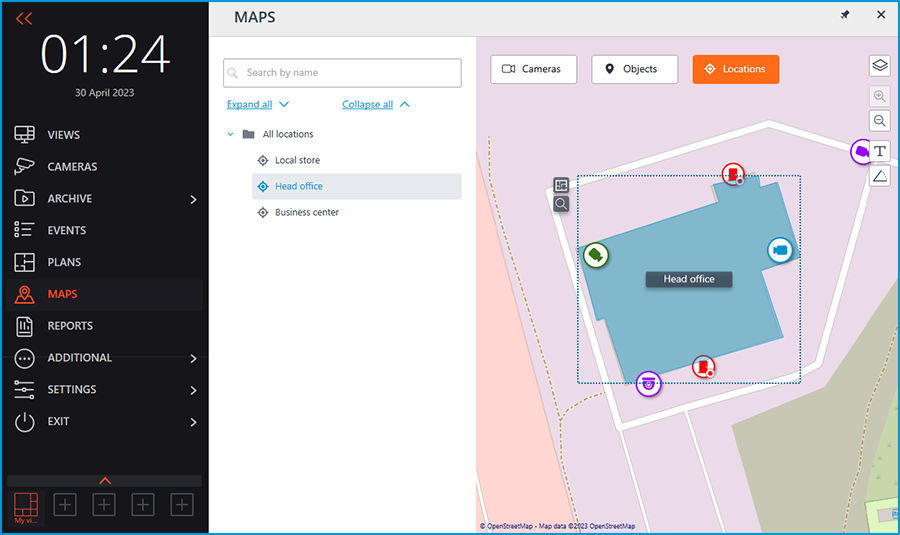
Interactive Maps🔗
Note
This feature is available only for Enterprise and ULTRA licenses.
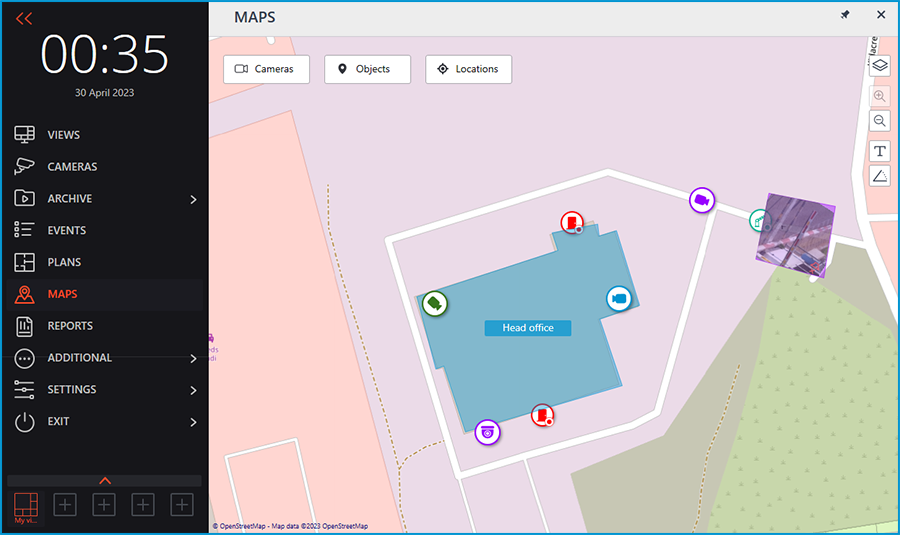
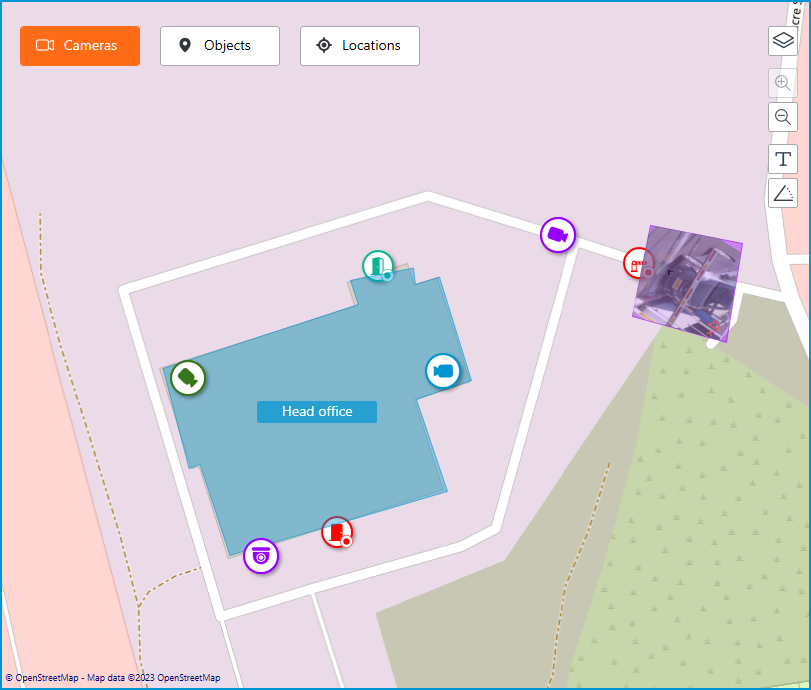
Eocortex allows placing and interacting with cameras, sensors, and relays on the geographic maps provided by the following map services: Google Maps and OpenStreetMap.
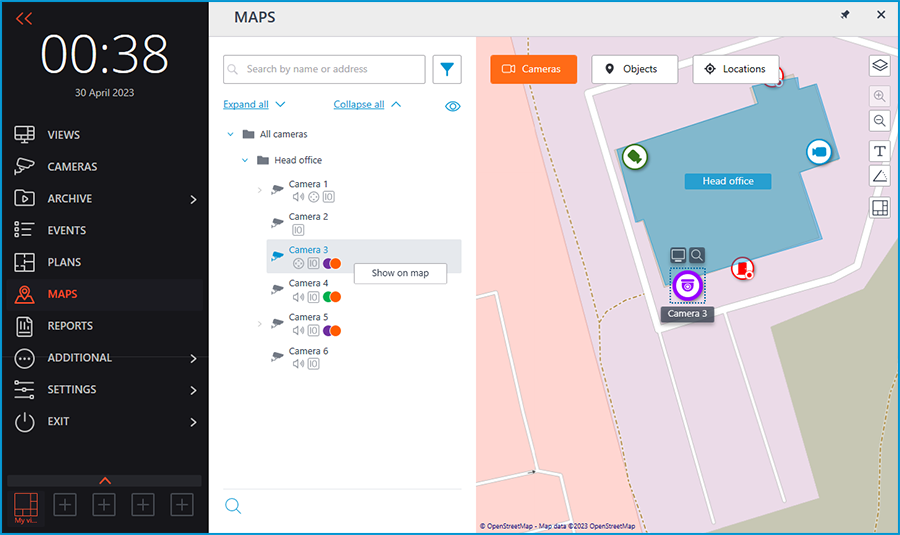
To get access to the Maps section, select the  Maps item in the main menu.
A bar with the following buttons is available on the right side of the map:
 Change layer: Changes the current map layer.
 Zoom in: Scales the map up.
 Zoom out: Scales the map down.
Note
The scale can also be changed with the mouse wheel.
 Show camera names: Hides or displays the names of all cameras on the map.
 Show fields of view: Hides or displays the field of view of all cameras on the map. If no fields of view are configured, this button will not be displayed on the panel.
 Open in the optimal grid: Creates a view from the cameras selected on the map. If no cameras are selected, this button is not in the panel.
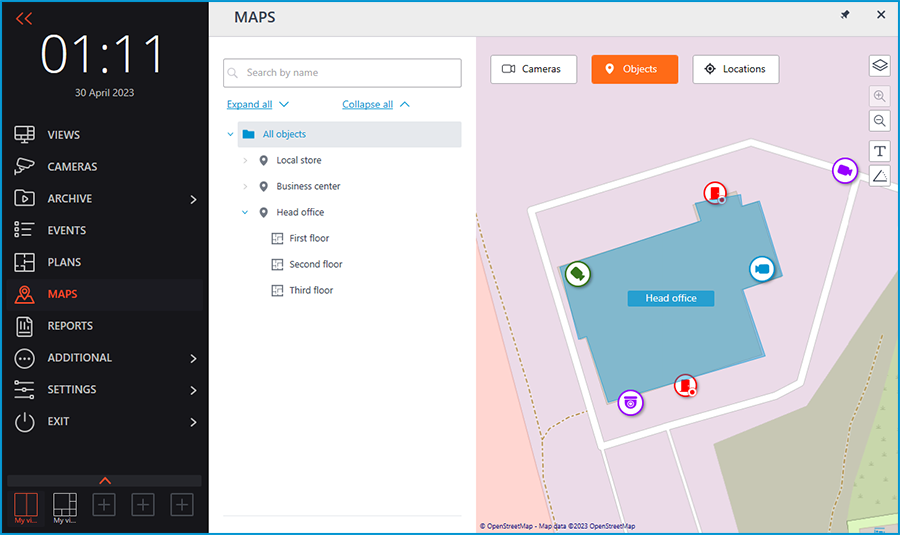
The Cameras, Objects, Locations, and Alarms buttons are at the top of the screen. Clicking the button opens a slide-out panel on the left with the relevant information.
Cameras🔗
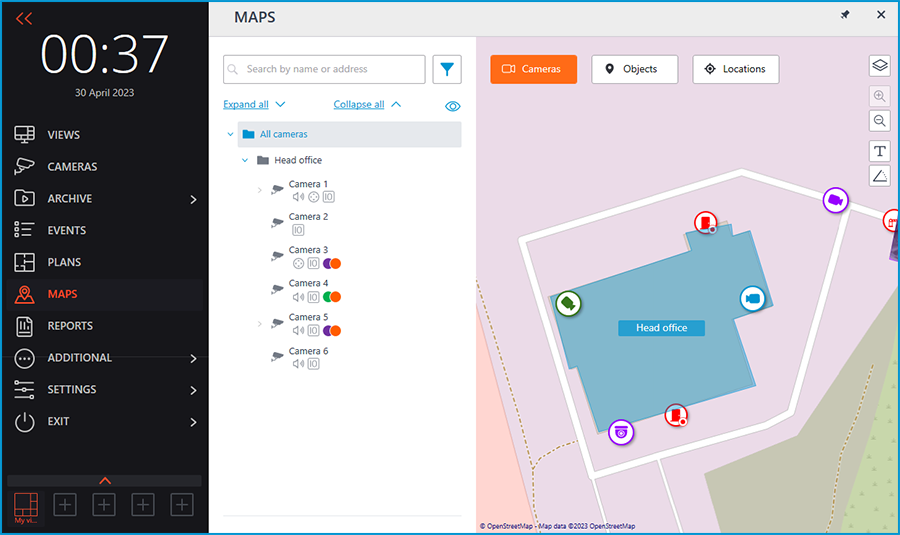
This tab contains the cameras tree.
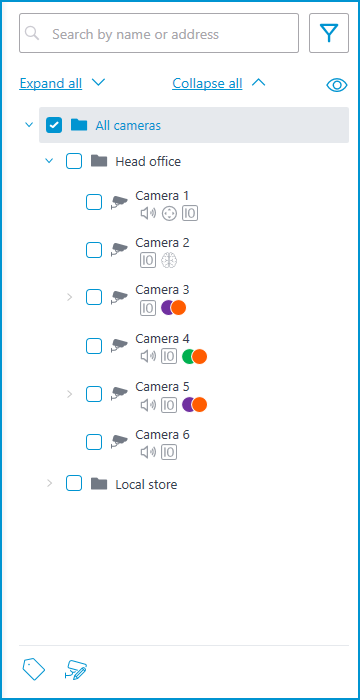
Cameras can have the following attributes:
 : the camera has enabled video analytics module;
 : the camera has enabled sound receiving option;
 : the camera has enabled PTZ;
 : the camera has enabled alarm inputs/outputs.
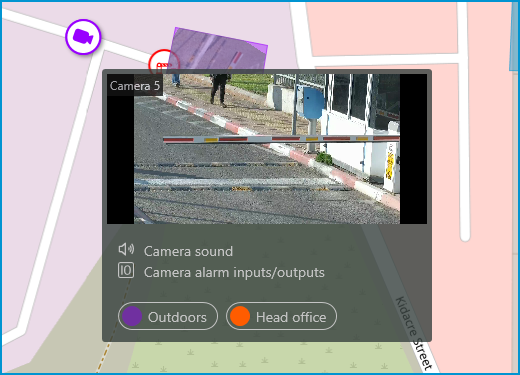
Colored labels: the camera has tags with the displayed colors;
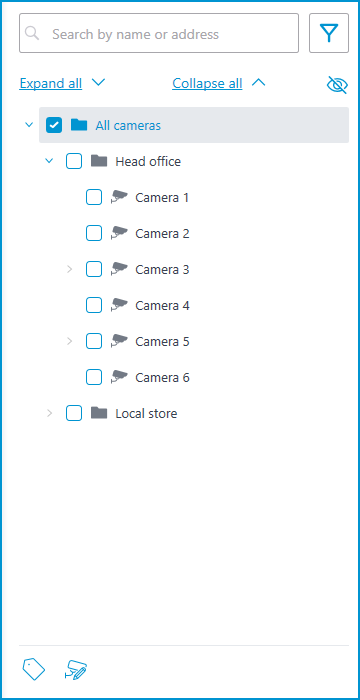
If necessary, you can hide the attributes by clicking the  icon on the right side of the tree.
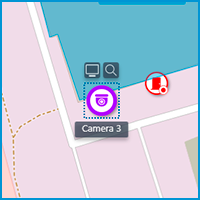
Hovering the cursor over the camera opens a preview window that contains video from the camera and a list of its attributes.

The same preview window opens when hovering the cursor over a camera located outside the cameras tree.
To select a camera manually, you can also find it by name or IP address using the search field above the camera's tree.
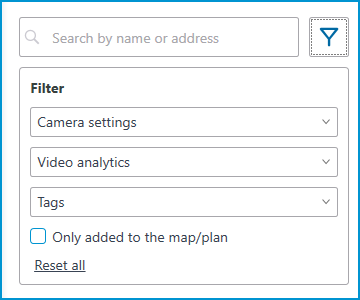
You can filter cameras by clicking the  icon and customizing the following filter options:
Camera settings
Filter by the following attributes: , , .
Video analytics
Tags
Note
The availability of filtering options depends on the settings of the cameras. Filtering applies immediately after selecting an item.
Warning
For placed sensors and relays, filtering only works for the Only added to the map/plan parameter.
If necessary, it is possible to collapse the filtering by clicking the filter button. When the filtering is applied and collapsed, the filter icon changes to  .
.
To quickly go to the camera placed on the map, select it in the list and click the Show on map item in the context menu. The same method works for the sensors and relays located on the map.
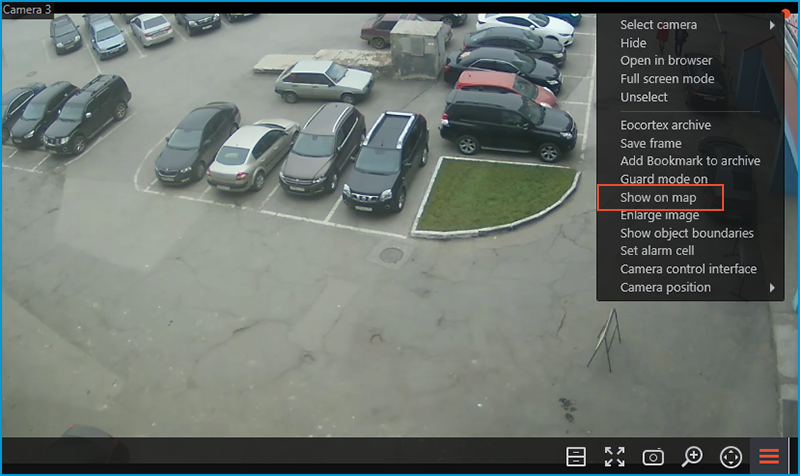
Alternatively, it is possible to go to the camera on the map by selecting Show on map in the camera cell context menu. You can use that option when viewing from both live view and the archive, including simultaneous playback of the archive of multiple cameras.
When a camera is selected on the map, the following buttons will pop up around the camera:
Viewing video from the camera in full screen mode
Viewing the camera in the tree
Note
Also, when a camera is selected, its name will be displayed. By default, it is hidden.
It is possible to display video in the field of view with the proper setting of the camera.
Warning
Video display in the camera's field of view on maps is not supported in the Eocortex Client application running under GNU/Linux operating systems.
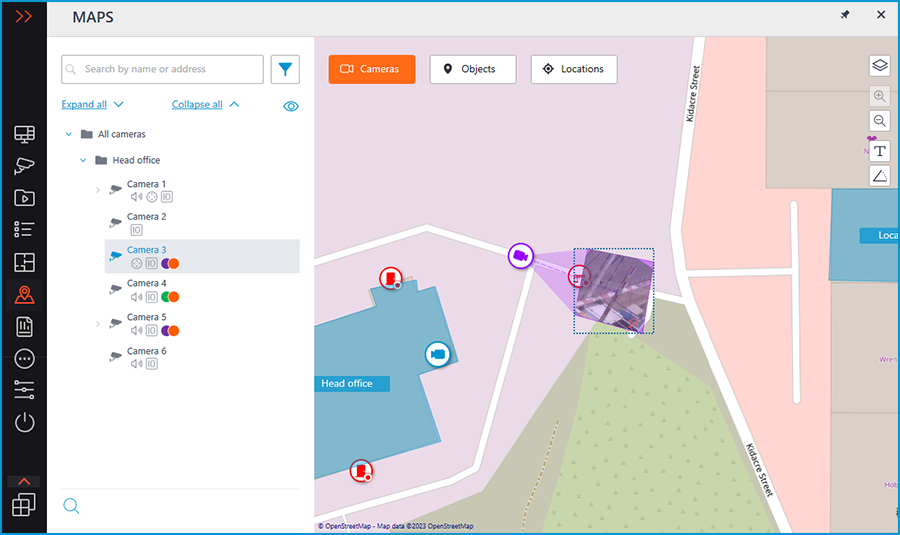
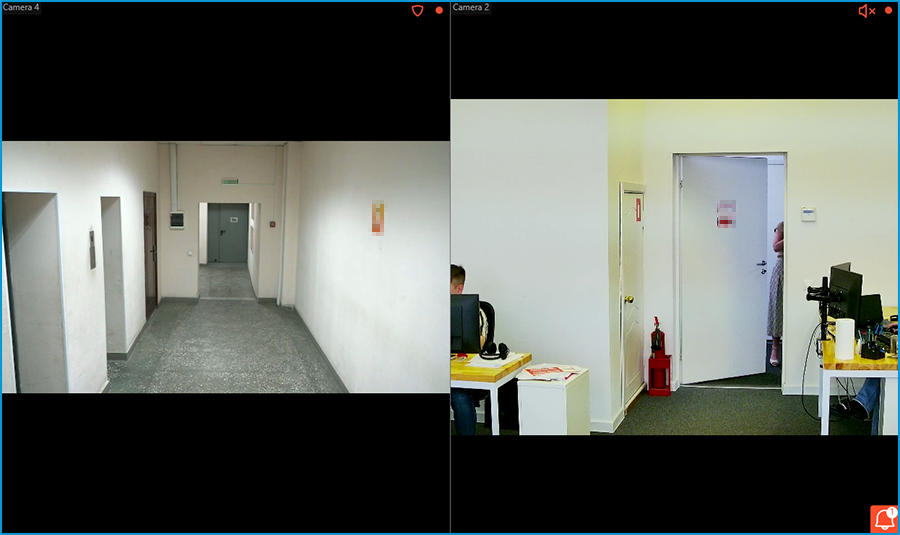
By selecting one or more cameras, you can create new client views containing the selected cameras. To select multiple cameras, right-click the mouse and stretch the rectangle, capturing the desired cameras.
To create a view made up of the selected cameras, click the button.
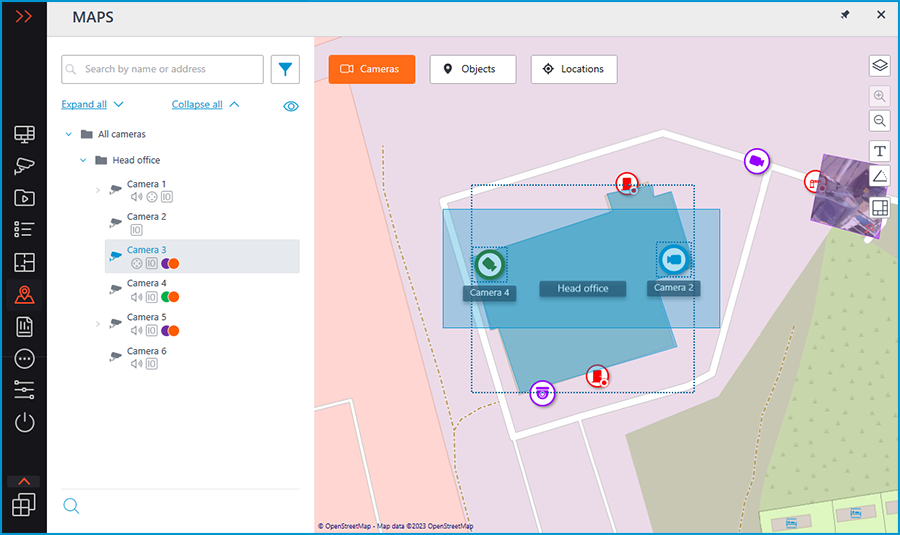
In addition to cameras, the map can display sensors and relays attached to the alarm inputs and outputs of cameras.
The state of the sensors and relays indicates with its color: red — off, green — on.
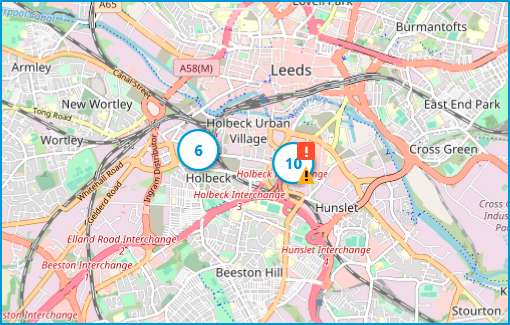
When the scale of the map is changing, cameras, sensors, relays, and sites on the map can be clustered into the group markers.
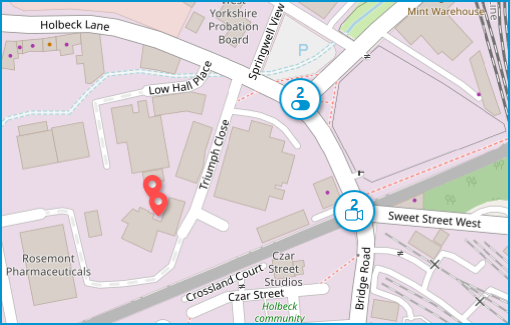
Elements of the same type located close to each other on the map are grouping into one marker with the number of grouped elements and their type: camera, sensor, relay, or site.
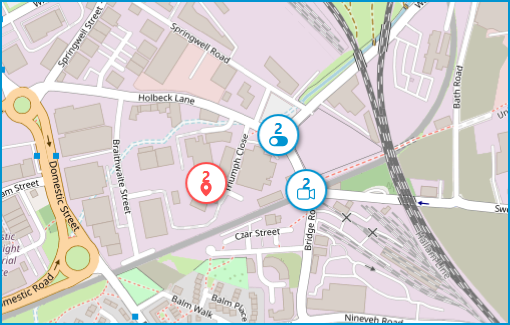
Elements of different types are grouping into one marker with the number of devices.
Note
If the number of grouped elements is more than 99, the number on the marker will be displayed as 99+.
Warning
Dragging cameras from a map or plan on one monitor and dropping them onto a view located on a separate monitor causes an error.
Sites🔗
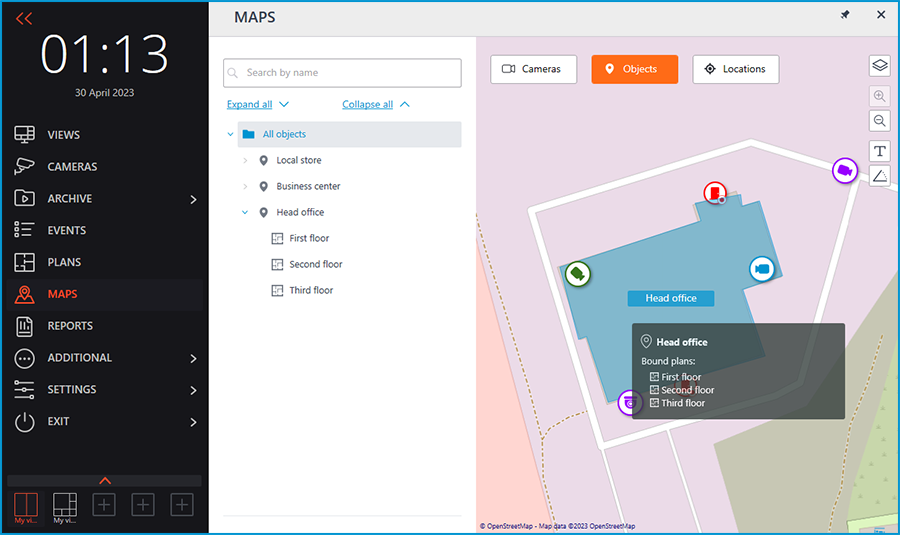
This tab displays the sites tree. A site is an area on the map that can be used to navigate to the Plans view.
If any plans are attached to the site, the tooltip with a list of attached plans will be displayed when hovering the cursor over the site.
Note
If more than 10 plans are attached, the first 10 plans are displayed and the number of other plans is shown below.
To go to the Plans section, select the site and click the Switch to plans button.
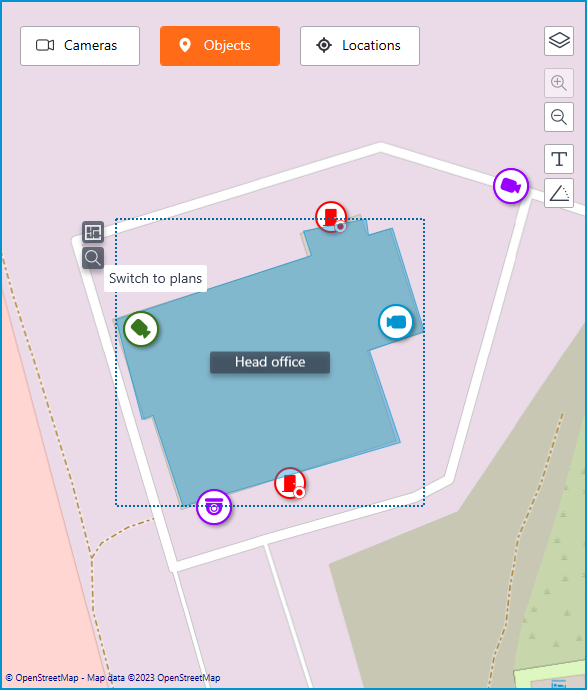
Clicking this button will display a tree of plans attached to the site.
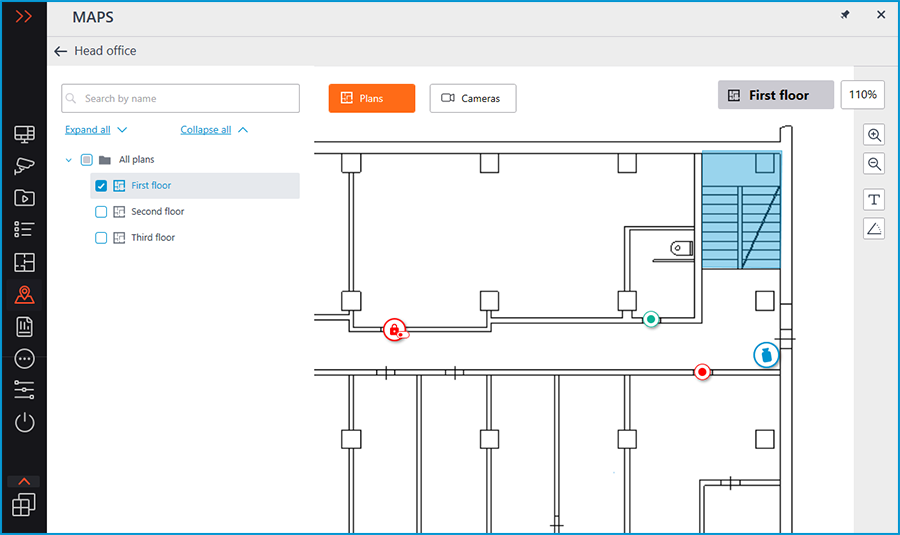
The header of the window displays the name of the site from which the window was switched to the Plans section and the Back arrow to go back to the Maps section.
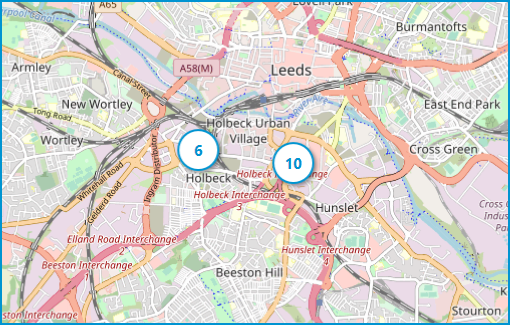
Locations🔗
Locations allow jumping to a preset area on the map with the specified scale.
This tab displays the locations tree, with which it is possible to quickly switch to the configured locations on the map.
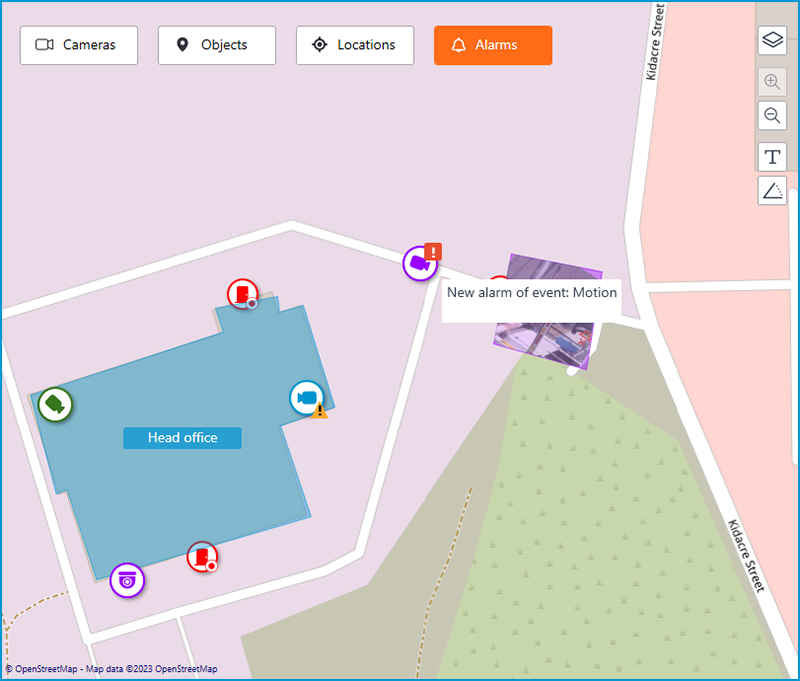
Alarms🔗
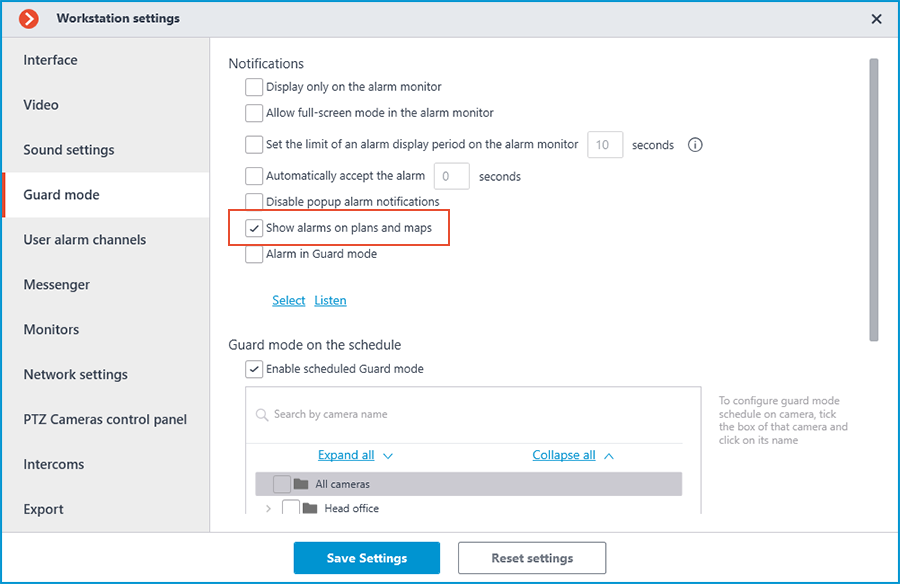
To enable displaying camera alarms, activate the Guard mode option in the Show alarms on plans and maps section of the workplace settings.
This tab displays alarms from all cameras.
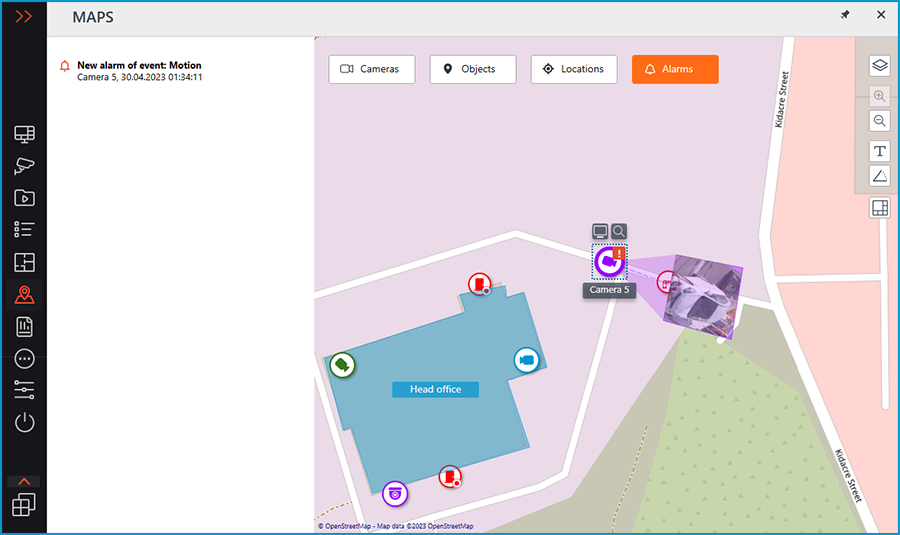
In addition to the alarm indicators, the cameras on the map may also have indicators of a broken or missing connection with the camera.
Alarms are indicated with a red square, broken or missing connection with a yellow triangle. When placing the cursor on the alarm indicator, the event that caused it will be shown.
Note
When there is no connection with the camera, the alarm indicator hides. When the connection is restored and the alarm has not been acknowledged yet, the alarm indicator displays again.
These indicators can also be on plans and sites.
Grouped camera markers also have alarm indicators. If the group contains cameras with an alarm and cameras with a broken or missing connection, both indicators will be displayed.
To switch to maps, you can assign the hotkeys in the Workstation settings.