More🔗
Tapping on  button opens a menu with additional app options.
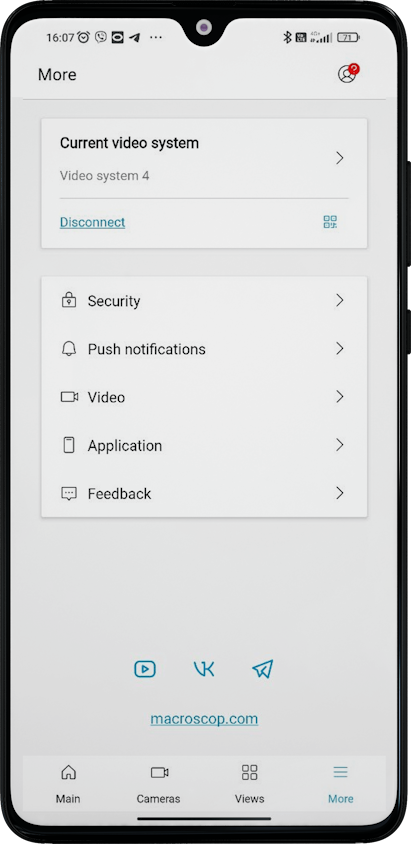
This tab provides information about the current video system, below that there are settings sections, and available social media and official website.
Account information🔗
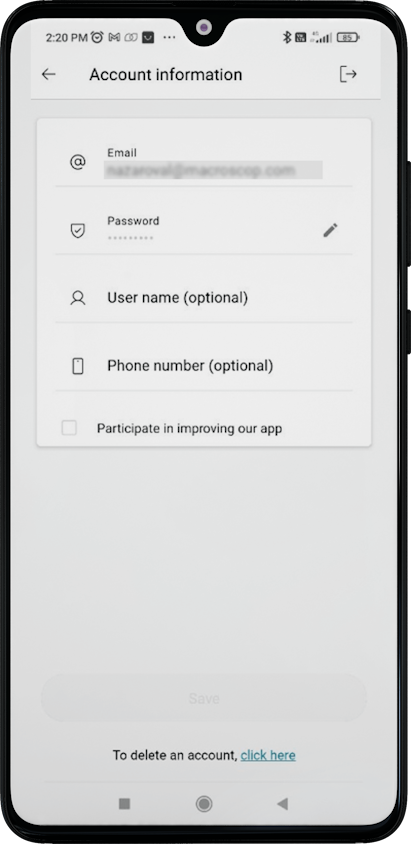
In the upper right corner of the settings screen there is an account icon, by tapping on it, you can open the user profile settings. Here you can change user data, delete the account or log out of it.
Note
If you haven't signed in to your account before, tapping the icon  will open the Log in page.
Warning
To fill in the User name and Phone number fields, the user must agree to the terms of the privacy policy.
Video systems🔗
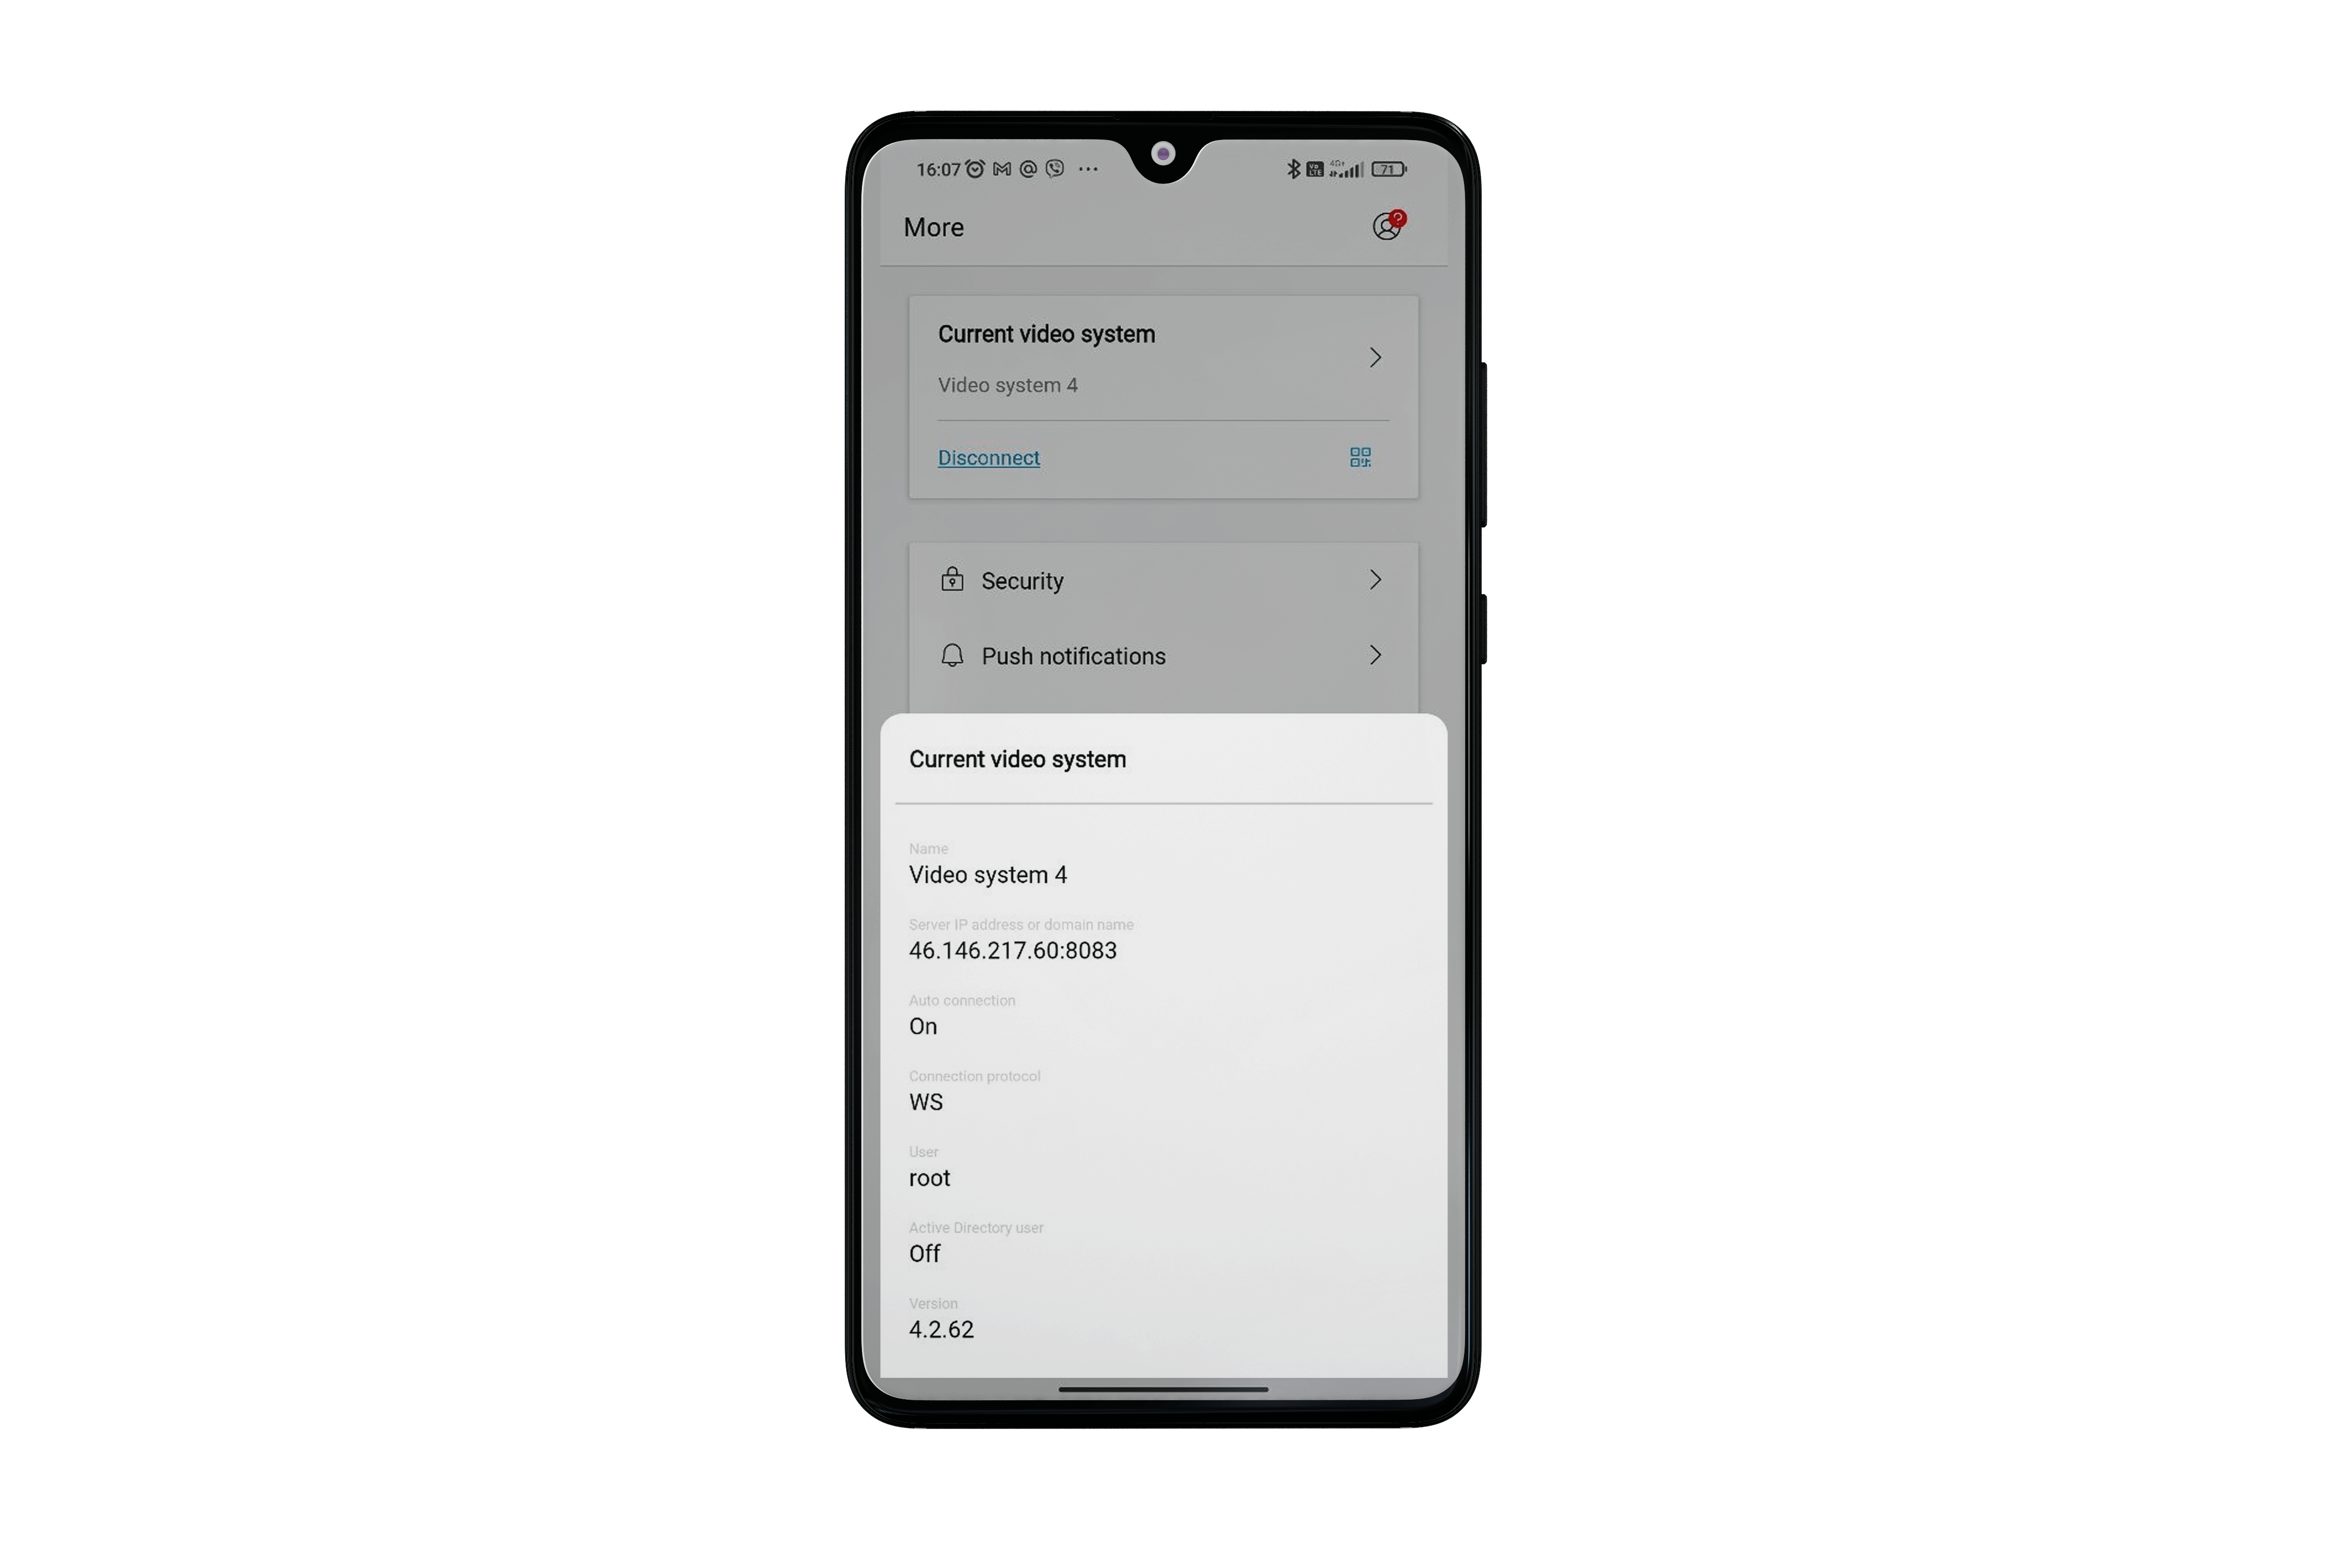
Tapping on the current video system displays a pop-up window with detailed information.
Note
To connect to another video system, it is necessary to disconnect from the current video system.
List of possible connection protocol options:
WS / WSS
HTTP / HTTPS
To generate a QR code, tap the  icon in the video system field.
When generating the QR code, it is possible to choose which information to include.
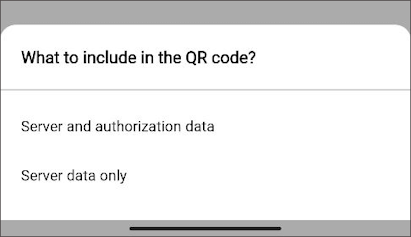
The generated code can be saved on your device and also shared with others.
To add a video system, scan the QR code. For more details, see Adding a video system.
Security🔗
Note
This settings section is available for Android version 10 and higher.
In this section, it is possible to set a passcode, and enable Face ID or Touch ID to sign in to the app.
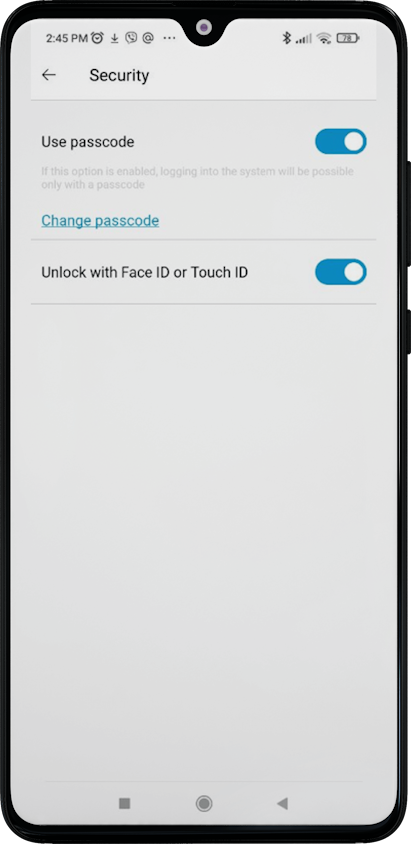
After setting the passcode, it is necessary to repeat the passcode to save it. After saving, all subsequent access to the Security section will be performed after entering the passcode.
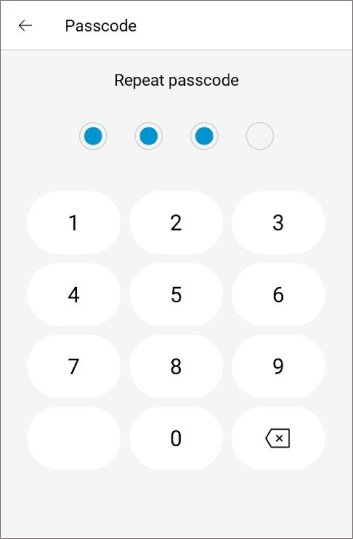
After the passcode is set, you can change it without entering the old one.
Note
Starting from Android version 11 and higher, after activation of passcode, it is possible to use Face ID or Touch ID for unlocking.
This option will be available if Face ID or Touch ID unlock is set on the user's device. When you enter the app, you will be prompted to Face ID or Touch ID unlock with the option to switch to passcode entry.
Push notifications🔗
This section displays a list of all video systems in the app with the option to enable/disable push notifications from them.
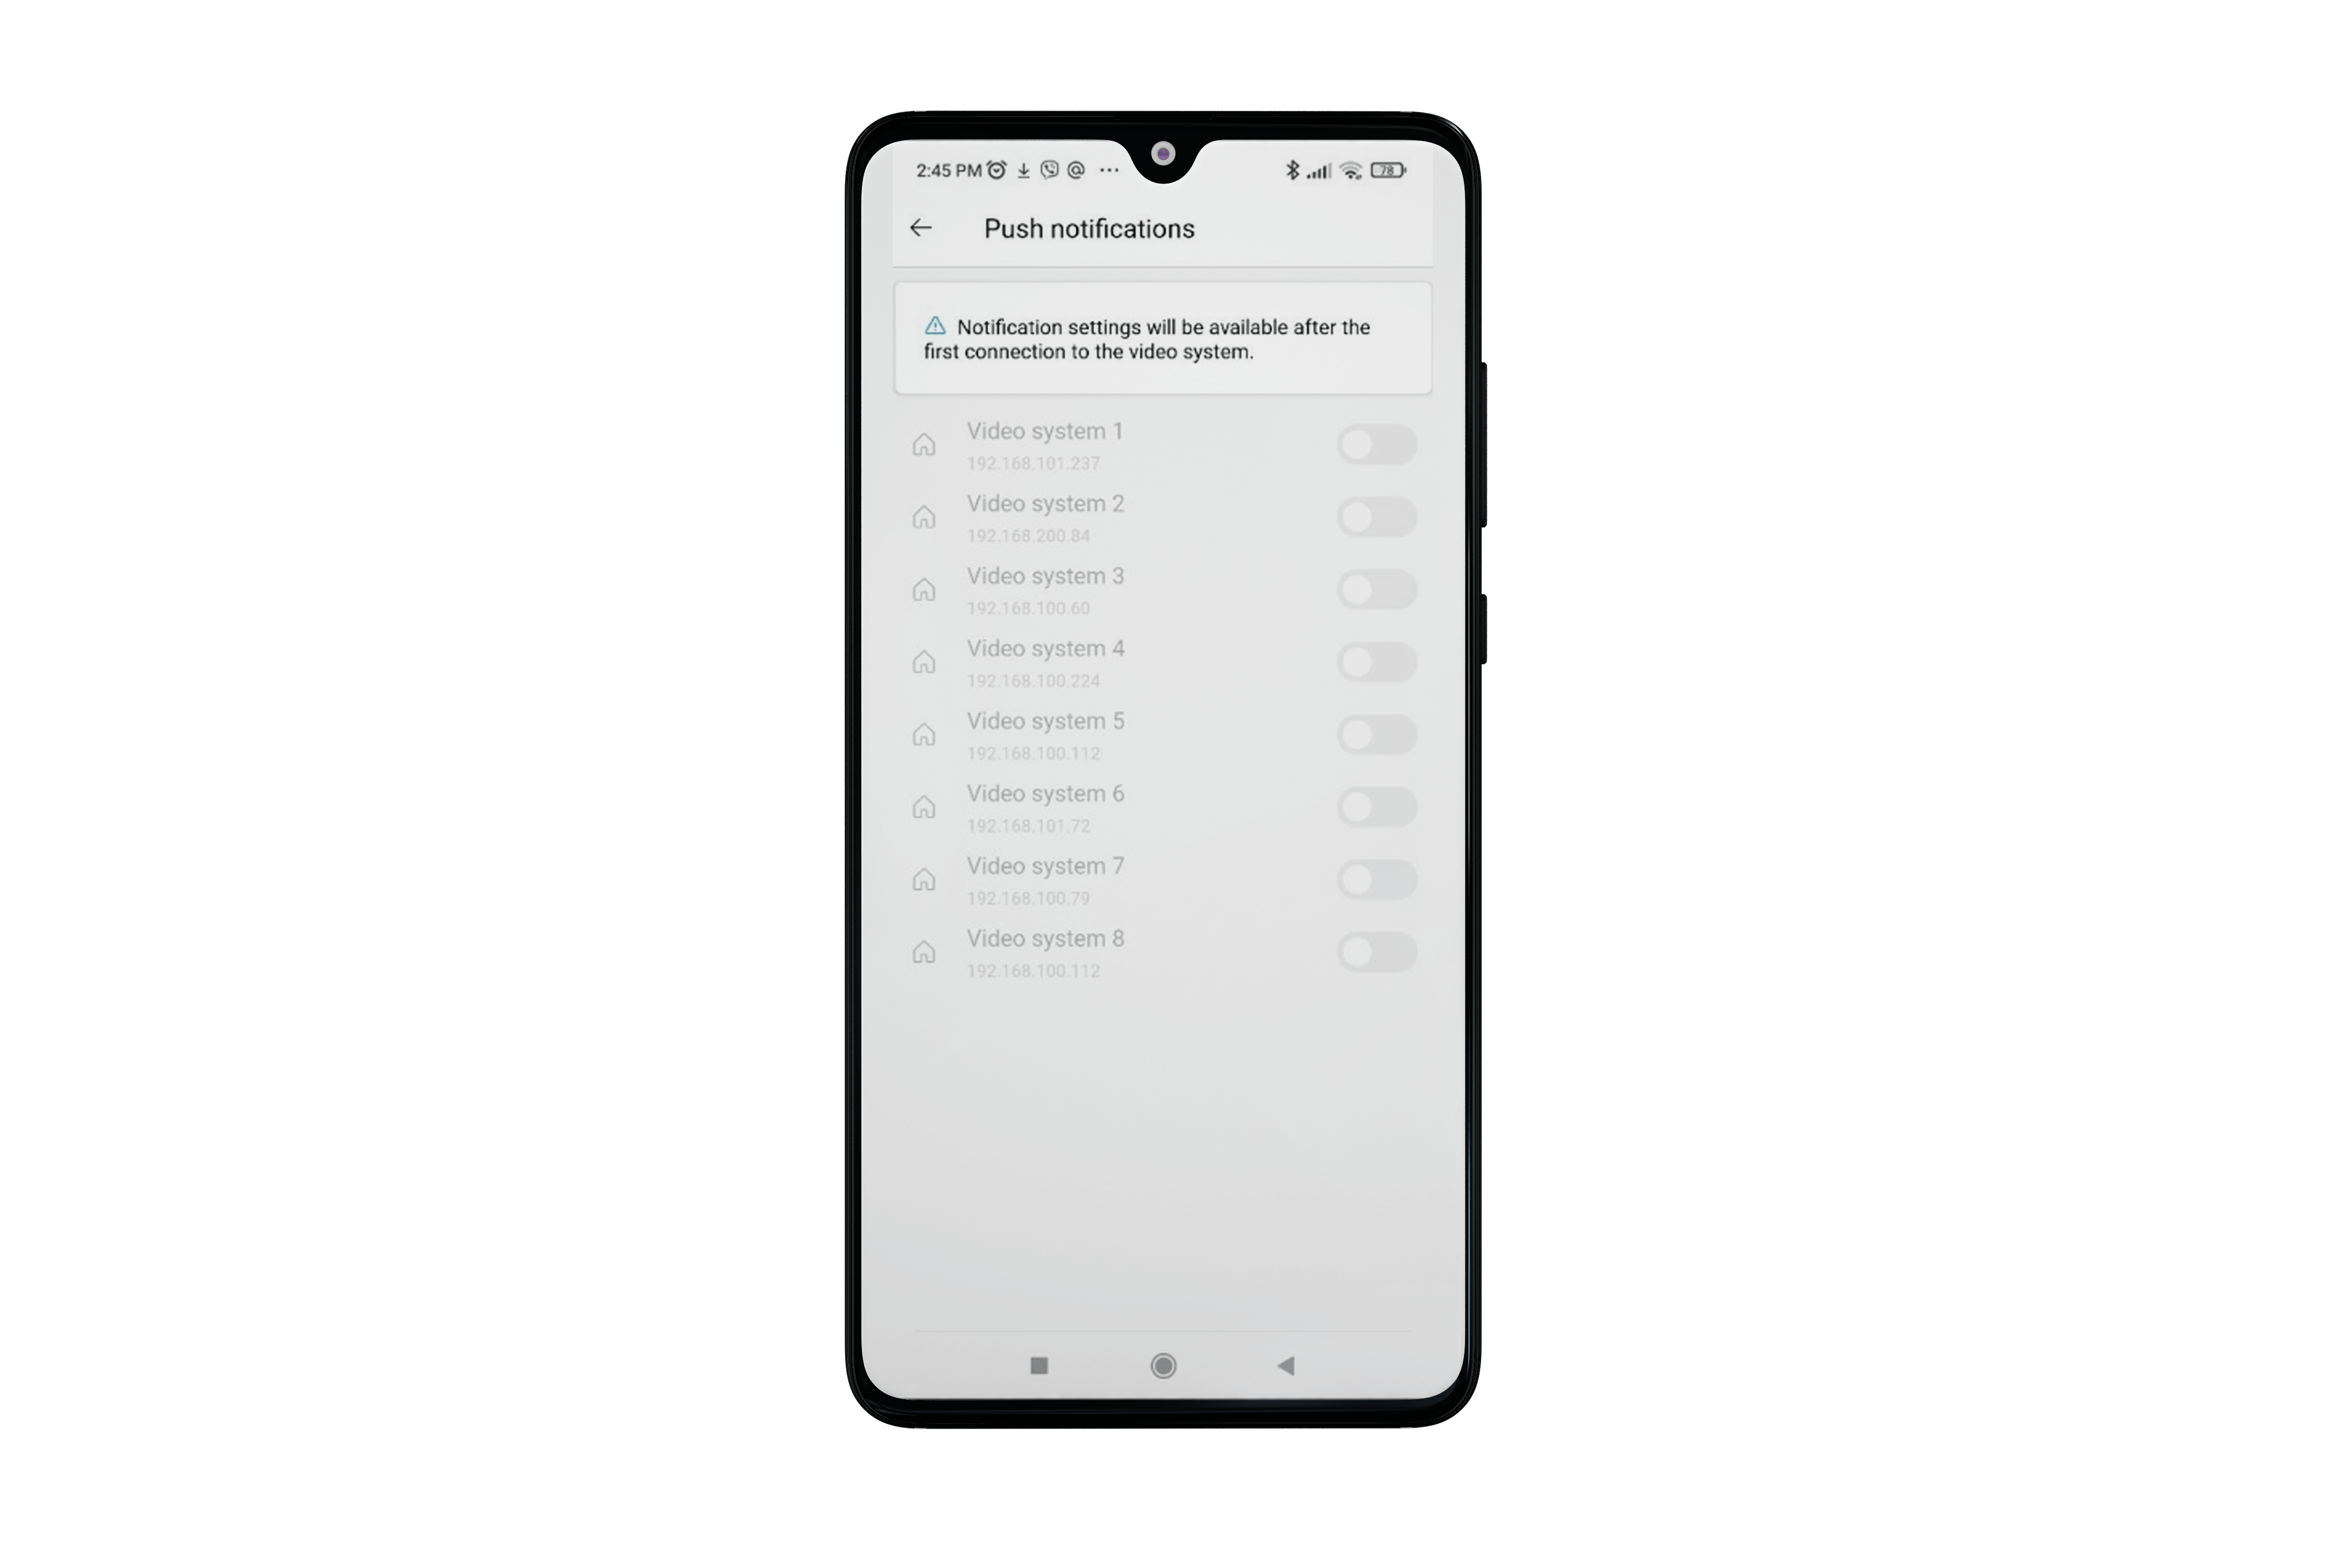
Note
Notification settings in the mobile app are available after first connecting to the video system.
Push notifications can be configured in the Eocortex Configurator application on the  Automation tab. For more information, see Send Push notifications to mobile devices.
Moments🔗
After switching to Moments, a list of blocks will open.

You can change the order of the blocks. To do this, tap the left side of the block and drag it.
Note
You can turn off the display of the Moments on the Main page by using the switch at the top.
To add a new block, tap the  button in the bottom right corner of the screen on the Moments settings page.
To change an existing block, tap the block's context menu button  and select Change Settings.
Adding a new block or editing an existing one opens the block settings mode.
The block settings mode consists of several steps.
Step 1 — Select cameras. At this step, you should select the cameras for which the events will be displayed.

Step 2 — Select event groups. At this step, you need to select event groups.

The following events are available:
Guard mode (alarm events)
Video analytics (analytics module events)
Camera-based analytics (analytics events on the camera)
More events (all other events in the system)
Note
Each group contains the expected number of events. Only one group of events can be selected.
Step 3 — Select events. At this step, you need to select specific events of the group.

Note
Each event has an approximate expected number of events of this type in the system. If there are more than 50 events, 50+ is specified. You can select multiple event types.
Step 4 — Checking settings. At this step, all unit settings are checked.

You can change the name of the block, change the selection of cameras and events.
You can also activate the Display only alarm events mode. In this case, only alarm events of the selected types will appear.
Note
At any step, you can exit the block settings mode by tapping the Cancel button. The changes will not be saved. A confirmation message will appear before exiting.
Video🔗
This tab contains application video display settings that apply to all systems added to the app.
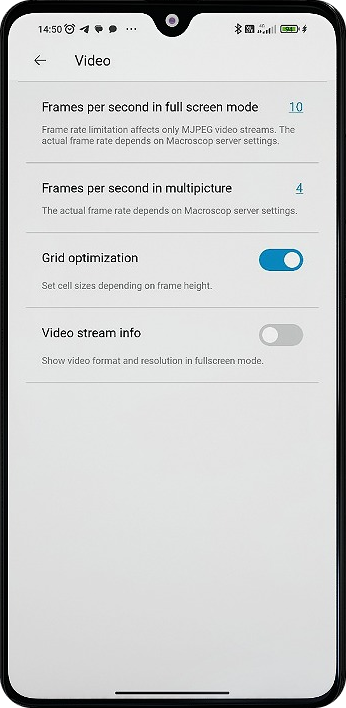
When the Grid optimization option is enabled, the dimensions of the video cells in the multi-picture are automatically set according to the video ratio. Thus, the cell width will be the same for all cameras, and the height will correspond to the highest camera in the row.
System Health Monitoring🔗
This section provides access to the system monitoring report.
Note
To view the system monitoring report, tap the System Health Monitoring widget on the Main page or select System Health Monitoring on the More page.
Warning
To view the video surveillance system monitoring report, the user must be connected to it.
The following tabs are available in the monitoring report:

Servers🔗
The report contains information about the status of video surveillance system servers monitored by the Eocortex Monitoring service:
CPU: CPU usage on the server (%).
RAM: ratio of memory used on the server to the total server memory (GB).
Working cameras: ratio of the number of working cameras to the total number of cameras on the server.
Errors: drop-down list of server errors and archive recording errors.
Additional: drop-down list with additional information about the server.

Note
By default, the Errors and Additional drop-down lists are collapsed.
By using the button  in the upper right corner, case-insensitive Search by cameras and folders is performed:

At the top of the screen, opposite the search button, the with errors filter is available. When this filter is selected, all servers with the status Errors present and Not working are displayed.
Warning
By tapping the button, the with errors filter is reset.
Cameras🔗
The report displays information about the status of cameras on servers monitored by the Eocortex Monitoring service. The report is presented as a tree of cameras attached to the server.

Warning
The camera tree display in the report is only available in the list view mode.
For each camera, either the status with the detected error (e.g., problems with receiving the main video stream) or the status No errors detected is displayed.
By clicking on the camera, it is possible to view information about the stream:

If the camera status differs from No errors detected, it is highlighted in red in the camera tree and displayed in the report as a camera operating with errors.
For servers and folders, the number of cameras operating with errors is counted:

Warning
If the server has the status Not working, it will not be available for viewing in the camera report.
By using the button in the upper right corner, case-insensitive Search by cameras and folders is performed:

The search results are displayed in the following order:
Server
Folder
Camera
When one of the results is selected, the search stops.
Warning
A single folder can contain cameras attached to different servers, so the server name is added to the camera and folder names (except for parent server folders) in the search results.
At the top of the screen, opposite the search button , the with errors filter is available. When the filter is selected, all cameras with a status other than No errors detected are displayed, as well as folders containing cameras with errors (the number of cameras with errors is greater than 0).

Warning
When clicking on the button, the with errors filter is reset.
Events🔗
The report is a log of events of the Eocortex Monitoring service.

The event contains the following information:
Information message.
Event time.
Name of the server where the event occurred.
The most recent events are displayed at the top of the log. The list of events is sorted by date.
Warning
The event time is displayed according to the device time usage setting. If the option is not enabled, the event time will be displayed in the server's time zone with UTC indicated.
Note
When opening the Events tab, the event log is not loaded completely. When scrolling through the log, earlier events are loaded in the background.
To filter events, tap the 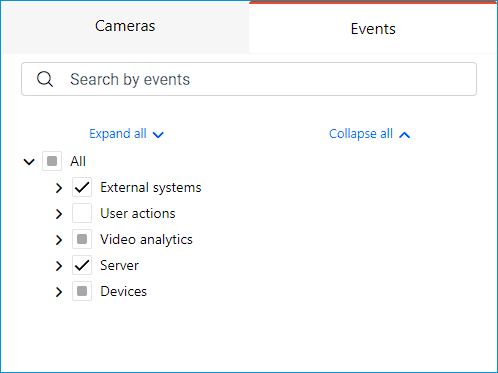 button.

The following filters are available:
Time period
The Up to option allows setting the date and time for events. Events that occurred after the specified time are hidden.

Warning
The date and time of the event are selected in the device's time zone.
Note
To apply the filter, tap the Apply button. If there are no changes, the button is unavailable.
Server
Allows selecting events for a specific server.

Warning
If there is only one server in the video surveillance system, the Server filter will be unavailable.
Note
To apply the filter, tap the Apply button. If there are no changes, the button is unavailable.
Camera
Allows selecting events by specific cameras. The selection is made in the camera tree.

Warning
If there is only one camera in the video surveillance system, the Server filter will be unavailable.
The Display events not assigned to a cameras option is also available.
Note
To apply the filter, tap the Apply button. If there are no changes, the button is unavailable.
The number of filters applied is displayed on the button:

To reset the filters applied to the log, click the Clear filters button.
Application🔗
This section provides general settings for the app.
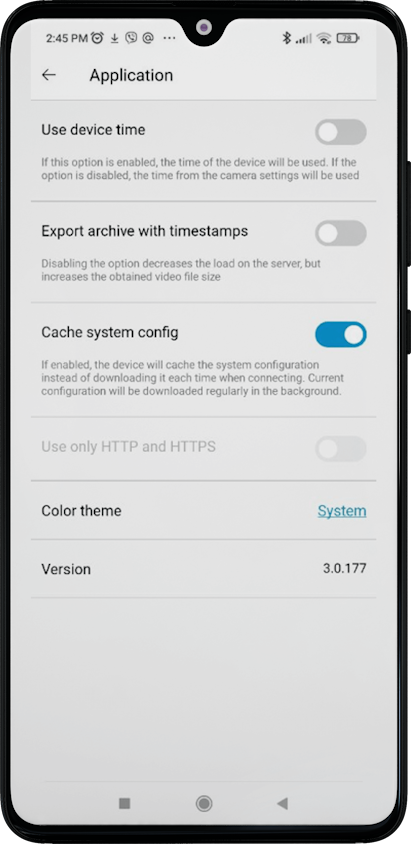
When Use device time is enabled, the device time will be used in notifications, full-screen playback, archive, and saved frames. By default, the time from the camera settings is used.
When the Export archive with timestamps setting is enabled, a timestamp is added to each frame, which significantly reduces the resulting video size, but increases the load on the server.
Enabling the Cache system config option provides the following features:
Reduces connection time to the video system by caching on the device.
Track user changes, including adding new settings and permissions to a user group, camera and view settings and access, and time zone and map information to the system.
System interface update.
Warning
Caching is only applicable to video systems version 2.5 and higher, otherwise the configuration will be loaded every time.
The Use only HTTP and HTTPS option is only available before connecting to the video system. This option allows you to disable the WS protocol, which is usually preferred but may not work efficiently in some cases related to server and device connectivity.
In the Color theme setting, you can choose one of the following color themes:
Light
Dark
System
The System theme depends on the color theme of the device's operating system and can be dark or light.
You can change the system theme in the following ways:
Manually by the user in the device settings.
Automatically, after the user configures the scheduled theme on the device. The application adapts to the current theme without reloading.
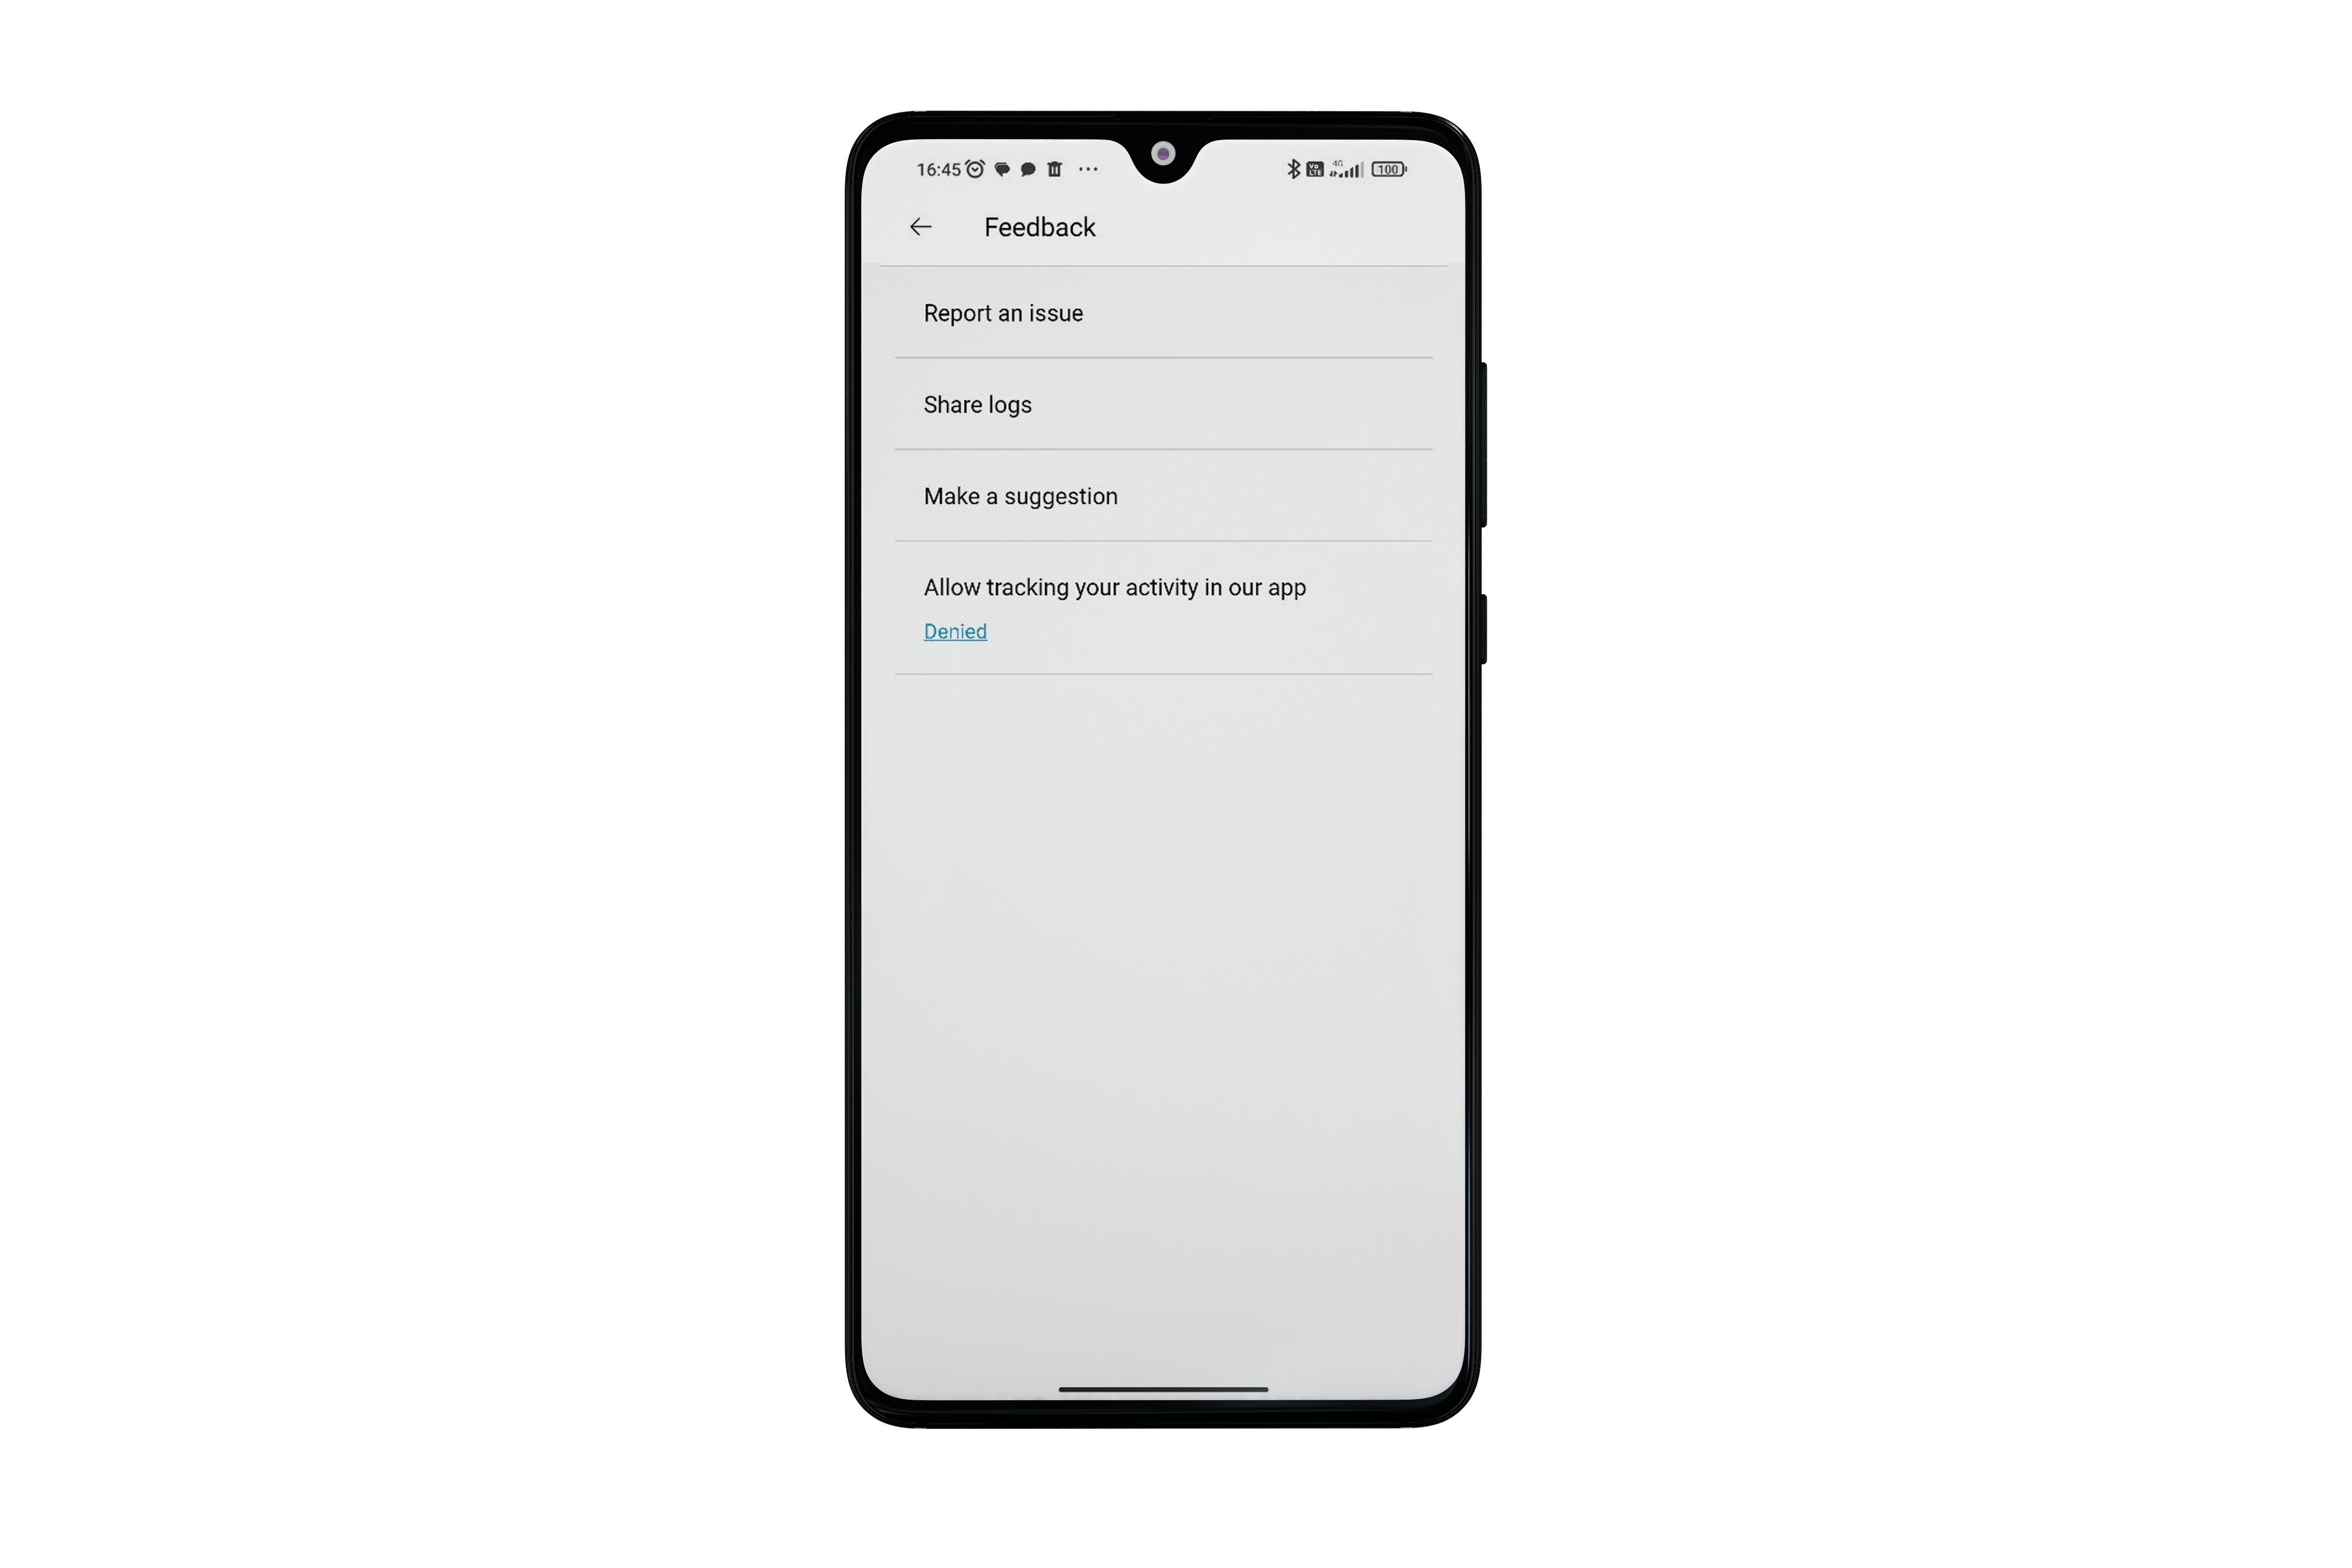
Feedback🔗
This section is provided for solving problems that have arisen, as well as for suggestions and evaluation of the application's performance.
About🔗
This section provides information about the Eocortex app.
