Configuring the Object Classification and Counting module🔗
Warning
Before using the neural network capabilities of the module, it is necessary to install the neural networks package.
To use the module, enable and configure it.
To do that, launch the Eocortex Configurator application, go to the  Cameras tab, select a camera in the list located on the left side of the page, then go to the Analytics tab on the right side of the page, and enable the module using the
  switch.
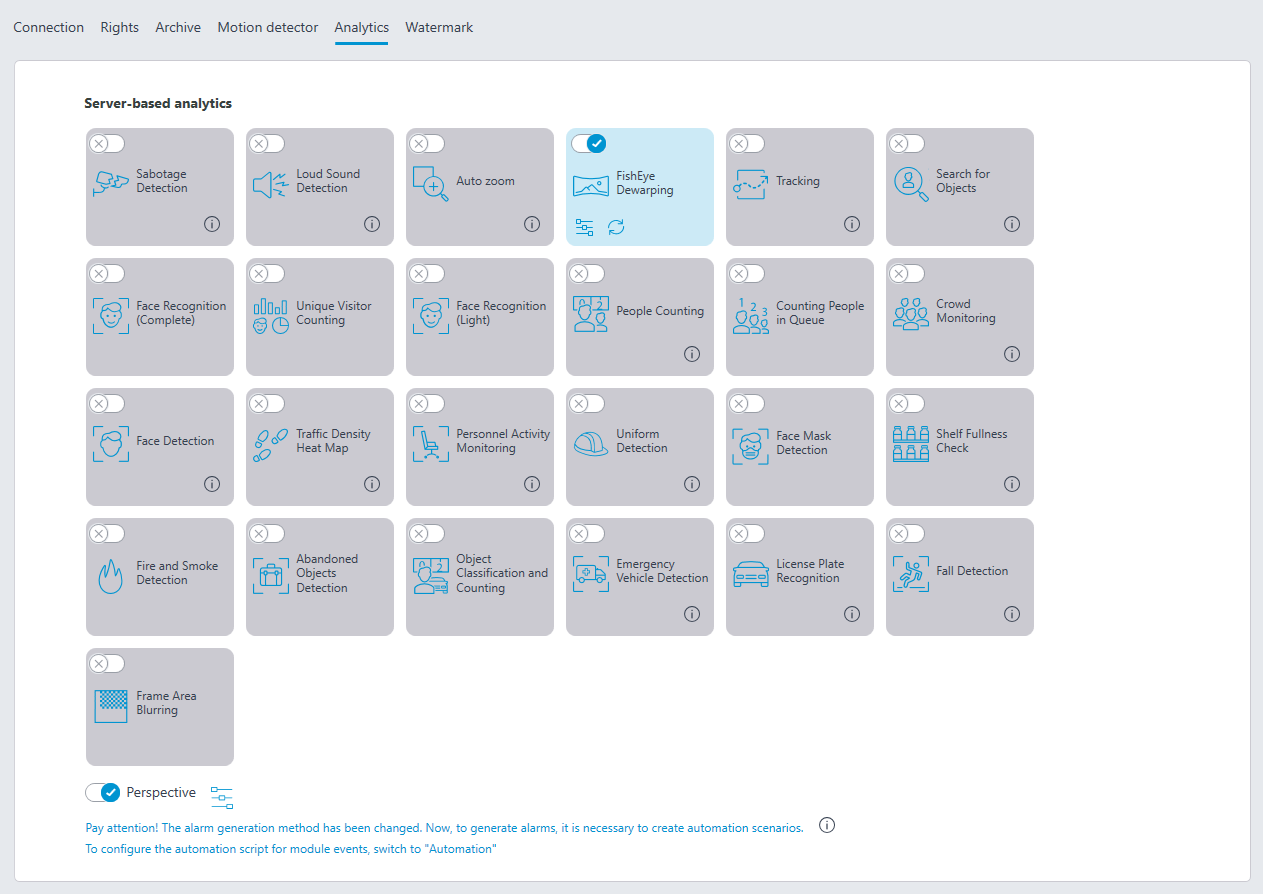
Clicking the  button opens the module setup window.
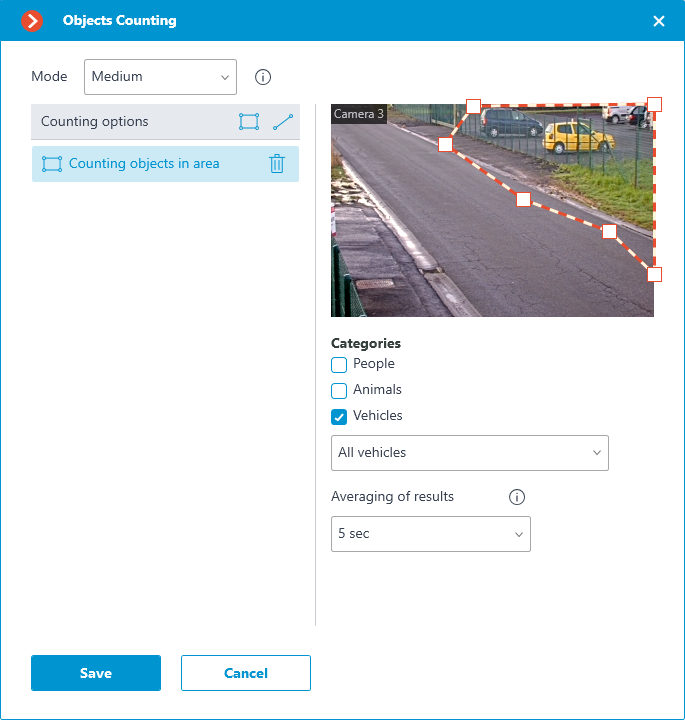
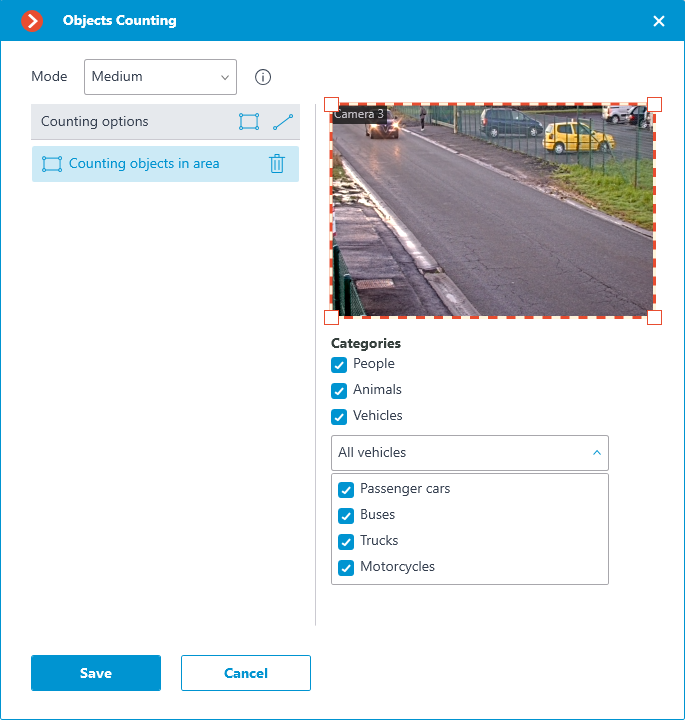
When setting up the module, it is necessary to select the operating mode. The following modes are available:
Slow mode: for standing or slowly moving objects. For example, parking lots, people in line, etc. Shift of objects on the frame in one second should not exceed 1/4 of their size in the direction of movement.
Medium mode: for objects moving at an average speed. For example, walking people, slow-moving vehicles in a parking lot, etc. Shift of objects on the frame in one second should not exceed their size in the direction of movement.
Fast mode: for objects that quickly come into the frame and leave the field of view. Vehicles on the highway, people running, etc. Shift of objects on the frame in one second should not exceed 2.5 object's sizes in the direction of movement.
In the Counting options list it is possible to set and configure counters. The following counter types are available:
 Counting objects in area: The count of objects within the area.
 Line intersection: The count of objects that crossed the line in a specified direction.
Counting objects in area🔗
To add an area, click  . When doing this, a rectangular area will be created in the preview window.
The zone configuration can be changed by dragging the key points at the corners of the polygon. To add a key point, it is required to double-click the left mouse button on the line; to delete — right-click on the key point.
For counting objects in the area, it is necessary to set the interval of averaging results. Averaging makes counting more resistant to sudden changes in the number of objects. The longer the averaging period, the slower the result will change.
Line intersection🔗
To add a line, click  . When doing so, a straight line will be created in the preview window.
Position of the line can be changed by dragging it by the points at the ends.
To reverse the direction of counting, click the  button in the upper-right corner of the preview window.
For counting objects crossing the line, resetting the counters can be enabled. It will require configuring the parameters for resetting the counters.
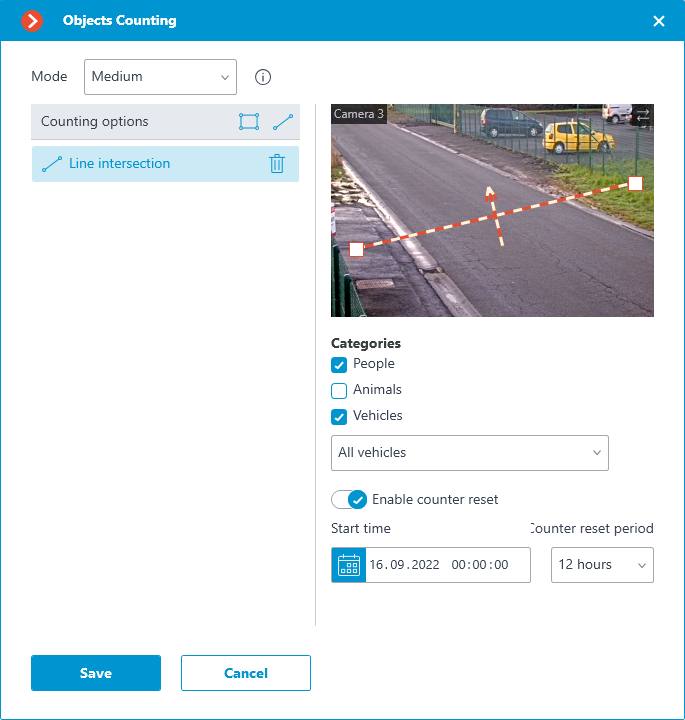
It is also necessary to select objects of which categories will be counted. The following categories are available:
People
Animals
Vehicles by type: Passenger cars, Buses, Trucks, Motorcycles.
Note
The module supports generation of Automatic reports.
Note
The module generates Emergency vehicle detected events.
Warning
The module will start working only when the settings are applied.