Usage🔗
Control panel🔗
The controls in Eocortex Web Client are similar to the controls in the Eocortex Client application. Clicking by the left border of the window opens the control panel.
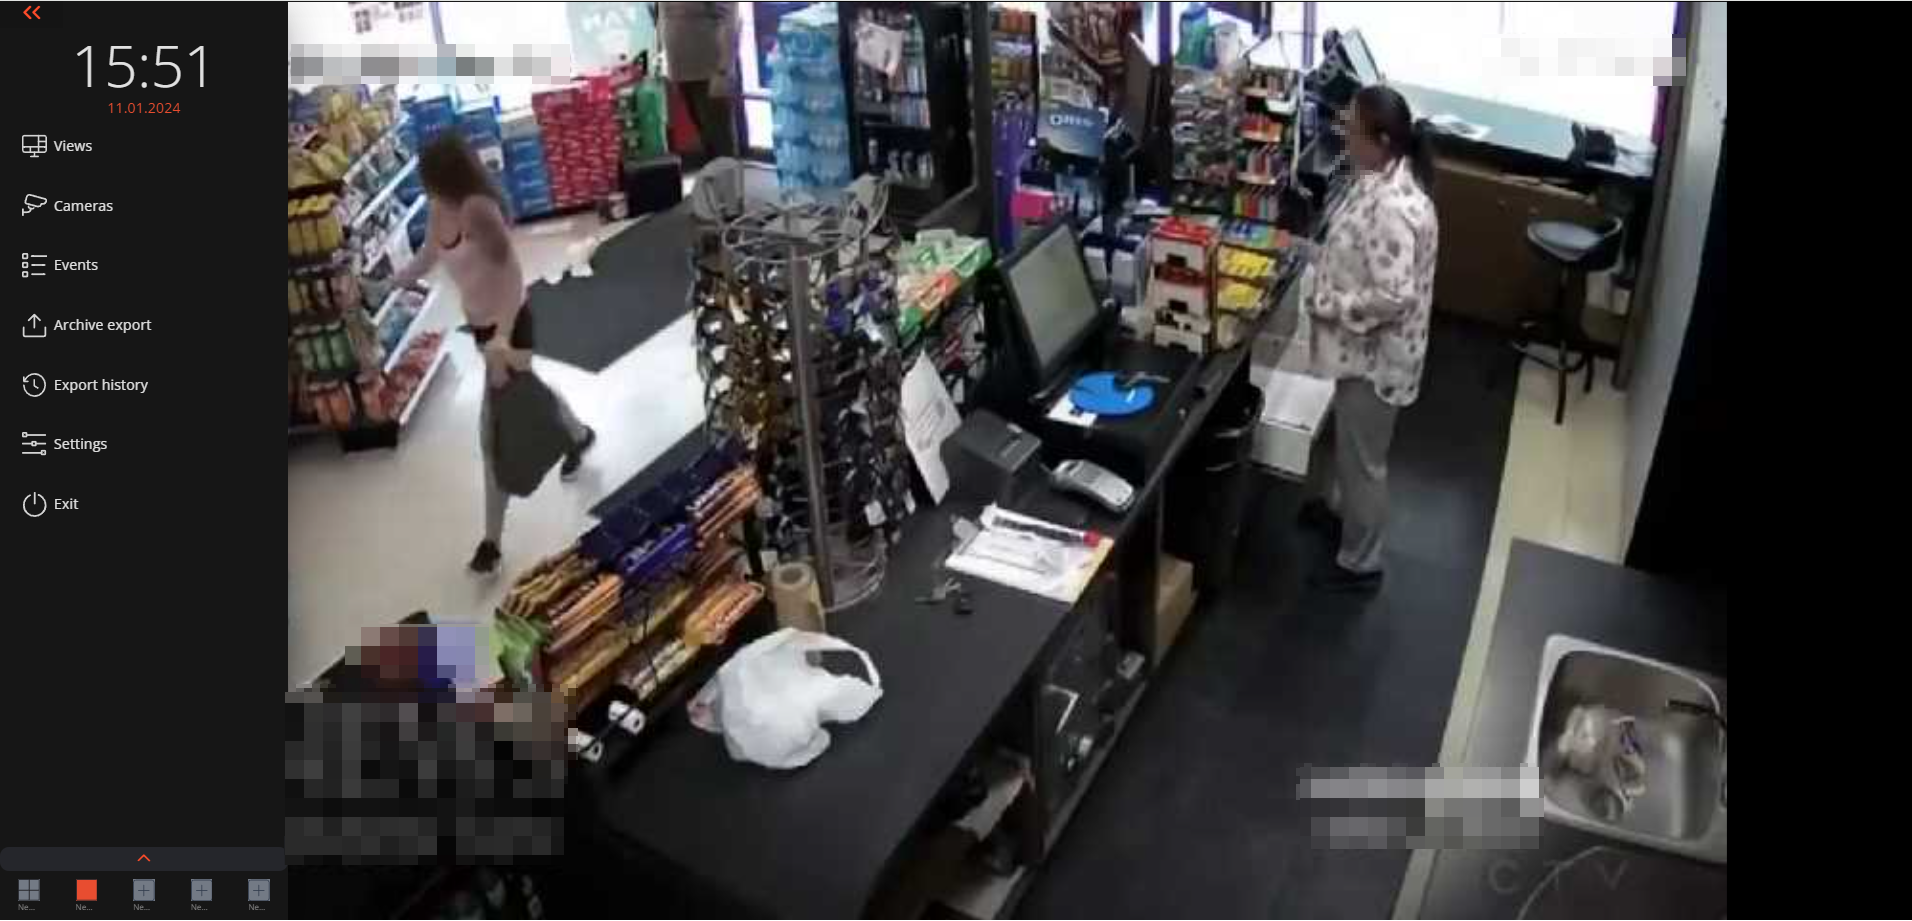
At the bottom of the control panel is a short view panel that displays a maximum of five user views that are the first in the general list of views.
A short list of views can be expanded to fill the entire sidebar. In this case, the search field for a view by its name will become available.
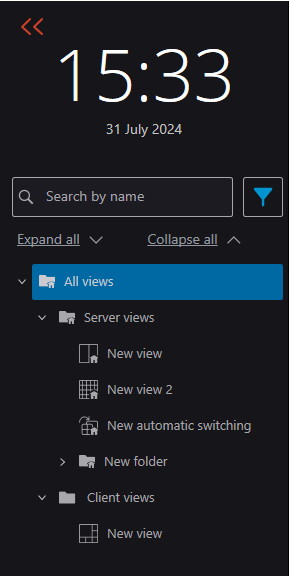
The following is a description of the pages that open when you select the corresponding control panel menu items:
Views🔗
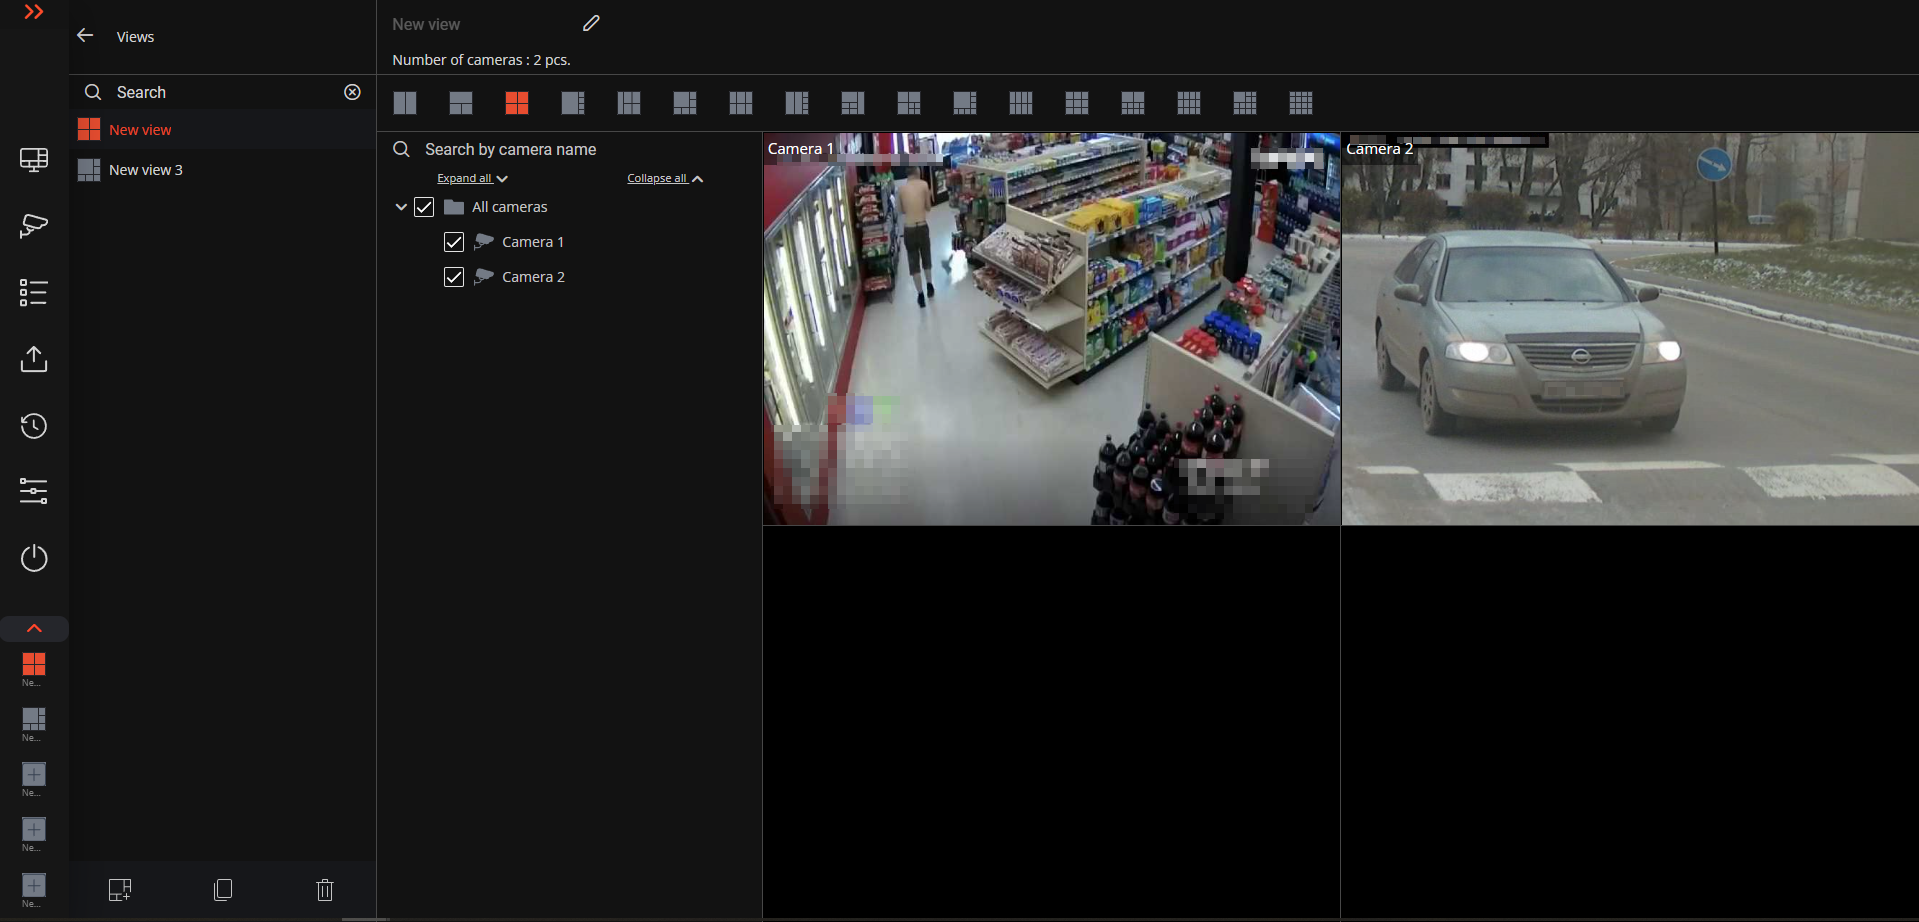
The view editor provides the ability to view and edit the view tree, add new views or create new ones based on existing ones, and delete views in groups.
Cameras🔗
Selecting cameras to be displayed on the screen.
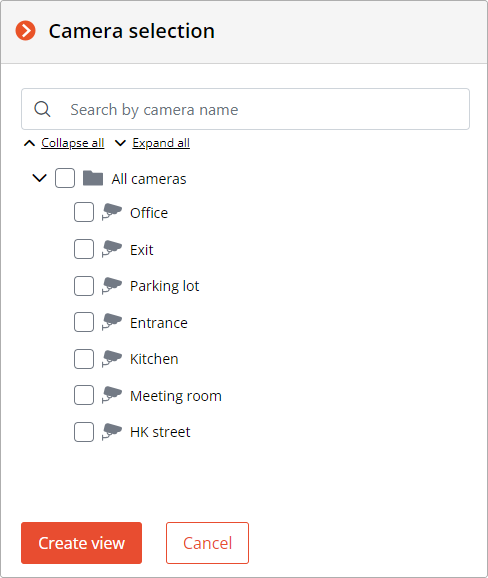
A camera preview is available in the camera selection window.
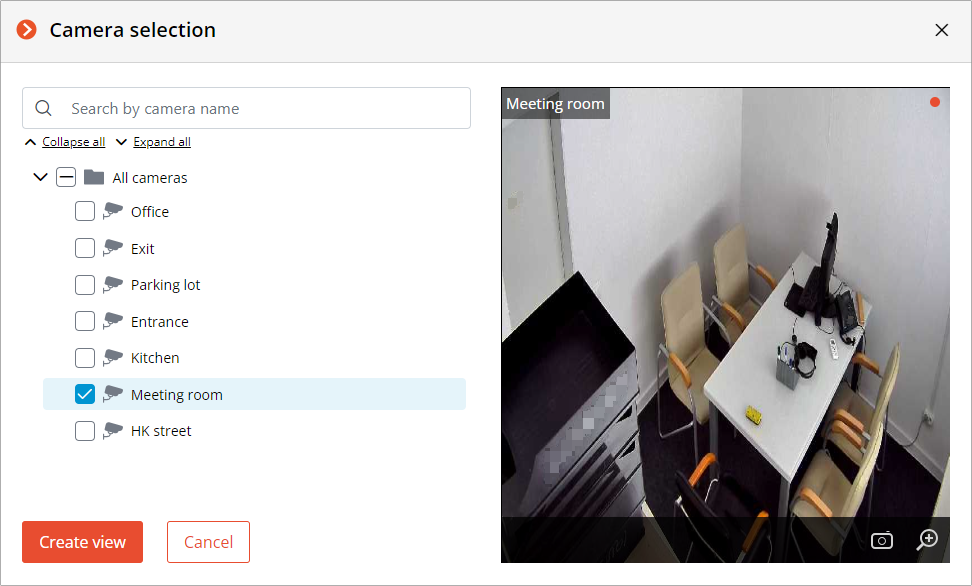
Clicking Create view button creates a view with selected cameras and a grid that places all the selected cameras with a minimum number of remaining empty cells.
Events🔗
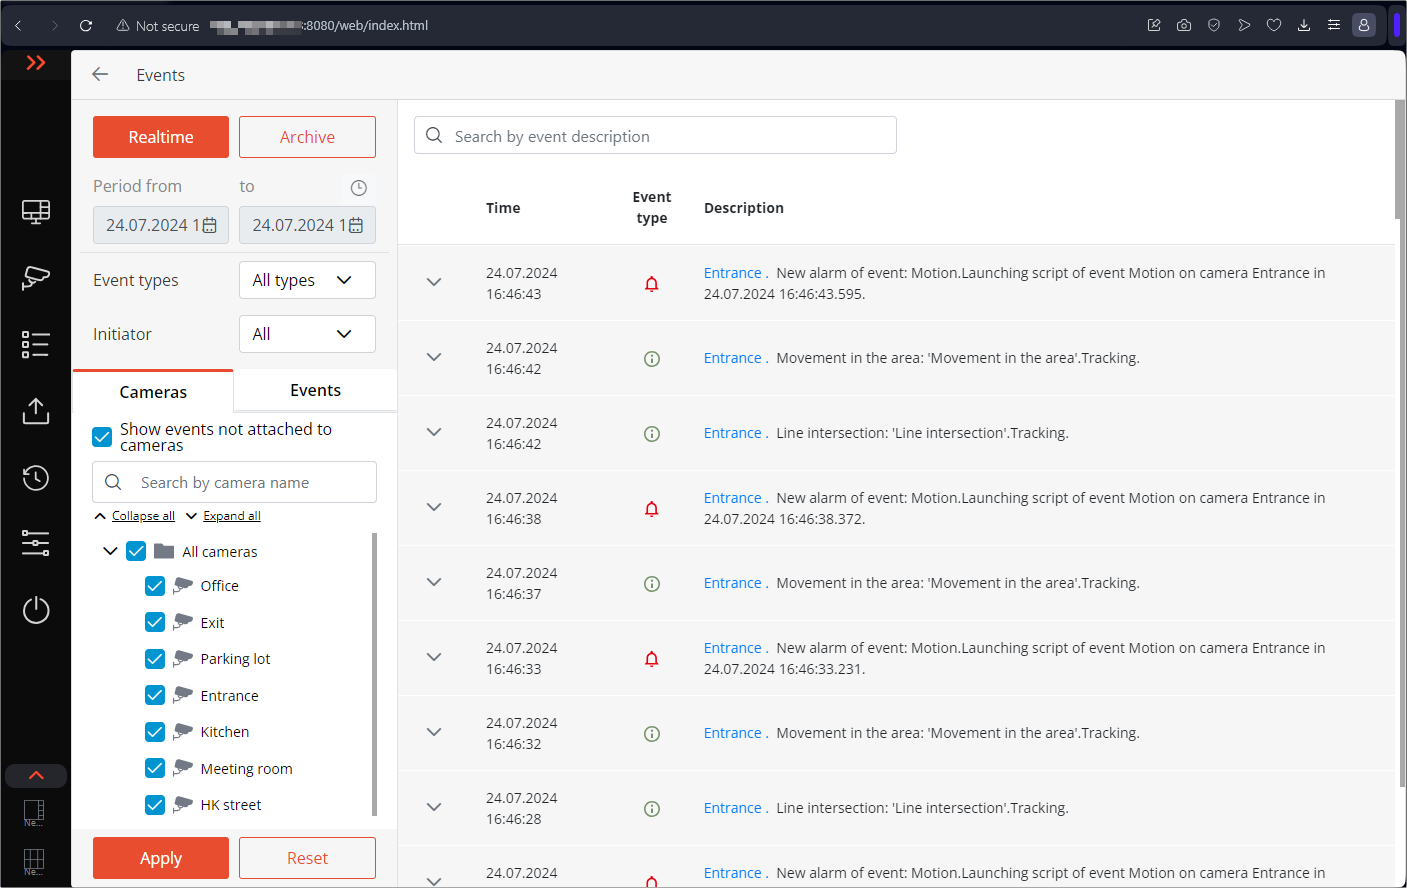
Events log. The list of system and user events with the ability to search, filter, and sort.
Archive export🔗
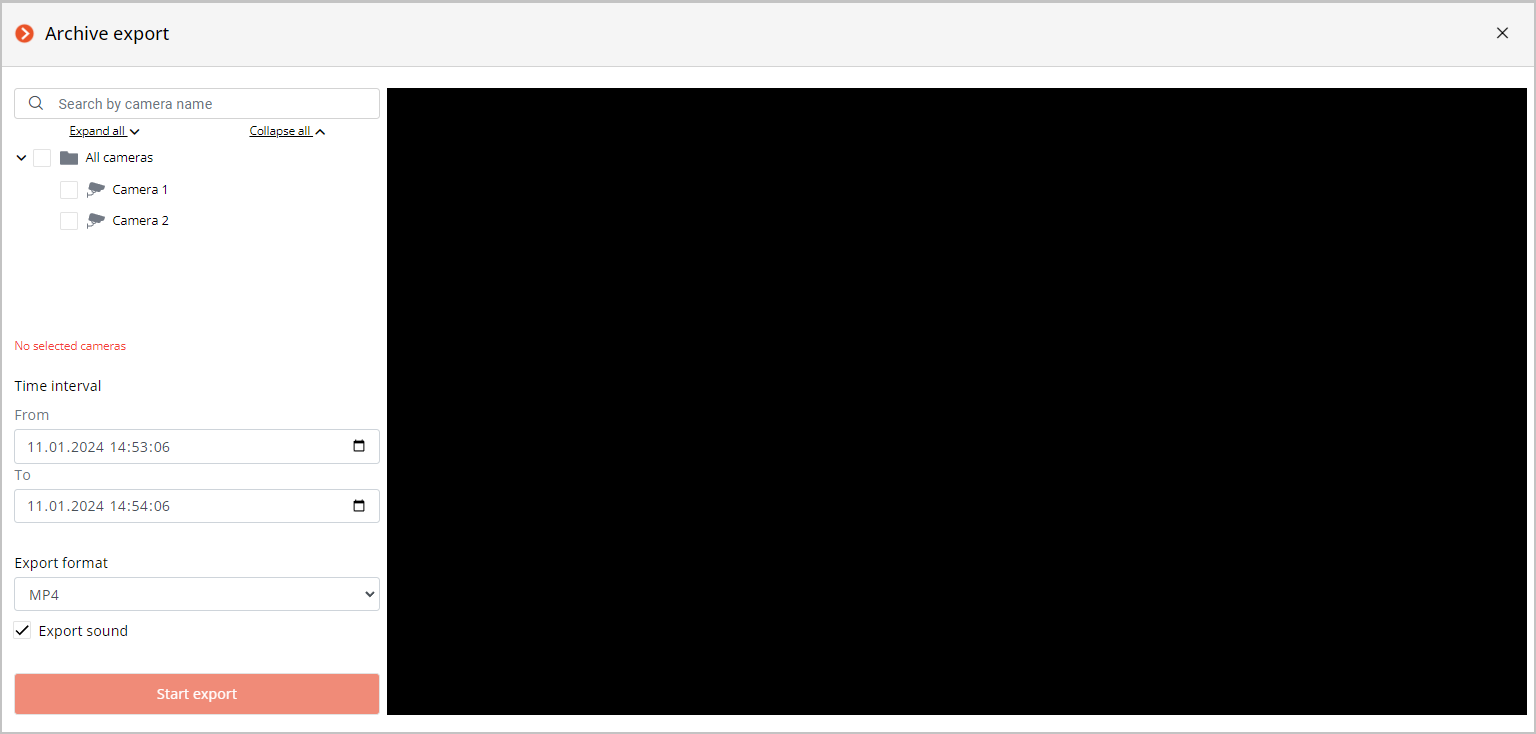
Export the archive fragment to a file. More details...
Export history🔗
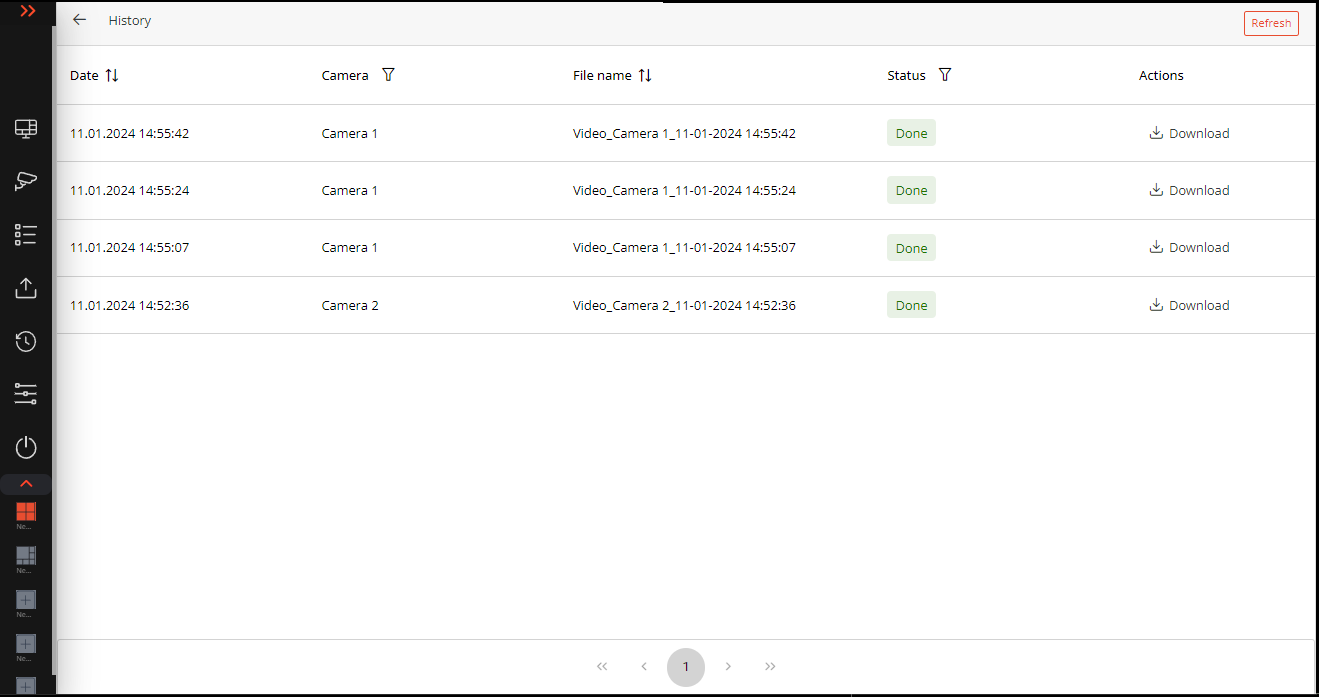
Viewing the current status and export history, downloading videos. More details...
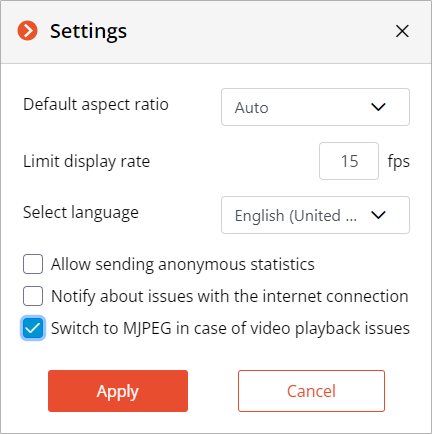
Settings🔗
Application settings.
Exit🔗
Return to the authorization form.
On-screen grid cell🔗
Grid cells display live and archive video of the selected cameras. One of the cells can be selected as active. The active cell is highlighted with a frame. To activate the cell, click inside it.
To call the context menu of the channel, right-click in the cell of that channel, or click to the  icon in the active cell.
Note
The contents of the context menu items and the active cell buttons depend on the camera and application settings.
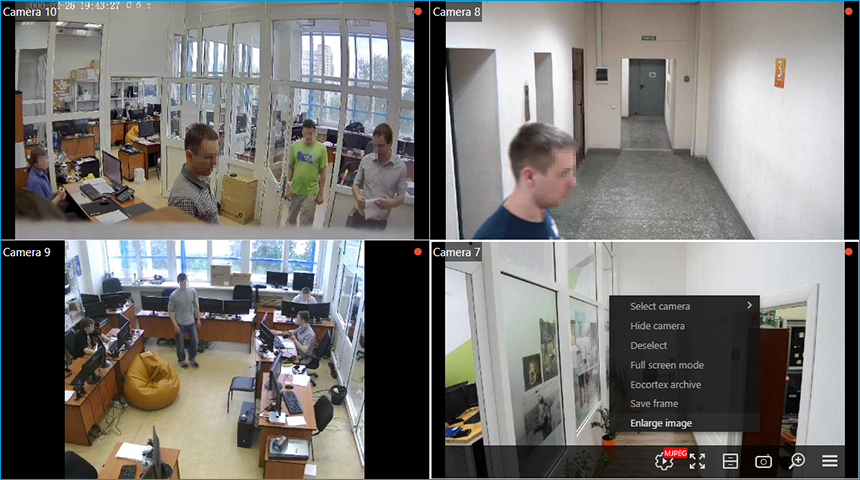
The following is a description of items in the context menu and control buttons:
Select camera: allows selecting the camera which will be displayed in the cell.
Hide camera: allows hiding the camera (clears the cell).
Unselect: removes the selection from the cell (makes the cell inactive).
 Full screen mode: expands the cell to the entire browser window.
Note
The change between the grid mode and full-screen mode can also be performed by double-clicking in the grid cell.
 Eocortex Archive : opens archive of the selected camera recorded on the server.
 Save frame: saves the current frame to disk. When this menu item is selected (or after clicking on the icon), the window for the selection of the location and name of the file to be saved will open.
 Enlarge image: displays the enlarged area of the frame. To enlarge the frame area, select this item in the context menu or click the corresponding button and draw the frame over the area to be enlarged. Enlarging mode can be disabled by clicking the middle mouse button.
 /
/  Show sound level: opens the sound volume control in the cells.
If the Play sound only on active camera option is enabled, only the sound from the active (currently selected) camera will be played in the on-screen grid; if the option is disabled, the sound will be played from all cameras displayed on the screen.

 PTZ: displays PTZ control elements.
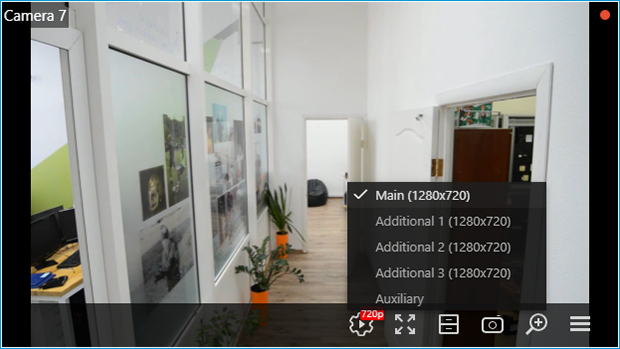
 Stream selection: Allows to choose the stream to display in the camera cell.
The following streams are available:
Main
Additional 1
Additional 2
Additional 3
Auxiliary
Note
Both main and additional streams are available for selection only in case if they are encoded to H.264 video codec in the source and the browser are capable to decode and display it.
Configuration of video streams should be performed by the surveillance system administrator.
Additional stream will always be available for selection. The server generates this stream in MJPEG from the original stream regardless of what video codec this original stream was encoded.
When assigning a camera to the cell for the first time, the additional stream will be displayed by default.
Warning
When viewing many cameras in H.264 video codec simultaneously, problems with the playback may occur. In such cases it is recommended to decrease the load to the browser by activating the Switch to MJPEG in case of video playback issues option in the  Settings window.

Full-screen live viewing🔗
Warning
The full-screen mode may significantly increase the load to the device where the browser with Eocortex Web Client is running. In addition, it may increase consumption of network channel with the surveillance server.
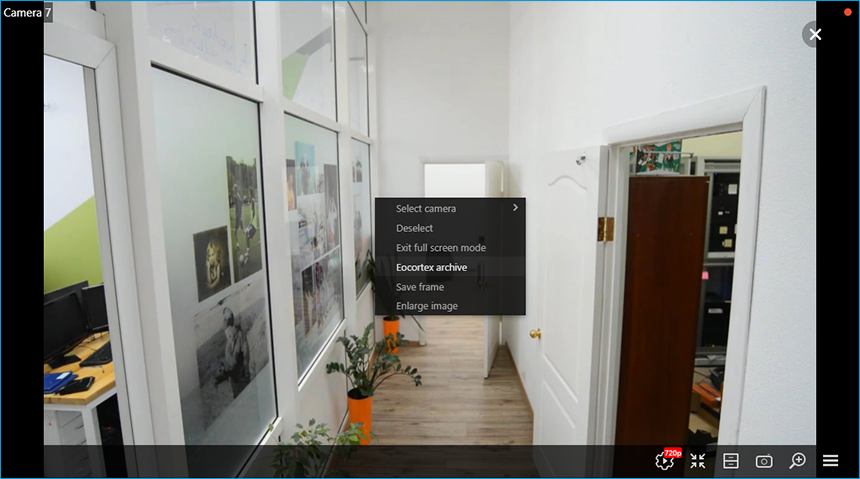
The following is a description of context menu items and buttons specific to full-screen viewing:
 Stream selection: Allows to choose the stream to display in the camera cell.
 Exit full screen mode: allows returning to the on-screen grid of channels.
 Eocortex Archive : opens archive of the selected camera recorded on the server.
 /
/  Show sound level: opens the sound volume control in full-screen mode.
Note
There may be a gap between the sound and the image that may be up to 1.5 seconds long.
Selecting a camera from a tree🔗
In Eocortex Web Client besides selecting cameras via the context menu, you can select cameras in a window containing a camera tree.

Camera tree allows to:
Choose the cameras in the list.
Find the cameras and folders by name.
Filter the camera tree by cameras' name.
Note
When the window is opened, the tree scrolls to the camera displayed in the active cell.
If the cell for which camera selection is performed is inactive (not selected in the grid), positioning in the tree to the selected camera may fail.
Playback of archive🔗
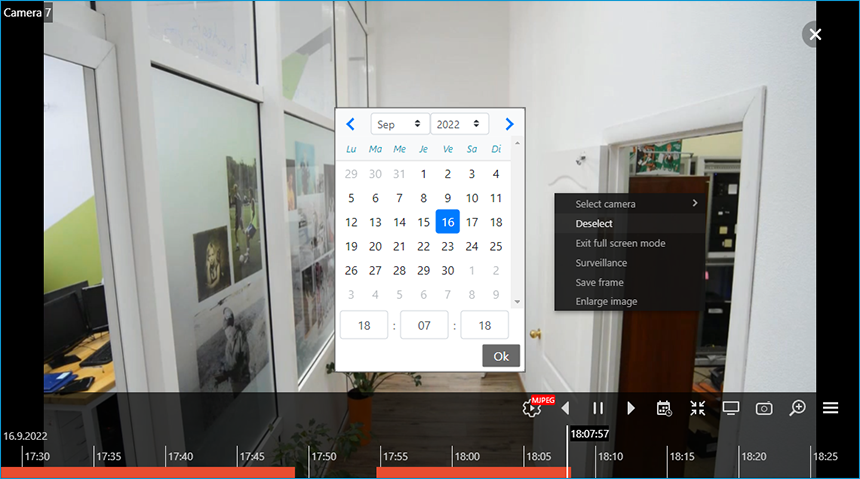
Warning
In the Eocortex Web Client application, it is not recommended to view videos with a reference frame interval (GOV) higher than 350. More details...
Note
The scale of time on the Fragments panel can be changed by rotating the mouse wheel.
The following is a description of context menu items and buttons specific to archive playback:
 Stream selection: Allows to choose the stream to display in the camera cell.
Note
Choice of stream for archive playback is saved for the camera. Selected stream will be applied to the camera next time when viewing archive.
 : expands the cell to full-screen.
 : playback controls: backward, forward, pause.
Note
When playing in backward, the archive recordings will be displayed only in key frames.
 : opens the calendar for switching to a set date and time.
 : controls the speed of video playback.
MJPEG video playback is available at 0.1×, 0.2×, 0.5×, 1×, 2×, 5×, 10×, 20× speed.
Warning
At speeds of 2× and above, the archive is played back only at reference frames.
Tip
To increase the smoothness of archive playback at speeds of 2× and above, it is possible to reduce the I-frame interval (GOV) on the camera. This will increase the frequency of reference frame recording, but archive recordings will take up more drive space (than archive recordings of the same duration before reducing GOV).
 Surveillance: switches the cell to live view.
 Save frame: saves the frame to the device.
 Enlarge image: enlarge the frame area (set with the frame). Press the middle mouse button to exit the zoom mode.
 : call the context menu.
PTZ control🔗
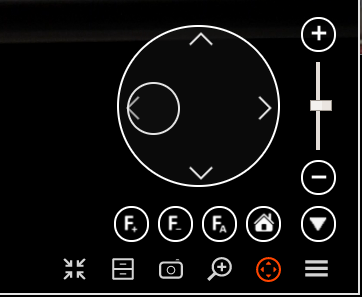
PTZ controls in Eocortex Web Client are similar to the controls in the Eocortex Client application.
Note
PTZ capabilities are only available in the full-screen view of the camera. Clicking the  button in grid mode will automatically switch to full-screen mode.
Pan and tilt can be performed with the virtual joystick by dragging a handle (a small circle inside a large circle) with the mouse.
 : Opens the tour list.
The selected tour from the list will be marked with a checkmark. After refreshing the page, the checkmark will disappear, but the tour will continue to be displayed on the screen.
 : Opens the preset list.
 : Returns the camera to the home position.
 : Controls the infrared lighting.
 : Controls the wiper.
 : Controls the washer.
 /
/  /
/  : Controls the focus.
 /
/  : Zooming in/out.
 : Hides the PTZ control panel.
Warning
PTZ Patrolling and Presets buttons are displayed if the corresponding settings are enabled on the camera. Other buttons will be displayed if camera settings are available, as well as the corresponding user permissions.
User tasks🔗
Clicking on the  button displays a list of tasks:

Confirmation of task completion:

Notification about task launch in the upper right corner of the screen:

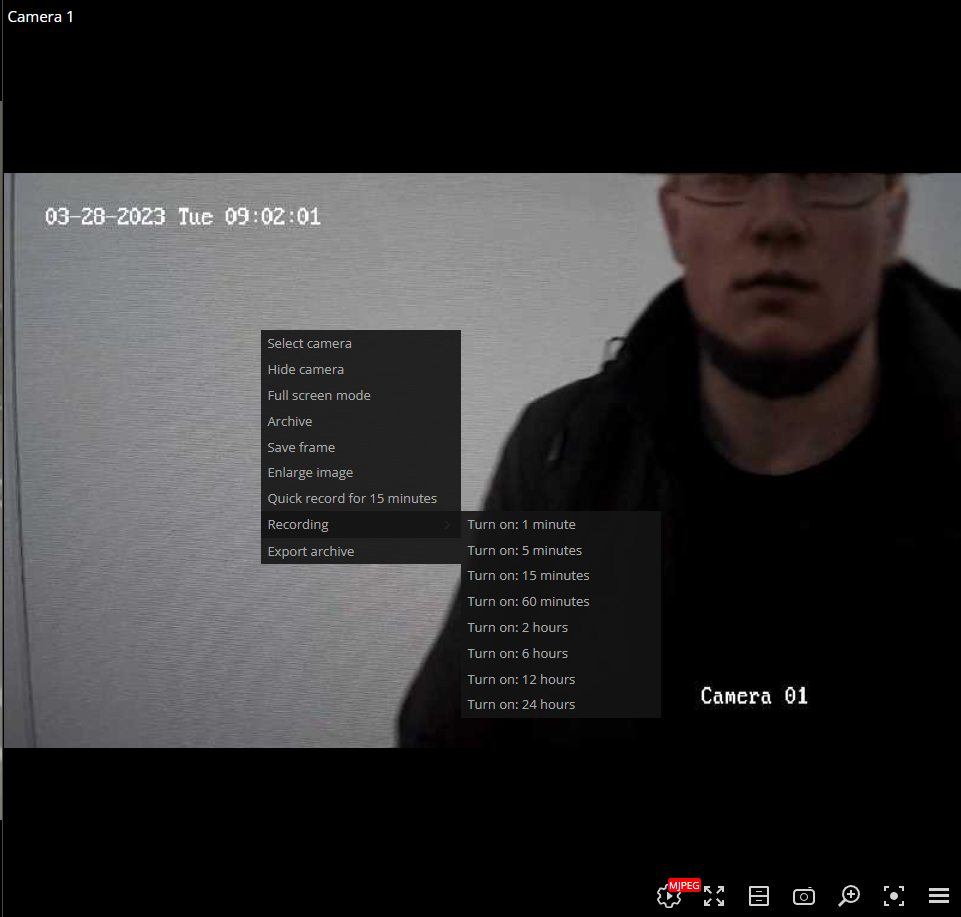
 .
. : Also enables recording to the archive for the next 15 minutes.