Views🔗
Note
View is a preconfigured screen grid with already placed cameras in the cells.
This page displays User views and Server views.
There are two viewing modes available for views:  list and
  tile. To switch between modes, use the buttons in the upper right corner of the screen.

The selected mode is saved for the entire Eocortex app, but does not match the mode selected on the Cameras page.
In the User views and Server views folders, folders are displayed first in the list, followed by views.
Note
The contents of the User views folder are saved when the account is authorized. In this case, all folders and views from the User views folder may be accessible to this account when authorized from another device.
Note
When updating the Eocortex app to version 6.0, all previously created user views are moved to the User views folder.
Note
If the Eocortex server version is lower than 4.3, all server views are saved to the Server views folder.
Search🔗
To perform a search, tap the  button in the upper right corner.
The search operates as follows:
The search is performed across all folders and views without exception.
The search is case-insensitive.
When results are returned, folders are listed first, followed by views.
Search results can be viewed in both list and tile modes.

Navigation🔗
When opening a folder, the name of the current folder appears at the top of the screen, and below is a navigation bar with the following options:
Go up one level to the parent folder;
Go to root folder by tapping the
 button.

The root folder contains two folders:
User views
Server views

User views are created and stored in the client application Eocortex. In the User views folder, various commands can be executed for folders and views.
Server views are stored on the Eocortex server and become available in the Eocortex mobile application when connected to the server. Access to certain server views may be restricted for specific user groups.
Warning
In the Eocortex app, server folders and views can't be changed, moved, or deleted.
User views and Server views can be added to favorites using the  button. The view added to favorites will be displayed on the Main page.
Viewing🔗
When choosing the view, the multi-picture page opens.
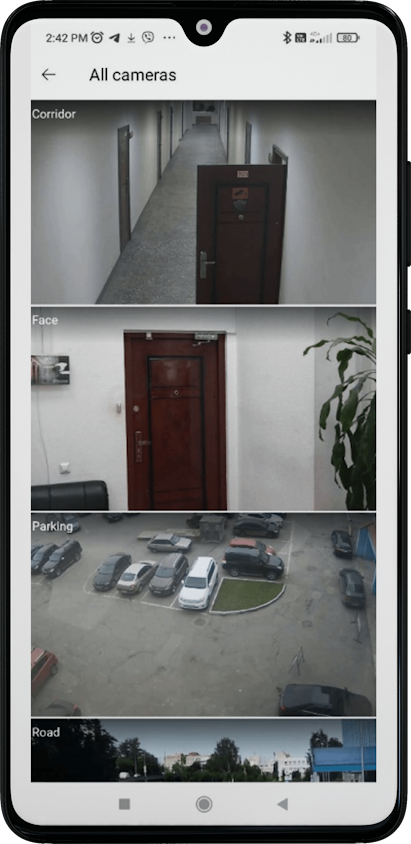
Multi-picture view is a display mode where the frame updates of the cameras directly depend on the number of cameras shown on the screen.
Note
The multi-picture can be viewed in both portrait and landscape orientations.
If the number of cameras is less than 14, the video will be displayed in the regular format. However, if the count equals or exceeds 14, the update will be frame-by-frame and sequential.
When scrolling or adjusting the number of columns, the cameras update accordingly.
While viewing, you can zoom to adjust the number of displayed columns, but this change will reset upon exiting the view.
You can swipe left or right to see other views.
Warning
Swiping views is only available within a single folder.
Tapping on a camera displays it in full-screen mode. Swiping left or right allows you to cycle through all cameras in the view.
If the column number is less than four, the camera names are displayed.
The  button in the upper right corner of the view allows you to perform the following actions:
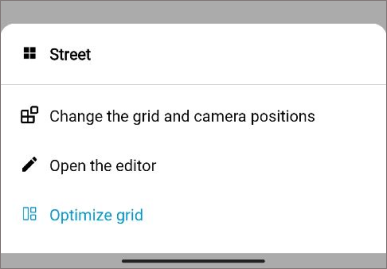
Exiting the view editor returns to the preview.
Note
Only grid optimization function is available for server views.
Grid optimization allows using screen space efficiently by adapting the cell sizes to the size of cameras. This option can also be configured on the More page in the Video section.
The image below shows the unoptimized and optimized grid view.

Warning
The optimization setting is applied to all views. The size of the view preview cells on the Main page and in the list of views is the same for all cameras, even if the optimization option is enabled.
Creating items🔗
Step 1 — Select an item to create
To create a new item, go to User views, select the folder where the new item should be created, tap the  button in the lower right corner of the screen, and select the item to be created.

Note
It is possible to create folders and views in any folders located in the User views folder.
Folders🔗
Step 2 — Set the folder name
If the New folder was selected, a dialog box will open where the Folder name should be set. After entering the name, tap the Ok button.

Warning
If the name box is left blank, the Ok button will be unavailable, and it won't be possible to continue creating the folder.
After tapping the Ok button, the new folder will be displayed in the folder selected during creation on the Views page.

Note
The new folder appears at the top of the list in the current folder.
Note
If folders with the same name were created within the same folder, a duplicate counter will be added to the name of the last folder created.

Views🔗
Step 2 — Set the view name
If the New view was selected, a dialog box will open where the View name should be set. After entering the name, tap the Ok button.
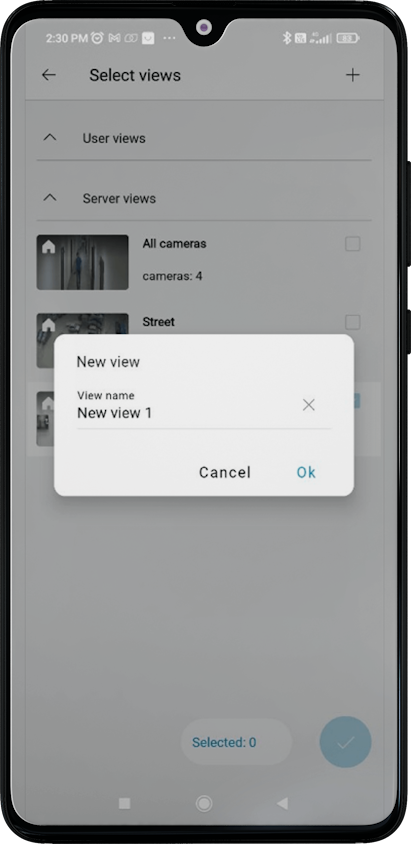
Warning
If the name box is left blank, the Ok button will be unavailable, and it won't be possible to continue creating the view.
Step 3 — Select cameras
Next, select the cameras for the view.
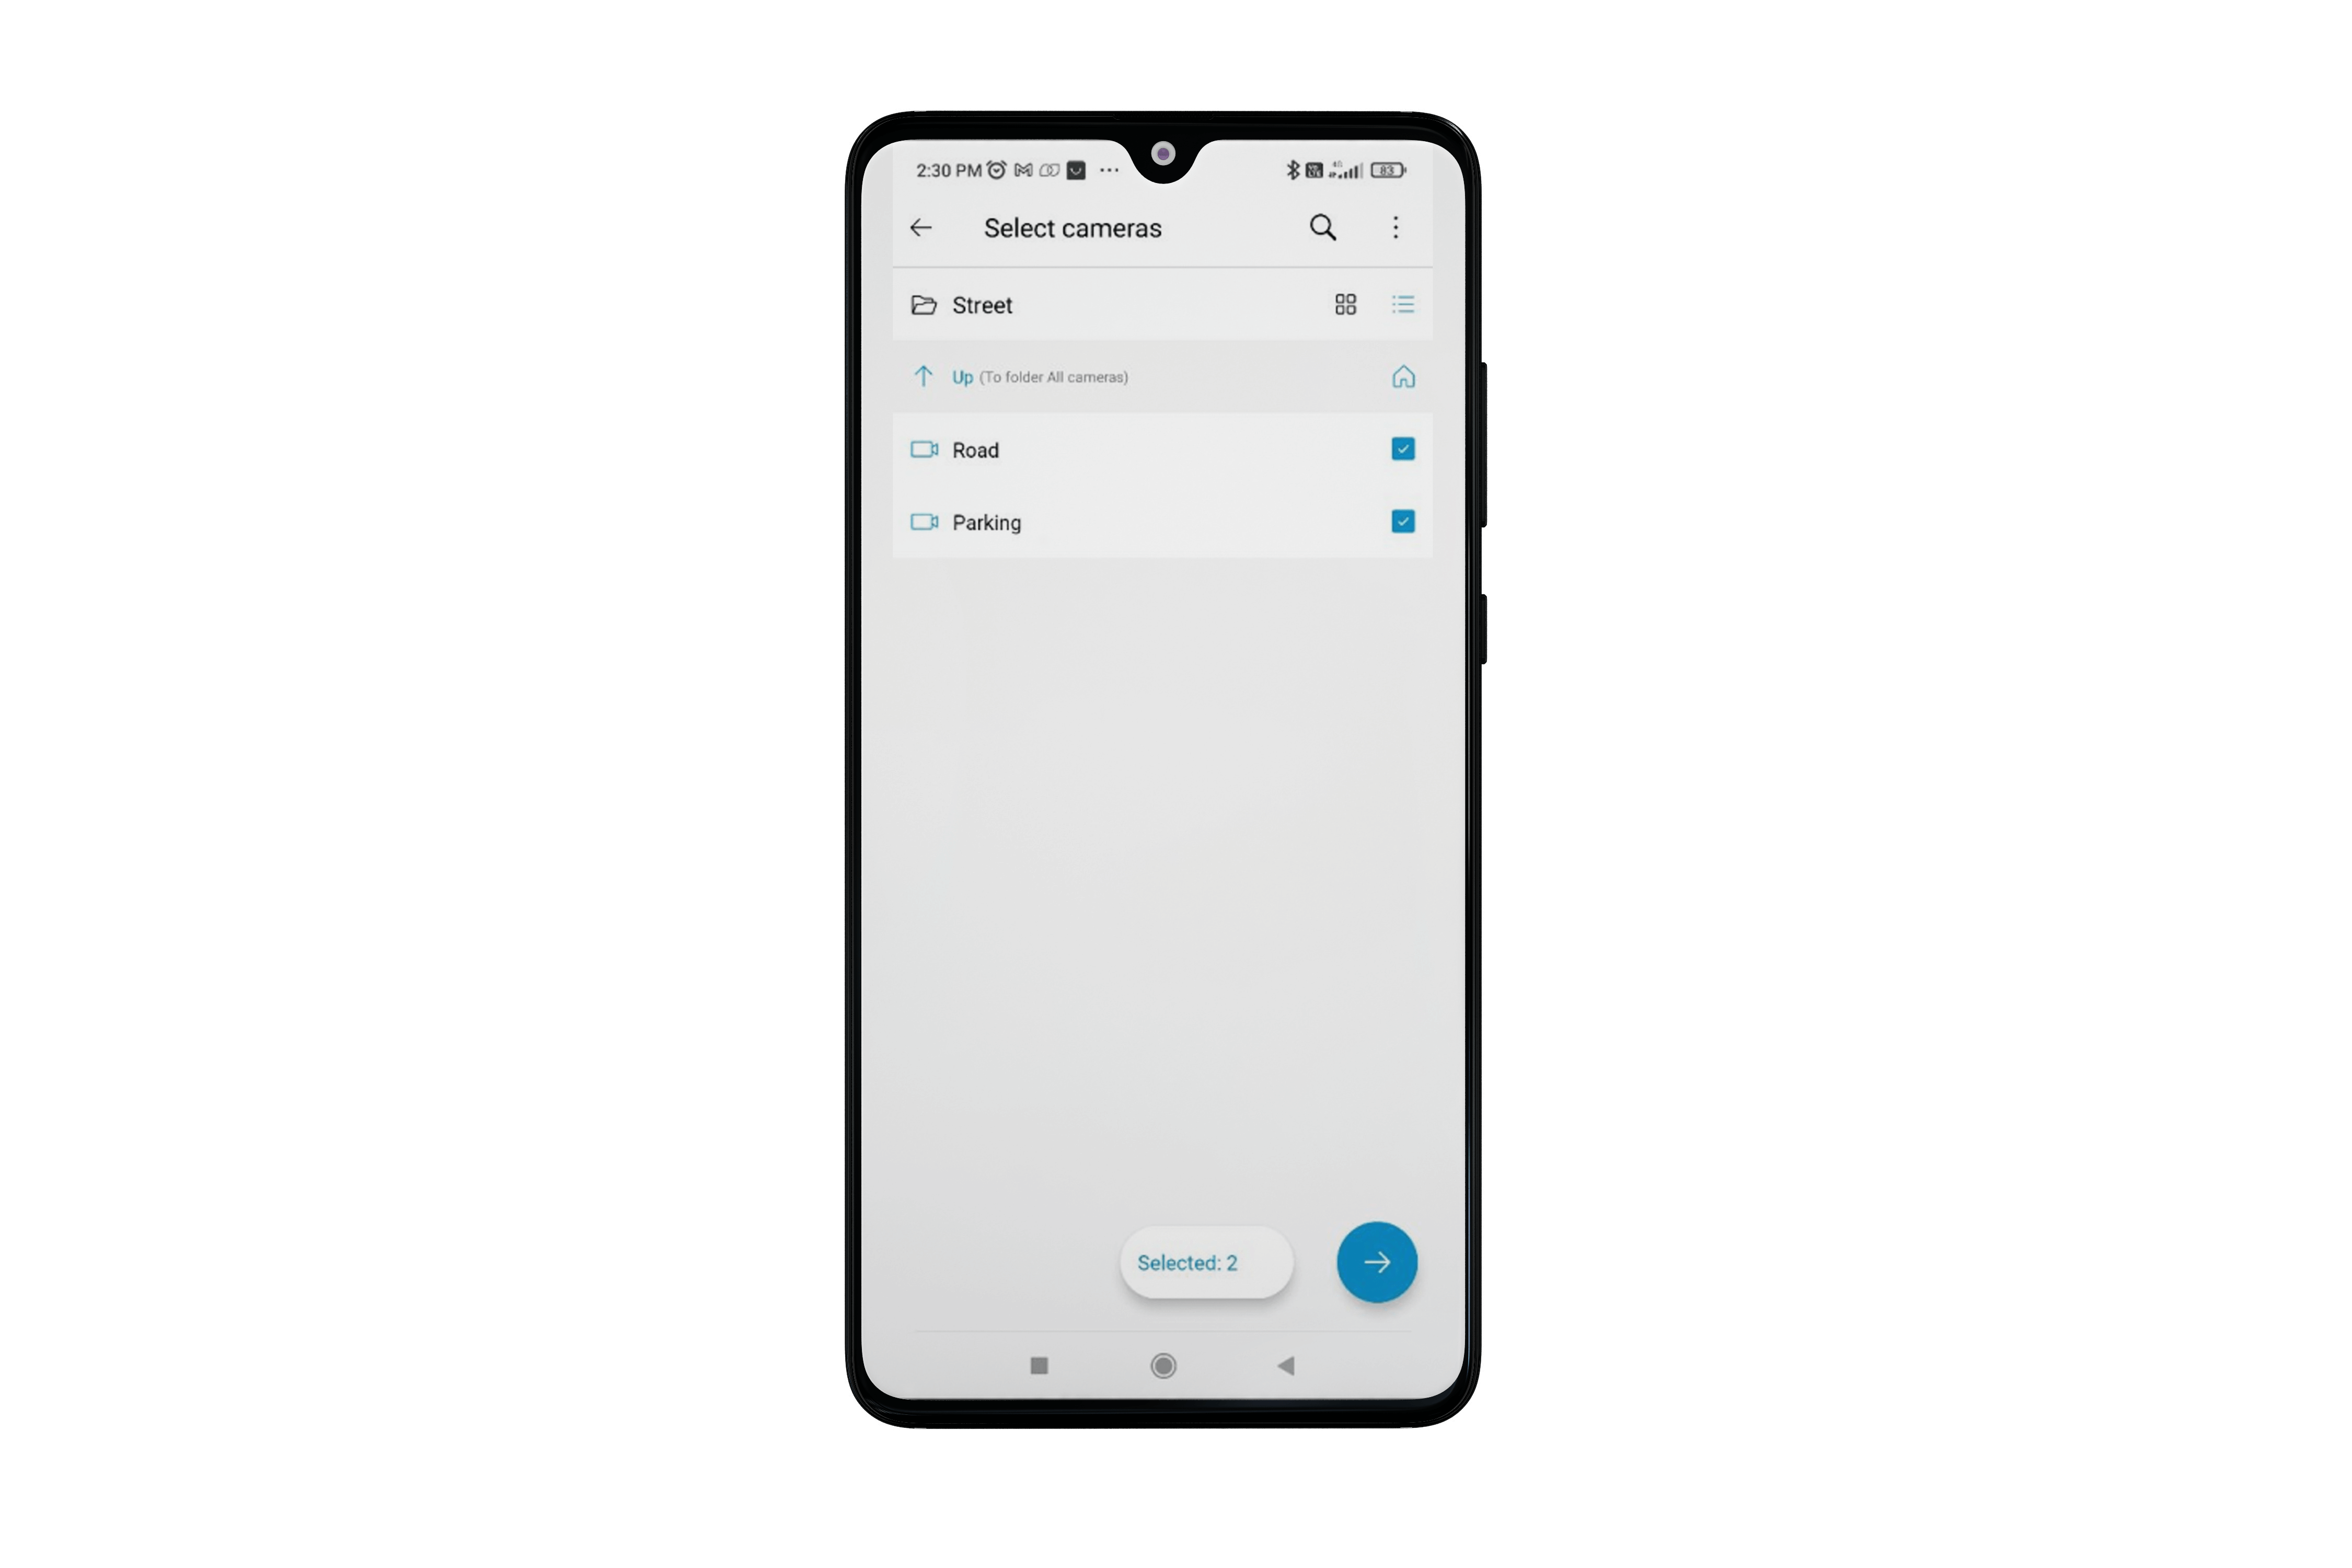
When selecting cameras, you can:
View them in the list
or tile mode.Use the search by cameras and folders.
Select and deselect cameras in a folder. To do this, tap the folder you want, then select or deselect cameras within the open folder.
View the list of selected cameras and remove cameras from it. Use the button at the bottom of the screen to open the list of selected cameras:

To remove cameras from the list, use the  button located opposite the camera name.

After selecting the cameras, tap the  button at the bottom of the screen.
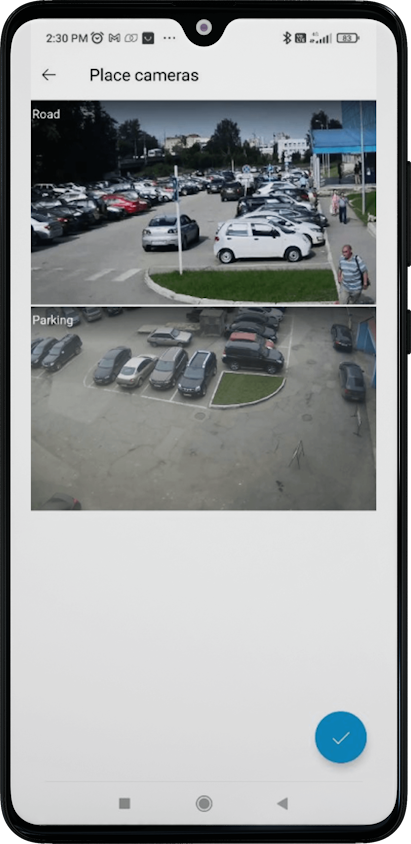
Step 4 — Place cameras
The next step is to locate the cameras in the view.
Use gestures to zoom the size of the displayed camera cells, and long touch to swap cells.
After tapping the  button, the new view will be displayed in the folder selected during creation on the Views page.

Note
The new view appears at the top of the list in the current folder.
Note
If views with the same name were created within the same folder, a duplicate counter will be added to the name of the last view created.

Context menu commands🔗
In the User views folder, a context menu button is available for each view and folder.

If you need to execute a command for a folder or view, tap the button. A context menu will open, containing the following commands:
Rename — allows you to rename a folder or view: to do this, enter a new name in the dialog box and tap the Ok button.

Move — allows you to select a folder and move an item (folder or view) to it.

Warning
When switching to moving mode, the User views folder becomes the root folder, and moving items is available only within this folder.
Warning
When moving a folder, it becomes unavailable for selection.
Warning
In moving mode, interaction with views becomes unavailable.
To execute the command, select a folder in the tree structure and tap the button. After that, a dialog box will open where you can confirm the moving of the item by tapping the Ok button.
To cancel the moving, tap the  button or cancel the moving in the dialog box.

Warning
Once the moving of the item has been confirmed in the dialog box, it will not be possible to cancel the command.
After executing the command, the folder from which the item was moved will open.
Delete — deletes the selected item (view or folder with all contents). Deletion of the item must be confirmed in a dialog box.

The following commands are available for the view:
Edit — allows you to change the view: select cameras and place them in the view.
Make a copy — makes a copy of the selected view. To make a copy, you need to confirm the action in the dialog box.

The created copy of the view is moved to the end of the list of views.

Change mode🔗
To enter the Change mode, there are several ways:
Method 1:
Open the User views, tap the button in the upper right corner of the screen, and select Change items.

Method 2:
Open the User views. Enter the Change mode by long tapping on one of the items (folder or view).
Warning
The Change mode is only available for items from the User views folder. However, items can only be changed within a selected folder.

Warning
All changes made in this mode will only be applied after tapping the confirmation button . Some changes require confirmation in an additional dialog box that appears after tapping the button .
To cancel all changes, tap the button.
The following options are available in change mode:
Changing the order of items.
By long tapping on one of the items, it is possible to move it to the location of another item.
Warning
The order can only be changed for items of the same type. In this case, you can change the order of either views or folders. It is not possible to change the location of a view and a folder.
Moving items to a folder.
Holding the item, move it over the folder and release it. Most of the item should overlap the folder.

Note
If you move an item to a folder that already contains an item of the same type (folder or view) with the same name, a duplicate counter will be added to the item being moved.
Deleting items.
If you have selected tile view mode, you can delete items using the button located in the upper right corner of each item.
Performing group operations.
To perform a group operation, select the items needed and tap the context menu button . The following commands are available in the context menu:
Move — allows you to move selected items to a folder.
Delete — deletes selected items.
Select all — allows you to select all items in the folder.
Deselect — cancels the selection of items in the folder.
Note
If no objects are selected in change mode, only the Select all command will be available in the context menu.
Preview in the list of views🔗
Each view has a preview on the left, showing the number of columns and camera previews.
If a frame can not be retrieved from the server, a gray background with a crossed-out camera will be displayed instead of the preview.
Caching🔗
When a new configuration is detected, if the real-time configuration update option is enabled, the following will occur:
Update of the server view list.
Refresh of cameras within both server and client views.
View deletion if it has no cameras.
While viewing in multi-picture mode:
Returning to the views list when the number or order of views changes.
Real-time update of the multi-picture view when cameras in views change.
When viewing a camera selected from the multi-picture view:
Returning to the views list if access to the view is denied.
Returning to the multi-picture display upon changing the view.
Video restarts when camera settings are modified.
During view editing:
Cameras are automatically refreshed.
If there are no cameras or access to them is denied, the view will not be saved.