Connection setup🔗
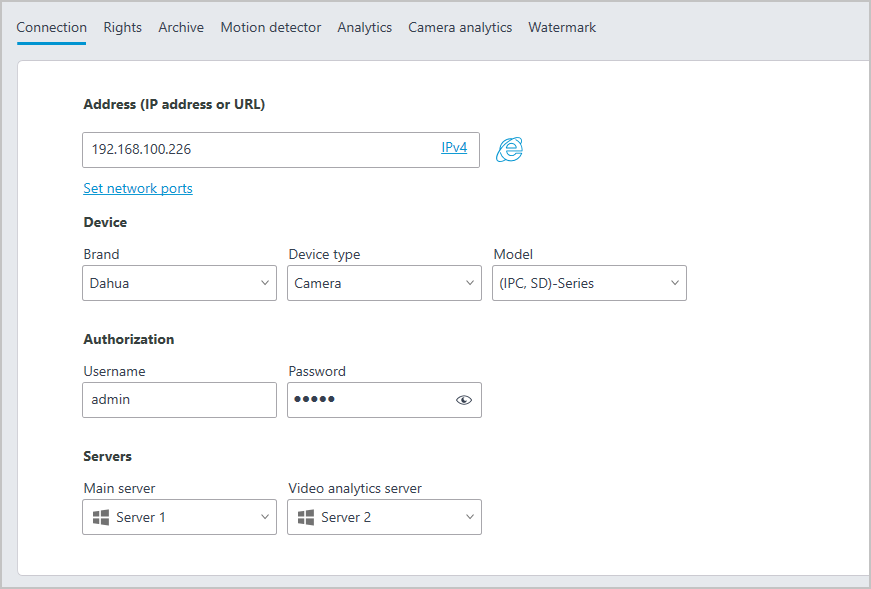
On the Connection tab, the connection to camera is set up as well as the parameters of the video streams received from the camera.
Note
For the drop-down lists of camera manufacturers and models, as well as servers, the search for the specific list position is available.
Note
The search in the drop-down list can be performed by any part of the searched word. The search is not case-sensitive of the text being entered.
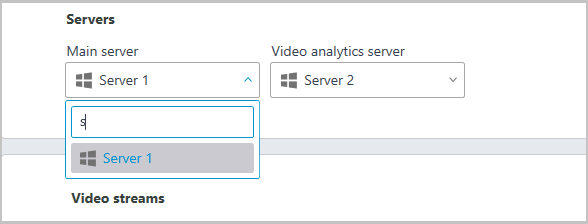
In the drop-down list, the needed position can be selected either with the mouse or with the keyboard using the up/down arrows and the Enter key.
If the user switch to another control during the search, then the list position that was highlighted during the switch will be used as a search result.
Address (IP address or URL)🔗
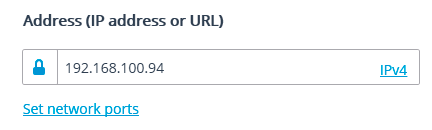
In order to connect to a camera, it is required to indicate its Address (IP address or URL). Prefixes like http:// are not required in this field. In some cases, it may be required to state a management port / data port of the device, for example, 192.168.1.55:8000.
If a camera supports the secure connection via HTTPS, it can be enabled by clicking on  button.
Note
This capability is available for selected cameras.
Note
The port indicated in the connection address field is used for the secure connection. If no port has been explicitly indicated, the port 443 will be used for secure connection.
Warning
The operability of all the utilized camera features with the secure connection is checked before starting to use such connection. The camera features whose safety cannot be verified will not work when the secure connection is established.
With the majority of cameras, all the features will work via HTTPS port with the secure connection. However, some cameras may use different ports for different functions. That is why the availability of all camera ports is verified.
Due to the above reasons, when the secure connection is used, it is recommended to check the operability of all the required camera features, such as alarm inputs and outputs, before applying the settings.
Warning
The validation of the TLS/SSL certificates used for the secure connection with the cameras is not performed. Thus, it is possible to use any certificate for the above mentioned means.
Note
In case of using the secure connection, the connection to the camera through the server is always used.
Warning
If the DevicePack or the server version earlier than 2.8 is used, the secure connection will be unavailable.
If a camera is connected using the IPv6 protocol, it is required to select this protocol in the dropdown list in the right part of the Address (IP address or URL) field.
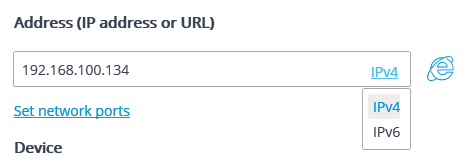
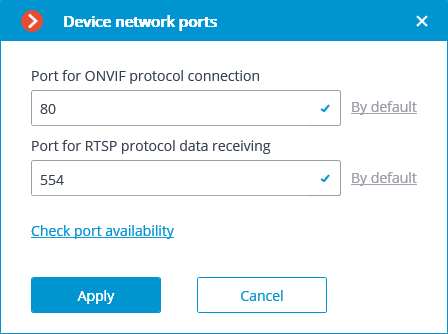
Set network ports link opens the Device network ports window allowing to specify ports that differ from those used by default.
Note
This capability may be unavailable for certain cameras.
Pressing the  button attempts to open the camera in a web browser.
Device🔗
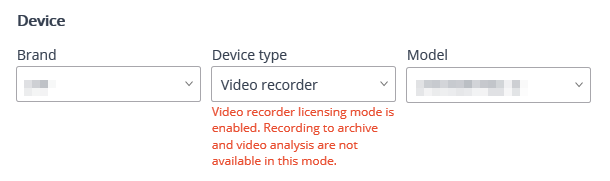
It is also necessary to set the manufacturer and the model of the camera.
Note
The connection of cameras the manufacturers or model of which are not in the list is described in Camera connection features section.
Note
Apart from the cameras, it is possible to connect video servers, video recorders and door phones selecting the appropriate device type.
For video servers, it is required to additionally indicate the number of a channel that the camera on this server is connected to.

For video recorders, the special licenses approved by the video recorder manufacturers are used.

Authorization🔗
If in order to connect to the camera it is required to log in, Username and Password must be set.
Note
Specified user must have full access to the camera.
Servers🔗
In the multi-server system, it is required to indicate which server will be assigned as main for the given camera. In case there are redundancy licenses, it is also possible to specify a backup server for the camera.
Main server is the server that connects to the camera and processes its video and audio data, including the analysis performed by the video analytics, recording to the archive and forwarding to the client applications.
Warning
In a multiserver system, when moving a camera from one server to another, the archive is not moved, but remains accessible provided that the previous server is accessible from the client computer (if the server is not directly accessible, use a proxy connection). If the camera is subsequently moved to a third server, viewing the archive on the first server may become unavailable.
See more information about Preserving archive when moving a camera to another server.
Backup server is the server that connects to the camera and processes its video and audio data in case of a failure of the main server or all of its archive drives. After the main server is restored to working order, switching from the backup server to the main server will occur.
Attention
When switching to the backup server, all of the video analytics modules enabled on the camera will cease to operate.
Note
When the Constant redundancy server feature is enabled, the backup server will constantly process video from the cameras linked to it.
Video analytics server is a server exclusively dedicated to launching video analysis modules that process video data sent from other servers. Having said that, the video analytics server does not perform archiving of the video data being analyzed nor its broadcasting to client workplaces; these actions are performed on the general servers of a video surveillance system. Thus, the Video analytics server allows to remove the load associated with video analysis from the rest of the servers.
Description, features and limitations of the video analytics server.
Time zone🔗

In the Time zone group of settings, the time zone that the camera will use in operations can be set:
Server time zone: the time zone of the server the camera is linked to will be used.
Camera time zone: the selected time zone will be used, regardless of what time zone has the server the camera is linked to.
Description🔗
In the Description you can specify additional optional details about the camera, including its location, purpose, or other relevant metadata.

Tags🔗
In the Tags field, you can either:
Choose an existing tag from the dropdown list.
Create and add a new tag.

To add a new tag, enter a name for the tag, select a color from the color palette, click the  button. The new tag will be automatically saved to the tags list and available for future use.

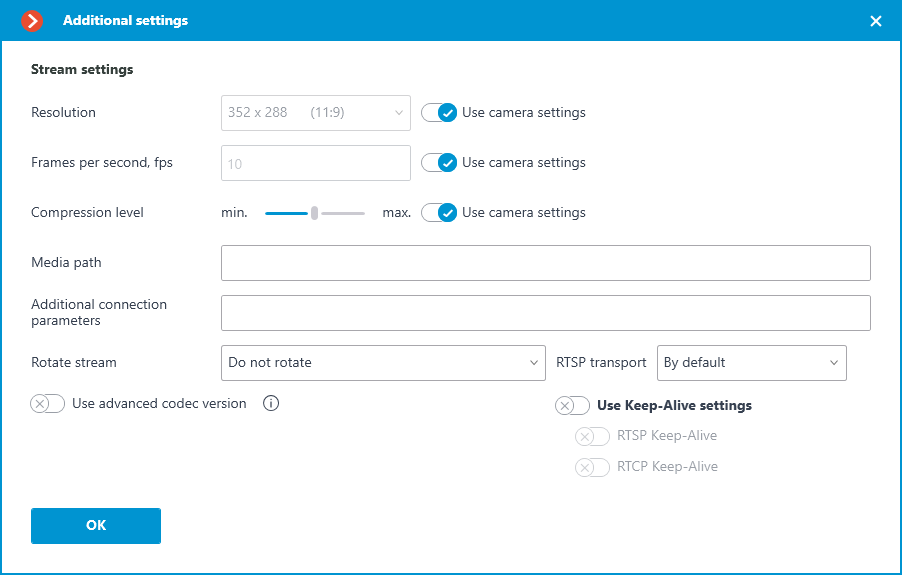
Video streams🔗
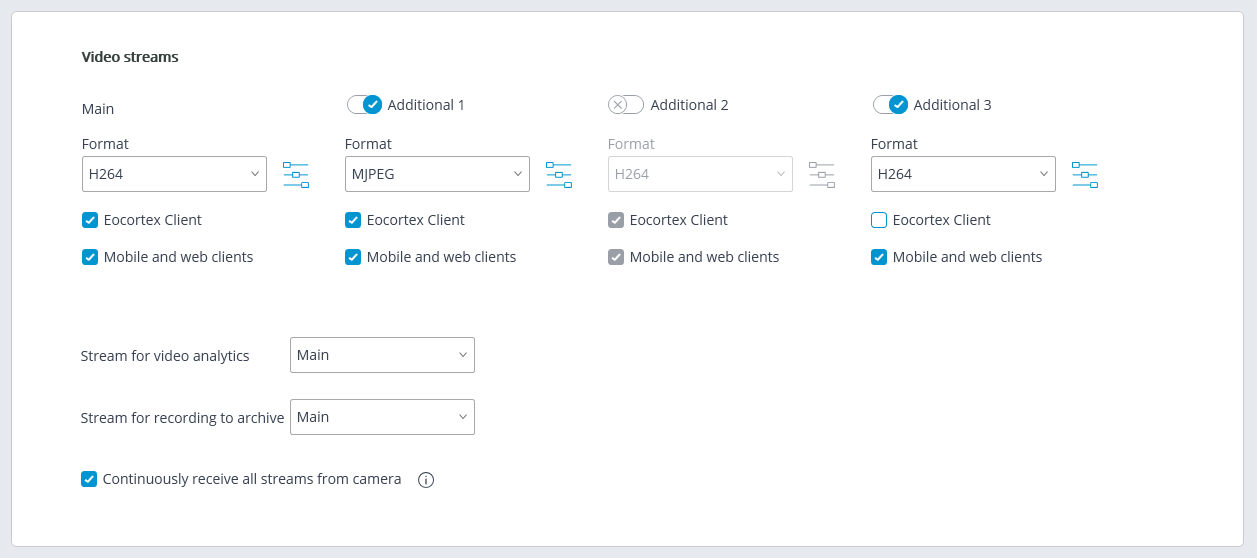
In the Video streams group of settings configuring the reception of video streams from the camera.
If the selected camera model supports additional video streams, it is possible to enable and configure them. It is required to select streams for archive recording and video analysis.
Note
More details regarding the video streams can be found in the Using multiple streams section.
Support of three additional streams is not implemented for all the cameras: for many cameras, only one additional stream is supported; for some cameras, only the main stream can be received.
The number of additional channels that are implemented in Eocortex is shown in the settings, even if the camera itself supports a larger number of streams.
The streams are configured on the camera itself. In the Eocortex Configurator, only the reception of these streams and their use in Eocortex are configured.
For each video stream, a codec specifies separately; client applications where the stream will be used are also selected. Clicking the button  opens the window with additional video stream settings.
Note
The parameters available in the Eocortex Configurator window may differ depending on the camera models.
Setting camera parameters from the Eocortex Configurator application is available for a limited number of camera models.
Note
To display the Use advanced codec version, selected video stream must be of H.264 or H.265 codec.
There are some requirements and limitations in the use of advanced versions of codecs.
Eocortex Client option : allows you to broadcast this video stream for displaying it in the Eocortex Client application.
Mobile and Web Clients option : allows broadcasting the video stream for displaying it in the Eocortex mobile application and the Eocortex Web Client.
Note
These options must be enabled for at least one video stream.
These options are enabled by default for all video streams.
Continuously receive all streams from camera: Constant receipt of all streams from the camera will improve the responsiveness of the interface in the clients at the expense of increasing the load on the server and network.
Additional🔗
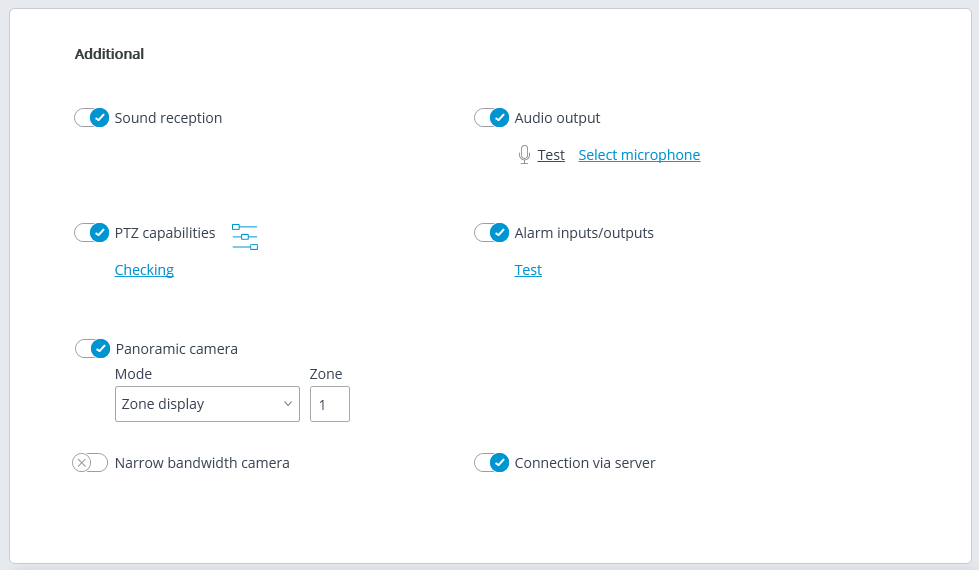
The following settings are available in the Additional group of settings.
Sound reception: enables the reception of sound from the camera.
Audio output: it enables the transmission of sound to the camera. With the push of the  button, the microphone connected to a computer is switched on, allowing to test the sound transmission. The choice of a particular sound device (driver) is made following the Select microphone link.
PTZ capabilities: enables the camera control features.
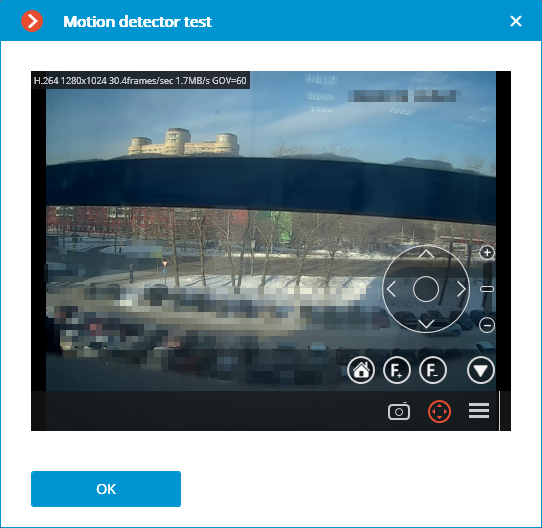
Test: link opens the window with the test video broadcasting which contains PTZ controls.
The  button opens the Tour setup (automatic patrolling) — the sequences of toggling camera presets.
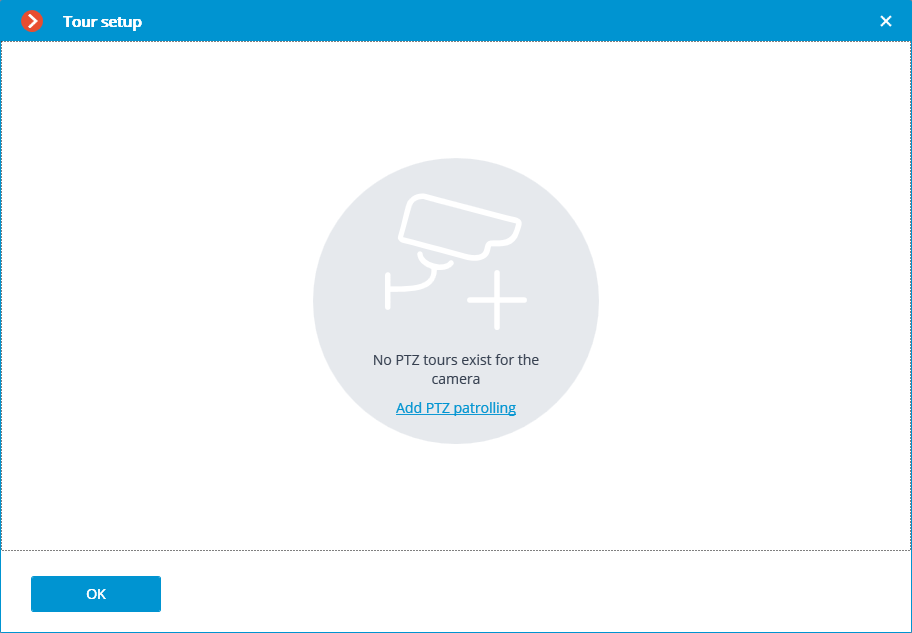
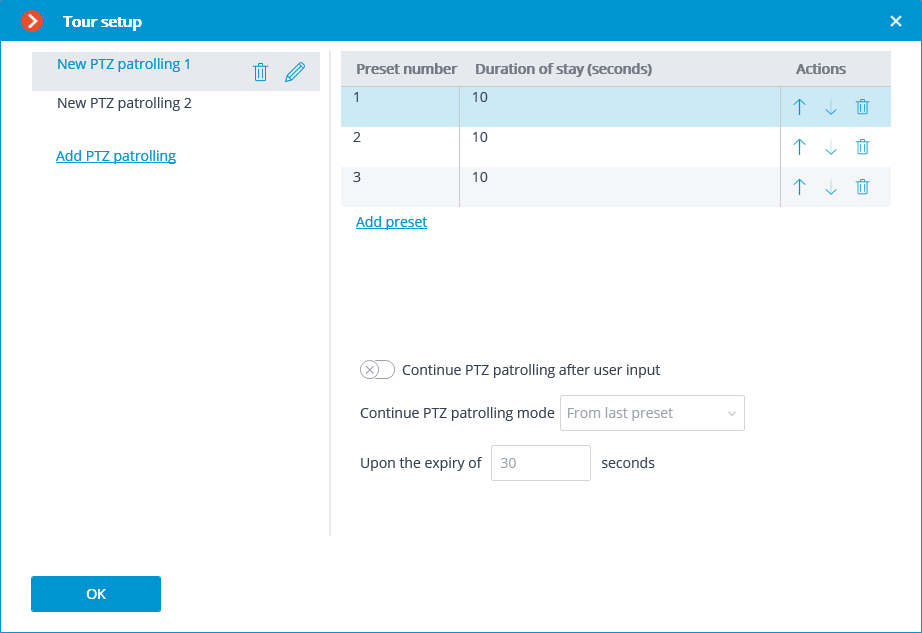
Note
To automatically start or stop a tour, configure automation script.
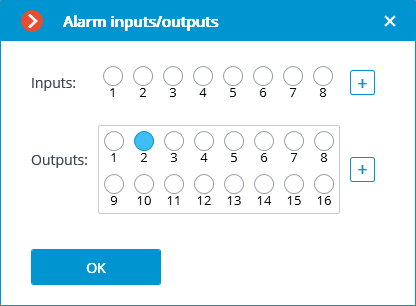
Alarm inputs/outputs: enables signal recording from the inputs and sending signals to the camera outputs.
The Test link opens the camera inputs and outputs window. When signals are sent to the inputs, the corresponding indicators will be highlighted in the Inputs line. For sending signals to the inputs it is required to click on the corresponding indicator in the Outputs line. By default, 8 input and output indicators are displayed; to have more inputs or outputs displayed, press [+] located to the right of the corresponding indicator block.
Panoramic camera: allows to select the display modes available for the particular model.
Note
If a position is selected in the Model field that corresponds not to a particular camera model but to a model range, the Panoramic camera option will be available on the condition that the PTZ camera feature support is implemented for at least one model from the selected range. That is why the Panoramic camera option is to be switched on only if the connected camera really is a PTZ one.
Narrow bandwidth camera: enabling this option will increase the time of waiting for the camera signal.
Connection via server: when this option is enabled, the video streams to the client workplaces will be transmitted through the server. When this option is disabled, video streams to client workstations will be transmitted through the server only if there is access to that server; if there is no connection between the client and the server, the client will connect to the camera directly.
Note
Some cameras have a limitation of the quantity of simultaneous connections, or they lower the frame transmission frequency when several simultaneous connections are in place. Thus, the connection through server ensures only one connection to the camera for any quantity of the client workplaces.
Warning
If this option is disabled, the Eocortex Client application will try to establish a connection with the camera according to the data specified in the channel settings. Receiving video streams may cause difficulties if the camera and the client workstation are located in different networks.
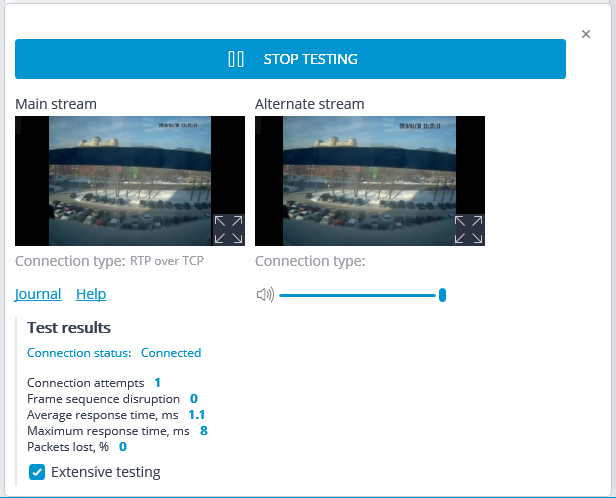
Test camera🔗
Pressing the Test camera button initiates an attempt to connect to the camera with the current parameters.

The connection status will be displayed in the test window. The test connection events are available in the log at the corresponding link.