Integration with BioStar 2🔗
Eocortex has the integration with the Suprema BioStar 2 ACS. With this integration, Eocortex can receive and process events from Suprema BioStar 2, as well as send commands to the ACS to perform various actions.
Note
Integration is available for servers running both Windows and Linux.
Note
Integration is available in version Eocortex 3.5 and higher.
Integration was performed with Suprema BioStar 2 version 2.8.11.60.
Description
The integration supports two-way interaction between Eocortex and Suprema BioStar 2, allowing to receive and process events from ACS in Eocortex applications, as well as to send control commands to the doors controlled by Suprema BioStar 2.
The event information can contain the following lines:
Type of event (code and description) (e.g.: Door opened by operator, Fire alarm, Access denied);
Information about the device (controller) (name and identifier). The controller can have relays and readers to which the doors can be connected. Information about them is not used in Eocortex;
Information about the door (name and identifier);
Information about the user (name and identifier);
Information about the user group (name and identifier).
As a command to the ACS, requests for one of the following actions can be sent:
Open — temporarily opens the door.
Release — removes the manual door lock/unlock.
Manual lock — manually locks the door. The door remains locked even if the user is successfully authorized.
Manual unlock — manually unlocks the door. The door remains open without the need for user authorization.
Clear alarm — removes the alarm state from the door.
Events log
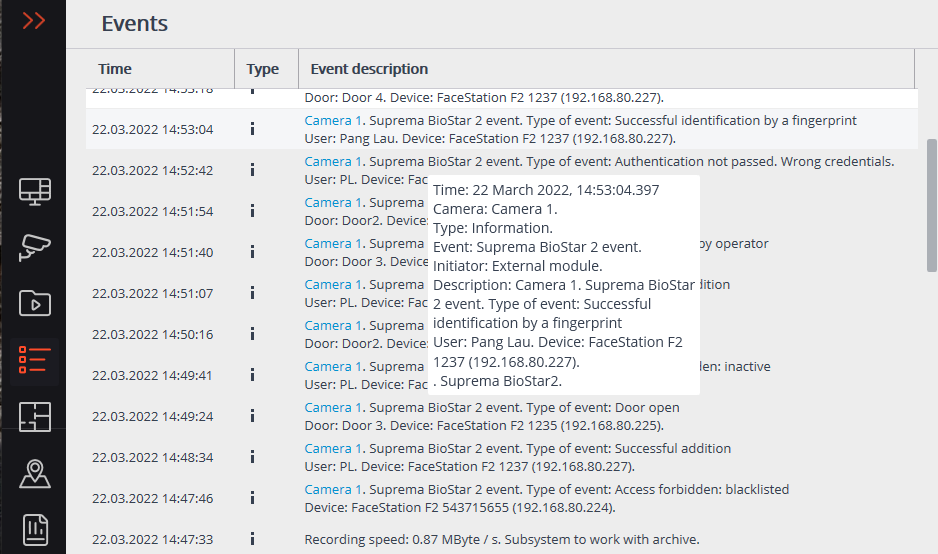
Events received from the ACS or created by sending commands to it are displayed in the Event Log of the Eocortex Client application. These events are associated with the relevant camera.
The following lines are displayed for the log entry, if available for this event type:
Type of event — the description of received event;
Name of device;
Name of door;
User name.
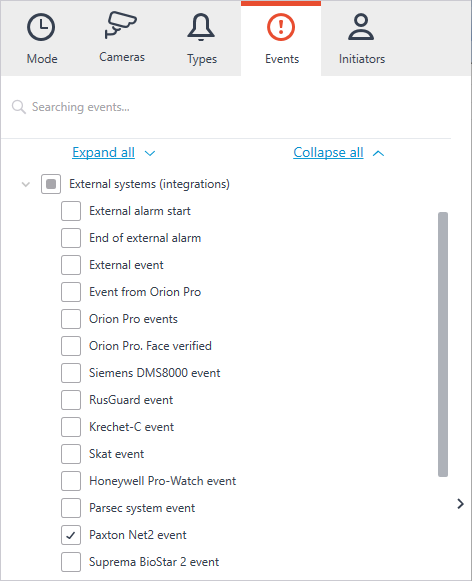
The Events log can be filtered to display events only from Suprema BioStar 2.
Setting tasks by events
To set up the scenario executing as a response to the event received from the security platform, go to the  Automation section of the Eocortex Configurator application. In the list of cameras, select a camera or a group of cameras and switch to the Tasks by event tab on the page that opens.
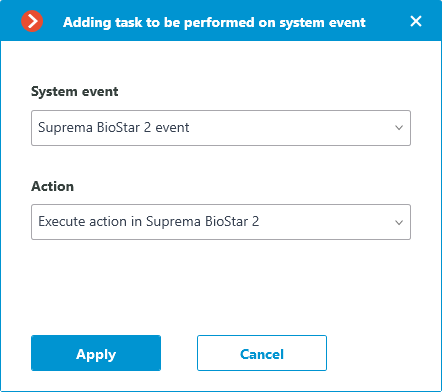
It is possible to configure any standard task for the Suprema BioStar 2 event:
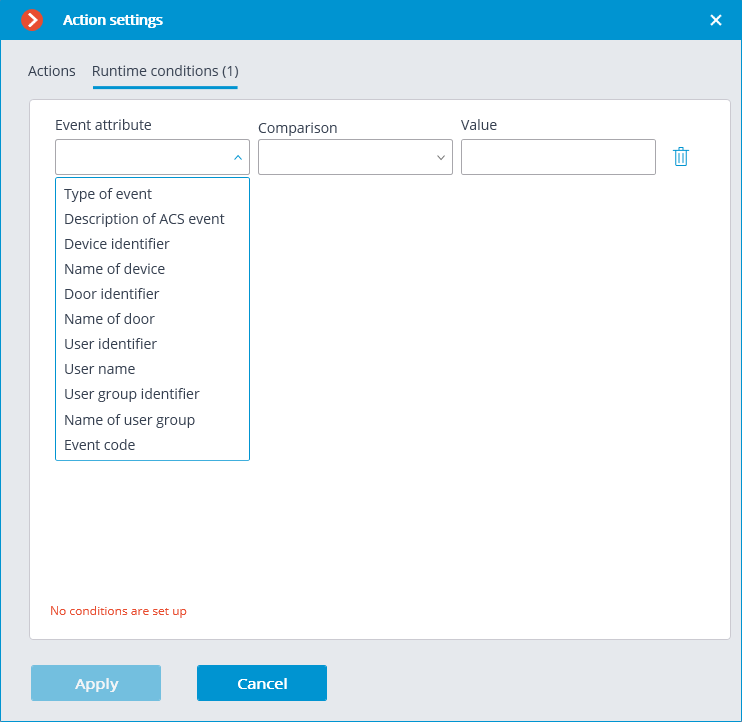
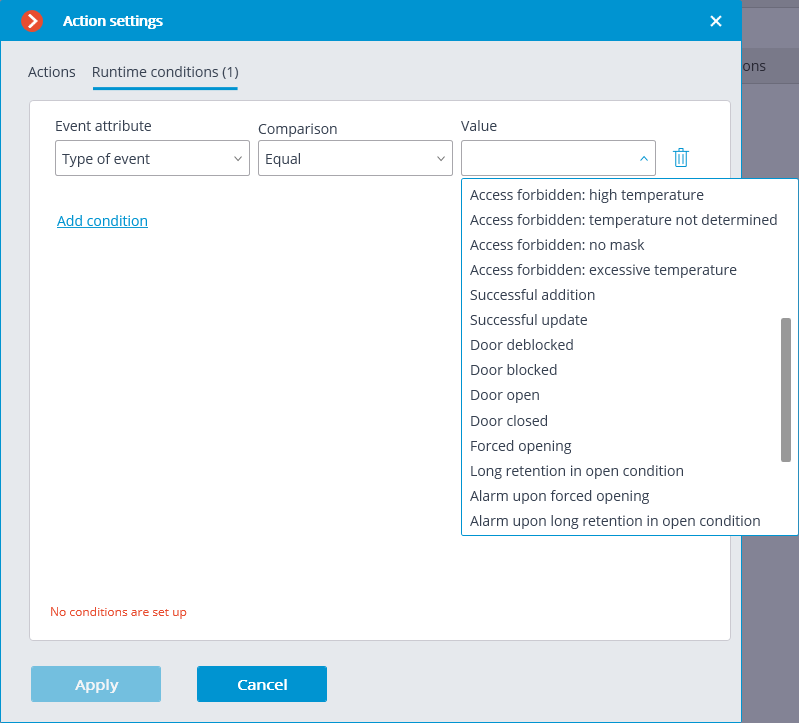
The following runtime conditions can be set for the scenario:
Event details:
Type of event — selection from several popular event types, e.g. Door Opened by Operator, Access Denied: Blacklisted, etc. Not all Suprema BioStar 2 event types are available in the list. If the type required to be used as the condition is unsupported, it is possible to use filtering by other fields: numeric Event code or string Description of ACS event;
Event code — numeric code of the Suprema BioStar 2 event.
Description of ACS event — non-localized event description string, as it comes from Suprema BioStar 2.
Device details:
Device identifier — usually a numeric permanent identifier of the device in Suprema BioStar 2;
Name of device — string device name in Suprema BioStar 2, can be changed in the ACS settings in the future.
Door details:
Door identifier — usually a numeric permanent identifier of the door in Suprema BioStar 2;
Name of door — string door name in Suprema BioStar 2, can be changed in the ACS settings in the future.
User details:
User identifier — usually a numeric permanent ID of the user associated with the event in Suprema BioStar 2;
Username — string name of the user in Suprema BioStar 2, can be changed in the ACS settings in the future;
User group identifier — usually a numeric identifier of the group to which the user belongs;
Name of user group — a name of the group to which the user belongs.
Note
Regarding the type of event, some lines may be not available in the received message.
Setting up scenario with Execute action in Suprema BioStar 2
Warning
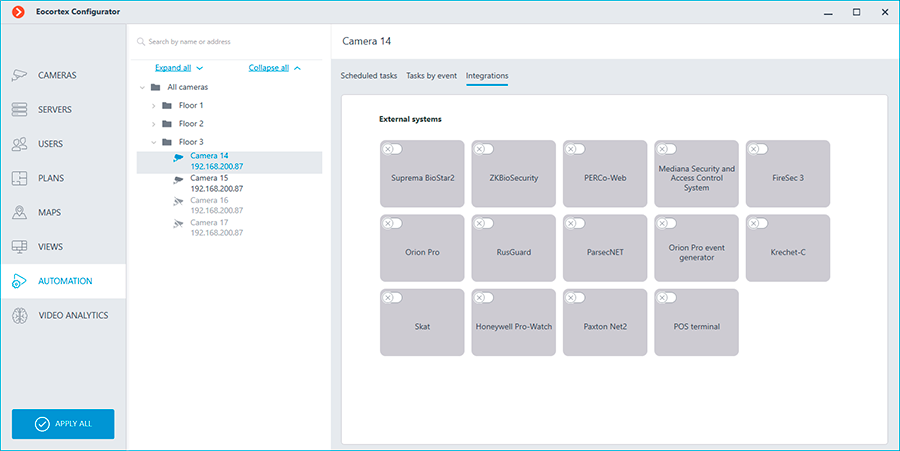
Before this feature can be used, it must be enabled and configured for the selected camera on the Integrations tab of the Eocortex Configurator application.
To configure an Execute action in Suprema BioStar 2 action, run the Eocortex Configurator application, go to the Automation tab, select an individual camera or a whole folder in the camera tree. Create a task with the needed execution method, selecting Execute action in Suprema BioStar 2 as the action. Sheduled tasks, Tasks by event and User tasks are supported.
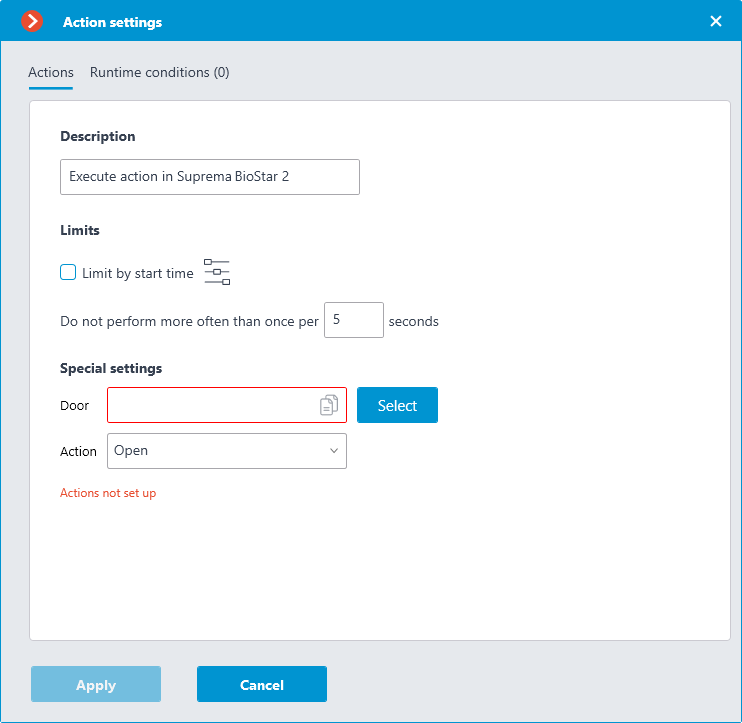
In the window that opens by clicking Apply, the Special settings section allows selecting the door to interact with, and selecting the action to be performed when processing the scenario.
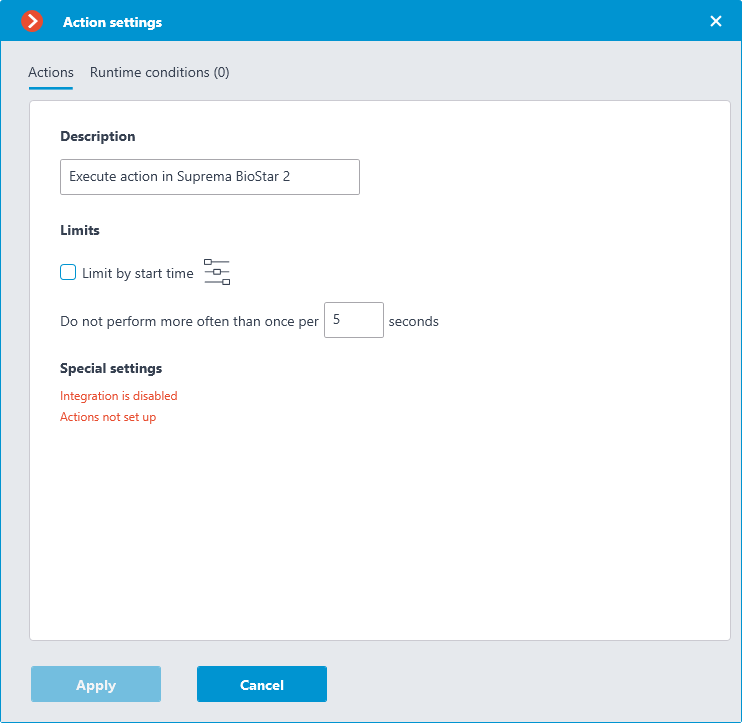
Warning
If the settings for integration with Suprema BioStar 2 ACS on the Integrations tab are not set, are incorrect or are inactive for the selected camera, the corresponding message will be displayed instead of the action settings in the Special settings section.
Clicking the Select button next to the Door field opens the device selection window. To load the list of doors available for interaction, the connection to Suprema BioStar 2 ACS will be established with the credentials that were specified in the Integrations section.
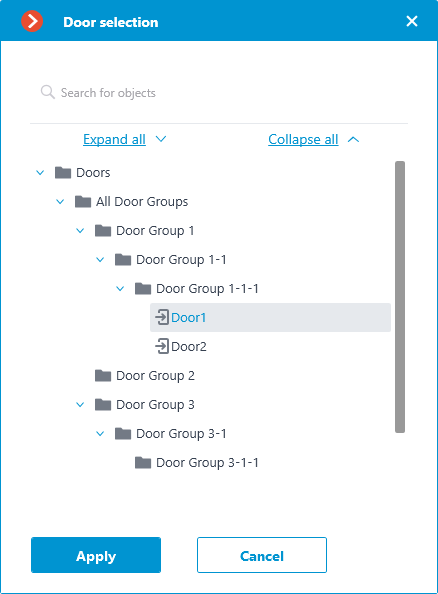
The Door selection window allows selecting the door from the list, for which the action should be performed. It is necessary to select a specific door, selecting a group of doors at once is not possible.
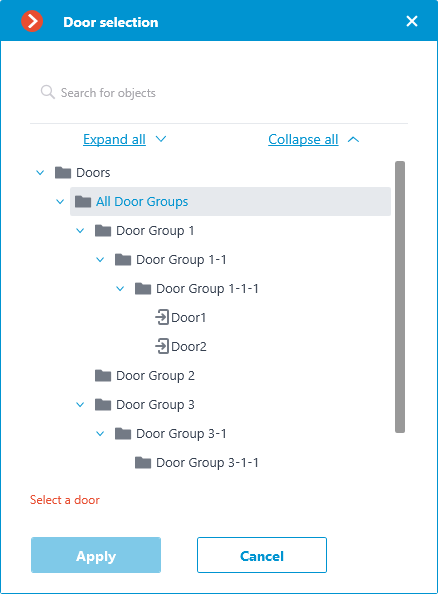
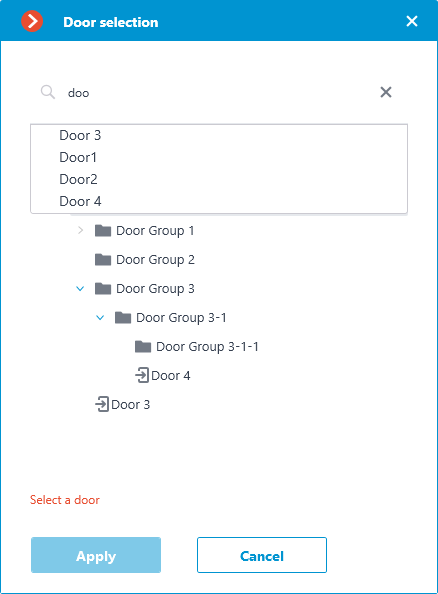
For easy navigation to the right door, the text search by its name is available at the top of the window. Select the desired door and click Apply to confirm.
Once the door is selected, the previously inactive  Copy button, located in the Door field, becomes available. Clicking this button saves to the clipboard the name and ID of the selected door, which can be used later for diagnostic or automation tasks.
The Action drop-down list provides a choice of actions to be performed on the selected door. The following options are available:
Open — temporarily opens the door.
Release — removes the manual door lock/unlock.
Manual lock — manually locks the door. The door remains locked even if the user is successfully authorized.
Manual unlock — manually unlocks the door. The door remains open without the need for user authorization.
Clear alarm — removes the alarm state from the door.
Once the door and the action to be performed are set, the previously hidden Test action link that triggers a test run of the settings becomes available.
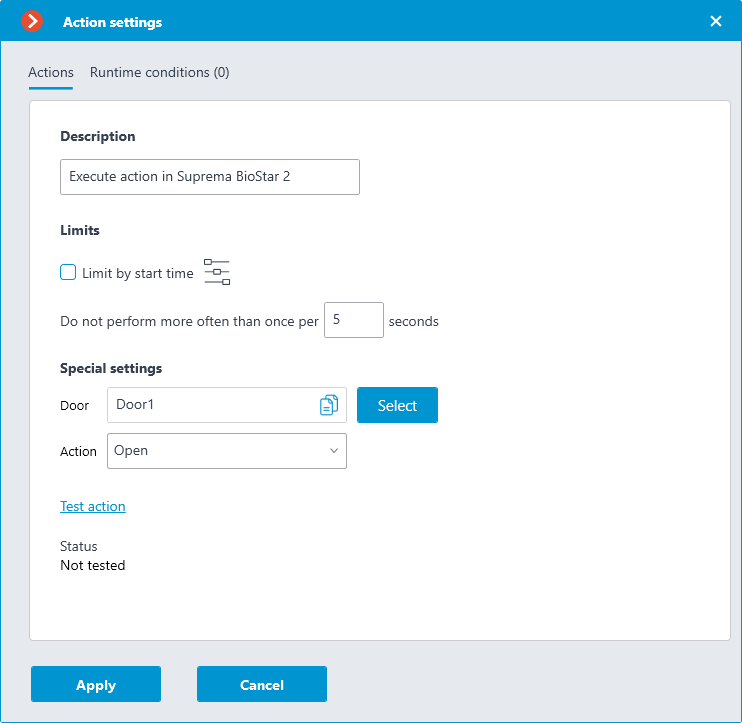
The current state will be displayed in the Status field as one of the following results:
Not tested — the settings were not checked, the functionality of the configured action is unknown.
Testing... — test run is performing according to the specified settings.
Connection succeeded — test run is successful, the settings are correct.
Request timeout — the command to run the action has not been sent to the ACS within the specified timeout period (by default, 100 seconds). Check if the integration settings are correct and if the Suprema BioStar 2 server is available.
Unknown error — test run of the action has failed for unknown reason. Detailed information about the error can be found in the Eocortex Server logs.
Warning
Under normal conditions, the connection to the ACS server is carried out by the Eocortex server, while the test connection in the settings window is made directly by the Eocortex Configurator application. When setting up the integration, it is recommended to make sure that all Eocortex components have access to the ACS server.
Setting the integration in Eocortex Configurator
Before the Eocortex server will be able to interact with the Suprema BioStar 2 ACS, it is necessary to configure the integration. To set it up, go to the Automation section of the Eocortex Configurator application. In the list of cameras, select a camera and switch to the Integrations tab on the page that opens, then activate the slider for Suprema BioStar 2 tile.
The following tabs are available in the integration settings:
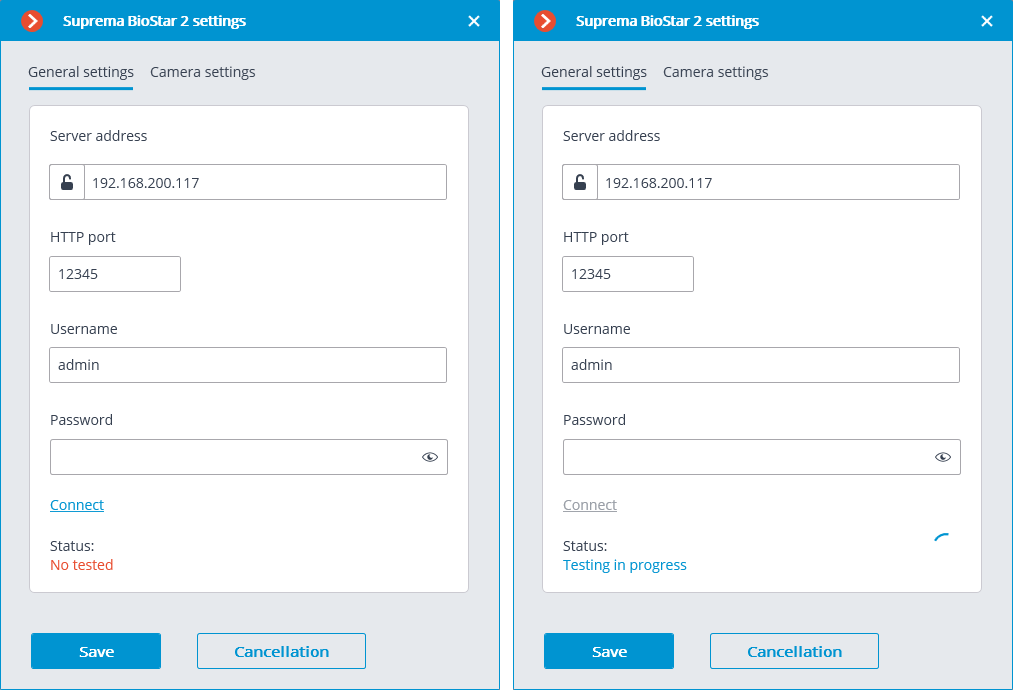
The General settings tab contains the settings for a network connection to the Suprema BioStar 2 ACS for the whole system.
The following settings are available:
Server address: IP address or URL of the Suprema BioStar 2 server. Prefixes, such as http://, are not required to be specified in this field. To enable a secured connection via HTTPS, click the
 button.
HTTP port: HTTP(S) port of the Suprema BioStar 2 server. Interaction with the ACS utilizes the HTTP and WebSocket protocols, but both protocols use the same port. The WebSocket port can be configured individually in Suprema BioStar 2 settings, but it is not necessary to set it in the integration settings.
Username.
Password.
When all settings are done, click the Connect button.
Note
The connection test result will be displayed in the Status field.
The Camera settings tab contains settings from which devices the system should receive events for this camera.
Note
By default, all ACS events will be received from all devices.
If the integration is enabled on multiple cameras with the default settings, the events will be duplicated for all enabled cameras.
There are 2 types of Suprema BioStar 2 objects available for configuration:
 Doors. A high-level object that is most often configured with rules in Suprema BioStar 2. Usually the door is connected to a relay and a sensor of other device. Receiving events from specific doors allows to configure the integration more precisely;
 Devices. A lower-level Suprema BioStar 2 object. Setting up to receive events from the device allows configuring the integration more flexibly. For example, if Suprema BioStar 2 is in the deployment phase, the list of doors and their properties will continuously change. When configuring to receive events from the specific door, it will be necessary to change the integration settings each time when something has changed. But when configuring to receive events from a device, when new doors are connected to the device, the integration settings would not need to be changed.
Setting up Suprema BioStar 2
To configure Suprema BioStar 2 for this integration, use the ACS web interface, which is available on the same port that is specified in the integration settings.
Note
The minimum version of Suprema BioStar 2 must support control over the used protocol (BioStar 2 New Local API).
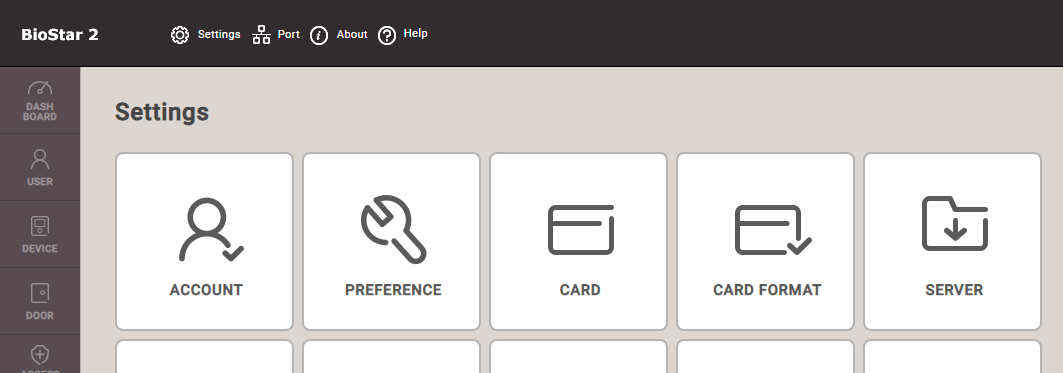
On the Settings tab of the Server section, the use of a secure connection can be configured.
Note
HTTPS is used by default.
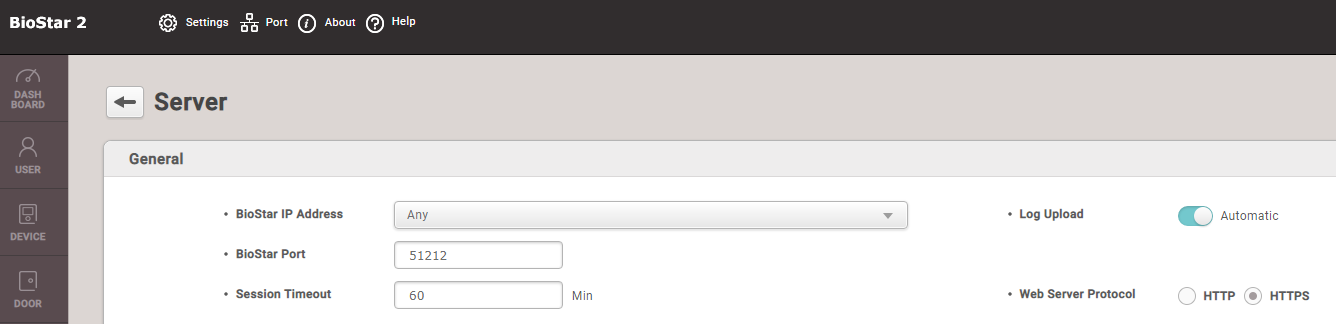
On the Port tab, network ports for connection can be configured. Eocortex uses either HTTP (if insecure connection is selected) or HTTPS (if secure connection is selected) connection port.
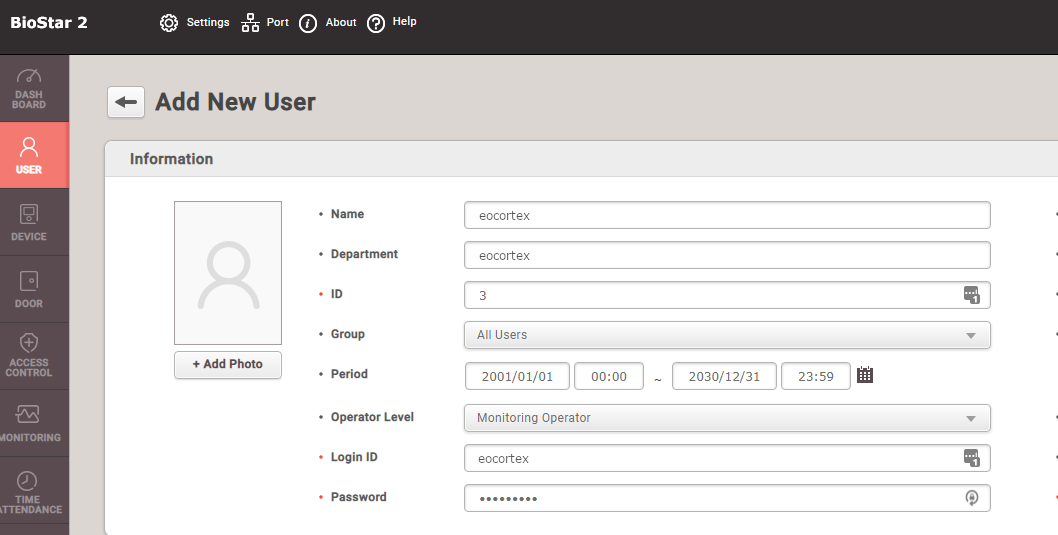
The user under which Eocortex connects to the ACS must be provided with rights to read and monitor data (Monitoring Operator level), in case of problems it is recommended to provide administrative access.
Requirements and limitations
Integration is developed using BioStar 2 New Local API, available in Suprema BioStar 2 since version 2.7.10. The possibility of enabling integration with earlier versions of ACS is not guaranteed.
The possibility of receiving events from Suprema BioStar 2 was developed for the ACS version 2.8.11.60. The functionality of this feature with earlier versions of the ACS is not guaranteed.
The possibility of sending commands to Suprema BioStar 2 was developed for the ACS version 2.9.0.80. The functionality of this feature with earlier versions of the ACS is not guaranteed.
The time and time zone settings on the Eocortex and Suprema BioStar 2 servers must match.
One Eocortex system can be connected only to one Suprema BioStar 2 server at a time.