Configuring the Abandoned Objects Detection module🔗
To use the module, enable and configure it.
Launch the Eocortex Configurator, go to the  Cameras tab, select a camera in the list located on the left side of the page, and set up the motion detector on the Motion detector tab on the right side of the page.
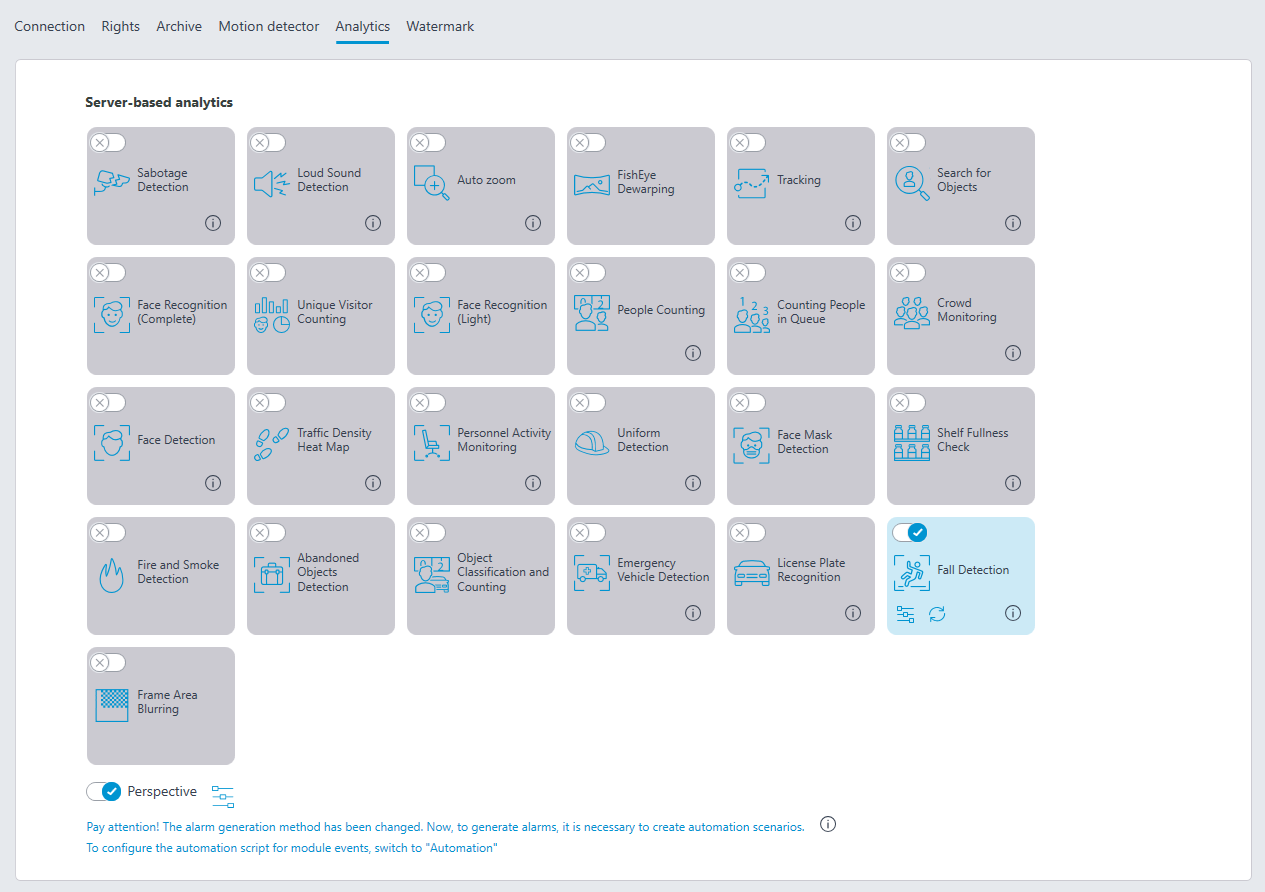
Then switch to the Analytics tab and enable the module using the  toggle.
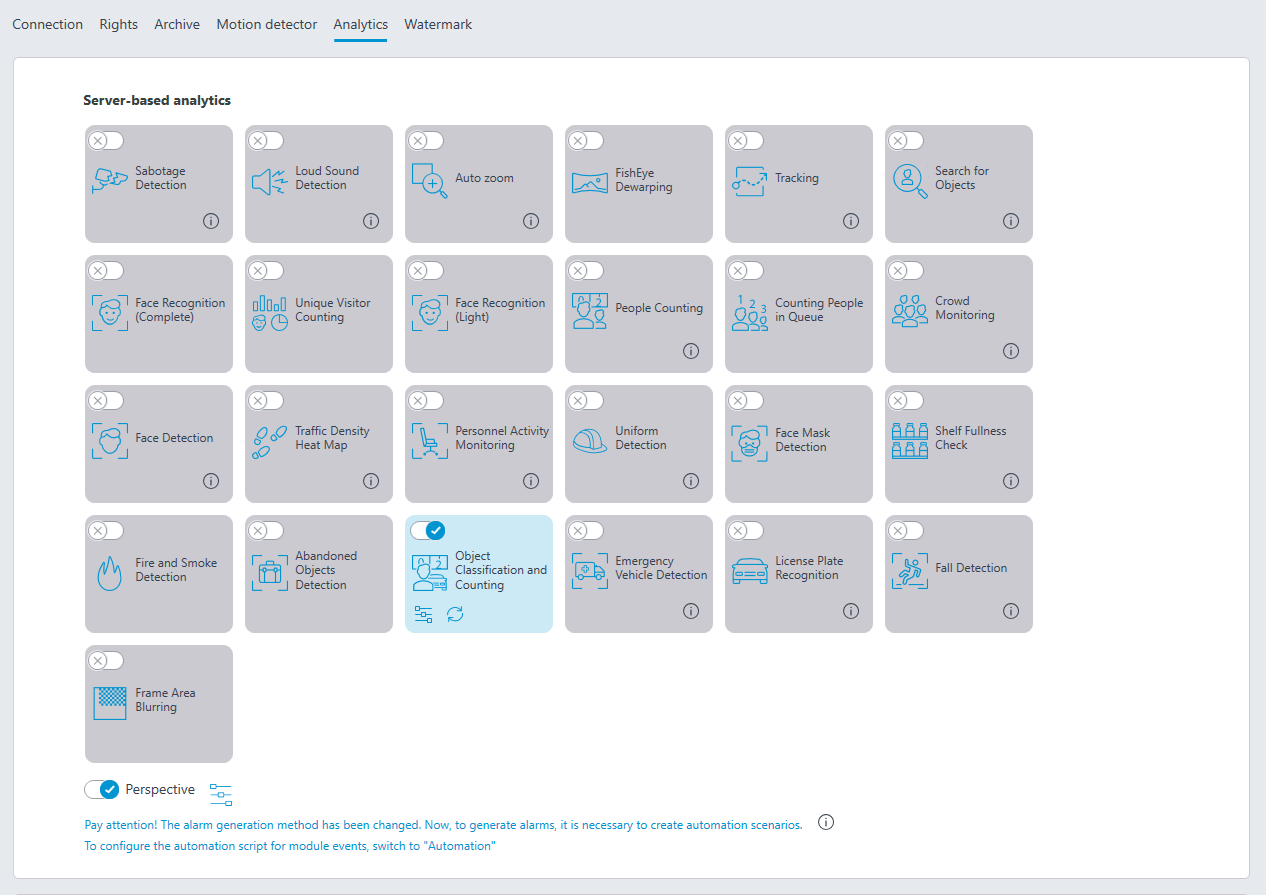
Clicking the  button opens the module setup window.
In the opened window the following settings have to be made:
Detection time: the objects that do not move during the time that exceeds the time preset in this window will be considered abandoned. The time from 30 seconds to 10 minutes can be set.
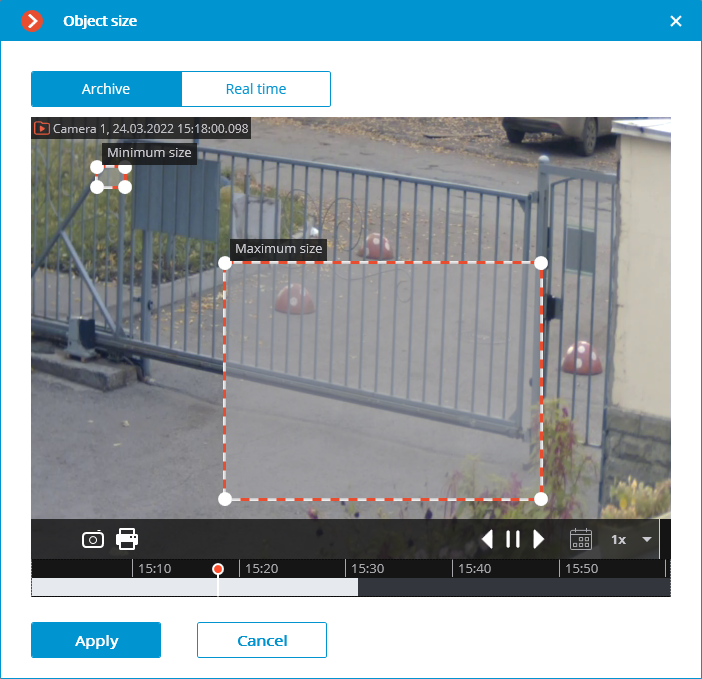
Set object size limits: opens the window where the minimum and maximum sizes of the objects that may be considered abandoned are set.
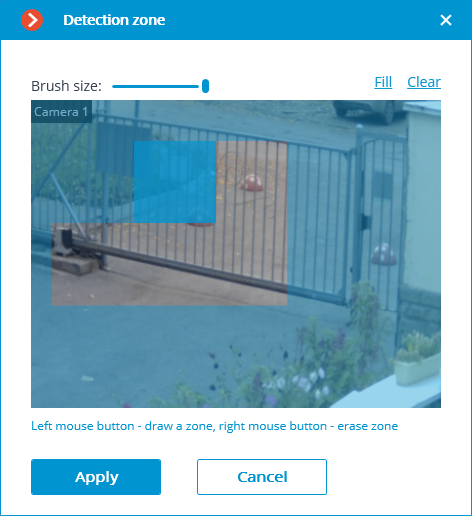
Set detection zone: opens the window where the abandoned objects detection zone is set.
Detection zones are the zones of the frame bounded by a closed polygon. The zone configuration can be changed by dragging the key points at the corners of the polygon. To add a key point, it is required to double-click the left mouse button on the line; to delete — right-click on the key point.
Warning
The module will start working only when the settings are applied.
Warning
After launching or relaunching, the module will need time for learning. During the learning process the objects will not be detected. This period roughly equals the double detection time set in the settings.
Warning
For reducing module learning errors, it is recommended to ensure that during the launch of the video surveillance server there are no moving objects in the frame, and the static background is not blocked by temporary static and slow-moving objects.