Camera view cell🔗

Note
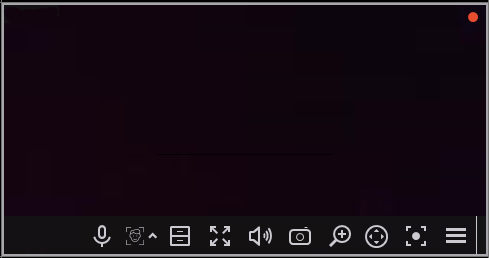
To make the control buttons of the camera cell available, click somewhere inside the cell.
Note
All commands that can be executed by pressing buttons in the interface of the cell, can be performed through the context menu as well.
Cell control buttons
If the archive is being recorded for the camera placed in the cell, the recording indicator is displayed in the right top corner of the cell:  .
.
 : enables audio transmission from the microphone of the client workstation to the camera speaker. Two operation modes are available:
Holding the button: The microphone works as long as the button is held down;
Switching the button: Clicking the button turns the microphone on and off.
Note
The microphone mode must be specified by the system administrator in the settings of the current workstation.
 : Switches the cell to the single camera archive view mode.
 : Expands the cell to full screen.
Note
Switching between grid mode and full screen mode can also be done by double-clicking in a cell.
 : saves a frame to disk.
 : Opens the volume control.
Note
The  icon appears in the following cases:
Receiving sound from the camera is not configured.
Receiving sound from the camera is configured, but no sound is being transmitted from the camera.
The sound from the camera is being transmitted, but the user has muted the sound in the cell.
 : enables the zoom mode. When this mode is enabled, selecting areas of the frame with the mouse enlarges them by the entire cell.
 : displays the PTZ control interface in the cell.
 : enables the recording of the next 15 minutes to the archive.
Note
If any of the described buttons is not displayed in the cell, it means that the corresponding feature on the camera is either not enabled or not available to the current user.
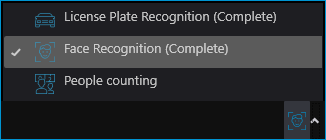
If any video analytics modules are enabled for the camera, additional interface elements of some of them can be enabled using the buttons. The following buttons are available:
 : The button that allows to display and hide the interface of the selected module. The visual appearance of the button depends on the selected module, displaying its icon. The module to control by this button can be selected by clicking the
  button.

The following modules can be selected:
Cell context menu
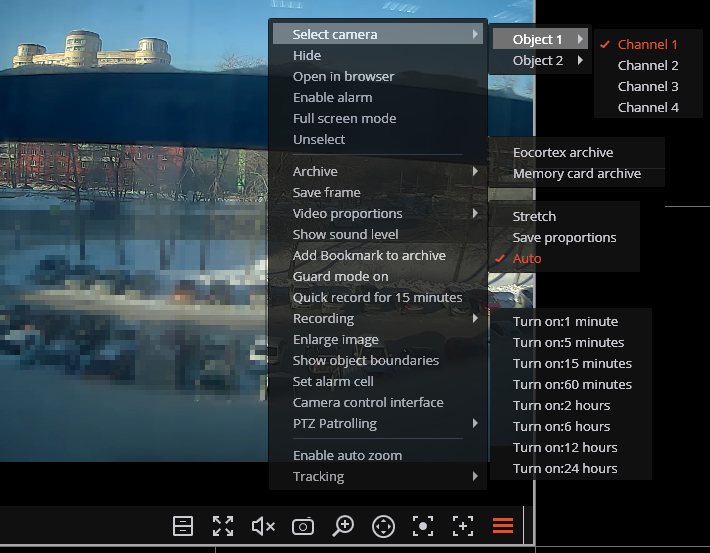
The context menu can be invoked in two ways:
By clicking the
 icon in the right bottom corner of the cell.
By right-clicking anywhere in the cell.
Note
The number of menu items may be different from below, depending on the settings of camera, archive and client workstation.

Description of the menu items:
Select channel: Allows selecting one of the available cameras to be displayed in the selected cell.
Hide: Removes the camera from the cell (frees the cell).
Open in browser: Opens the camera web interface in browser.
Enable alarm: Turns on the alarm in the cell.
Full screen mode / Exit Full screen mode: Switches the camera display between full screen and grid mode.
Note
Switching between grid mode and full screen mode can also be done by double-clicking in a cell.
Unselect: Removes selection from the cell (makes it inactive).
Archive: Switches the cell to View the single camera archive mode.
The access to the following archive types is possible:
Eocortex Archive : The archive stored on the Eocortex server.
Memory card archive: The archive stored on the memory card of the camera.
Save frame: Saves the frame (frame fragment) to the selected location.
Video proportions: Allows selecting frame proportions.
Show sound level: Displays the volume control element at the bottom of the cell.
Add Bookmark to archive: Opens the Archive bookmark creation window.
Guard mode on/off: Enables/disables the Guard mode for the camera.
Quick record for 15 minutes: Enables the compulsory video recording from the camera to the archive for 15 minutes
Recording: enables the compulsory video recording from the camera to the archive for the time interval selected in the submenu.
Warning
Compulsory recording to the archive will only be available if the system administrator has set permissions for the camera and the user to record to the archive.
Note
If the compulsory recording is enabled, the recording to the archive will be continuous during the specified time, no matter what recording mode was set by the system administrator for this camera.
Note
When the compulsory recording ends, the recording to the archive will be in the mode set by the system administrator for this camera.
Note
When the compulsory recording is enabled, the Turn off recording item with the remaining recording time (remaining recording time: XX min.), which stops the recording, will be displayed in the context menu.

To disable compulsory recording, select this option.
Note
If the context menu does not contain Quick record for 15 minutes and Recording items, it means that archive recording for this camera is set up to the Always on (continuous) mode or completely disabled.
Enlarge image: Allows to zoom in on a selected fragment of the frame.
Show objects boundaries: Enables the display of colored rectangular frames for moving objects (when using the software motion detector) and for detected faces (using face detection module).
Set alarm cell: The cell in the alarm mode will display the cameras on which the Alarm was triggered
Camera control interface: Enables/disables the PTZ control interface.
Camera position: Allows to set the camera to the pre-configured position (preset).
Note
The items associated with the intelligent modules related to this camera are located at the bottom of the menu. For descriptions of these items, refer to the sections describing the corresponding intelligent modules.
 :
:  :
: