Views🔗
Note
View is a pre-configured screen grid with already placed cameras in the cells.
This tab displays user and server views, which can be collapsed if necessary.
You can change the order of user views by long pressing and dragging.

If the view is a user view, a button appears in the corner, which can be used to rename, edit or delete the selected view.
Viewing
When choosing the view, the multi-picture page opens.
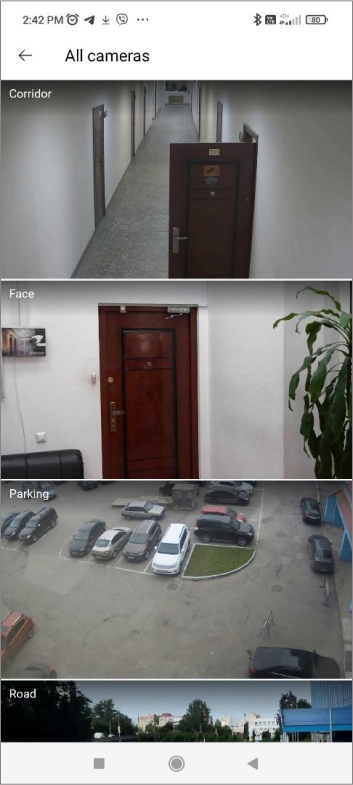
Multi-picture view is a display mode where the frame updates of the cameras directly depend on the number of cameras shown on the screen.
Note
The multi-picture can be viewed in both portrait and landscape orientations.
If the number of cameras is less than 14, the video will be displayed in the regular format. However, if the count equals or exceeds 14, the update will be frame-by-frame and sequential.
When scrolling or adjusting the number of columns, the cameras update accordingly.
While viewing, you can zoom to adjust the number of displayed columns, but this change will reset upon exiting the view.
You can swipe left or right to see other views.
Tapping on a camera displays it in full-screen mode. Swiping left or right allows you to cycle through all cameras in the view.
If the column number is less than four, the camera names are displayed.
For client views, a button appears in the corner. Pressing it lets you modify the grid, adjust camera positions, and access the view editor. Exiting the editor returns you to the view display.
Creating a new view
To create a new view, click on the plus button, which is located in the upper right corner of the screen.
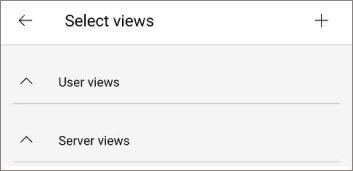
In the appeared window enter the name of the view.
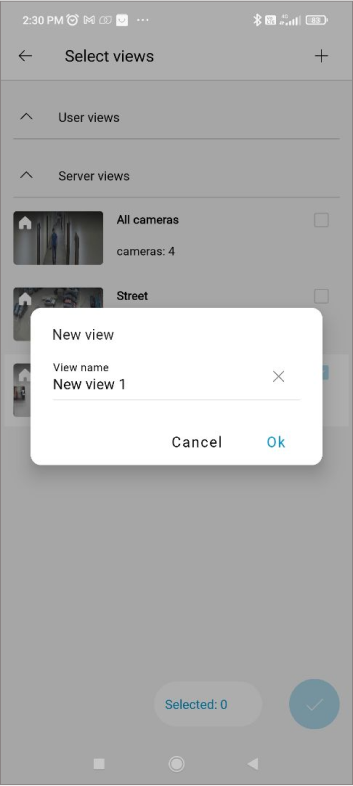
Next, select the cameras for the view.
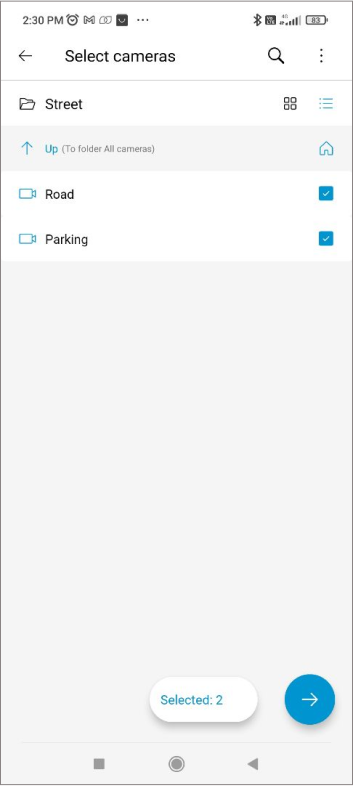
When selecting cameras, you can:
View them in list or tile mode;
Use camera and folder search.
Select and unselect cameras in the current folder, taking into account cameras in subfolders, by clicking the
button in the top right corner.
Use gestures to zoom the size of the displayed camera cells, and long tap to swap cells.
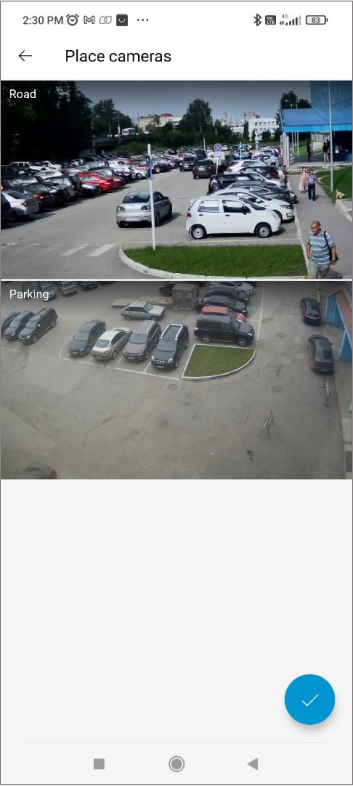
After clicking the checkmark at the bottom of the screen, the new view will appear at the top of the Main page and in the list of user views.
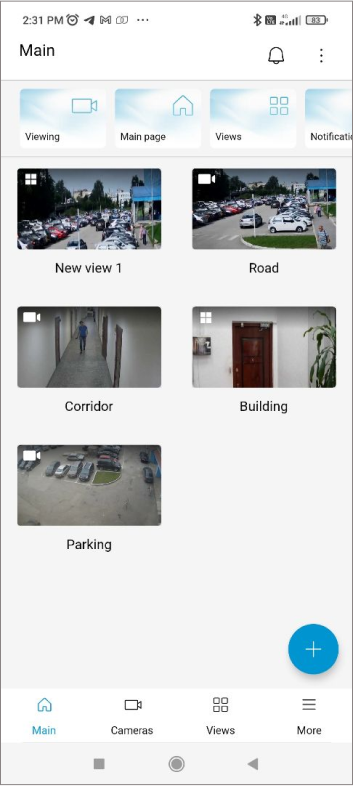
Note
All previously marked checkboxes will be saved. The user can continue working with the selected views after completing the process of creating a new view.
View previews
Each view has a preview on the left, showing the number of columns and camera previews.
If a frame can not be retrieved from the server, a gray background with a crossed-out camera will be displayed instead of the preview.
Caching
When a new configuration is detected, if the real-time configuration update option is enabled, the following will occur:
Update of the server view list.
Refresh of cameras within both server and client views.
View deletion if it has no cameras.
While viewing in multi-picture mode:
Returning to the views list when the number or order of views changes.
Real-time update of the multi-picture view when cameras in views change.
When viewing a camera selected from the multi-picture view:
Returning to the views list if access to the view is denied.
Returning to the multi-picture display upon changing the view.
Video restarts when camera settings are modified.
During view editing:
Cameras are automatically refreshed.
If there are no cameras or access to them is denied, the view will not be saved.
Back Navigation

Clicking the Back button activates the following actions:
Full-screen view will be closed.
The view name window will be closed without saving changes.
The camera selection page will be closed without saving changes.
The camera arrangement modification page will be closed, transitioning back to the camera selection without saving changes.
The window opened by clicking the
button will be closed.
Double tap closing the app.