Shelf Fullness Check: Example of usage🔗
One of the reasons for lost profits in retail is the untimely display of goods on the shelves. According to a number of studies, the total loss from the lack of goods on the shelves can reach up to 4% of the store's turnover. The Eocortex company has developed the Shelf Fullness Check module to promptly notify shop assistants about empty shelves in stores. An example of using this module is described below.
Solution overview
There is a supermarket with a high turnover due to the high flow of visitors. The task is to reduce losses from untimely display of goods on the shelves in the sales area.
To solve this task, a video surveillance system built on IP cameras and Eocortex software will be used. Moreover, this system will also be used to ensure the security of the supermarket, prevent theft and suppress staff abuses.
Below is the map of the supermarket. The cameras that monitor the fullness of the shelves are highlighted in blue.
The number of cameras that monitor the fullness of the shelves is based on the number of controlled shelves and their positions, the room configuration, the expected parameters of the cameras, and also taking into account restrictions, requirements and recommendations of the module. As a result, 10 cameras were obtained, each of which monitors the status of 10 shelves, for a total of 100 shelves.
To ensure the security of the supermarket and prevent theft, 11 more cameras will be used around the perimeter. Another camera with sound recording function will be placed above the point of sale.
Monitoring of the general situation at the facility is carried out by displaying streams from the cameras on the computer screen located at the guard post.

Shelf fullness control is organized as follows:
The merchandiser responsible for filling the shelves is equipped with a smartphone or tablet with the Eocortex mobile application installed.
The Eocortex server, having detected a shelf fullness level lower than the specified value, sends a push notification to the merchandiser's device indicating which shelf needs to be filled.
The merchandiser, having received a notification, picks up the corresponding goods in the warehouse and fills the shelf. In addition, he can first open the corresponding camera in the Eocortex mobile application to confirm the status of the shelf and take notes or check the plan for laying out goods on the shelves in a third-party application, if one is installed on the device.
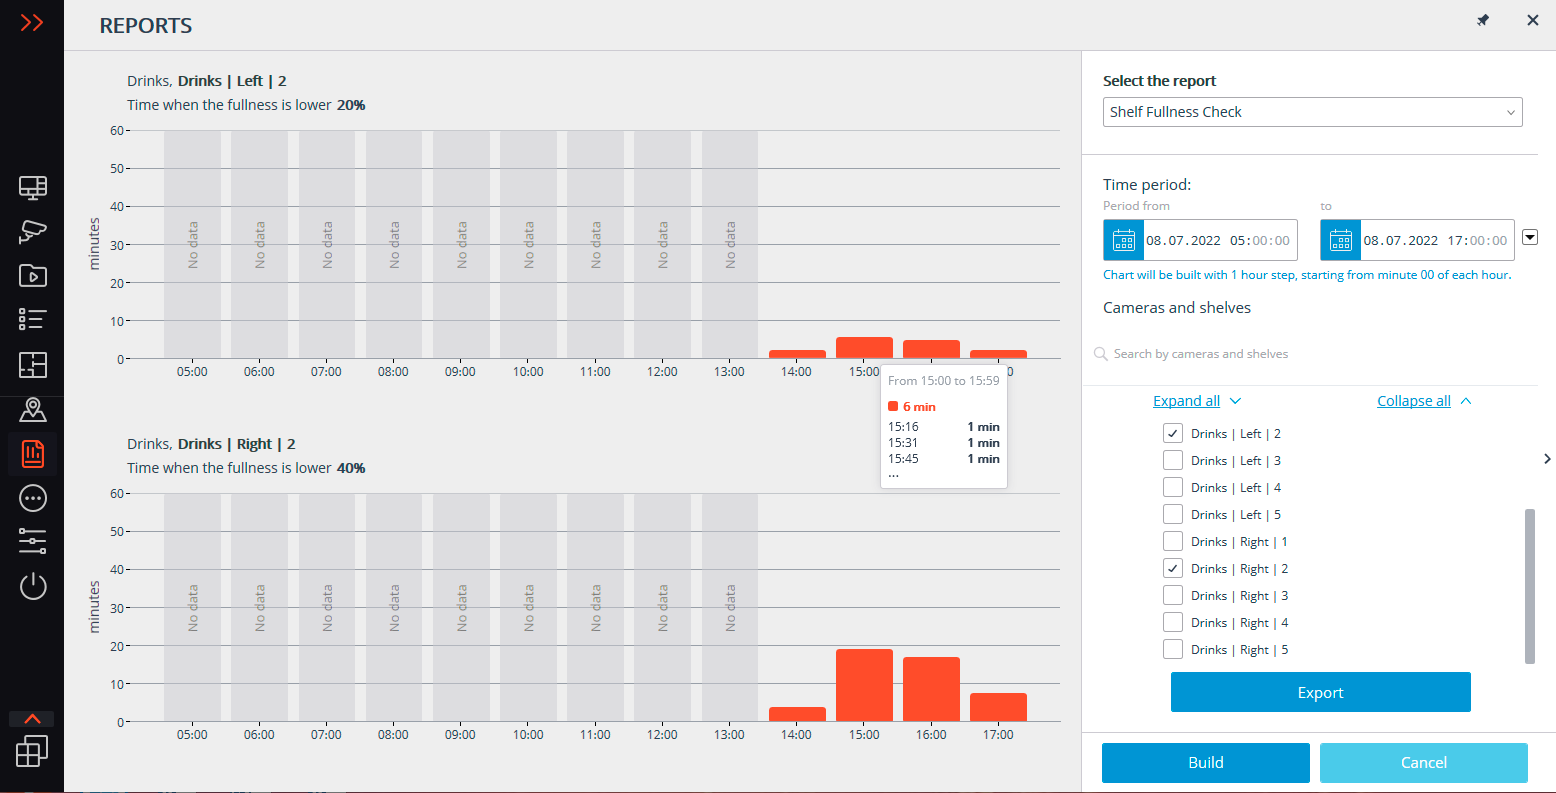
Sales area administrators and other authorized supermarket staff can monitor the overall situation, the state of the shelves, and generate reports on empty shelves for various periods using the Eocortex Client application installed on their computers and laptops.
Deploying a video surveillance system
The Software for IP Cameras / Calculator was used to calculate servers and client computers, as well as to estimate the required network bandwidth. All calculations were performed with the following camera parameters: two H.264 streams with a resolution of 2 megapixels (Main) and 0.3 megapixels (Additional 1); for the Shelf Fullness Check module, the frame rate is 10 fps and analysis on the Main stream; for other cameras, the frame rate is 25 fps and analysis on the Additional 1 stream.
Based on the calculations, a video surveillance system will be deployed with two Eocortex video servers, on which the Eocortex LS license is installed: on the first one will be 17 licenses to work with IP cameras, 1 license for sound reception feature and 5 licenses for Shelf Fullness Check for 4-10 shelves module; On the second one — 5 licenses for IP cameras and 5 licenses for Shelf Fullness Check for 4-10 shelves module.
Below is a map of the system network topology.

When installing and configuring cameras, follow the module requirements and recommendations.
When deploying video surveillance servers, prepare the hardware and operating system first, then install the Eocortex Server service, followed by license activation.
Install the Eocortex Client application on the computers of managers and security guards, and mobile applications (for Android or iOS) on smartphones and tablets.
Configuring a video surveillance system
After deploying and activating the license of both servers, combine them into a single system and configure them.
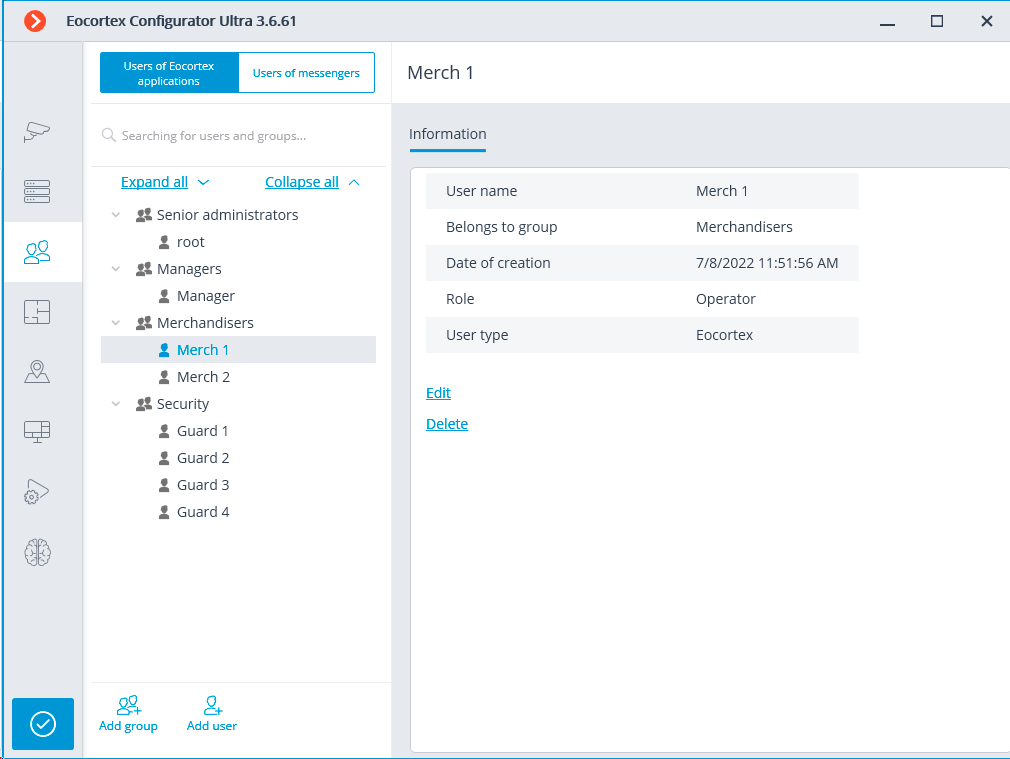
Next, set up user rights for system users: create the appropriate user groups (Administrators, Managers, Merchandisers, Guards, etc.), assign permissions to groups and add users.
Then connect and configure the cameras, having previously created groups of cameras: Sales area, Outdoor, Service, Shelves.
Note
To make adding cameras with similar settings more convenient, it is recommended to add and configure one camera, then right-click it and in the context menu that opens, select Create new camera based on the highlighted one or Create a group of cameras based on the selected one: in this case, all settings of the original camera will be copied.
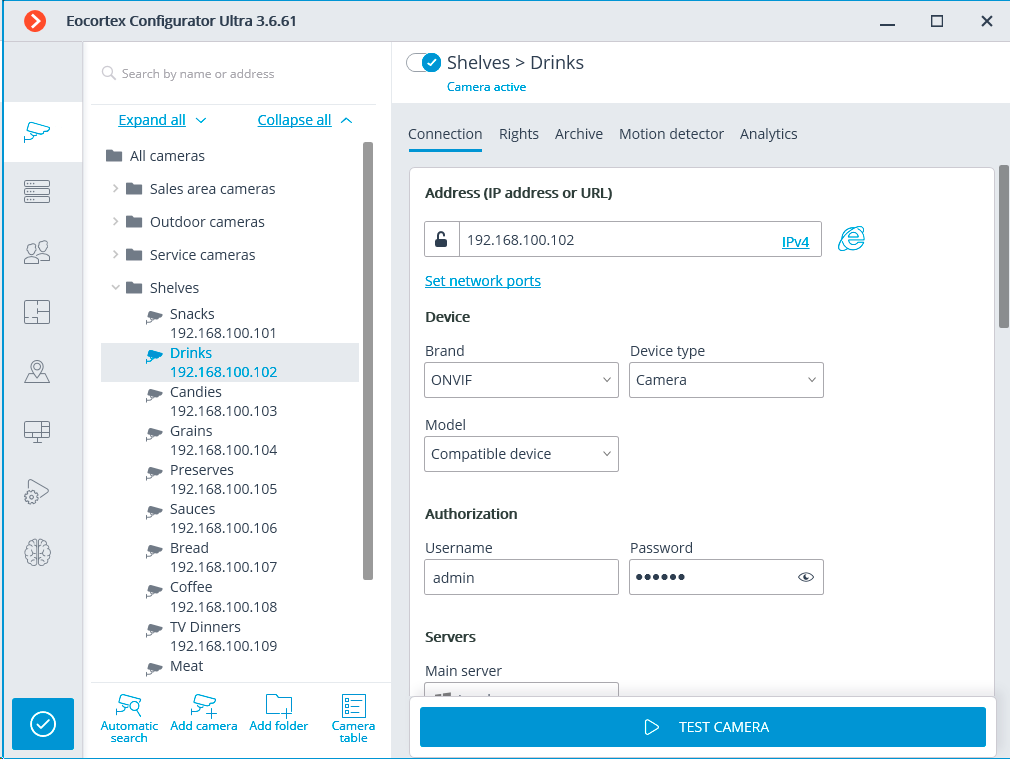
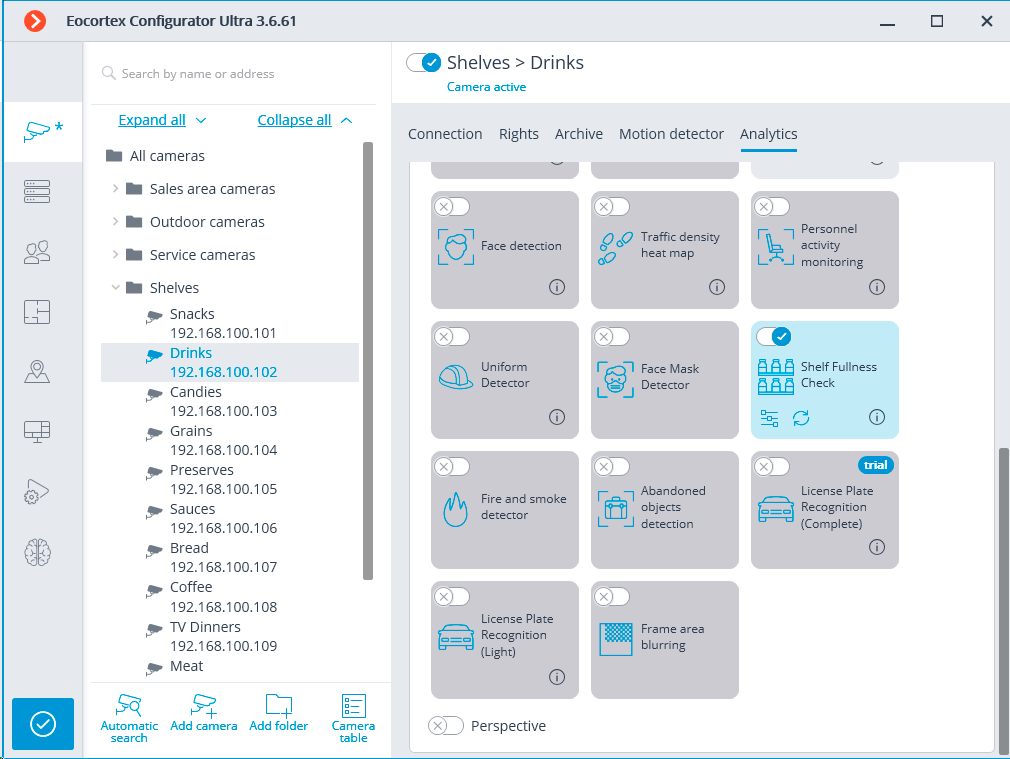
For cameras intended to monitor the fullness of the shelves, after completing all general camera settings (connection, archive, software motion detector), enable and configure the Shelf Fullness Check module. Below is an example of module configuration.
Configuring video analytics
The settings of the Shelf Fullness Check module for the camera are carried out on the Cameras page of the Eocortex Configurator application. To configure the module, after adding a camera to the system, configuring its connection to the server and enabling software motion detector, switch to the Analytics tab, enable the module using the  switch and open the module settings window using the
  button.
In the module settings window, add the shelves (no more than 10) and set their contours.
Note
Nodal points of the shelf borders are dragged with the mouse. To add a new point, left-click on the borderline. To remove an existing point, right-click on it.
Warning
The contour of the shelf must be defined in such a way as to exactly cover the controlled area to be filled.
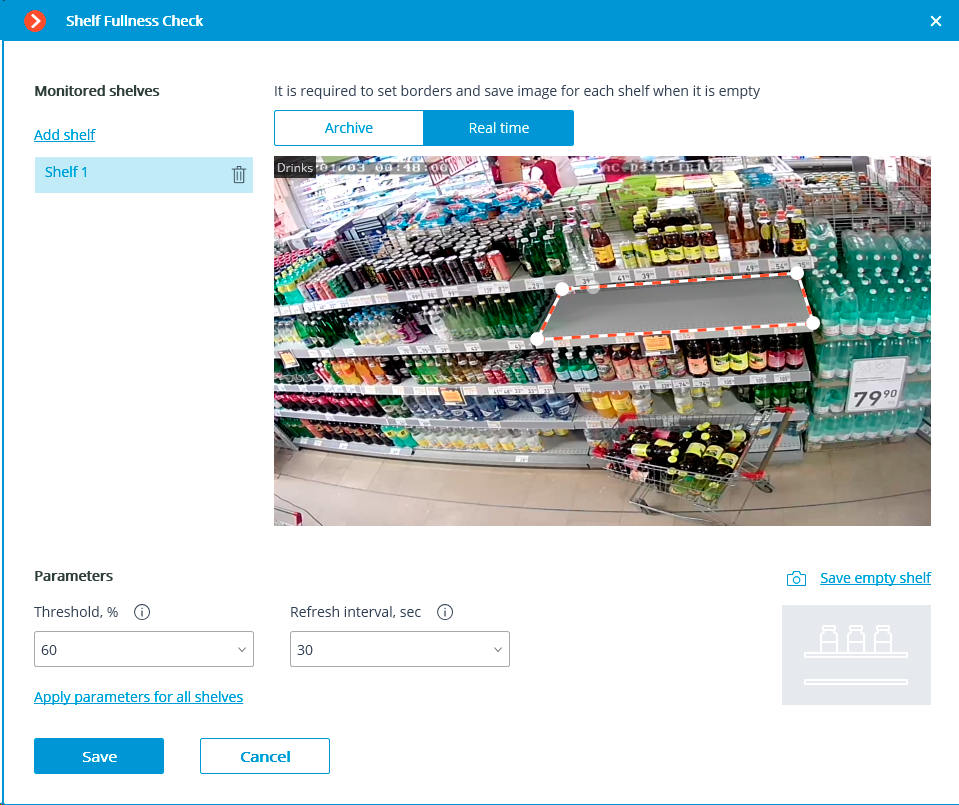
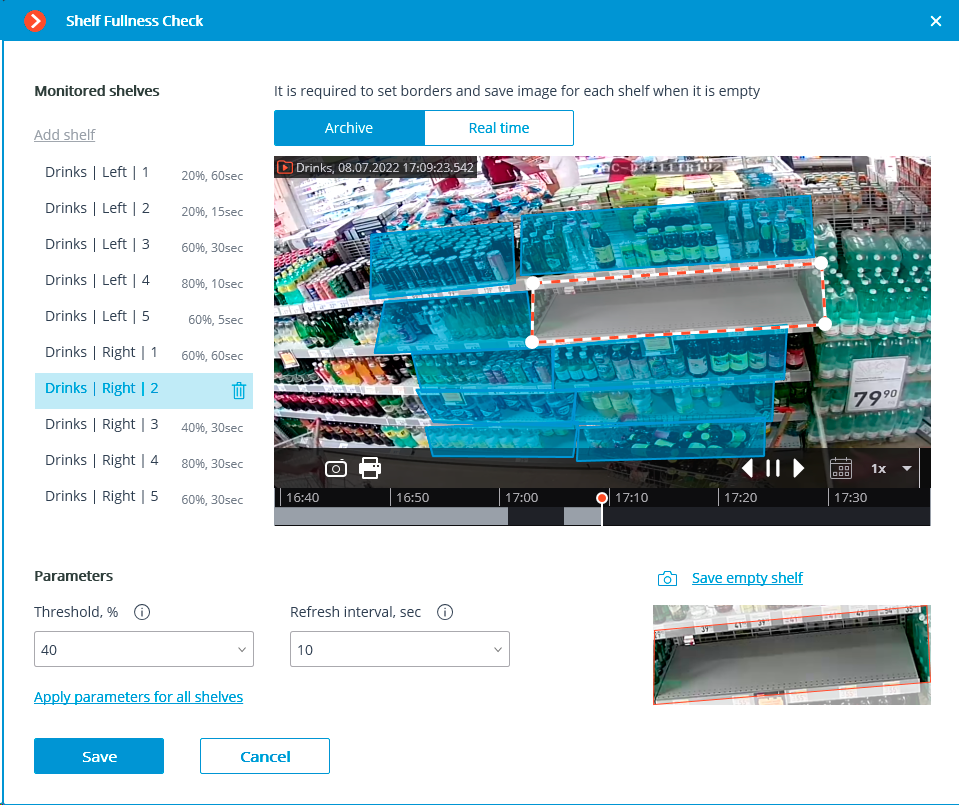
For each shelf, use the Save empty shelf button to specify an image of an empty shelf. For these purposes, it may be more convenient to switch to the Archive tab and select the moment when the currently configured shelf was empty.
Set the Threshold, % and Refresh interval, sec for each shelf. If the same settings are used for all shelves, it will be more convenient to set these parameters after adding all the shelves by clicking the Apply parameters for all shelves link.
After completing the module settings for the camera, click Save.
The next step, after adding and configuring cameras, is to set up scenarios for sending Push notifications to users of mobile applications when the shelf fullness falls below a specified level.
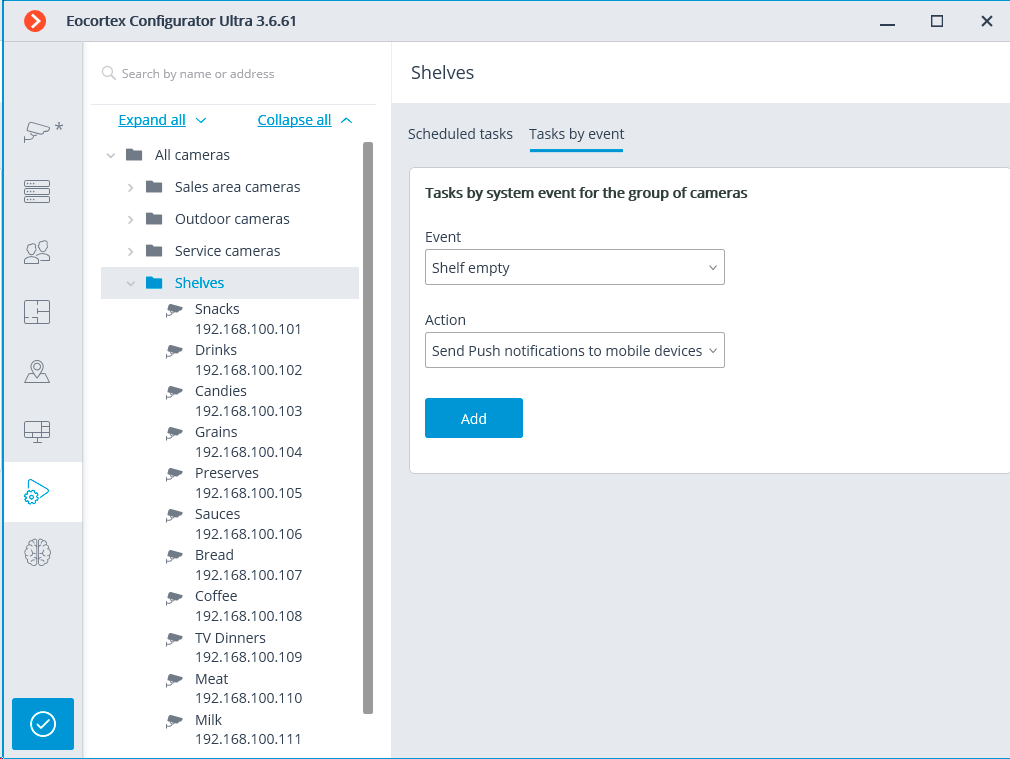
To do this, go to the  Automation tab, select the Shelves folder in the cameras tree, and then, on the opened page, go to the Tasks by event tab.
In the Event drop-down list, select Shelf empty, in the Action drop-down list — Send Push notifications to mobile devices, then click the Apply button.
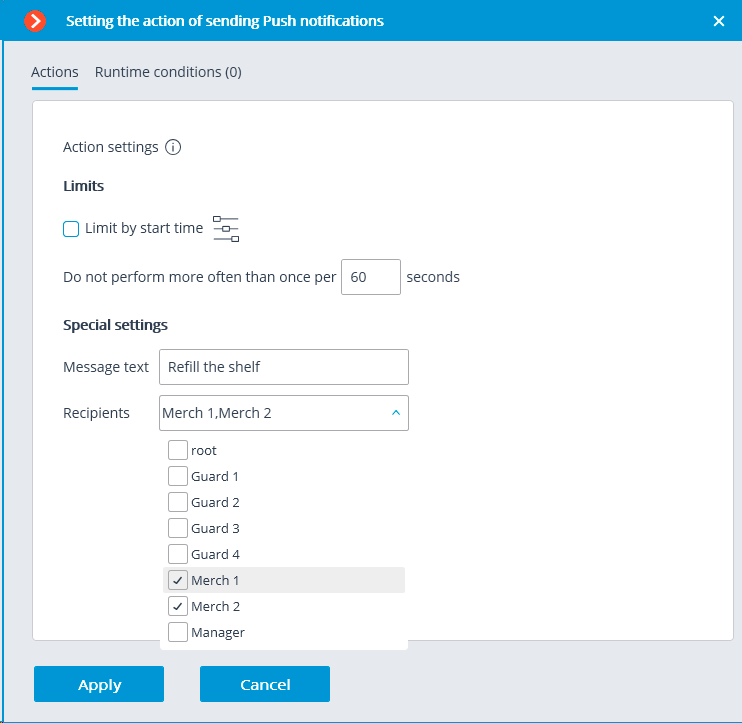
On the Actions tab of the window that opens, set the appropriate text in the Message text field, taking into account that the message will automatically contain the name of the camera. In the Recipients drop-down list, mark the users that will be used for authorization in mobile applications and should receive notifications. After clicking the Apply button, all cameras in the group will have the same scenario: sending a push notification when the fullness level of the shelves monitored by this camera is below the allowable level.
Note
When adding an action to a group of cameras, the ability to specify additional conditions for sending notifications is not available.
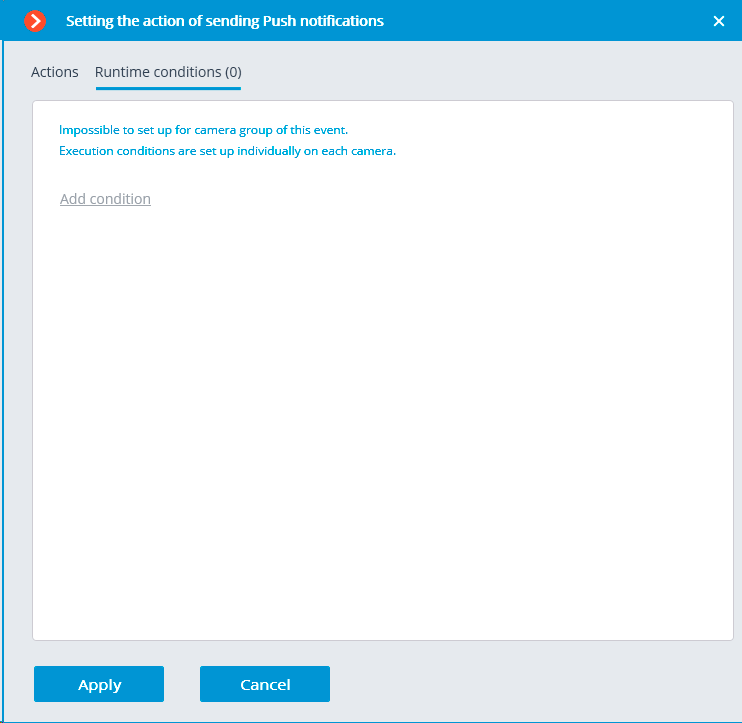
If it is necessary to indicate the names of shelves in messages, then additional conditions must be added for each shelf in the automation settings of each camera separately.
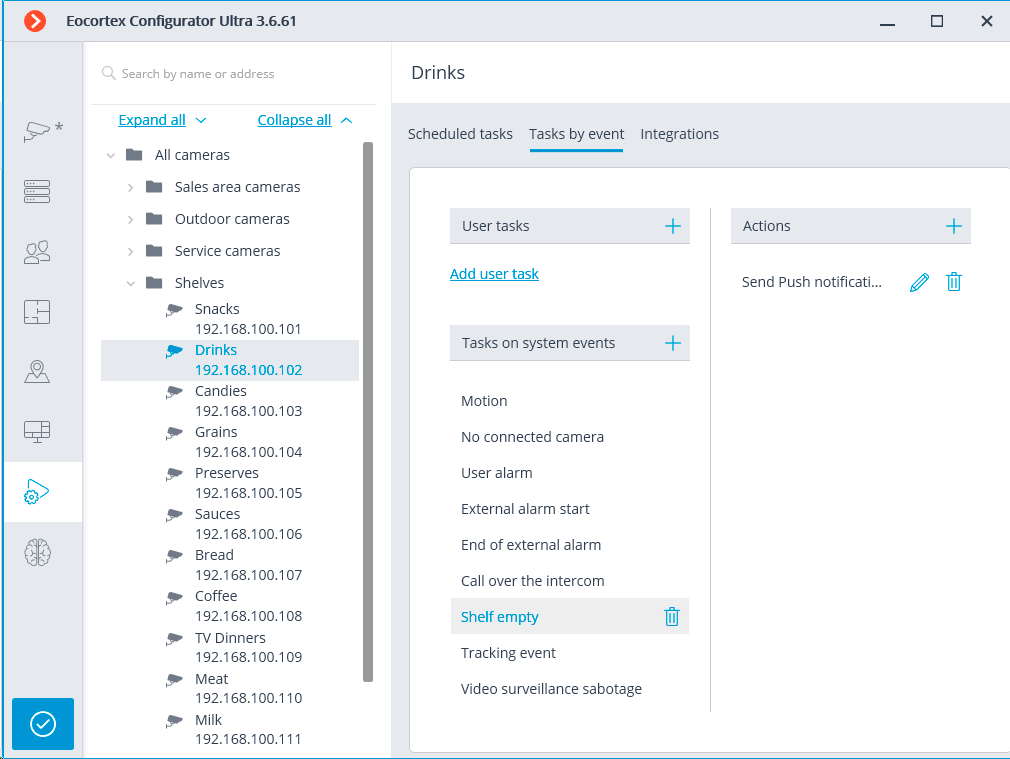
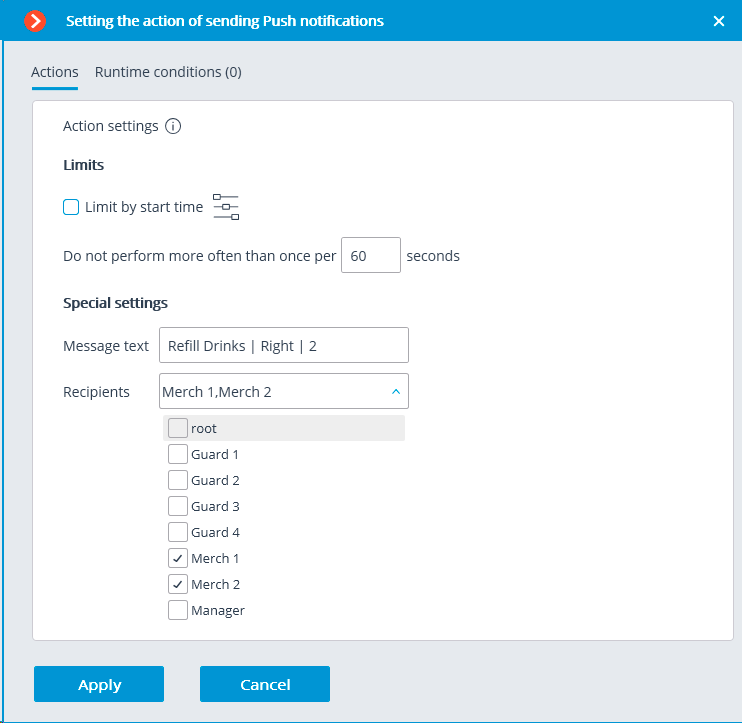
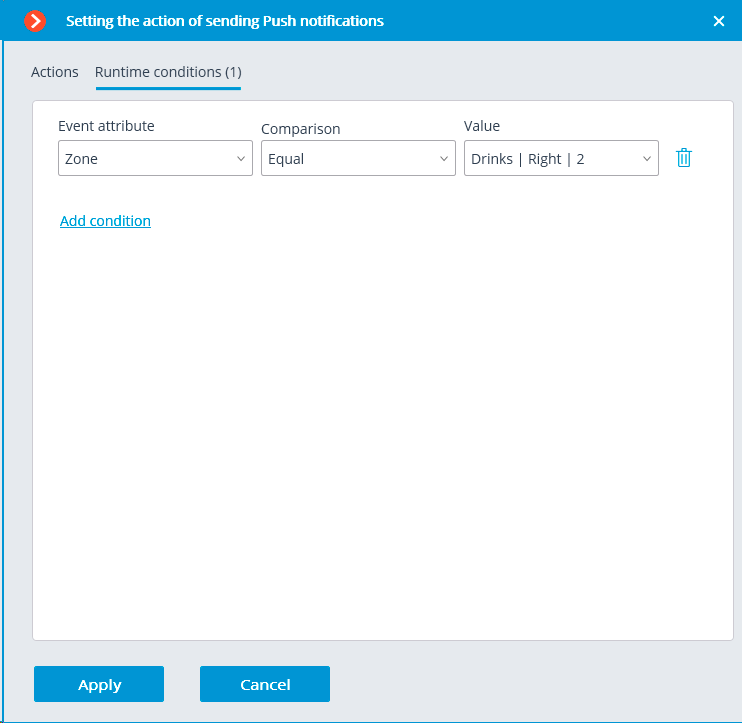
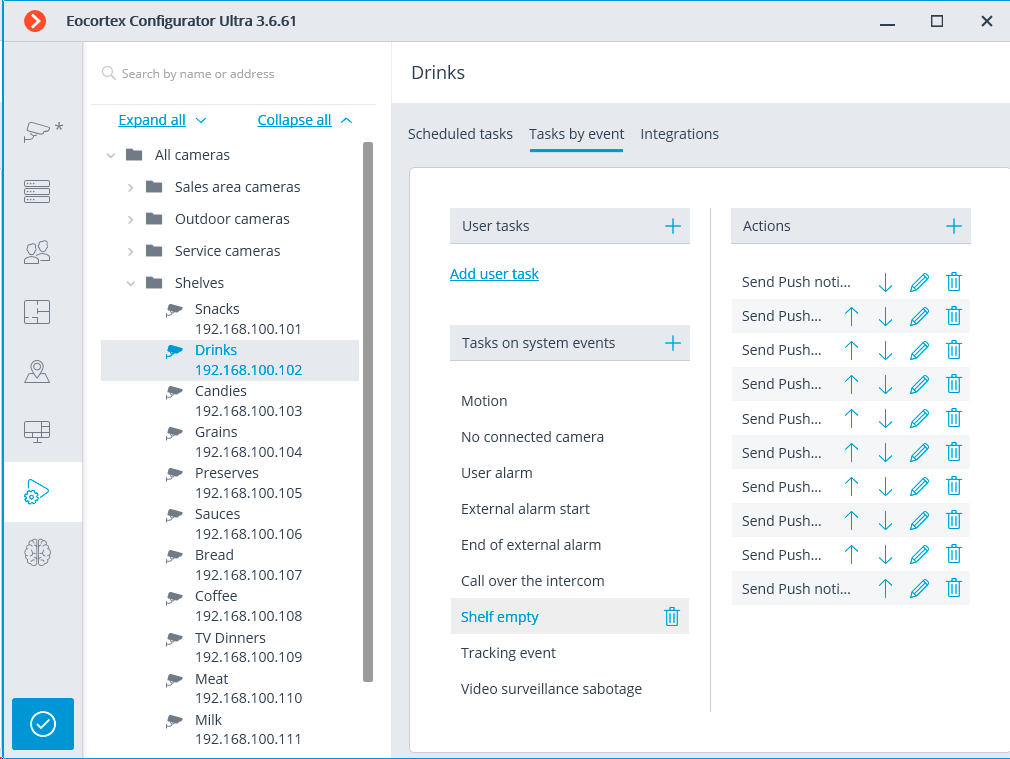
To confirm the settings changes, click the  Apply button.
Using video analysis results
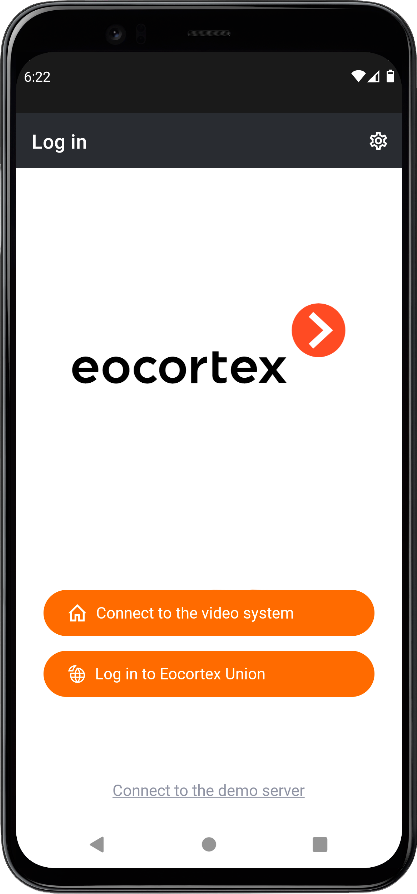
After installing the Eocortex mobile application on the device, connect it to the system with which it should work by tapping the Connect to the video system.
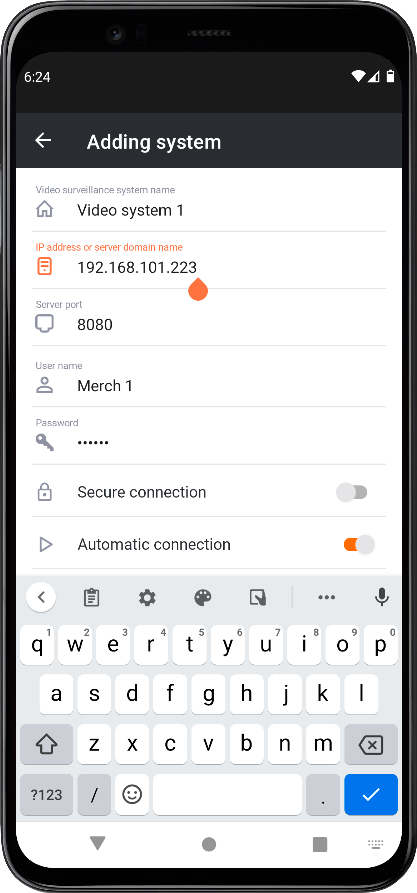
Specify the IP address of one of the servers in the system settings, enable the Connect automatically option, set the name and password of the user who should receive notifications about empty shelves. The System Name field may contain any name.
The function of receiving Push notifications is enabled by default, but you can check its status in the settings to be sure.
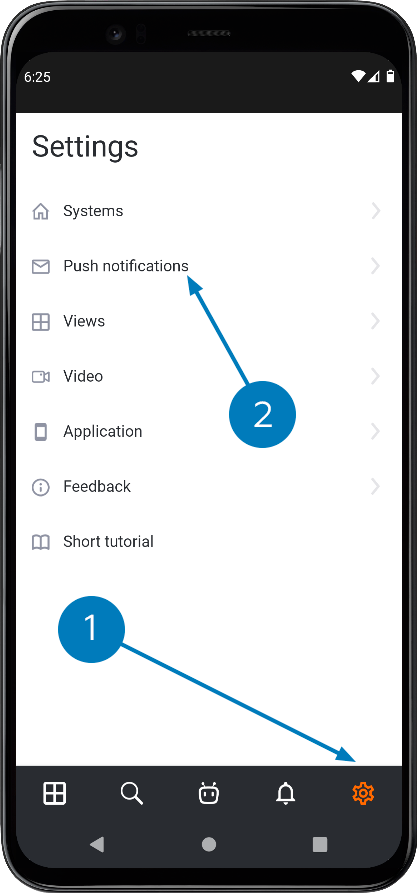
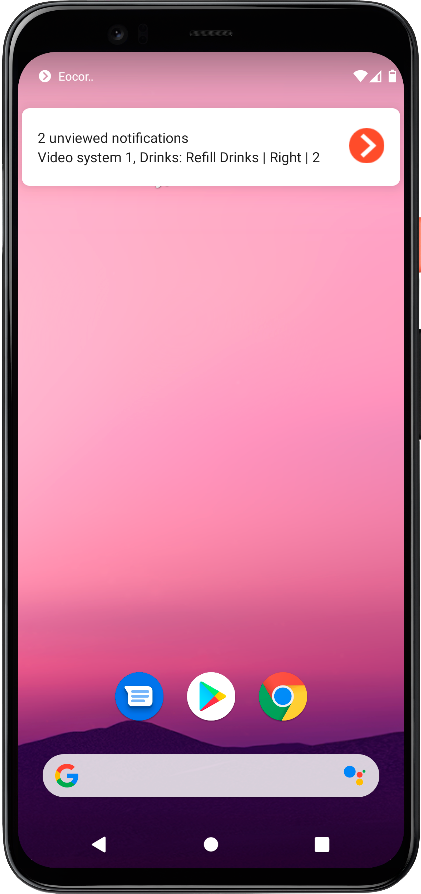
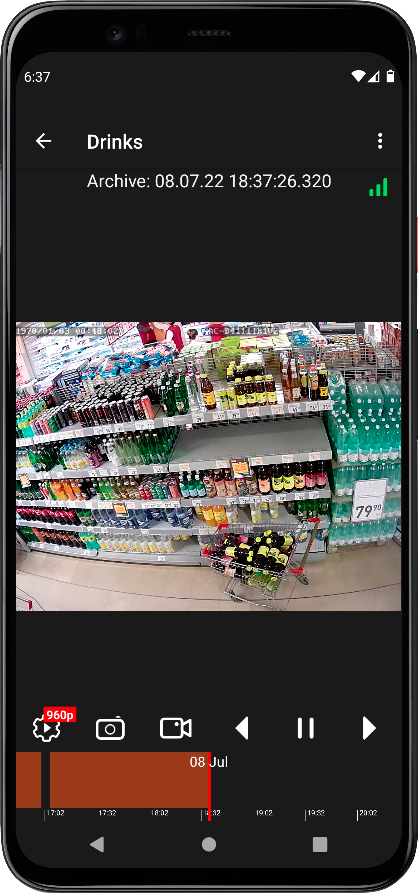
After connecting to the system for the first time, the device will be ready to receive notifications of empty shelves. Tapping the notification will open the camera with the related shelf on the screen.
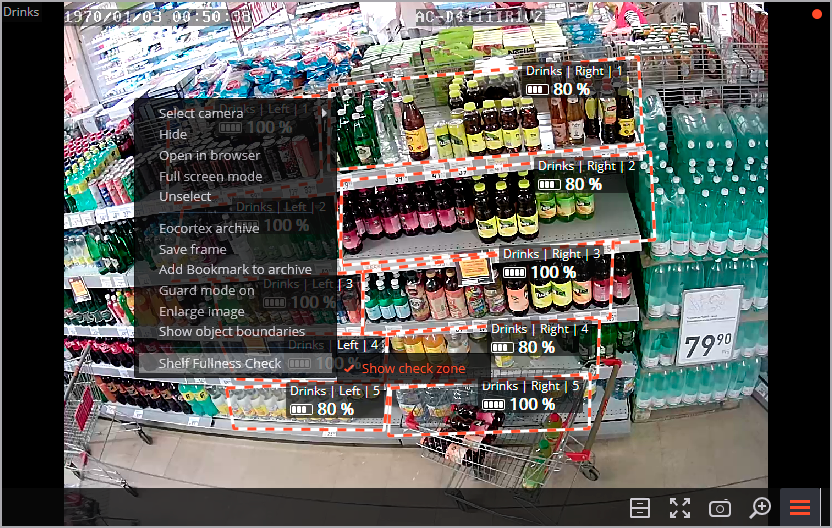
In the Eocortex Client application, displaying the contours of the shelves and their current fullness can be enabled. To do this, call the context menu in the camera cell and, in the Shelf fullness item, enable the Display control zones sub-item.
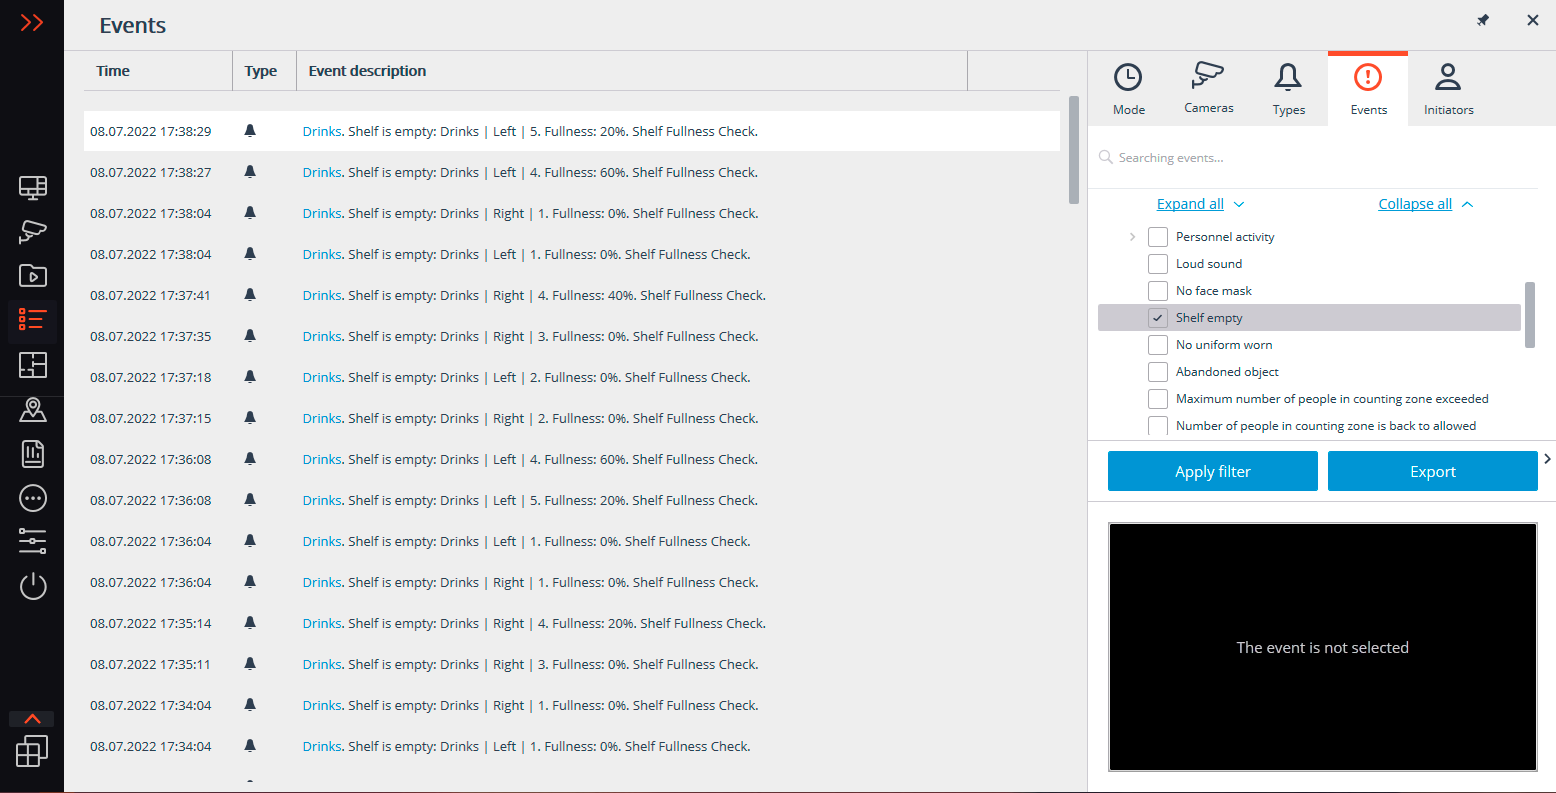
It is also possible to view the log of events related to the decrease in the filling level of the shelves below the allowable values.
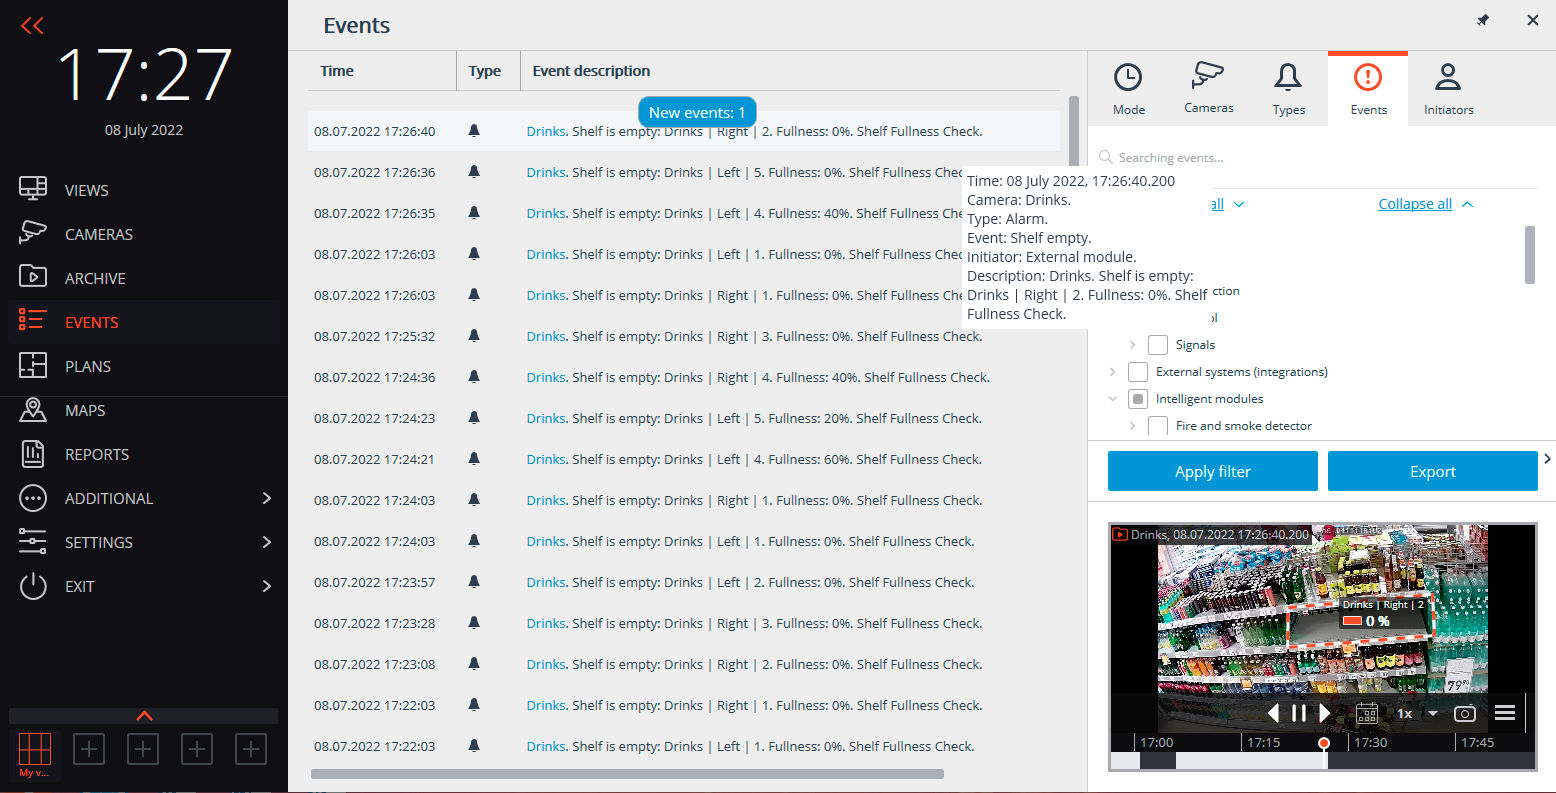
In addition, it is possible to generate a report showing how long the shelf fullness level has been below the allowable value.
