Service configuration🔗
The Long-term database service ensures storing of selected types of events and access to them regardless of the archive storage settings. With this service there is no need to be concerned that event data will be lost if the archive is deleted.
Note
This feature is available only for Enterprise and ULTRA licenses.
To enable and configure the Long-term database service, follow these steps:
Launch the launch the Eocortex Configurator application application.
Go to the
 Servers page.
Select the
 General settings item in the list of servers.
Switch to the Services tab.
Enable the
 Long-term database option.
Configure the interaction with the Long-term database service, such as the following:
Configure a network connection to the service.
Change the password of the service if needed.
Select disks for storing events.
Configure the synchronization schedule for events between the servers and the service.
Select types of events and their period of storage in the service database.
Configure the sending of service e-mail notifications.
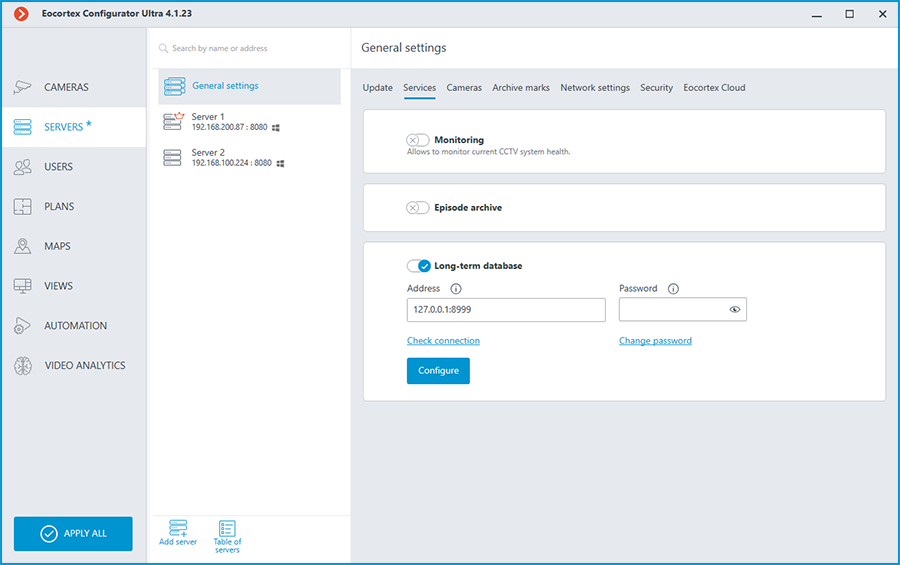
Connection settings
This setting can be changed on the Services tab, where the service was enabled.
Network connection to the service must be configured to get access to the configuration of conditions for storing events in its database.
Below is a description of settings:
Address: Address of the long-term database service. This address must be accessible to all servers. If the connection port for the service has been changed, the new port must be specified in the same field, with a colon after the address.
Password: Password of the long-term database service. The default password is blank.
Check connection: Clicking this link starts the test connection to the Long-term database service.
Change password: Clicking this link opens a window that allows to change the password of the Long-term database service. It is recommended to change the password at the first service setup.
Configure: Clicking this button opens the window with the Long-term database service settings.
Once the Address and Password fields are filled in, it is recommended to test the connection to the service by clicking the Check connection link. Depending on the validity of the settings and availability of the service, the results may be as follows:
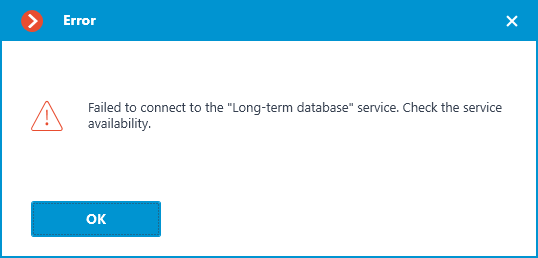
Failed to connect to the service at the specified address and port during the connection test. Check the validity of the specified data and the network availability of the service for the server and try again.
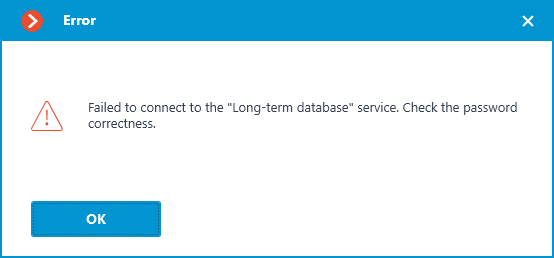
Connection to the service was successfully established during the connection test, but the used password does not match the one saved in the service settings. Check that the password you have entered is valid.
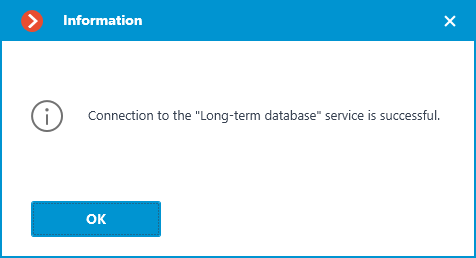
Connection test is successful, it is possible to proceed with further setup of interaction with the service.
Changing service password
Configuration can be made in a separate window that opens by clicking the Change password link on the Services tab.
The Long-term database service does not have a password by default and this may conflict with local security policies.
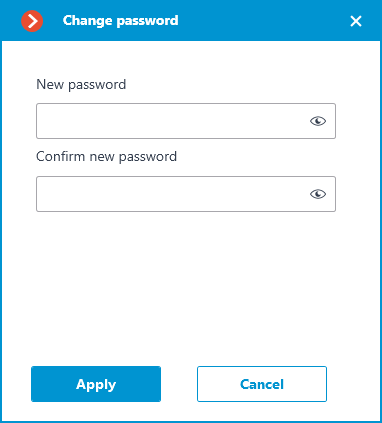
To set or change the password for the connection to the service, click the Change password link under the Password field on the Services tab.

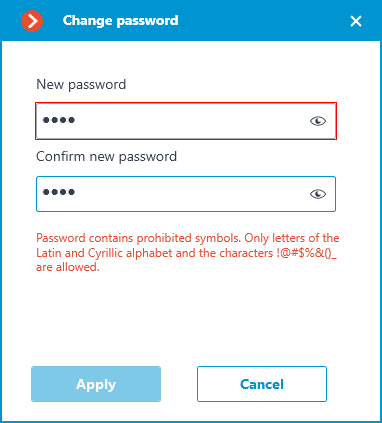
In the window that opens, fill in the New password and Confirm new password fields with the password.
Note
When setting or changing a password, there are a few requirements that must be met:
Service must be available when changing the password.
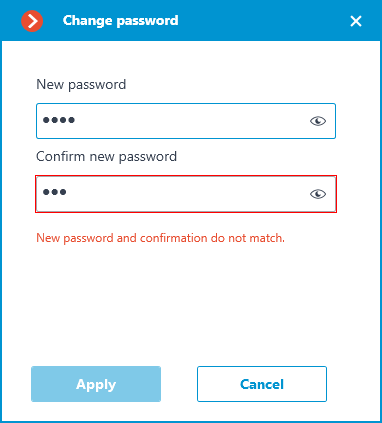
The password and its confirmation must match.
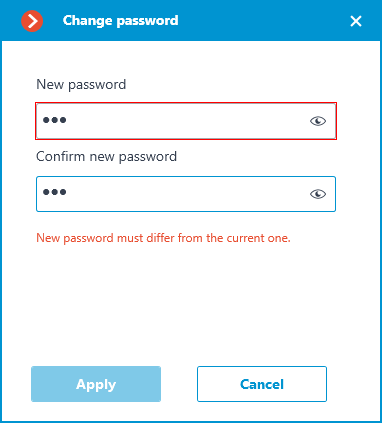
The new password must not be identical to the old password when it is changed.
The password can contain characters of the Latin and Cyrillic alphabet.
The password may include numbers.
Only the following special characters are allowed in the password: !@#$%&()_‐
The password can be blank.
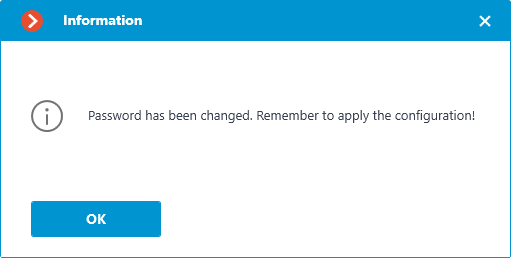
If all requirements have been met, clicking the Apply button will set a new password for the service and display the corresponding message.
Warning
To save the settings and then synchronize them with the service, apply the settings.
If any requirement is violated when setting a new password, the window will show a warning and the Apply button will be blocked.
Storage disks settings
Configuration can be made in a separate window that opens by clicking the Configure link on the Services tab.
The Database tab contains settings for selecting drives to store events on the service.
Note
Disks are selected for the device on which the service is installed.
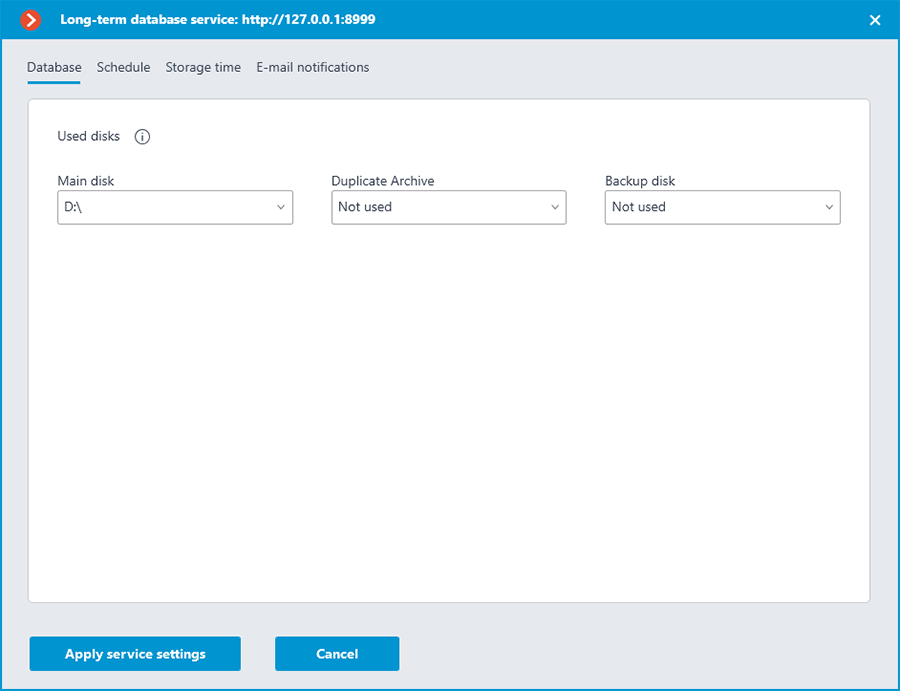
One of the following roles can be assigned to the disk:
Main disk
Duplicate Archive
Backup disk
Main disk must be assigned in any case, duplicate and backup disks are assigned optionally. Events are recorded on the primary and backup disks all the time. The backup disk is to be used only when neither the primary nor the backup disk are available for recording. Events are being read simultaneously from all disks regardless of their role. Event duplicates are discarded from the display when reading disks. For example, if an event is detected on the Main disk, the same event from other disks will be discarded when displaying in the Eocortex Client application.
Events will not be synchronized between service disks. For example, events recorded to the Backup disk while the Main disk was unavailable will not be transferred to it after recovery.
Warning
It is not recommended using for storage of the service database disks that are already used for recording of the Eocortex archive. The archive can take up a large amount of disk memory and this may significantly reduce the number of events that can be saved to such disk. For correct service work it is recommended to choose disks, which are not being used by other Eocortex applications for writing.
When applying the settings, the Long-term database service checks the drives for the presence of archive records. If such records will be detected on the disk selected for storing the service database, a window with the corresponding warning will open.
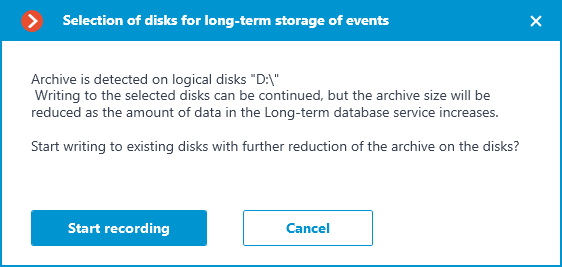
At this point it is possible to cancel applying the settings by clicking the Cancel button and return to the service settings to select another disk, or start recording on the selected disks without changing the settings by clicking Start recording.
Event synchronization settings
Configuration can be made in a separate window that opens by clicking the Configure link on the Services tab.
The Schedule tab contains settings for event synchronization schedule between the databases of the service and the Eocortex servers.

The synchronization schedule consists of the following settings:
Synchronization frequency, hours is how often the service will synchronize events from the databases of servers.
Available intervals, hours: 1, 2, 3, 4, 6, 12, 24.
Start time is the time of first data synchronization between the service and servers.
Once the settings are applied, the server will perform the first synchronization with the Long-term database service at the time specified in the Start time field, and then continue performing synchronization according to the specified interval.
Note
First synchronization of events for each server happens according to its local time. If servers of the same system are located in different time zones, they will perform the first synchronization with the service at the time corresponding to the specified hour in their time zone.
For example:
Server 1 is in UTC+3 and Server 2 is in UTC+10. The setting is made at 16:00 UTC+3. If the first synchronization time is set to 20:00, Server 1 will start synchronization on the same day when the setting was applied, when Server 2 will wait for the next day to start — for the UTC+10 time zone it will already be 23:00 at the moment of applying settings.
Warning
The Eocortex server synchronizes the settings with the Long-term database service every 10 minutes. Start time should be at least 10 minutes later than the current time. If synchronization of the settings happens after the time specified as Start time, event synchronization will be postponed to the next day.
For example:
service started at 14:40, the next synchronization of settings will be performed at 14:50. At 14:41 service settings were changed, setting the first synchronization at 14:45. Synchronization will be performed at the specified time, but only on the next day — the synchronization of settings occurred later than the specified time of event synchronization.
Event storage settings
Configuration can be made in a separate window that opens by clicking the Configure link on the Services tab.
The Storage time tab contains settings for selecting event types and time limits for storing them in the service database.
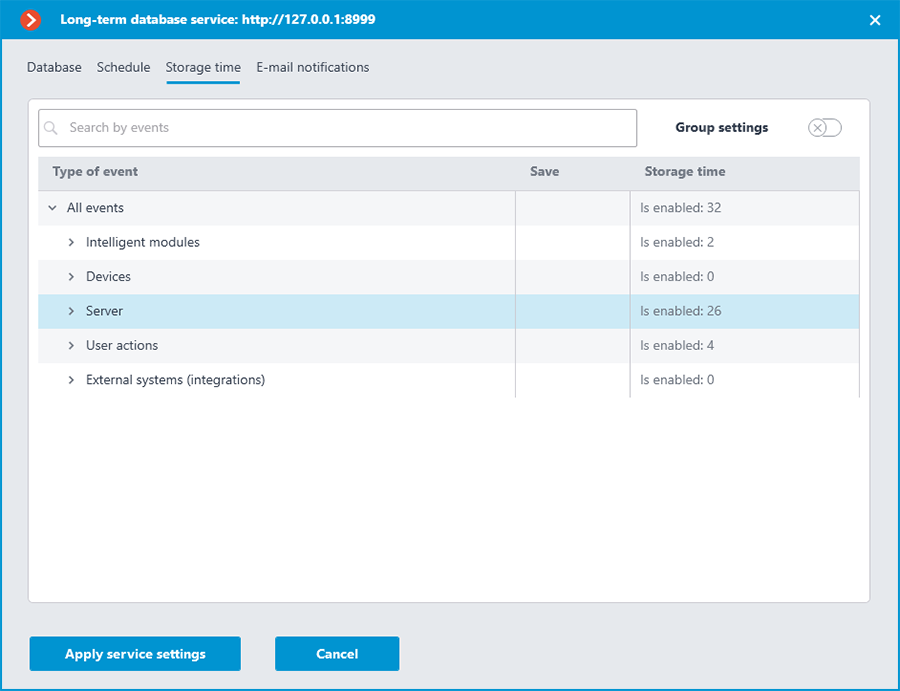
This tab allows specifying the type of events to be stored in the Long-term database service database, as well as the storage period for them.
Settings on the Storage time tab are represented as a table with the following columns:
Event type — the list of events available for synchronization with allocation by groups. Whether an event group is collapsed or expanded in the Event type column determines the contents of the other columns.
Save — synchronization setting (enabled or disabled) for the selected event type.
The synchronization setting in the Save column is available only for individual event types. It is not possible to select in this column an entire group for saving — the space next to the group name will be empty.
Storage time — the storage time of events of the selected type in the service database.
The storage duration setting in this column is available only for individual event types. For a group of events, the number of event types enabled and configured for synchronization will be displayed at this position.
Storage time is set starting from the moment when the event was created in the Eocortex server database. So, for example, if the storage period is set as 1 week, the Storage time service will delete the event from its database when it expires and will not synchronize it again even if the event will still exist in the Eocortex server database.
Note
The maximum storage time of events in the Storage time service database is 100 months.
For the convenience of configuration, there is the text search field available on the tab, allowing to quickly navigate to the needed type of events.
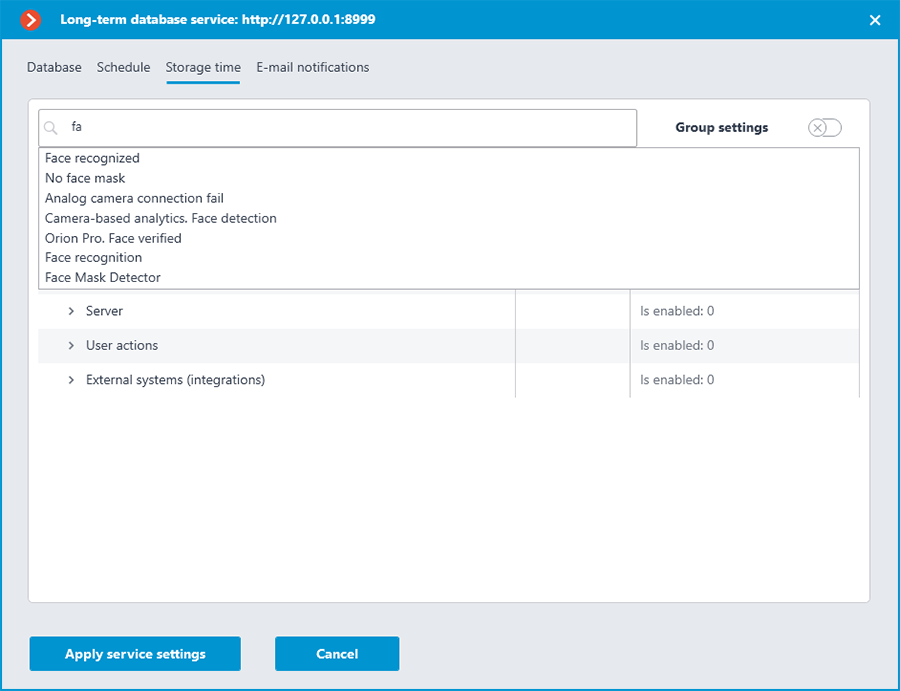
Storage time can be set in one of the two available modes:
The individual setting is the default mode, which allows selecting the wanted types of events to be stored and setting individual storage time for each of them.
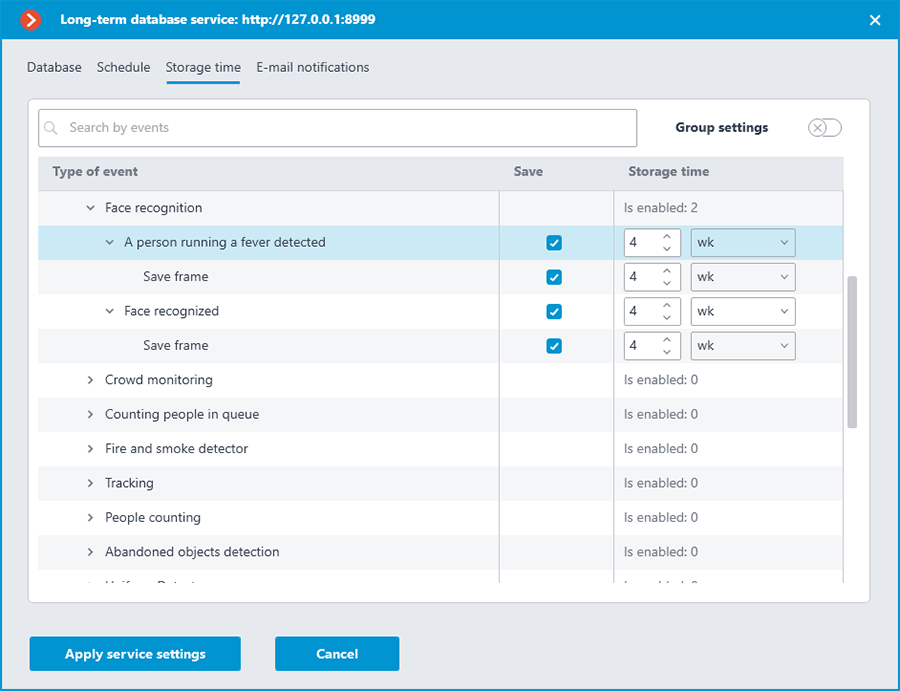
To set up event storage in the individual setting mode, follow these steps:
Find the needed event type in the Save column by using the search field or manually, by expanding the event groups.
Enable storing events of the selected type in the Save column.
If the selected event type has the option of saving a frame associated with the event, this option will be automatically enabled when the event type is selected. It can be deactivated in the same Save column.
Warning
Frame storage relies on the event being stored, so it is not possible to choose to store a frame without storing the event.
Specify the storage time for events of the selected type in the Long-term database service database.
If the Save frame option is available and enabled for the event, it is also possible to set an individual storage time for the saved frames.
Warning
Storage time of a frame cannot exceed the storage time of the event to which it belongs.
Group settings is an additional mode that allows setting the same storage time for multiple event types simultaneously.
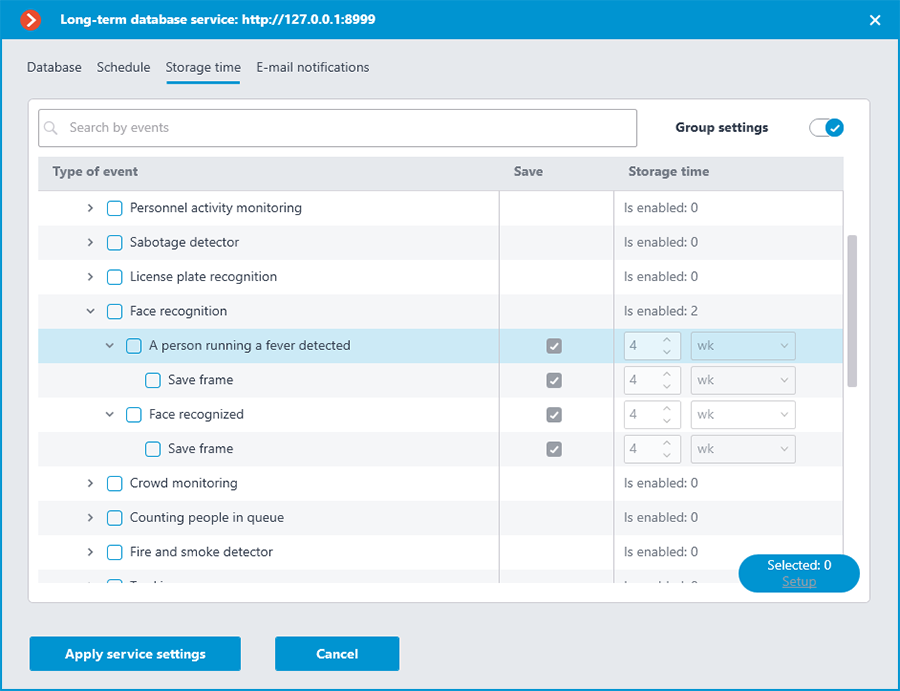
This mode can be activated by clicking the  Group settings switch in the upper right corner of the tab.
When this setting mode is enabled, the configuration window changes: settings in the Save and Storage time columns are locked, in the Event type column checkboxes for selection of event types appear to the left of their names, and in the lower right corner the Configure button appears for configuring the selected event types.
To configure event storage in Group settings mode, follow these steps:
Enable the Group settings mode with the
 switch in the upper right corner.
Use the checkboxes in the Event type column to select the needed event types.
It is possible to select not only individual event types, but also entire groups, including the All events root group.
If frame storage is available for the event, this option is also will be flagged as selected.
Click the Configure button in the lower right corner.
In the Selected events settings window, set the event storage time.
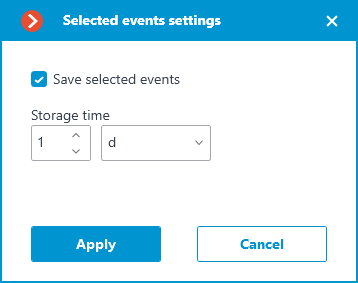
When configured as a group, the same storage time is set for all selected events. The Save selected events option allows to quickly enable or disable storage of selected event types. This can be useful if it is necessary to override storage settings for multiple event types. This option is enabled by default.
Apply settings.
If it is necessary to customize any of the event types, the Group settings mode can be disabled with the same switch in the upper right corner.
Email notifications settings
Configuration can be made in a separate window that opens by clicking the Configure link on the Services tab.
The Long-term database service has the ability to notify a user about encountered problems using email.
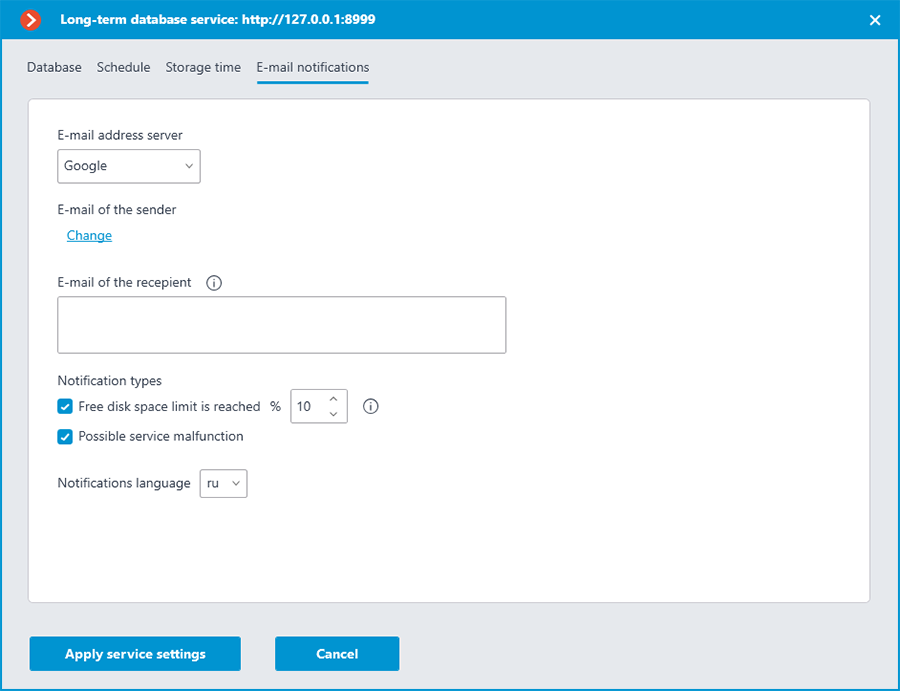
To send notifications, an SMTP server must be specified. The following options are supported:
Google
Yandex
Set manually
When selecting the Google or Yandex options, clicking the Change link in the E-mail of the sender section will open the authorization window of the selected email service.
When selecting the Set manually, the SMTP server address and port, sender address and password must be set manually.
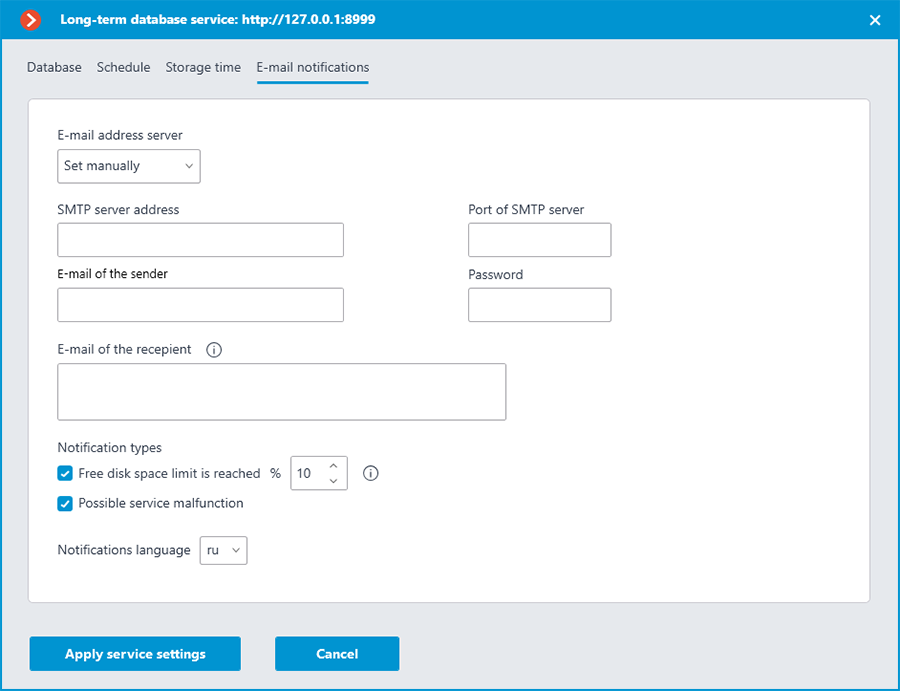
The E-mail of the recepient section allows specifying one or more recipients of the notification by separating the addresses from each other with a comma, semicolon or adding a new line for each recipient.
The Notification types section allows specifying the types of notifications that the service should send to the recipients. The following notification types are supported:
Free disk space limit is reached — will be sent when one or more disks used by the service have a percentage of free space less than the specified.
Possible service malfunction — will be sent when the service has failed to save events to disk. Possible causes of the error:
The disk has run out of space to write.
PostgreSQL failed to add a record to the database. The database file may be corrupted.
Other recording problems have occurred.
Details about the error can be found in the service logs. It is also recommended attaching them to the message in case of contacting technical support.
Access settings
Note
The Long-term database service does not imply additional settings limiting user access to the stored content. If a user is allowed to access a camera, it will also have access to the events for that camera stored in the service database.