Module setup🔗
Warning
Before using the face recognition or unique visitor counting modules, it is required to install the additional components on the server.
To use the module, enable and set up the software motion detector, then activate the module itself.
To do that, launch the Eocortex Configurator application, go to the  Cameras tab, select a camera in the list located on the left side of the page, and set up the motion detector on the Motion detector tab on the right part of the page.
Then go to the Analytics tab, enable the module using the  switch, and adjust it pressing the
  button.
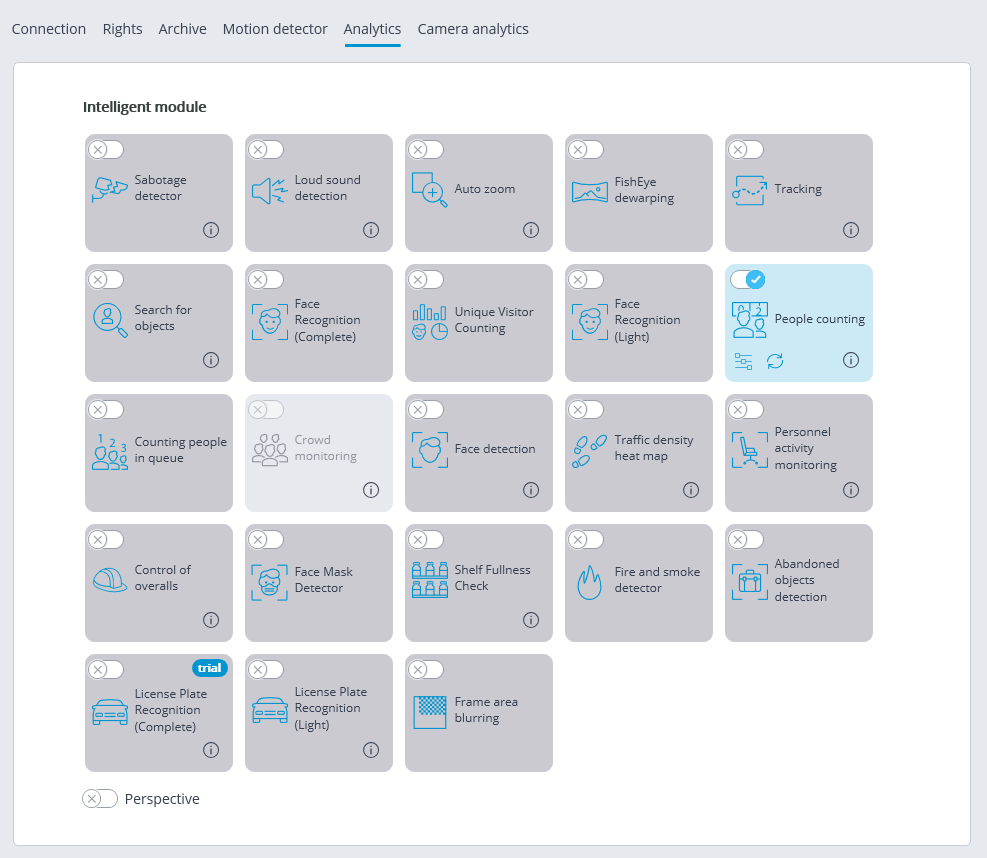
Warning
It is possible to simultaneously enable on the same camera only those modules that are based on the face recognition technology: Face Recognition (Complete) and Unique Visitor Counting. No other face recognition modules can be enabled simultaneously on the same camera.
Note
The minimum width and height of an object in the software motion detector settings must be smaller than the size of a face.
Some settings of the modules are the same; others are unique for each one. The module settings are described below.
Main settings
The Main settings tab is used to set the general settings for recognition.
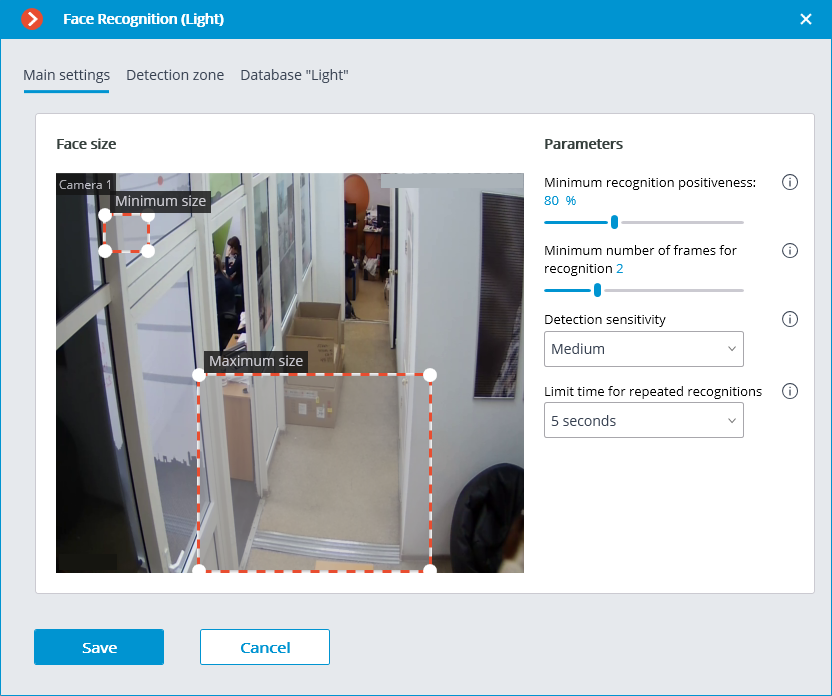
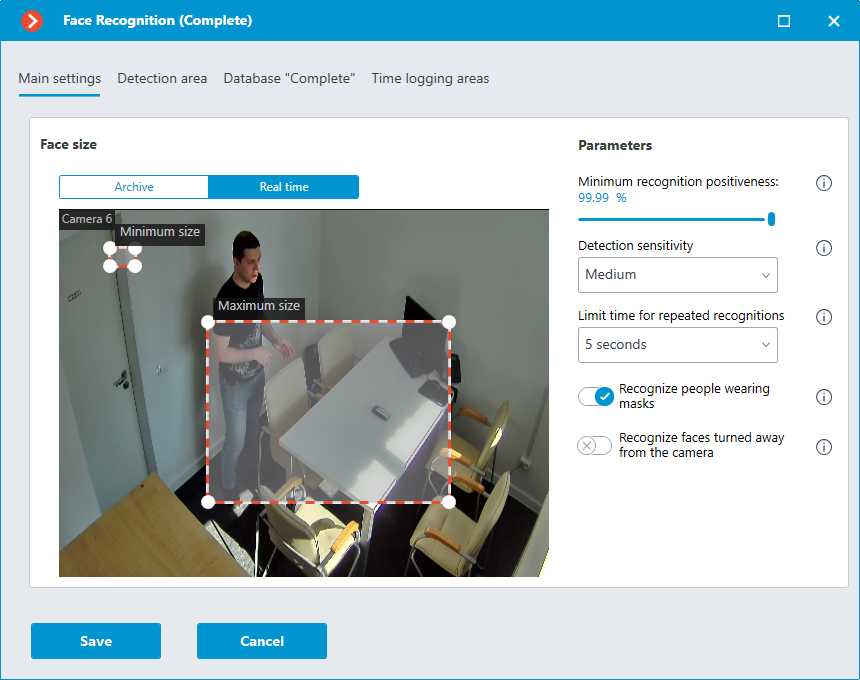
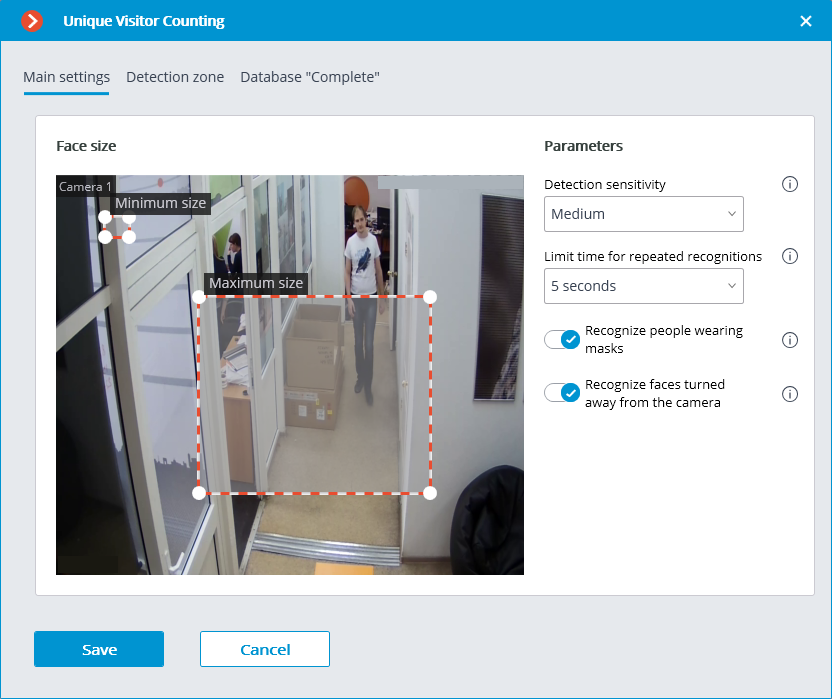
Minimum size and Maximum size: Allow to set, using frames, the minimum and the maximum size of a face to be detected. The minimum size that is too small may lead to false detections due to the low quality of small images of the faces.
Minimum recognition positiveness:: the cases of recognition with the similarity value lower than the specified threshold will not count. Lowering the value will allow to better recognize people wearing sunglasses, with partially covered faces, etc., but, at the same time, may lead to false recognitions. The available range of values is 70–100%; default value: 80%.
Detection sensitivity: The higher the sensitivity, the lower the minimum acceptable quality of the images of the faces required for recognition. The higher value can help in case of low light conditions, but may also result in erroneous detections and in detecting bad quality images of the faces. The lower value reduces the module’s capability to detect faces turned away from the camera. The allowable range of values is as follows: Minimum, Low, Medium, High and Maximum; the default value is Medium.
Limit time for repeated recognitions: the minimum time between detections of a face of the same person. It prevents occurrence of the identical entries in case of the successive appearances of the same person in the frame. The allowable range of values: Not to limit, 5 seconds, 30 seconds, 1 minute; the default value is Not to limit.
Minimum number of frames for recognition: if a person was detected in the camera field of view less than a specified number of times, no recognition will be performed. The available range of values is 1-5; the default value is 2.
Recognize people wearing masks and Recognize faces turned away from the camera: allow more flexible configuration of the module: if these parameters are disabled, this will reduce the number of potentially false triggerings, and if they are enabled, the module will detect and recognize faces more accurately.
Note
These parameters only affect the ability to identify masked and turned away faces, detection will be performed in any case.
Note
In Tasks by event, it is possible to set scenarios based on the presence or absence of a mask on a person’s face, as well as by the attribute of whether a person’s face is turned away from the camera.
Detection area
On the Detection area tab, the user can specify the area where the system will search for faces. By default, the detection zone occupies the whole frame.
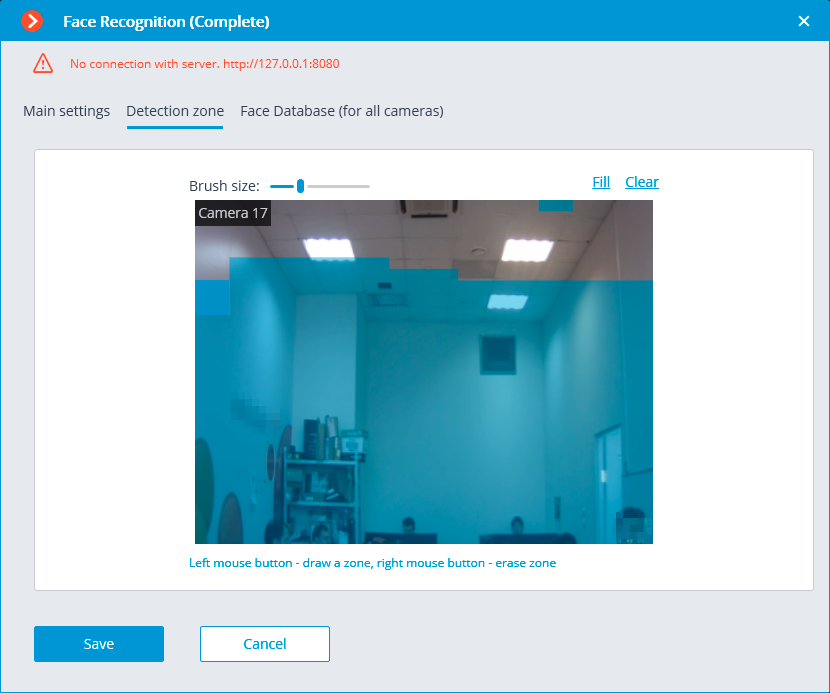
Database
On the Database tab, the parameters of connection to the face database are set.
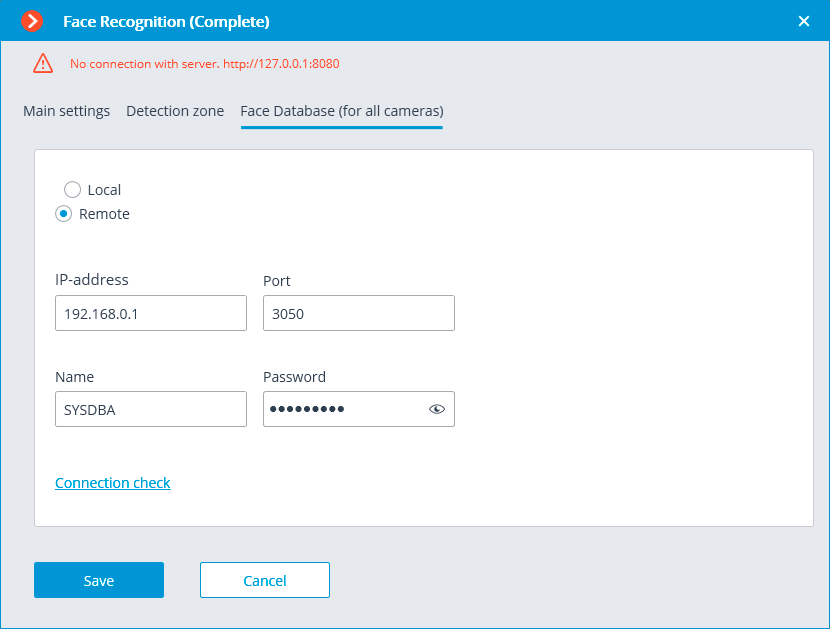
Two database deployment options are available: Local or Remote.
If the recognition process runs on only one server, it is recommended deploying the database on this server by selecting Local.
If the recognition process is running on several servers, the database should still be hosted only on one of them. For this purpose, select the Remote option for all cameras and specify the database connection parameters: server address, name and password of the database administrator. The same applies when the database of the module is deployed on one server, and the camera with the module enabled is attached to another one.
Note
Eocortex version 3.6 and lower uses Firebird DBMS with the following default values:
Port: 3050
Username: SYSDBA
Password: masterkey
Note
Starting from version Eocortex 4.0, the module's database is handed over to the PostgreSQL DBMS with the following default values:
Port: 5432
Username:
For Windows: postgres
For Linux: eocortex
Password: masterkey
Warning
Remote access to databases is not allowed by default in PostgreSQL and must be additionally configured if remote databases are used for analytics. All settings must be done for the server where the database is stored. Settings are slightly different for Windows and Linux operating systems.
When the server is running for the first time after upgrading Eocortex to version 4.0 or higher, the existing module database will be automatically transformed to be compatible with PostgreSQL.
Warning
If connecting to a Remote database, use the DBMS Username and Password that are valid for the server storing the database.
Warning
Independent of the database location, the recognition events (date and time of recognition, coordinates of the object in the frame, binding of the recognized object to the database) will always be stored on the server to which the camera with the corresponding events is bound.
Warning
Synchronization with the database located on a remote server can take some time
Note
When using a remote database, the remote database replication mechanism will be applied.
It is possible to check the availability of the database clicking the Connection check link. If the server is unavailable, the corresponding message will be displayed.
It is possible to set the own face database for the Face Database Complete for an individual camera of a group of cameras using the field Database identifier.
Warning
The field Database identifier is not initially displayed at the launch of the module.
Note
To use this capability, it is required to set Database identifier via REST API.

Time logging areas
Warning
This tab is only available in the settings of the Face Recognition (Complete) module.
The parameters to be used for creating Work time logging (Complete) report are set on the Time logging areas tab.
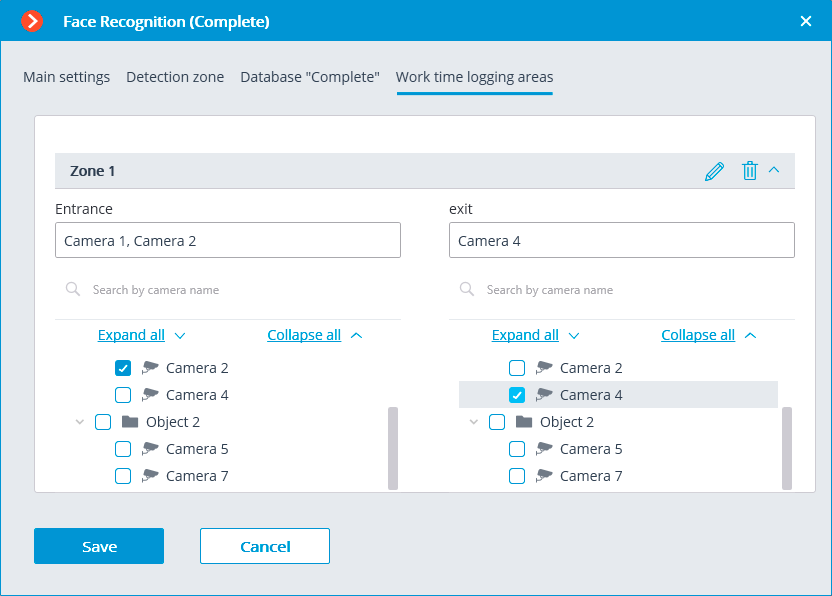
Work time logging (Complete) report is formed by areas (zones). An area is a territory where it is required to monitor the presence of persons. The people’s faces must be recognized at the entrance to and the exit from the area by the Face Recognition (Complete) module. Several cameras may be used for a single area both at the entrance and at the exit.
Note
If a face was recognized at the exit of the zone, but was not recognized at the entrance, the person's time in the zone will be counted from 00:00.
For each area, it is possible to open the settings and set the cameras for performing face recognition on the entrance and exit. Only the cameras with the Face Recognition (Complete) module enabled will be shown in the hierarchical list.
Warning
The module will start working only when the settings are applied.